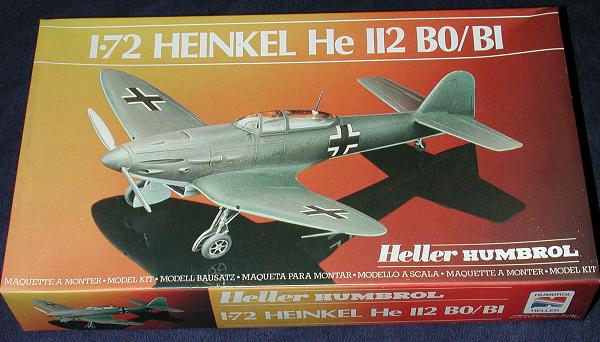
Heller 1/72 He-112B
|
KIT # |
240 |
|
PRICE: |
$5.00 when new |
|
DECALS: |
Two aircraft |
|
REVIEWER: |
|
|
NOTES: |
|
BACKGROUND |
For a look at what's in the box and a brief historical background, visit the preview.
|
CONSTRUCTION |
You know, I've always liked most of Heller's kits. They are generally interesting subjects, are not loaded down with detail and are often very pleasant builds. The He-112 is no exception as I built this kit many years ago and remember it as a good time. Probably the biggest downfall of the kit is that it doesn't have enclosed wheel wells so you can look right through the gun ports to the ground.
 Well, construction got off to the usual start with a couple of
subassemblies; the wings and the cockpit. All of the cockpit bits were glued in
place and the whole thing painted RLM 02 Grey using Model Master enamels. The
instrument panel was painted flat black and then glued in place. A touch of
dry-brushing was done and that was it. It was then sandwiched between the
fuselage halves along with the lower radiator.
Well, construction got off to the usual start with a couple of
subassemblies; the wings and the cockpit. All of the cockpit bits were glued in
place and the whole thing painted RLM 02 Grey using Model Master enamels. The
instrument panel was painted flat black and then glued in place. A touch of
dry-brushing was done and that was it. It was then sandwiched between the
fuselage halves along with the lower radiator.
The usual sanding and re-scribing was done at which time the wings were attached. No trauma here as the fit is quite good. There was some need for filler on one side to smooth things out a bit. Then the tail planes were glued in place. This aircraft is a bit odd looking from the top as the wings are quite short compared to the tail planes. No wonder the Japanese complained of high wing loading! The cockpit was stuffed with tissue and the area around it was painted RLM 02. Then the tissue removed, some touch up painting done in the cockpit and the radio mast glued in place. The cockpit was then masked and a hole opened for the radio mast. A bit of non-fogging superglue was used to hold the canopy in place. The canopy does not really fit as good as I'd like, but no other option is available. Then it was time to do some painting!
|
CAMOUFLAGE |
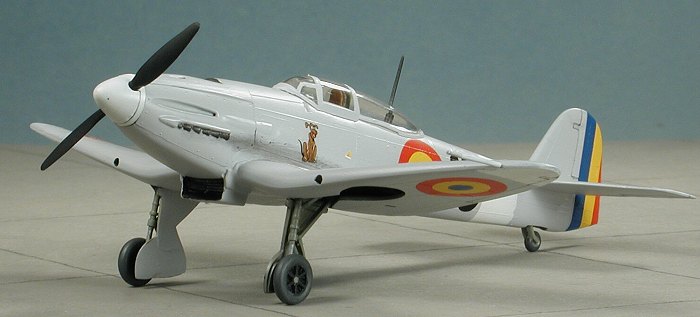
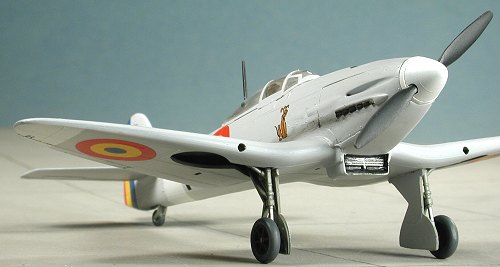
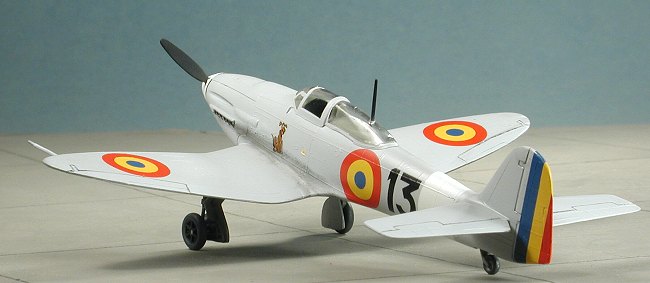
Choosing a color scheme for this kit was a real problem. I had Aeromaster 72-135 for the He-112 and all of the schemes on it were good ones. The previous He-112 kit I built was a Luftwaffe one so I didn't do that one. I wanted to do the version with the individual ejector exhaust so that eliminated the Spanish versions. I finally settled on the Romanian version that did the final He-112 flight in 1946 after the war. This was because of the vivid roundel colors and the neat Pluto dog markings on the side.
 First thing I did was to paint the aircraft wing tips, aft fuselage, prop
spinner, and rudder white, using Floquil Reefer White. These areas were masked
according to the decal sheet instructions. Make sure you don't mask the full
rudder as the stripes don't cover that whole area. I did the rudder white so
that the yellow and red wouldn't be dulled by the underneath color. The rest of
the aircraft was a light grey. No specifics are given for this color, so I used
Polly S RLM 63 light grey acrylic. We've discovered since this paint was
released that RLM 63 is a lot closer to RLM 02 than any light grey so it seemed
appropriate to use up what was in the bottle. Once that paint was on and dry,
the kit was taken back to the bench for more stuff to be glued on.
First thing I did was to paint the aircraft wing tips, aft fuselage, prop
spinner, and rudder white, using Floquil Reefer White. These areas were masked
according to the decal sheet instructions. Make sure you don't mask the full
rudder as the stripes don't cover that whole area. I did the rudder white so
that the yellow and red wouldn't be dulled by the underneath color. The rest of
the aircraft was a light grey. No specifics are given for this color, so I used
Polly S RLM 63 light grey acrylic. We've discovered since this paint was
released that RLM 63 is a lot closer to RLM 02 than any light grey so it seemed
appropriate to use up what was in the bottle. Once that paint was on and dry,
the kit was taken back to the bench for more stuff to be glued on.
|
A BIT MORE GLUING |
At this time, the wheel wells and landing gear were painted RLM 02 Grey-Green. Then the gear was glued in place after having the oleos painted aluminum. The wheels were glued on as were the gear doors. The last part to be glued was the pitot tube. Then it was taken back to the painting area and given several coats of Future. This is so the decals can be put on without any silvering problems.
|
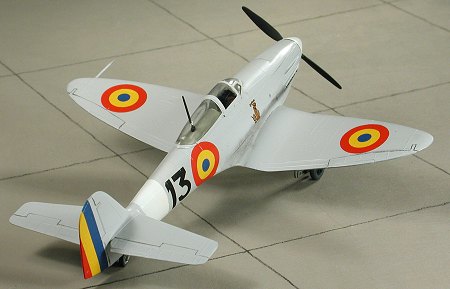
DECALS |
 Aeromaster didn't want any problems with mis-registration so the roundels are
all two part. The lower sections were all put in place first. It seems to me
that the fuselage roundel is too large, but I had no alternate so it was used. I
also put on just one side of the rudder stripes. These fit quite well and didn't
have a lot of overlap. The Pluto markings are also two-part. All decals were
given a dose of Champ to help them snuggle down once the decals had been in
place for a few minutes. The next day, the second layers were applied and that
was it for the decals.
Aeromaster didn't want any problems with mis-registration so the roundels are
all two part. The lower sections were all put in place first. It seems to me
that the fuselage roundel is too large, but I had no alternate so it was used. I
also put on just one side of the rudder stripes. These fit quite well and didn't
have a lot of overlap. The Pluto markings are also two-part. All decals were
given a dose of Champ to help them snuggle down once the decals had been in
place for a few minutes. The next day, the second layers were applied and that
was it for the decals.
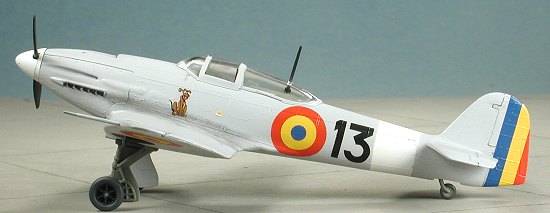
A coat of semi-matte clear was applied to seal in the decals and the final paint touchups were applied. Somehow, the radio antenna mast came unglued and it can't be pulled through the hole so it makes it tough to rig a long wire on this one! Since this was the last of its kind, it undoubtedly had its guns removed so no gun stains were done. It would probably have been kept in relatively good condition so none of the usual wear and tear. A very light exhaust staining was done, the mask taken off the canopy and the kit was done.
|
CONCLUSIONS |
This kit is truly what I call a 'two-week wonder'. It took me two weeks from start to finish. For me that is pretty quick as most kits take me several times that long to get finished. Though it is a simple kit and an older kit, it is still a very nice model. If you want to spend the time bringing it up to current standards, then you can make it into an even better model. It is one that I can recommend to everyone, even the raw beginner. Probably the worst part of the kit is finding one as I hear it is a bit tough to locate.
May 2002
Review kit courtesy of my kit collection.
2015 update. AZ and RS models does several variants on the He-112 now so the Heller isn't the only option.
Copyright ModelingMadness.com. All rights reserved. No reproduction in part or in whole without express permission from the editor.
If you would like your product reviewed fairly and fairly quickly, please contact the editor or see other details in the Note to Contributors.