AML 1/72 Göppingen Gö-9
| KIT #: | 72024 |
| PRICE: | $19.98 MSRP |
| DECALS: | One option |
| REVIEWER: | Scott Van Aken |
| NOTES: | Short run kit with resin parts and vacuformed canopy |
| HISTORY |
Please visit the preview to get a look at what is in the box and a short history of the type.
| CONSTRUCTION |
After looking over the parts. I decided to follow the instructions on this one (and a gasp arose from the crowd). To that effect, I sawed off the seat and gingerly cut the control stick from the resin block. These two items were then superglued onto the cockpit floor. While that was drying, I removed the wing and fuselage parts. These then had the sprue attachment stubs sanded down. The plastic in this kit is a bit softer than what you may be used to, so when sanding, don't break out the big guns except when they are really needed.
 Once the ejector pin stubs were cut
and sanded from the inside of the wing, I glued the lower wing halves to
the upper wing. At the same time, I test fit the cockpit tub into the
fuselage halves. The fit here isn't too bad. The seat snuggles into a cut
out in the upper wing so I attached the wing to see how things fit. It was
then that I decided to slide the interior in place and glue the fuselage
halves together before the wing totally dried. Even after trimming the mold
flash, it was apparent that the wing wouldn't be a very good fit. Gluing
the fuselage together, I then flooded the wing join with cement and applied
a bit of pressure. Once things had dried, I saw that all the seams would
need filler. I also noted that the aft wing/fuselage join wasn't good as
the circumference of the wing attachment was a bit larger than the fuselage
at this point. Filler was slathered everywhere for the first application.
Once the ejector pin stubs were cut
and sanded from the inside of the wing, I glued the lower wing halves to
the upper wing. At the same time, I test fit the cockpit tub into the
fuselage halves. The fit here isn't too bad. The seat snuggles into a cut
out in the upper wing so I attached the wing to see how things fit. It was
then that I decided to slide the interior in place and glue the fuselage
halves together before the wing totally dried. Even after trimming the mold
flash, it was apparent that the wing wouldn't be a very good fit. Gluing
the fuselage together, I then flooded the wing join with cement and applied
a bit of pressure. Once things had dried, I saw that all the seams would
need filler. I also noted that the aft wing/fuselage join wasn't good as
the circumference of the wing attachment was a bit larger than the fuselage
at this point. Filler was slathered everywhere for the first application.
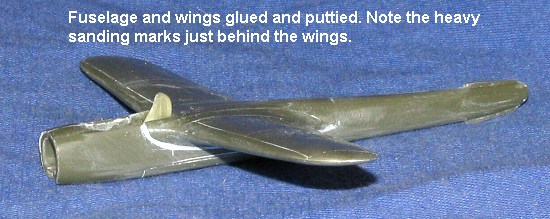 After it dried, I broke out the
coarse sanding stick and went to work on the front and rear wing/fuselage
join to bring things down to the same level. Then I went over all the rest
of the filler areas with decreasing grits of sandpaper starting with 320,
then 400, then 600 then 1200. This is something I do with all my models. I
do have to be careful with the 320 as its scratches are often difficult to
remove. All the while I was doing this, I was thinking how much this looked
like a 1/144 Do-17....
After it dried, I broke out the
coarse sanding stick and went to work on the front and rear wing/fuselage
join to bring things down to the same level. Then I went over all the rest
of the filler areas with decreasing grits of sandpaper starting with 320,
then 400, then 600 then 1200. This is something I do with all my models. I
do have to be careful with the 320 as its scratches are often difficult to
remove. All the while I was doing this, I was thinking how much this looked
like a 1/144 Do-17....
With the wing in place and filled, I
glued on the horizontal stabs and the fin. These are butt joins and
generally the airfoils are wider than the roots to which they fit. Once
again, out with the filler. I also glued on the nose cap. I spent a lot of
time mashing down lead weights to fit in what small nose space their was
before gluing on the cap. I doubt if it is enough, but at
 least I made the
attempt. Then began several applications of filler to get things to smooth
out somewhat. I also glued on the lower fin. The interior and wheel wells
were given a preliminary RLM 02 paint coat and the instrument panel painted
black and dry-brushed.
least I made the
attempt. Then began several applications of filler to get things to smooth
out somewhat. I also glued on the lower fin. The interior and wheel wells
were given a preliminary RLM 02 paint coat and the instrument panel painted
black and dry-brushed.
I cut out the canopy and masked it off in preparation for painting it black. I also test fit it and noticed that the fit was going to be an issue as it was rather poor. Since the canopy was to be a separate color from the rest of the aircraft, I put tape over the cockpit. Now that the airframe was together, I decided that now would be a good time to toss on some paint.
| COLORS & MARKINGS |
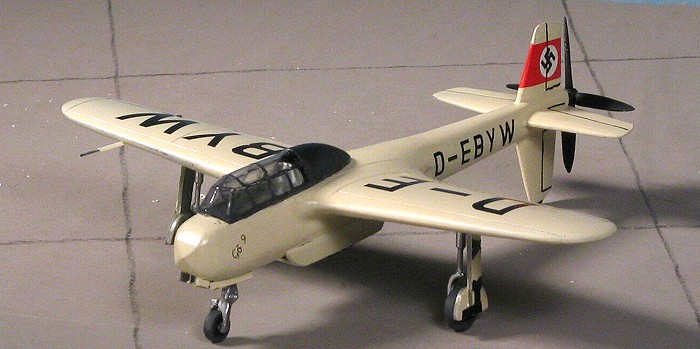
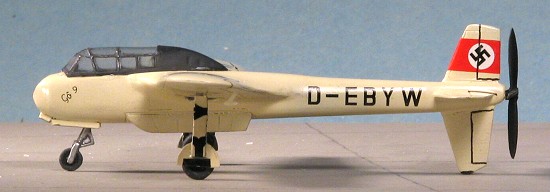
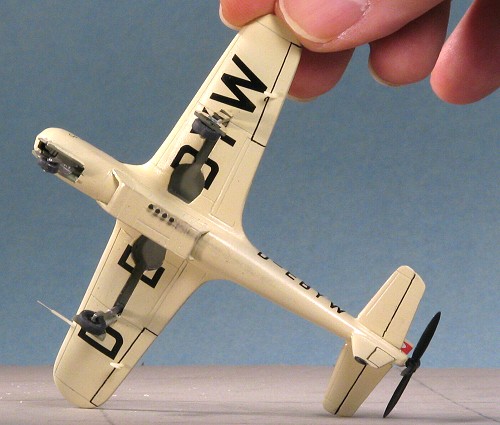 Generally, overall colors are pretty
easy. In this case, RLM 05 Cream. Not exactly one that most paint companies
provide, but Testors does a nice Light Ivory in its general enamel line-up
that looks good and is gloss to boot. I painted the back half of the
aircraft as well as the underside of the wings. Color seems to be just the
ticket. Before continuing, I had more work to do.
Generally, overall colors are pretty
easy. In this case, RLM 05 Cream. Not exactly one that most paint companies
provide, but Testors does a nice Light Ivory in its general enamel line-up
that looks good and is gloss to boot. I painted the back half of the
aircraft as well as the underside of the wings. Color seems to be just the
ticket. Before continuing, I had more work to do.
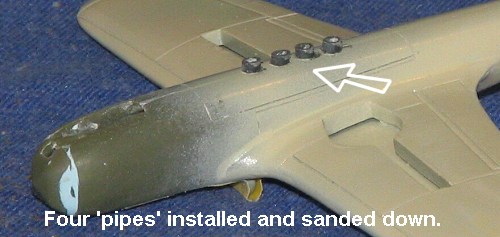 On the underside there is to be
attached a large fairing/scoop. This is to provide cooling for the
air-cooled in-line four. You have to make four things that are either
exhaust pipes or engine cylinders. I don't know which they are as the
instructions don't say. I used some appropriate tubing that I just glued to
the centerline. When nice and dry, I sanded them down until the fairing fit
over the top of them. They are sanded till they are quite short. The scoop
goes on in reverse of what you'd think it would with the more abrupt
opening at the back. That was glued in place and then I glued on the nose
gear doors. These don't really follow the contour of the nose at all well
and I'm not really sure how they'd work if one were to make a wheels up
model. However, they are on there. I also had to do a bit of filler work at
the back as some seams showed up there. I also glued the prop together.
This is four thick plastic blades and a thin resin hub. There are four
slots cut in the resin hub, but to put the blades in there would result in
a gross pitch of the blades. I sanded the bottom of each blade and butt
joined it to the hub using super glue to sort of reinforce things. It was
then painted flat black. Unusual for a German prop as they are usually RLM
70, but that is what the instructions called for.
On the underside there is to be
attached a large fairing/scoop. This is to provide cooling for the
air-cooled in-line four. You have to make four things that are either
exhaust pipes or engine cylinders. I don't know which they are as the
instructions don't say. I used some appropriate tubing that I just glued to
the centerline. When nice and dry, I sanded them down until the fairing fit
over the top of them. They are sanded till they are quite short. The scoop
goes on in reverse of what you'd think it would with the more abrupt
opening at the back. That was glued in place and then I glued on the nose
gear doors. These don't really follow the contour of the nose at all well
and I'm not really sure how they'd work if one were to make a wheels up
model. However, they are on there. I also had to do a bit of filler work at
the back as some seams showed up there. I also glued the prop together.
This is four thick plastic blades and a thin resin hub. There are four
slots cut in the resin hub, but to put the blades in there would result in
a gross pitch of the blades. I sanded the bottom of each blade and butt
joined it to the hub using super glue to sort of reinforce things. It was
then painted flat black. Unusual for a German prop as they are usually RLM
70, but that is what the instructions called for.
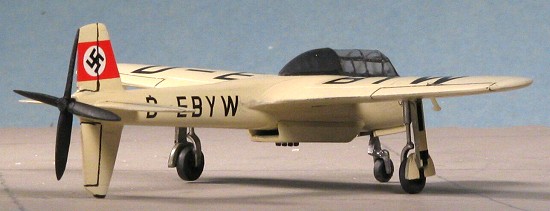
I then applied the Light Ivory to more of the airframe. More glitches showed up under the paint that needed fixed. I painted the gear struts aluminum after attaching the nose wheel and the additional side of the fork. The wheels need drilled out more to fit the axles. The main gear are just odd looking as the forks seem for much larger wheels that what is provided. There are also no oleo scissors for the main gear, but without reference photos, they may not have been present.
 The next step was to attach the
canopy. Since this is black while the rest of the airframe is cream, I
decided to leave it off until after painting. Once I peeled off the tape
and took a sharpened toothpick to scrape off the leakage, I applied the
canopy to the airframe. It fits very well behind the seat and at the nose.
The part in between, however, is another story. You see, it appears that
the fuselage is too thin in this area. I say that as I got the sides of the
canopy to fit fairly well by touching a bit of super glue to the gap and
squeezing the canopy up against the fuselage side. I did this after I super
glued the front and back to get things aligned. It looks OK, but I sure
wouldn't want to take it to a contest.
The next step was to attach the
canopy. Since this is black while the rest of the airframe is cream, I
decided to leave it off until after painting. Once I peeled off the tape
and took a sharpened toothpick to scrape off the leakage, I applied the
canopy to the airframe. It fits very well behind the seat and at the nose.
The part in between, however, is another story. You see, it appears that
the fuselage is too thin in this area. I say that as I got the sides of the
canopy to fit fairly well by touching a bit of super glue to the gap and
squeezing the canopy up against the fuselage side. I did this after I super
glued the front and back to get things aligned. It looks OK, but I sure
wouldn't want to take it to a contest.
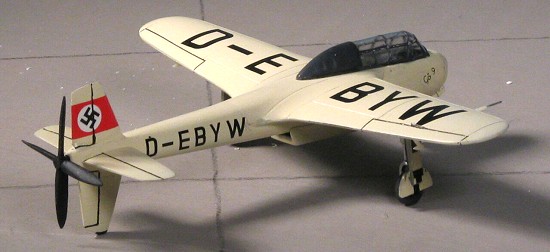
I next put on the decals. The decals are nice and thin and have lots of clear carrier around them. They went on with little trouble, but were generally impervious to Microsol/set and I had to use Solvaset to get them to snuggle down. I used the kit swastika halves and getting them aligned was like herding cats, mostly due to the carrier film. For the underside, AML provided additional code letters, but did not provide an additional hyphen. Here is how I handled that, as the code covers the doors. There is no way the doors will fit into the openings as they just aren't designed that way. I applied the decals as normal and when they'd fully dried, I took a super sharp blade and cut out those in the wheel well. Naturally, there was some tearing as these are quite thin. Then, eyeballing what needed to be cut out of the additional letters, I did so and applied them to the gear doors. Any bits that hung over the doors were cut away after they'd dried. I used gloss black paint to handle any touch ups that were needed.
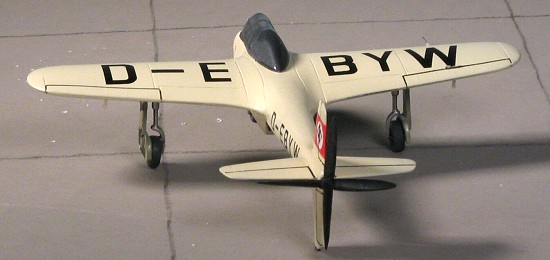 Gluing the gear in place takes
a bit of planning. You also have to consider the main gear doors when doing
the main gear as they are shown in the drawings as attaching darn near the
wing. Now, here are your choices in this regard. One is that you can leave
the gear length alone, glue the doors to the wing and have the struts stick
down way too far. Another is that you can glue the gear doors to the wheels
so that about half sticks out as they should, and have a huge gap between
the door and the wing. This makes things very wobbly as well. A third
choice, and the one I took, was to glue the gear doors to the wheel as it
should be, and then sand down the strut until the door meets the wing. A
fourth option would be to make new doors out of plastic card and were I to
do this kit again, that would be my choice. I'm saying that for two
reasons. One is that the card doors would be much more scale and not stick
out so far to the side. The second is that when the struts are trimmed,
that lowers the entire aircraft. This meant that the kit was supported by
the nose gear and the lower fin. I eventually trimmed on the rear fin to
get things level. This is not a bad thing, as even the weight I crammed
into the nose was not enough to prevent tail sitting.
Gluing the gear in place takes
a bit of planning. You also have to consider the main gear doors when doing
the main gear as they are shown in the drawings as attaching darn near the
wing. Now, here are your choices in this regard. One is that you can leave
the gear length alone, glue the doors to the wing and have the struts stick
down way too far. Another is that you can glue the gear doors to the wheels
so that about half sticks out as they should, and have a huge gap between
the door and the wing. This makes things very wobbly as well. A third
choice, and the one I took, was to glue the gear doors to the wheel as it
should be, and then sand down the strut until the door meets the wing. A
fourth option would be to make new doors out of plastic card and were I to
do this kit again, that would be my choice. I'm saying that for two
reasons. One is that the card doors would be much more scale and not stick
out so far to the side. The second is that when the struts are trimmed,
that lowers the entire aircraft. This meant that the kit was supported by
the nose gear and the lower fin. I eventually trimmed on the rear fin to
get things level. This is not a bad thing, as even the weight I crammed
into the nose was not enough to prevent tail sitting.
| FINAL CONSTRUCTION |
 That pretty well leaves me with
a few very small items. The nose gear doors have to be cut as there are two
very small doors that fit at the extreme front. Allow me to take a moment
to mention that the nose gear doesn't look like that on the box art or the
decal and painting instructions. It seems that it should have two oleos and
two oleo scissors place on opposite sides of the strut. There also seems to
be some sort of cover or mud guard that is not provided in the kit. While
it won't make a farthing's difference to anyone who sees the model, it was
shown and should be provided as such.
That pretty well leaves me with
a few very small items. The nose gear doors have to be cut as there are two
very small doors that fit at the extreme front. Allow me to take a moment
to mention that the nose gear doesn't look like that on the box art or the
decal and painting instructions. It seems that it should have two oleos and
two oleo scissors place on opposite sides of the strut. There also seems to
be some sort of cover or mud guard that is not provided in the kit. While
it won't make a farthing's difference to anyone who sees the model, it was
shown and should be provided as such.
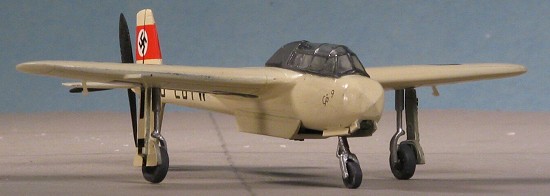
After gluing on the nose gear doors, I then cut the pitot tube and aileron mass balances from their resin stub. Since they are nearly the same shade as the rest of the airframe, they were glued in place without being painted. A touch of silver on the pitot tip was all that was needed. The last thing I did was to trim the prop shaft a bit and shove the prop up the bum....errr...back of the fuselage. A bit of painting on the exhaust, a touch of pastels and the kit had finally become a model.
| CONCLUSIONS |
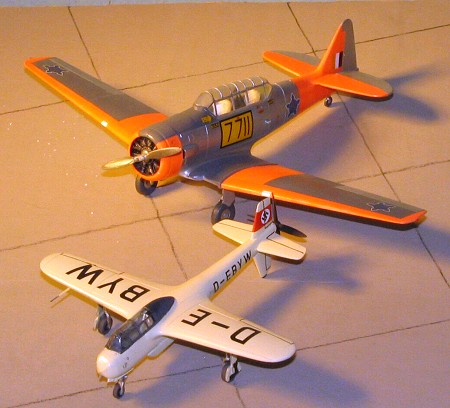 This kit has
to be one of the smallest I've done in a while. It compares in tiny-ness
with the Baynes Bat that was done last year. I've provided a
comparison image with a Hawk 1/72 T-6. Many may wonder if this kit is worth
the effort. Well, I have to say yes. Despite the challenges and the fact
that it is so small, the truth is that if you want the unusual (and this
certainly qualifies), then you have to enter the realm of the short run. By
their very nature, they are not engineered like a Tamiya kit, and the
modeler has to rely on their abilities and experience to get the best out
of them.
This kit has
to be one of the smallest I've done in a while. It compares in tiny-ness
with the Baynes Bat that was done last year. I've provided a
comparison image with a Hawk 1/72 T-6. Many may wonder if this kit is worth
the effort. Well, I have to say yes. Despite the challenges and the fact
that it is so small, the truth is that if you want the unusual (and this
certainly qualifies), then you have to enter the realm of the short run. By
their very nature, they are not engineered like a Tamiya kit, and the
modeler has to rely on their abilities and experience to get the best out
of them.
As was quoted by William Shatner (winner of the Overactor's Overachievement Award six years in a row), in one of the Star Trek movies "We learn by doing", and the more of these kits you tackle, the better you get and the less intimidating they become. If you are up to the challenges and want something truly interesting, then this one is for you.
January 2005
#1345 in a series
Copyright ModelingMadness.com. All rights reserved. No reproduction in part or in whole without express permission from the editor.
If you would like your product reviewed fairly and fairly quickly, please contact the editor or see other details in the Note to Contributors.