Hobby Boss 1/72 Do-335 'Pfiel'
| KIT #: | 80293 |
| PRICE: | $17.99 SRP |
| DECALS: | One option |
| REVIEWER: | Scott Van Aken |
| NOTES: | New tool Easy Assemble kit |
| HISTORY |
 The Dornier Do 335
Pfeil ("Arrow") was a
World War II heavy fighter built by the Dornier company. The two-seater
trainer version was also called Ameisenbär
("anteater"). The Pfeil's
performance was much better than other twin-engine designs due to its unique
"push-pull" layout and the much lower drag of the in-line alignment of the
two engines. The Luftwaffe
was desperate to get the design into operational use, but delays in engine
deliveries meant only a handful were delivered before the war ended.
The Dornier Do 335
Pfeil ("Arrow") was a
World War II heavy fighter built by the Dornier company. The two-seater
trainer version was also called Ameisenbär
("anteater"). The Pfeil's
performance was much better than other twin-engine designs due to its unique
"push-pull" layout and the much lower drag of the in-line alignment of the
two engines. The Luftwaffe
was desperate to get the design into operational use, but delays in engine
deliveries meant only a handful were delivered before the war ended.| THE KIT |
This is one of a new line of twins in the Easy Assembly
series from Hobby Boss. The Do-335 is most welcome in this line of kits and
should prove to be popular. As is the norm with these kits, the wing is a single
piece with the lower fuselage incorporated into it. Thanks to slide mold
technology, the upper fuselage is a single piece as well. There is a small
cockpit that has a seat, stick and floor. The instrument panel is a decal that
fits into the upper fuselage section. Scoops and exhausts are separate and can
be a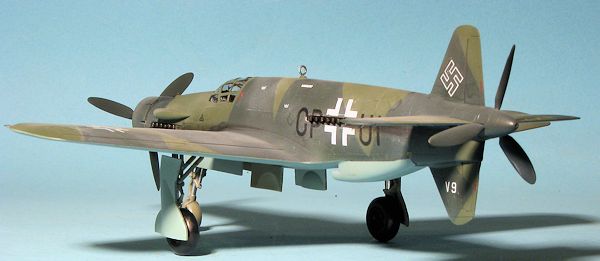 dded later. The rear fit insertion is also separate and is molded along
panel lines. There is a single clear canopy and without the huge mounting tabs
we've seen on earlier kits. I know I appreciate that.
dded later. The rear fit insertion is also separate and is molded along
panel lines. There is a single clear canopy and without the huge mounting tabs
we've seen on earlier kits. I know I appreciate that.
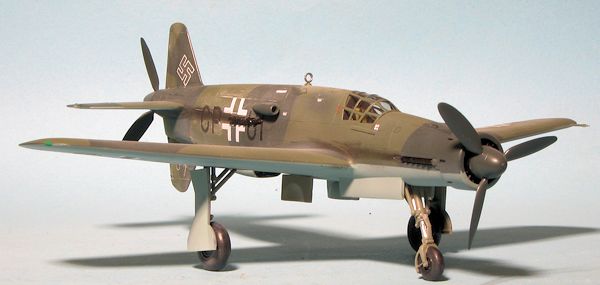
Landing gear are nicely done with the main gear having separate oleo scissors, retraction struts and wheels. The front strut has the wheel molded in place. with separate struts. HB seems to make one glitch in each of its EA kits and in this one it is the props. Basicaly the props are turning the wrong way. Now one could probably just switch the front and the rear prop and mount them backwards (after a bit of modification to the shafts) were it not for the fact they are different sizes. Adding to this is the deal that the blades are actually airfoil shaped so would have the flat part at the 'front'. Looks like a job for aftermarket.
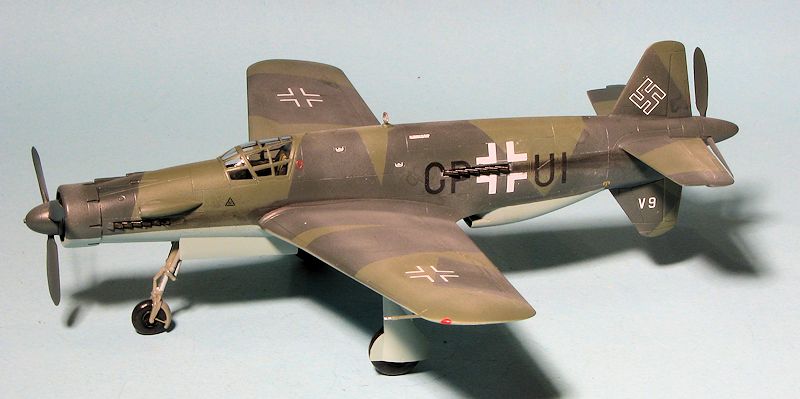
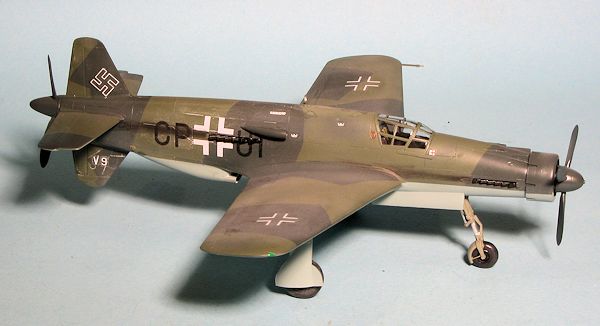
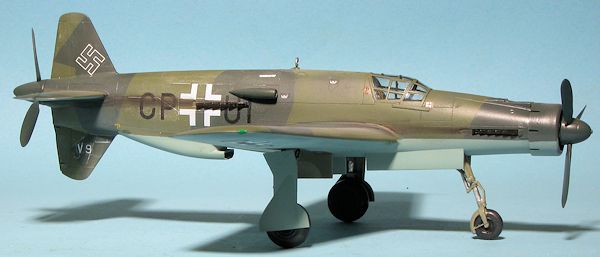
Instructions are well done with Gunze paint references. There are markings for one aircraft, the lone surviving Do-335 that is held by the Smithsonian and is now in their collection at the Dulles airport. This aircraft was completely rebuilt by Dornier in Germany and allowed to be displayed in Germany for ten years before being returned to the US. In addition to these markings, separate number 113s are provided in case you wished to do that one, though it is not shown in the instrucctions. The plane is in late war camouflage of (and correct me if I miss this as only generic colors are provided) RLM 81/83 over 65.
| CONSTRUCTION |
 Thanks to its design, there are not a lot of parts. First
step is to assemble the interior bits and then paint all the interior things
with RLM 66. When it dried, I made up a harness with thin tape strips. I then
recalled the last time I built a Do-335, which was the Monogram kit many decades
back. It needed a lot of nose weight, so to be sure, I packed 14 grams of weight
in the nose. There is room for it so no worries there. The interior was then
glued to the lower wing.
Thanks to its design, there are not a lot of parts. First
step is to assemble the interior bits and then paint all the interior things
with RLM 66. When it dried, I made up a harness with thin tape strips. I then
recalled the last time I built a Do-335, which was the Monogram kit many decades
back. It needed a lot of nose weight, so to be sure, I packed 14 grams of weight
in the nose. There is room for it so no worries there. The interior was then
glued to the lower wing.
With the decal placed in the instrument panel area and dry,
I attached the upper fuselage section. This is a good fit, but you have to come
at things by sliding it in place from the rear in order to get the seat to be in
front of the aft bulkhead. Otherwise it ends up behind it. The fit is actually
quite good and while you'll need filler (especially on the area forward of the
wing), the rest of the join line save the little 'jag' behin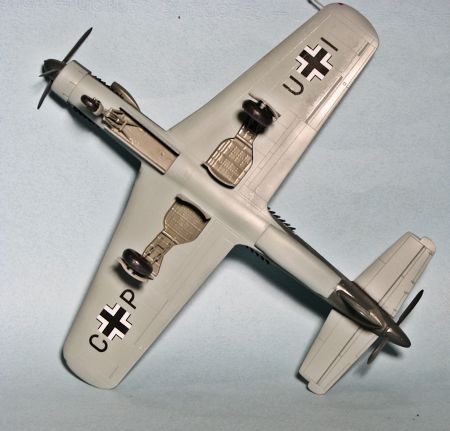 d the wing, can
simply be sanded. The lower fin is a butt join and it fits well, again with some
sanding when done. I then attached the tail planes. These are keyed, though from
the look of things, I don't see why.
d the wing, can
simply be sanded. The lower fin is a butt join and it fits well, again with some
sanding when done. I then attached the tail planes. These are keyed, though from
the look of things, I don't see why.
I tacked the forward engine cowling on with some paint and then glued on the lower engine's intake scoop. This is a tad undersize and is also not quite the right shape. Looking at photos, the upper part should be closer to the fuselage and the lower section should not be straight but a continuation of the curve of the rest of the fuselage behind it. Check out the photos of the real plane on Google. Add to it that the intake should be oval and not squared off as comes in the kit. I foresee an upgrade part in the works for this. I also sanded off the mold seam on the upper spine of the fuselage. The canopy was masked and attached, followed by the two engine supercharger intake scoops. These both will have large sprue attachment points and for some odd reason, they were placed on the top of the part where any imperfections of removing them will be easily seen.
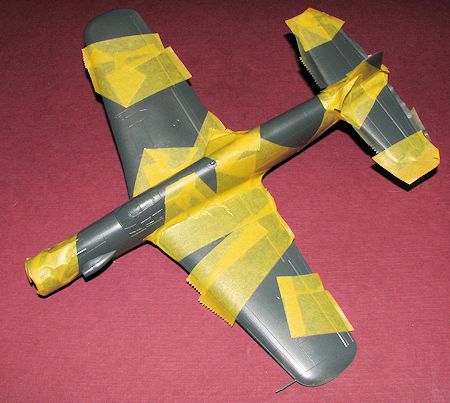
| COLORS & MARKINGS |
 se it? I painted all the underside
bits and outer gear doors with this shade.
se it? I painted all the underside
bits and outer gear doors with this shade. | FINAL CONSTRUCTION |
 With the major painting done, it was time to put it on its landing gear.
Thanks to all the attachment points, these pieces required quite a bit of
clean-up. The instructions would have you paint the gear black, but looking
at period photos, it was pretty obvious that these were not that shade but
probably RLM 02, so that is the main shade I used. The tires were painted
with Floquil's weathered black while the various exposed struts got the
treatment with Testors chrome silver. These were then glued in place and
thanks to the nose weight overload, no worries about tail sitting.
With the major painting done, it was time to put it on its landing gear.
Thanks to all the attachment points, these pieces required quite a bit of
clean-up. The instructions would have you paint the gear black, but looking
at period photos, it was pretty obvious that these were not that shade but
probably RLM 02, so that is the main shade I used. The tires were painted
with Floquil's weathered black while the various exposed struts got the
treatment with Testors chrome silver. These were then glued in place and
thanks to the nose weight overload, no worries about tail sitting. 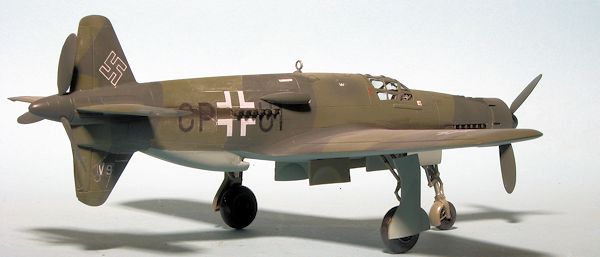 astika
was wrong and it should have been a white outline only so I removed the one
already on with tape. I found one in an Xtradecal swastika sheet that, while
a bit thinner in outline, was the right size.
astika
was wrong and it should have been a white outline only so I removed the one
already on with tape. I found one in an Xtradecal swastika sheet that, while
a bit thinner in outline, was the right size. | CONCLUSIONS |
Aside from the very preventable research/molding glitches, this is quite a nice kit. It fits well and provided no surprises during construction. You will need considerable nose weight and it would have been nice to have been given some information in that area. I am sure the aftermarket folks will be doing something about the props and hopefully provide a replacement rear fuselage intake. However, these items shouldn't deter you from giving this one a go.
| REFERENCES |
http://en.wikipedia.org/wiki/Do-335
Dornier Do-335 Pfiel by J. Richard Smith & Eddie J. Creek. Classic Books, 2006
July 2013
Thanks to Squadron Products for the preview kit. Get this one today at your local retailer.
If you would like your product reviewed fairly and fairly quickly, please contact the editor or see other details in the Note to Contributors.