|
KIT # |
? |
|
PRICE: |
$10 about 20 years ago |
|
DECALS: |
None |
|
REVIEW : |
|
|
NOTES: |
Basic vacuform |
|
HISTORY |
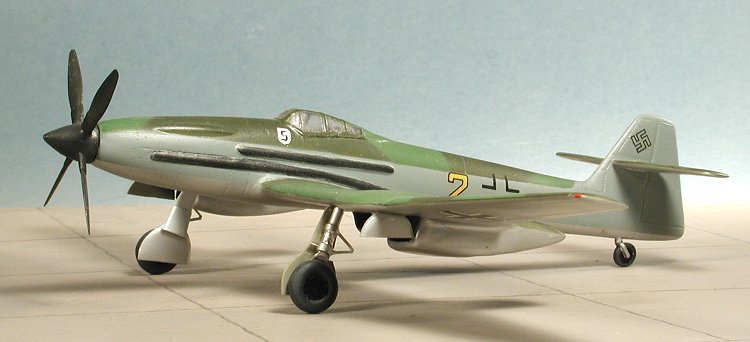
The Bv-155 was initially a Messerschmitt project to produce an ultra-high altitude fighter. The initial prototype was powered by a turbosupercharged DB 603E engine and had the long wings needed for such altitudes. The aircraft also needed a lot of cooling to operate that high up. Several different radiator designs were tried and the final result was two very large underwing radiators.
Messerschmitt had enough on its hands with the 262 and other projects so the 155 was turned over to Blohm und Voss who had the space and workforce available to handle such a project. After the usual multitude of changes to design, the Bv-155B v1 was finalized and work went on at a frenzied pace. The war situation was worsening day by day as 1944 went on. First flight of the prototype was scheduled for early 1945.
Finally, on 8 February, 1945 the Bv-155v1 took to the air. The flight was short as there were a number of problems. Returning to the base, these problems were noted and technicians worked around the clock to get the aircraft ready for another flight. This took place on 10 Feb. While a longer flight, there were also some difficulties with on-board systems. Upon returning from that flight, the prototype was pushed back into the hangar and work commenced to rectifying the gripes.
 February 21 was the date of the third flight. This one was also
not perfect as a sequencing problem with the landing gear had the outer gear
door close before the landing gear was able to fully retract. This temporarily
blocked the radiator and coolant temps started to climb. The landing gear was
recycled and successfully stowed, but damage had already be done to the door.
The aircraft was then run through some tests to see if previous problems had
been fixed and the flight successfully concluded. The aircraft was returned to
the shops for more work and there is no record of any other flights being made
prior to the end of the war.
February 21 was the date of the third flight. This one was also
not perfect as a sequencing problem with the landing gear had the outer gear
door close before the landing gear was able to fully retract. This temporarily
blocked the radiator and coolant temps started to climb. The landing gear was
recycled and successfully stowed, but damage had already be done to the door.
The aircraft was then run through some tests to see if previous problems had
been fixed and the flight successfully concluded. The aircraft was returned to
the shops for more work and there is no record of any other flights being made
prior to the end of the war.
One additional flight was made after the war. The British captured Hamburg and the B&V works. After painting on British roundels and giving it serial PN 820, it was taken for a flight by a British pilot. He managed to crash land it and it was written off. The nearly complete v2 and v3 were taken away to the UK and US respectively. The v3 was the prototype to the BV-155C and is currently in store at NASM's Garber Facility, the sole remaining example of these interesting aircraft.
|
BUILDING THE KIT |
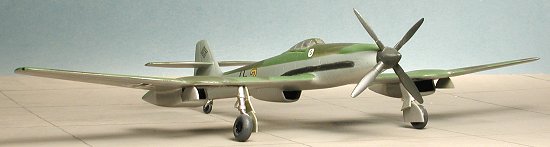
The Wings 72 Bv-155 was one of my earlier attempts at building a vacuform kit. The long wingspan was what really got my interest. Back in the those days, vacuform kits were without decals, metal bits, resin bits or any injected parts. What some call 'the good old days' where you needed to use some of that modeling skill to finish a kit.
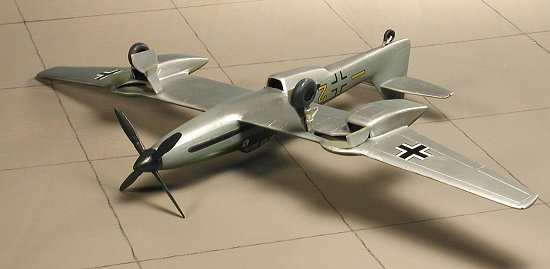
Once the kit parts had been removed from their backing sheet, the vac kit builds just like any other injected model, only you have to make some of the smaller bits. This kit had an interior consisting of a floor, aft bulkhead, seat and instrument panel. The control stick was scrounged from the spares box. I did not include any side consoles or other stuff on the inside as I wasn't that good at doing these things. Before gluing the fuselage halves together, I opened up the large fuselage intake and smaller exhaust area. Then this area was blanked off with some spare card to prevent a see-through effect.
 While the
fuselage was drying, I opened up and blanked off the wing radiators and glued
the wing sections together. The same with the tail planes. I didn't thin the
trailing edges of the wings as a good vacuform builder should do and so these
areas are a bit thick! I did install a spar into the wings to keep them
together. The wings came as a two part per side assembly. The inner section
housed the landing gear (which had the doors cut out, but the wells were not
blocked in), while the outer section was to fit into the inner section. A piece
of card was glued to the outer section and then this tab inserted into the inner
piece. Over the years, the wing has shown several cracks at that join as I tend
to pick the kit up by the wing tips!
While the
fuselage was drying, I opened up and blanked off the wing radiators and glued
the wing sections together. The same with the tail planes. I didn't thin the
trailing edges of the wings as a good vacuform builder should do and so these
areas are a bit thick! I did install a spar into the wings to keep them
together. The wings came as a two part per side assembly. The inner section
housed the landing gear (which had the doors cut out, but the wells were not
blocked in), while the outer section was to fit into the inner section. A piece
of card was glued to the outer section and then this tab inserted into the inner
piece. Over the years, the wing has shown several cracks at that join as I tend
to pick the kit up by the wing tips!
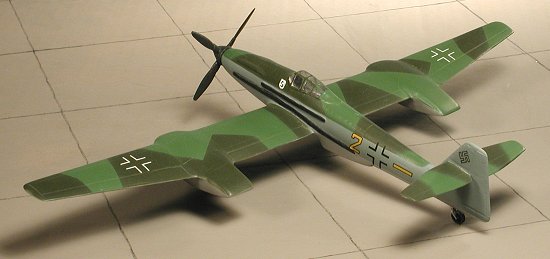
The tailplanes were butt joined to the tail section. The vac canopy was cut out as best as I could and then glued in place. The interior and wheel wells were painted RLM 02 grey as I was unaware of the need to paint the cockpit RLM 66 at the time. At this time, I basically had a complete airframe. The canopy was masked off and it was time to try some painting
|
PAINT |
The underside was painted using Testor's Aluminum metallizer. The small sheet in
the kit recommended this color as well as the late war RLM 82/83 brown and
bright green (at least, I think I have those colors correct!), for the upper
surface. The side of the fuselage was painted RLM 76. I followed the guide in
the instructions and used Xtracolor to paint these colors. Since it was a
splinter camo upper surface, I masked off the areas using low tack tape. Once
the paint was dry, I used clear acrylic to cover it.
|
CONSTRUCTION CONTINUES |
The tail wheel was
from the parts box and the main landing gear constructed out of aluminum tubing,
using the kit wheels. Actually I was real proud of myself when I finished that
particular construct. My first scratch built landing gear! They were butt glued
to the inside of the wings and the gear doors glued on.
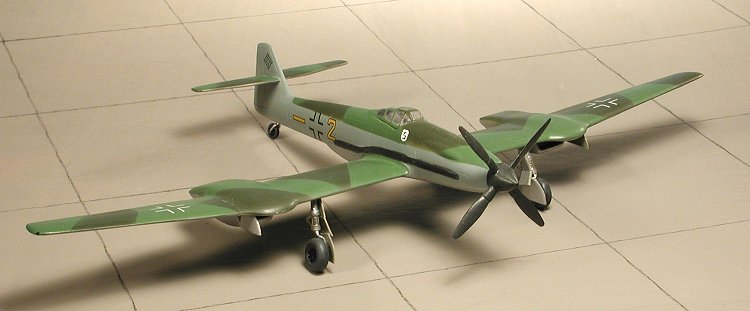
 The next step was to find something to use for the landing gear
and the prop/spinner. Though it would have been better to use the ones supplied
in the kit, I was not good at doing vac kits as it meant filling the props with
putty and then smoothing it out later. Instead, I used a prop from an Airfix
P-61, though it is no where near 'paddle bladed' enough. Not sure where the
spinner came from, but it is too pointy as you can see in the photo. Had I had
the book when building the kit, I'd have not made several goofs! That is the
problem when one has insufficient references.
The next step was to find something to use for the landing gear
and the prop/spinner. Though it would have been better to use the ones supplied
in the kit, I was not good at doing vac kits as it meant filling the props with
putty and then smoothing it out later. Instead, I used a prop from an Airfix
P-61, though it is no where near 'paddle bladed' enough. Not sure where the
spinner came from, but it is too pointy as you can see in the photo. Had I had
the book when building the kit, I'd have not made several goofs! That is the
problem when one has insufficient references.
|
CONCLUSIONS |
Well, for an early vac build, it didn't turn out too bad at all. It is quite crude compared to what I am building now, but it is still a favorite of mine, even after all these years. The pictures that accompany this article were taken but a few days ago, so it has managed to survive several moves without any major damage!
|
REFERENCES |
Monogram Close-Up #20: Blohm und Voss Bv-155, by Thomas Hitchcock, 1990
Copyright ModelingMadness.com. All rights reserved.
Review kit courtesy of me and my wallet!
If you would like your product reviewed fairly and fairly quickly, please contact the editor or see other details in the Note to Contributors.
Back to Reviews Page 2020