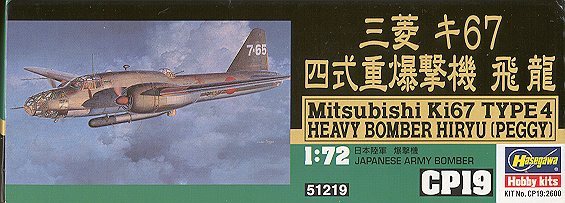
Hasegawa 1/72 Ki-67 'Hiryu'
|
KIT # |
CP 19 |
|
PRICE: |
$26.98 |
|
DECALS: |
See Review |
|
REVIEW : |
|
|
NOTES: |
|
|
HISTORY |

Design of the Ki-67 Hiryu "Dragon Slayer", began in late 1939 with a requirement to Mitsubishi for a fast heavy bomber. The design was approved in early 1941 and Mitsubishi was directed to start work on the prototype. This aircraft was completed in late 1942 and 17 preproduction aircraft were subsequently built. Full production bombers rolled off the assembly line in August 1944.
Due to the changed conditions of the war by that time, nearly all of them were outfitted at torpedo bombers. Unfortunately, the 'Long Lance' torpedoes were too large to fit in the bomb bay so had to be carried externally under the aircraft. Several were also upgraded with warning radars, though this did not apply to all aircraft. Other uses for the Hiryu were as mother ships for the Ohka piloted bombs.
First combat use of the aircraft was in October 1944 by the 98th Group off the coast of Taiwan. Unfortunately for the Japanese, most of their trained bomber crews has already been lost in the years before. The new, poorly trained crews that were left, were unable to effectively use this new bomber. It also didn't help that the Allies had air supremacy over the target.
|
THE KIT |
Hasegawa continues its current trend in 1/72 of releasing kits of Japanese bomber aircraft. The Hiryu is the fifth of the series; the other four being the G4M2 Betty, Ki-49 Helen, G3M2 Nell, and P1Y1 Frances. It seems that they are alternating between Army and Navy bombers. With this being the case, a Ki-21 Sally shouldn't be too far behind!!
 Molding
is very typical of what one would expect from a new mold Hasegawa kit; it is
excellent. Also typical of Hasegawa, the six medium grey sprues are all
packaged together in the same bag. The clear bits and decal sheet are in a
separate bag. Rather than show you a composite of all the spures, I'm going to
start putting up (where appropriate) the parts layout drawing and a
representative section of the kit. As you can see, there are quite a few bits
and pieces in this kit. In addition, there are those interesting little polycaps
for the propeller shafts.
Molding
is very typical of what one would expect from a new mold Hasegawa kit; it is
excellent. Also typical of Hasegawa, the six medium grey sprues are all
packaged together in the same bag. The clear bits and decal sheet are in a
separate bag. Rather than show you a composite of all the spures, I'm going to
start putting up (where appropriate) the parts layout drawing and a
representative section of the kit. As you can see, there are quite a few bits
and pieces in this kit. In addition, there are those interesting little polycaps
for the propeller shafts.
 Just
on an aside, it was Tamiya that started that trend back with their 1/48 Rex
floatplane, however Hasegawa is the one that has made the most use of this
feature. If you remember their Ki-84 kit, it had a ton of them!
Just
on an aside, it was Tamiya that started that trend back with their 1/48 Rex
floatplane, however Hasegawa is the one that has made the most use of this
feature. If you remember their Ki-84 kit, it had a ton of them!
In terms of options, there are three major ones, all confined to the bomb bay area. You can have it with doors closed. You can have it with doors open and Ta-bombs (whatever they are) installed. Or you can have it with doors off and the torpedo installed. There is also the option of having the radar antenna installed.
Should you wish the aft fuselage guns in the extended position, you have to cut off the rear of the side clear blisters. I would think that few modelers will do that!
The cockpit section is quite detailed with full crew positions and the fuselage fuel tank. How much can be seen after construction is unknown, but that doesn't stop real modelers from detailing those areas, does it??
Decals are for three aircraft. All are painted exactly the same, with dark green over light grey. The only difference is the tail markings that are carried.
Anyway, on to the construction of the kit.
|
CONSTRUCTION |
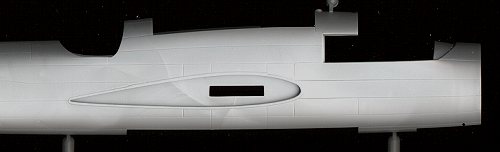
First start for me, it to see what subassemblies can be constructed before any real building can get underway. To this end, I glued the wheels together (they are weighted, which is nice), the wings (after opening the hole in the leading edge of the right one for the radar antenna), the torpedo, and started work on the interior. In the aft section there is a small box of some sort that needs glued in place. The interior is quite complete and has the bomb bay on the underside. Right above the very detailed bay, there are a huge number of sink marks. Fortunately, those should be practically invisible once the fuselage is glued together. There are also holes in the fuselage side that need opened for the fuselage antenna, if you want to use them.
 The interior consists of the
usual seats, control columns, and instrument panel. Also in there is a very
large fuel tank, a navigator/radio operators position, and the bombardier's
position. The bombardier's position is glued to the front of the main floor.
There is some shaving to either the main floor or bombardier's section needed
where they join to get a good fit. On the underside, the fore and aft bulkheads
for the bomb bay were glued in place. Moving back to the fuselage, the swing arms
for the guns need to be glued in place. This is a bit of a tricky spot as one
end is glued to the fuselage interior and the other end to the inside of the
fuselage blisters. I just glued mine to stick out the holes quite a bit so that
when gluing the blister in place, it would push on the swing arm so no glue
would be needed. At least, that is the theory! Once all the bits and pieces were
glued together in the interior, it and a number of other parts, were painted with Aeromaster Mitsubishi
Interior Green Acrylic.
The interior consists of the
usual seats, control columns, and instrument panel. Also in there is a very
large fuel tank, a navigator/radio operators position, and the bombardier's
position. The bombardier's position is glued to the front of the main floor.
There is some shaving to either the main floor or bombardier's section needed
where they join to get a good fit. On the underside, the fore and aft bulkheads
for the bomb bay were glued in place. Moving back to the fuselage, the swing arms
for the guns need to be glued in place. This is a bit of a tricky spot as one
end is glued to the fuselage interior and the other end to the inside of the
fuselage blisters. I just glued mine to stick out the holes quite a bit so that
when gluing the blister in place, it would push on the swing arm so no glue
would be needed. At least, that is the theory! Once all the bits and pieces were
glued together in the interior, it and a number of other parts, were painted with Aeromaster Mitsubishi
Interior Green Acrylic.
 It was then that I noticed
that the tongues for the bomb bay bulkheads are quite visible in the interior.
The aft one will be invisible, but the front one is quite prominent and will be
seen through the canopy. I decided to go ahead and fill it in as surely if I
didn't, it would be the most obvious glitch on the kit!! Once that was done, the
area was resprayed. The seat cushions were painted leather and the grips on the
control wheels painted black. There are decals for the instrument panel and the
radio panels. These look very convincing once in place.
It was then that I noticed
that the tongues for the bomb bay bulkheads are quite visible in the interior.
The aft one will be invisible, but the front one is quite prominent and will be
seen through the canopy. I decided to go ahead and fill it in as surely if I
didn't, it would be the most obvious glitch on the kit!! Once that was done, the
area was resprayed. The seat cushions were painted leather and the grips on the
control wheels painted black. There are decals for the instrument panel and the
radio panels. These look very convincing once in place.
In the back, the side guns were painted gunmetal with wood stocks and grips. These were then glued in the stowed position above the side blisters. While cleaning these up, the soft nature of the plastic used in this kit came to prominence. I don't remember some of the other newer kits being made of this soft plastic. While it is easier to work with, I prefer the strength of the older formula of plastic. Those of us that are a bit rough with cleaning up parts will have to be quite careful with this softer plastic as it is easy to bend/break small parts.
Next, the fuselage halves
were glued together. While joining the fuselage halves, the upper turret needs
to be put in place. Several test fittings showed that it wasn't necessary to
fully assemble this turret, so the gun and clear bits were left off until later.
This makes it easier to mask the turret and clean up the upper fuselage seam. At
this time the insert above the cockpit
 was installed. While gluing the fuselage
together, I noticed a number of sink marks where the horizontal stabilizers
attach to the fuselage and those were filled. While waiting for the filler to
dry, the running lights on the horizontal stabs were removed as per kit
instructions.
was installed. While gluing the fuselage
together, I noticed a number of sink marks where the horizontal stabilizers
attach to the fuselage and those were filled. While waiting for the filler to
dry, the running lights on the horizontal stabs were removed as per kit
instructions.
Then the horizontal stabilizers were glued in place. While this was going on, the engine nacelles were glued together and the seams filled. After those were finished, they were glued onto their respective wings. No filler was needed for the nacelle/wing join thanks to the very good design and the soft plastic. When dry, the wings were then cemented into the recesses in the fuselage. I like this design as it eliminates any need to use filler at the wing/fuselage join. The next step is one that I was not looking forward to: the installation of a lot of clear bits!!
First ones were the side blisters. These leave a bit of fuselage inside the blister. There is no indication on what color to paint it so I used the interior green. Then it was time to start putting in the transparencies. First were the side blisters. Then the small panel under the bomb aimer and then the cockpit canopy. These were all masked using Scotch tape, a rather tedious job and especially tiresome on the side blisters. All the transparencies were cemented in place using non-fogging superglue.
Once those were done, the guns and mounts for the nose and tail were painted and then inserted in the nose and tail transparencies. When dry those items were masked. Again a very tedious job due to the myriad of small triangular frames. This is where an Opti-visor or other magnifying aid comes in very handy!!!
In between bouts of masking, several of the other bits were painted. The torpedo is black with aluminum props and wooden fins. The mounts for the torpedo and landing gear legs were painted aluminum as was the 'engine block' for each side. There really is no engine as the fan (also painted aluminum) obscures any detail. In addition, the props were glued to the spinners and painted that dark brow 'Propeller Color' that is prevalent on Japanese aircraft.
 Next the guns were painted
gunmetal in preparation for installing the nose and tail transparencies.
Removing the transparencies was a bit of a problem in that I managed to crack
both of them when cutting off the brace in small area of them. In the nose, the
bomb aimer's floor was superglued in place and the nose transparency glued to
the front of the fuselage. It was here that I noticed a big problem. The sides
fit beautifully, but the top and bottom had a huge step down to the fuselage.
Not much that could be done on
Next the guns were painted
gunmetal in preparation for installing the nose and tail transparencies.
Removing the transparencies was a bit of a problem in that I managed to crack
both of them when cutting off the brace in small area of them. In the nose, the
bomb aimer's floor was superglued in place and the nose transparency glued to
the front of the fuselage. It was here that I noticed a big problem. The sides
fit beautifully, but the top and bottom had a huge step down to the fuselage.
Not much that could be done on  the bottom other than some sanding to attempt to
even things up. Some detail was lost but will be restored when masked. On the
top the problem was even worse. Several coats of filler were put in place on the fuselage to try
to blend things in. Sanding on the transparency would have lost too much detail
to make it worthwhile.
the bottom other than some sanding to attempt to
even things up. Some detail was lost but will be restored when masked. On the
top the problem was even worse. Several coats of filler were put in place on the fuselage to try
to blend things in. Sanding on the transparency would have lost too much detail
to make it worthwhile.
I feared a similar problem in the rear, and got it, but not to the degree of the front. Before gluing in place, the aft cannon and mount was glued into the transparency. Then came the extremely tedious job of masking off all those transparencies. To say that this took a long time is a bit of an understatement. Fortunately, I have an Opti-visor to help my aging eyes. All of the flat panes were done with low tack Scotch tape. Those with some curve in them were done with regular Scotch Magic tape and those for the side bubbles and turrets were done using Bare Metal Foil. Then the openings were stuffed with tissue and it was off to the paint shop.
|
PAINT |
 This is basically a two color paint scheme. Underside was done
with Aeromaster Underside Surface Grey Green acrylic. This was sprayed on first
and any masking needed was done. The upper surface is a mixture of 10%
'Propeller color' and 90% Khaki. The callouts are for Gunze paints, however, I
cannot get the enamels that are called out so used Aeromaster paints. Aeromaster A/N Red Brown Primer
and RLM 79 Sand Yellow Acrylics were mixed until I got a darkish brown color to
match what was on the box top. It turned out to be more than 90/10, but looks
good. Actually, it looks a lot like good old US Olive Drab! After the usual back
and forth spraying with the required colors, the aircraft was, for all intents
and purposes, painted.
This is basically a two color paint scheme. Underside was done
with Aeromaster Underside Surface Grey Green acrylic. This was sprayed on first
and any masking needed was done. The upper surface is a mixture of 10%
'Propeller color' and 90% Khaki. The callouts are for Gunze paints, however, I
cannot get the enamels that are called out so used Aeromaster paints. Aeromaster A/N Red Brown Primer
and RLM 79 Sand Yellow Acrylics were mixed until I got a darkish brown color to
match what was on the box top. It turned out to be more than 90/10, but looks
good. Actually, it looks a lot like good old US Olive Drab! After the usual back
and forth spraying with the required colors, the aircraft was, for all intents
and purposes, painted.
|
CONSTRUCTION CONTINUES |
Once the basic painting was done, any overspray in the bomb bay and wheelwells was touched up by brush and the landing gear was glued into place. The tailwheel support is very strong and the main gear assembly fit quite well. I was apprehensive about spreading the main gear legs apart to accept the flattened wheels, but other than a few scrapes, it wasn't a problem. The scrapes were touched up.
Next, the engines were glued together. This is engineered quite well, with separate exhaust stacks. First the engine body had the small plastic hold down installed in the front. Then it was glued to the cowling. The engine body has the cowl flaps in them. Next the exhaust stacks were glued to the back of this assembly, allowing the stacks to protrude from the cowl flaps. This assembly was then glued to the nacelle. A very neat procedure.
 The propellers, which had already been painted, had the backing
plates glued to them. Then the engine fans were glued to the backing plate.
These were left until the final stage to push into place. There really is no
engine detail as none can be seen due to the engine cooling fans. This
arrangement is very much like that on the FW-190A series of aircraft.
The propellers, which had already been painted, had the backing
plates glued to them. Then the engine fans were glued to the backing plate.
These were left until the final stage to push into place. There really is no
engine detail as none can be seen due to the engine cooling fans. This
arrangement is very much like that on the FW-190A series of aircraft.
The control surfaces were then highlighted with a Rapidograph pen. If you don't have one, I can highly recommend it as it is a great tool for this purpose. Next the gear doors were glued in place and then the torpedo mounts were glued into the bomb bay. These parts fit very well and the super attachment points made it a no brainer.
When dry, the kit was sprayed with Future clear acrylic in preparation for the decals. Decals were not a real problem with this kit. The Hasegawa decals, though a bit thick, worked just fine. In most cases no setting solution was used, and on a few of them only the Microscale solvents were needed. I picked the one with the neatest looking tail markings!
 Once those were dry, the kit was wiped down to get rid of decal
residue, then the main gear doors were glued in place. This left only some
clear bits and a few antenna to still be attached. The kit was then oversprayed
with a clear acrylic matte. Then it was on to another time-consuming project;
removing the masking from the windows. It took the better part of two hours to
do and some of the acrylic paint chipped during the process of removing the
sticky residue left by the tape and foil. A fine brush patched those bits up
with no problem.
Once those were dry, the kit was wiped down to get rid of decal
residue, then the main gear doors were glued in place. This left only some
clear bits and a few antenna to still be attached. The kit was then oversprayed
with a clear acrylic matte. Then it was on to another time-consuming project;
removing the masking from the windows. It took the better part of two hours to
do and some of the acrylic paint chipped during the process of removing the
sticky residue left by the tape and foil. A fine brush patched those bits up
with no problem.
Next the tail gun was repainted gunmetal and the upper turret pieces snapped together and snapped in place. No glue was used on any of the upper turret parts. The nose turret assembly was glued to the inside of the nose cone and that attached to the nose with non-fogging super glue. Same with the tail cone. On to the antennas. There are nine radar antennas to attach. Four on each side of the fuselage and one on the wing. Those were prepainted flat black and then installed in the holes opened for them in an earlier step. Any glitches were then touched up.
The torpedo was glued to its harness. Then the upper navigators dome was glued in place along with the upper antenna mast. The mast was then painted to match the upper fuselage color. A pitot mast was glued to the lower nose section and painted aluminum. Finally, the wing tip lights were attached after painting the attaching areas the appropriate red or blue and the props pushed into the engines. The last painting was for the formation lights on the wings, fuselage and tail. After all that was done, pastels were used to simulate engine exhaust.
|
CONCLUSIONS |
 I really liked this kit. Not only because it turned out so well,
but because it was well engineered. Sure, there are some problem areas to be
careful of, and all that masking is quite time-consuming, but that is part of
modeling. The kit looks just great when done and it is so much better than the
old LS kit. Another appealing part of it is that the price is reasonable for the
quality of the kit and the amount of modeling time you get for your money. While
not for the tyro, I can recommend this kit to anyone who has mastered basic
building skills.
I really liked this kit. Not only because it turned out so well,
but because it was well engineered. Sure, there are some problem areas to be
careful of, and all that masking is quite time-consuming, but that is part of
modeling. The kit looks just great when done and it is so much better than the
old LS kit. Another appealing part of it is that the price is reasonable for the
quality of the kit and the amount of modeling time you get for your money. While
not for the tyro, I can recommend this kit to anyone who has mastered basic
building skills.
Copyright ModelingMadness.com. All rights reserved. No reproduction in part or in whole without express permission from the editor.