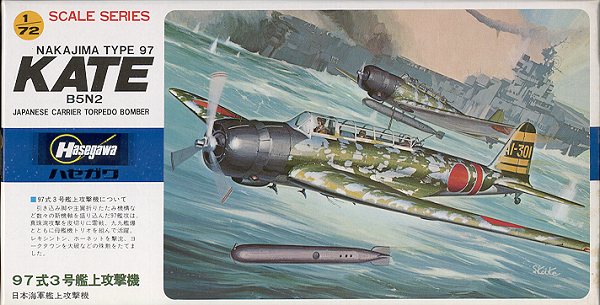
Hasegawa 1/72 B5N2 'Kate'
|
KIT # |
B 4 |
|
PRICE: |
¥350 |
|
DECALS: |
Two schemes; see review |
|
REVIEW : |
|
|
NOTES: |
|
|
HISTORY |
Nakajima's B5N was an answer to a 1935 requirement for a naval torpedo bomber that could also perform long range reconnaissance. It had to be of modern all metal construction, be relatively fast, and have retractable landing gear. In order to achieve that, Nakajima designed a low wing, three place monoplane. All ordnance was to be externally carried. The wings were quite long in order to achieve bombing stability and provide long range. Being carrier borne the wings were manually folded to save space.
After being blooded in China in the late 1930s, improved versions of the B5N were available in large numbers for the start of the war with the US. Kates were responsible for much of the devastation created at Pearl Harbor as they and their 'Long Lance' torpedoes were most effective against the battleships moored next to Ford Island.
Kates were used throughout the early and middle stages of the war, only replaced late in their career by the larger and faster Jill and Grace. However, by that time, though there were many targets, there were few operational carriers and even fewer trained crews.
No Kates have survived the war to be displayed in museums. At least, none that I'm aware of.
|
THE KIT |
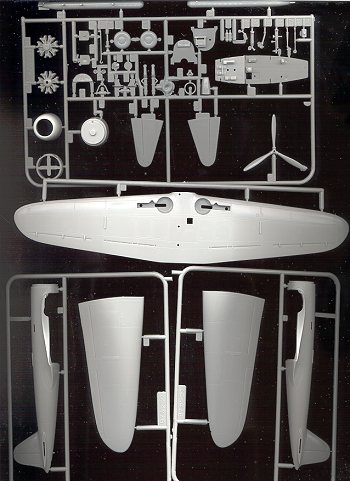
This is one of the Mania kits that Hasegawa purchased in the early 1980's. It has fine engraved details, boxed in wheel wells, a nice interior, detailed engine, and some interior sidewall details. Not bad for a kit designed in the early 1970s.
It does suffer from some poor ejector pin placement, notably right in the middle of the seat. There is also some minor flash, but nothing major at all. This particular kit was purchased in 1984. It is still in the catalogue, albeit with different box art and undoubtedly different decals from this version. There is a clear but distorted canopy and a tube of glue.
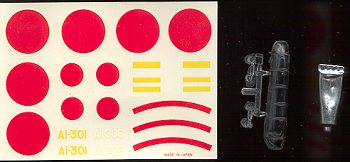 The decal sheet is
typical of this era of Hasegawa. It is rather thick and has reds that are too
bright. They are from two of the carriers at Pearl Harbor. I would guess that
Akagi and Kaga since the codes are AI- and AII- .
The decal sheet is
typical of this era of Hasegawa. It is rather thick and has reds that are too
bright. They are from two of the carriers at Pearl Harbor. I would guess that
Akagi and Kaga since the codes are AI- and AII- .
The instruction sheet is a fold out that has the history and paint/decal guide on one side and the construction sequence on the other. There are six steps, each showing the parts and giving color call-outs. Unfortunately, everything is in Japanese since this isn't an export kit. However, those of us with a few kits under our belts should have no real trouble figuring out colors, especially since recent information has undoubtedly made some of the call-outs obsolete.
Overall, it looks like it will be a nice kit to build and one that should not take that long to complete. Not sure what is available in aftermarket stuff for this kit, but built right from the box it should be a very nice presentation.
|
CONSTRUCTION |
 Naturally, I started
by putting together a bunch of the interior parts. It is quite complete for its
scale, consisting of three seats, a control column, bombsight, oxygen bottles,
and extra cartridge magazines. There is adequate detail on the instrument panel
as well as on the radio panel and other auxiliary panels on the fuselage side
wall. Most of the interior pieces were assembled and then the interior, fuselage
and the bulkheads separating the various compartments were painted Nakajima
Interior Green from the Aeromaster range.
Naturally, I started
by putting together a bunch of the interior parts. It is quite complete for its
scale, consisting of three seats, a control column, bombsight, oxygen bottles,
and extra cartridge magazines. There is adequate detail on the instrument panel
as well as on the radio panel and other auxiliary panels on the fuselage side
wall. Most of the interior pieces were assembled and then the interior, fuselage
and the bulkheads separating the various compartments were painted Nakajima
Interior Green from the Aeromaster range.
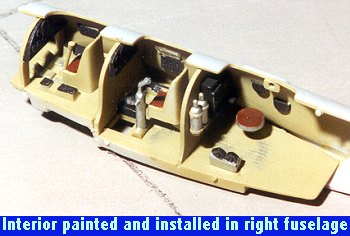 Once that was dry, the radios
and instrument panel were painted black. The oxygen bottles and bomb sight were
painted aluminum. The seat bottoms were painted leather. There were major sink
marks in the seat bottoms and in the floor. The seats were filled with white
glue, which took care of much of the damage and the floors were left alone.
Thanks to the thickness of the canopy, that won't be visible from the outside.
The bulkheads were glued in place and the small windows were glued in the
fuselage side. There is a lot of flash on the clear parts that need to be
cleaned up before use. Same with the smaller parts on the sprue. I think this
kit may have been an old Mania molding that was bought by Hasegawa. Once the interior was drybrushed, it was glued into
the fuselage and the halves glued together. Fit is good, though there are some
sink marks near the alignment pins that will need filled.
Once that was dry, the radios
and instrument panel were painted black. The oxygen bottles and bomb sight were
painted aluminum. The seat bottoms were painted leather. There were major sink
marks in the seat bottoms and in the floor. The seats were filled with white
glue, which took care of much of the damage and the floors were left alone.
Thanks to the thickness of the canopy, that won't be visible from the outside.
The bulkheads were glued in place and the small windows were glued in the
fuselage side. There is a lot of flash on the clear parts that need to be
cleaned up before use. Same with the smaller parts on the sprue. I think this
kit may have been an old Mania molding that was bought by Hasegawa. Once the interior was drybrushed, it was glued into
the fuselage and the halves glued together. Fit is good, though there are some
sink marks near the alignment pins that will need filled.
Then it was on to the wings. These fit quite well, needing a bit of filler on the leading edges. There is a window that goes into the center section, so don't forget to install it. Then the wings were fit onto the fuselage. I aligned the wing roots as my primary concern. This left a bit of a gap at the front, but nothing major. When the wings had dried, filler was used at the front gap and the bottom rear wing/fuselage join.
 Meanwhile, the engine cylinders
were painted black and drybrushed with aluminum. The cowling and cowl flap ring
were fit together and painted Cowling Blue-Black, again, from the Aeromaster
range. Meanwhile, the torpedo was assembled, cleaned up and painted aluminum
with a black nose. Next part was the engine mount and the tailplanes. No filler
needed for the tailplanes, but the engine mount needed some for a good fit. Then
the cowl flaps section was glued in place followed by the engine.
Meanwhile, the engine cylinders
were painted black and drybrushed with aluminum. The cowling and cowl flap ring
were fit together and painted Cowling Blue-Black, again, from the Aeromaster
range. Meanwhile, the torpedo was assembled, cleaned up and painted aluminum
with a black nose. Next part was the engine mount and the tailplanes. No filler
needed for the tailplanes, but the engine mount needed some for a good fit. Then
the cowl flaps section was glued in place followed by the engine.
Next step was to paint the part under the canopy glazing Nakajima interior green, which was done with a brush. Then the canopy was glued on and masked using Scotch tape and Tamiya masking tape. The engine was masked off, the tail wheel glued in place and it was off to the paint shop for the first application of paint.
|
PAINT & DECALS |
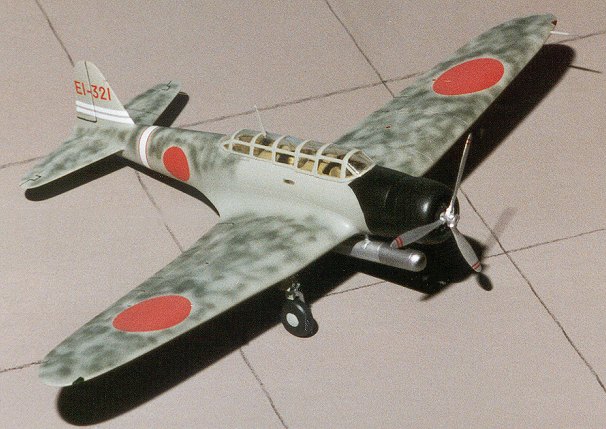
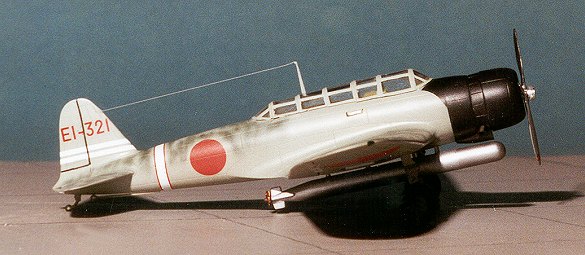
I really didn't want to use the kit decals and was unable to find any of the Tora, Tora, Tora sets from Aeromaster. Fortunately, my good buddy, Drew Nix, had one of the sheets and wasn't going to use either of the Kate markings on it. Choosing which scheme to do was the hardest part of building this kit. According to my reference, neither one of the two aircraft depicted carried a torpedo at Pearl Harbor. I finally chose the light grey aircraft with the green mottle from the Shokaku as the subject of this kit, though it was after MUCH waffling that this decision was made!
 First thing I did was to paint the airframe overall Nakajima
Navy Grey, which is an Aeromaster Acrylic color. A couple of sessions got it
completely painted. The paint covers very well, though it doesn't stick as well
as the enamel. Though I had already painted the engine cowling, I had painted it
Blue-black which is a Mitsubishi color. The greenhouse was protected by tape and
the cowling and forward fuselage repainted in flat black. Once that was done and
dry, the black was masked off using Tamiya tape, making sure I got a nice curved
section in there, and the airframe resprayed grey to cover the black overspray.
Then it was back to the work bench to put some more 'stuff' on it (like the
decals) before continuing the paint scheme.
First thing I did was to paint the airframe overall Nakajima
Navy Grey, which is an Aeromaster Acrylic color. A couple of sessions got it
completely painted. The paint covers very well, though it doesn't stick as well
as the enamel. Though I had already painted the engine cowling, I had painted it
Blue-black which is a Mitsubishi color. The greenhouse was protected by tape and
the cowling and forward fuselage repainted in flat black. Once that was done and
dry, the black was masked off using Tamiya tape, making sure I got a nice curved
section in there, and the airframe resprayed grey to cover the black overspray.
Then it was back to the work bench to put some more 'stuff' on it (like the
decals) before continuing the paint scheme.
|
CONSTRUCTION CONTINUES |
Aeromaster's decals from their sheet 'Tora Tora Tora part 1 was used for this kit. This was mainly because the kit decals are thick, too bright, and the white is an ivory color; all of these things very common for Hasegawa decals in the mid 1980s. Just to mention a few things about the sheet and directions. First of all, there are no overhead images of any of the schemes. Not that unusual as most of the markings are for overall grey aircraft, but the one I chose to do is mottled and a top view would have been very helpful. Next, the decals shown on the instructions are larger than what is offered on the sheet except for the tail markings and fuselage band. Those items are larger and while the tail band isn't a problem the tail codes are really too big so I had to place them lower than was shown on the instruction sheet.
Other than that, they really are very good and reacted well to Superscale's setting solution. I did use a touch of Champ on the tail markings to get them to snuggle down into the rudder hinge area. I also used it on the tail band as the band had some creases in it. It almost seems as if the decals were not designed for the Hasegawa kit, but in 1/72, I know of no other.
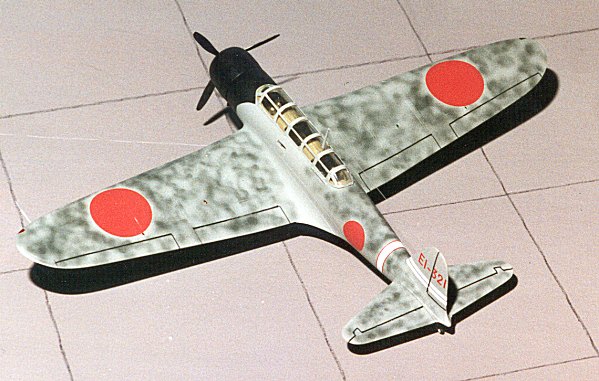 Once they were dry, the excess solution was wiped off and it was
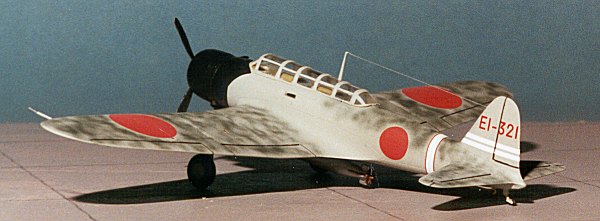
back to the paint shop. The upper surface of this aircraft is mottled with dark
green. It is one of those schemes done at local level after all the markings had
been put on the plane so that is why I put on the decals before doing the upper
surface mottling. I used very low pressure and thin paint to accomplish this and
used Aeromaster Nakajima Navy Green acrylic. There is llittle mottling around the
greenhouse section, so most of the mottling on the fuselage is confined to the aft
fuselage. There is also none on the vertical stab or rudder. The painting went
much better than I had hoped and the effect is quite convincing. It took a
steady hand to keep it off the decals!
Once they were dry, the excess solution was wiped off and it was
back to the paint shop. The upper surface of this aircraft is mottled with dark
green. It is one of those schemes done at local level after all the markings had
been put on the plane so that is why I put on the decals before doing the upper
surface mottling. I used very low pressure and thin paint to accomplish this and
used Aeromaster Nakajima Navy Green acrylic. There is llittle mottling around the
greenhouse section, so most of the mottling on the fuselage is confined to the aft
fuselage. There is also none on the vertical stab or rudder. The painting went
much better than I had hoped and the effect is quite convincing. It took a
steady hand to keep it off the decals!
Once that was done and dry, the aircraft was overcoated with a semi-gloss clear as those early war aircraft were well maintained and in many cases waxed for extra speed.
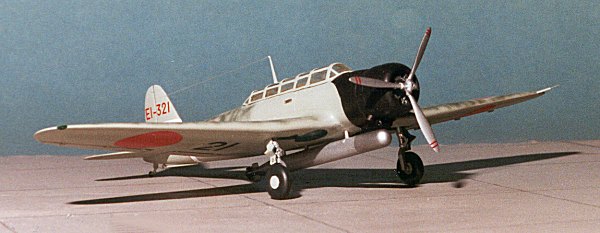
Now for some more bits and pieces. The wheel were glued onto the struts and then the gear doors. It was here that I noticed I had made an error. The gear doors are designed to be fitted onto the struts before the struts are glued to the wheel wells. No way would they now fit. I had to trim off a small section of each before gluing. (Don't tell anyone I made a goof, ok?). Next I noticed that the tail hook wasn't yet installed. No where on the instructions does it even mention it so I drilled a small hole in the underside and put in the hook. What an oversight for a Naval aircraft!
Staying on the underside, the masking was removed from the bomb aimer's window and the torpedo glued in place. This had been painted aluminum with a steel head and copper prop. Next was the exhaust stubs. Those were painted Burnt Iron and glued in place. All that was left was the prop (painted aluminum with black backsides), pitot tube and radio mast. First, the masking was removed from the greenhouse and front of the engine. Once the masking was taken off (a very painless process compared to the real hassles I had with the Bare Metal Foil), then the radio mast and pitot tube were glued in place. Any touchup needed was done and a radio wire was made from stretched sprue. Presto! a very nice Kate!
|
CONCLUSIONS |
I thoroughly enjoyed building this kit. No resin, no photo etched, no vacuformed, no real hassles. Despite its ancient (I'd bet over 30 years) molding, it looks very much like a Kate. The addition of the aftermarket decals and the neat paint scheme really make it something I enjoy adding to my WW2 1/72 Japanese aircraft collection. Recommended for all but the bare beginner.
|
REFERENCES |
Famous Airplanes of the World #32: Type 97 Carrier Torpedo Bomber, January 1992
Model Art #406: Camouflage and Markings of Imperial Navy Bombers in WWII.
Review copy courtesy of me and my wallet!
If you would like your product reviewed fairly and fairly quickly, please contact the editor or see other details in the Note to Contributors.
Back to Reviews Page 2020