Pavla 1/72 Nakajima Ki-87
| KIT #: | 72002 |
| PRICE: | $14.98 when new |
| DECALS: | One option |
| REVIEWER: | Scott Van Aken |
| NOTES: | Short run with metal, p.e. and vacuform parts |
| HISTORY |
 The Ki-87 was developed in response to American B-29
Superfortress raids on the Home Islands. It followed up on earlier research by
Nakajima and the Technical Division of Imperial Army Headquarters into boosting
a large radial engine with a turbo-supercharger, which had begun in 1942, well
before the B-29 raids began. The turbo-supercharger would allow for good
performance at high altitudes.
The Ki-87 was developed in response to American B-29
Superfortress raids on the Home Islands. It followed up on earlier research by
Nakajima and the Technical Division of Imperial Army Headquarters into boosting
a large radial engine with a turbo-supercharger, which had begun in 1942, well
before the B-29 raids began. The turbo-supercharger would allow for good
performance at high altitudes.
Construction was delayed due to problems with the turbo-supercharger, and the prototype was not completed until February 1945; it first flew in April, but only five test flights were completed.
| THE KIT |
This is Pavla's second kit and shows how far this short run company has come over the years. There is a single sprue containing the injected plastic parts, a small bag of metal bits, a photo etch fret, two vacuformed canopies and a section of screen mesh.
The
plastic bits are lightly engraved panel lines with the big pieces having large
ejector towers and some of the smaller bits being almost buried in flash
and plastic blobs. The tail wheel will take some major
 drilling and shaping to
remove the part from its surrounding plastic. Yes, this is old style short run.
The metal castings are for the turbo, exhaust and engine fan. The first two
items are also done in plastic, but the metal castings are not much better in
terms of molding. Oddly, the turbocharger bit is larger than the plastic one. .
drilling and shaping to
remove the part from its surrounding plastic. Yes, this is old style short run.
The metal castings are for the turbo, exhaust and engine fan. The first two
items are also done in plastic, but the metal castings are not much better in
terms of molding. Oddly, the turbocharger bit is larger than the plastic one. .
Photo etch is used for tail gear doors, the short main gear doors, wheel well interior and oleo scissors. The two vacuformed canopies are fairly well done and thick enough to allow you to cut them without too much trauma. The mesh screen is to be placed behind the turbo assembly. Actually, it looks like one installs the mesh and glues the bits to it.
Instructions are well drawn and show any trimming needed as well as when you need to fabricate parts from stretched sprue. One thing that needs fabricated is a tail gear well as one is not provided in the kit and you'll need something to which the tail gear is to be attached. As I mentioned in the opening, this is an old style short run kit. The decal sheet is for the lone prototype and looks to be well printed. As this kit has been around for quite a while, one has to wonder how viable the sheet still might be. Fortunately, it is only 'meatballs' and prop warning stripes.
| CONSTRUCTION |
 There are times in my life when sanity slips the surly bonds of reason and I
decide to build kits like this. I guess it comes from some deep seated need to
build something different and since no one that I know of has kitted this one
before, it was a prime target. Besides, it comes in one of the end opening boxes
that had become flattened over the years and I just wanted it off the shelves.
There are times in my life when sanity slips the surly bonds of reason and I
decide to build kits like this. I guess it comes from some deep seated need to
build something different and since no one that I know of has kitted this one
before, it was a prime target. Besides, it comes in one of the end opening boxes
that had become flattened over the years and I just wanted it off the shelves.
My first task was to remove all the big bits from the sprues. This included
the prop and to no surprise while removing the gigantic sprue attachment points
on the spinner (these are also on the tips of the prop blades), I broke off one
of the blades. I then grabbed the grinder to remove the ejector towers from the
fuselage interior a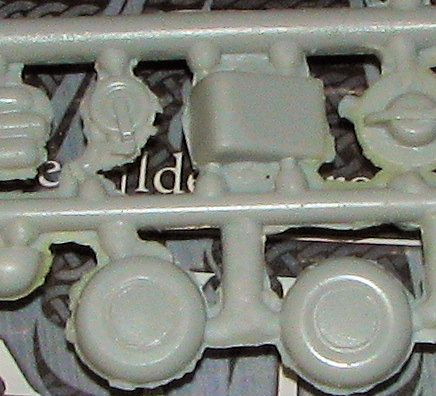 nd the inside
of the wings. Next, the flash on the fuselage halves was removed. This is not
your garden style onion-skin thin stuff, but flash that is the same thickness as
the surrounding plastic. I found a diamond flat file to be very useful in this
process.
nd the inside
of the wings. Next, the flash on the fuselage halves was removed. This is not
your garden style onion-skin thin stuff, but flash that is the same thickness as
the surrounding plastic. I found a diamond flat file to be very useful in this
process.
I next turned my attention to the interior. I first removed the floor section and sanded or filed down all the little blobs of plastic that seem to be everywhere on this kit. Then, after much cleaning up, the previously flash encrusted seat was glued on. Oddly, no seat harness is included on the p.e. fret so I used an Eduard set I had laying about. The instructions recommended an Israeli light green so once I got the seat installed, the instrument panel cleaned up and installed along with the poorly done metal control stick, all those bits were painted as was the interior side wall.
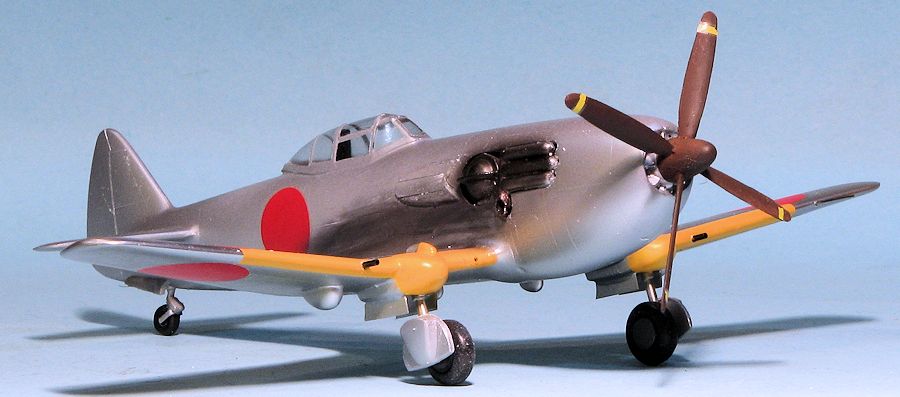
Meanwhile I started work on the turbocharger area on the right fuselage. The metal bits are not well done, but better than the plastic ones, which miss the turbocharger exhaust section. I had to do quite a bit of cutting and used a motor tool to help out. Eventually I got the two metal turbocharger bits to fit and slathered super glue on the back side of these bits to keep them in place. A photo etch heat shield was also added at this time.
Next step was to glue the wing sections together. This took a lot of
pre-sanding and grinding to get the mating surfaces flat, and even after that,
the landing gear 'knuckles' were not well matched, but nothing that sandpaper,
files and super glue couldn't fix. After getting the wings fairly well done, I
glued the fuselage halves together, starting at the back. There is a metal
engine fan that takes up the front
 of the cowling. Even after filing off all the
gunk from the outer circumference, it was just a tad too wide. Rather than fuss
with it, I got it in place and flooded it with super glue, followed by
accelerator to keep it in place. Much of this seeped into the seam which was a
good thing as it is now firmly attached and the resultant gaps are also filled.
of the cowling. Even after filing off all the
gunk from the outer circumference, it was just a tad too wide. Rather than fuss
with it, I got it in place and flooded it with super glue, followed by
accelerator to keep it in place. Much of this seeped into the seam which was a
good thing as it is now firmly attached and the resultant gaps are also filled.
Since the instrument panel and cockpit floor were too wide to fit, those were sanded down a bit at a time until I could get the interior into shape and it was then glued in place. It then came time to fit the wings. Well the joining surfaces on the upper wings were not at all the same shape so I sanded on the wing roots until I could get the wing to even fit somewhat properly. This was followed by many applications of super glue filler to take care of the horrendous gaps. The large step at the forward underside of the wings was easily taken care of thanks to 250 grit sand paper.
Once the wings were on, the tailplanes were added. Compared to the wings, they were a breeze with only filler needed. I made a 'floor' to allow the tail gear something to which it could be attached out of plastic card. Then I moved to the wheel wells and found a drill bit the same diameter as the gear legs and drilled small depressions into the forward well for them to sit in. They could have been butt joined, but a more positive attachment area doesn't hurt. The tail gear piece was laboriously removed from its flash and when clean enough, I used a file to cut a groove in the section of plastic used for the gear well into which I then attached the tail gear.
 Back at the wings, I attached the shell collectors and drilled out the holes
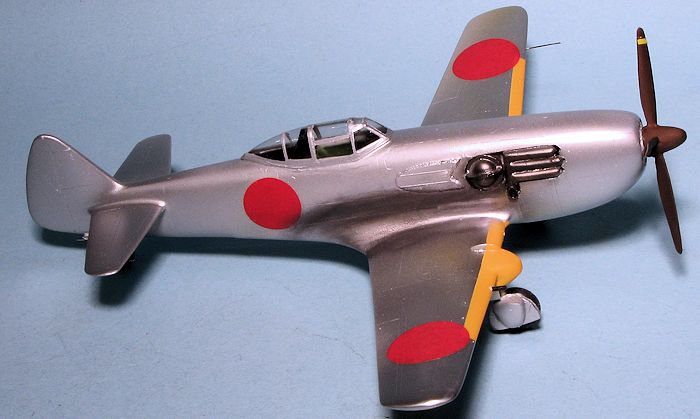
for the guns in the leading edge. I then cut out, masked and attached canopy.
This is held in place with clear paint and I have to say it is on there nice a
tight once the paint cures.
Back at the wings, I attached the shell collectors and drilled out the holes
for the guns in the leading edge. I then cut out, masked and attached canopy.
This is held in place with clear paint and I have to say it is on there nice a
tight once the paint cures.
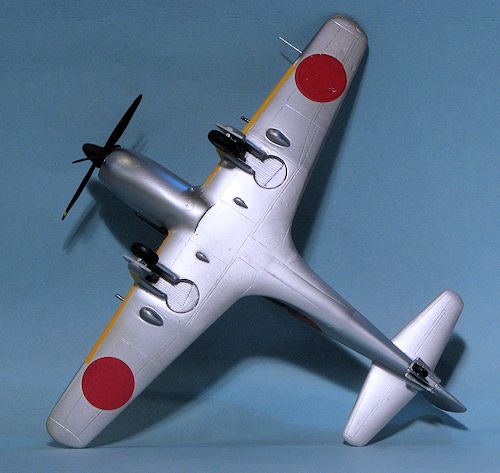
Returning to the gear, I attached the photo etch oleo scissors and decided to use the p.e. forward gear doors. These took a while to get in place as the join edge is super thin and the parts kept falling off. Eventually they stayed on long enough for me to reinforce the join with more super glue. There are small gear doors on the aft section of the main gear wells that are apparently only open during the cycling of the landing gear. A rather odd place to put gear doors, but there it is. For the tail gear doors, I went with plastic as the etch ones are flat and need to be pretty curved.
| COLORS AND MARKINGS |
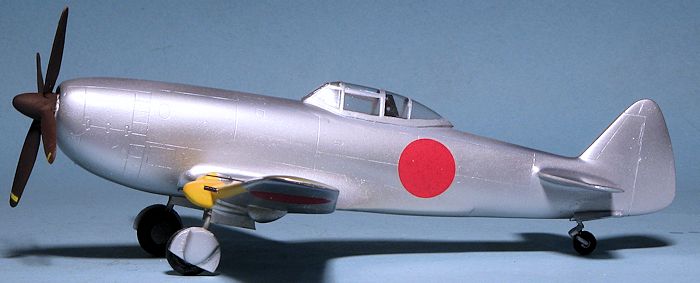
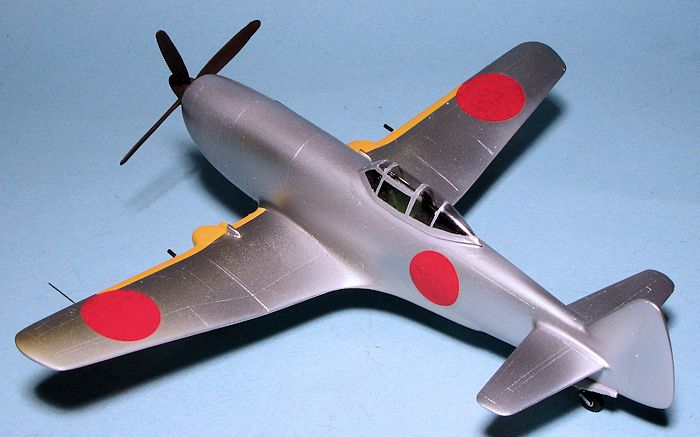
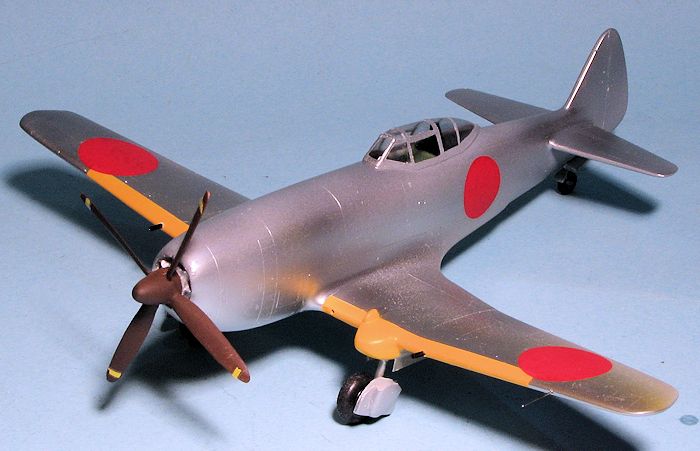
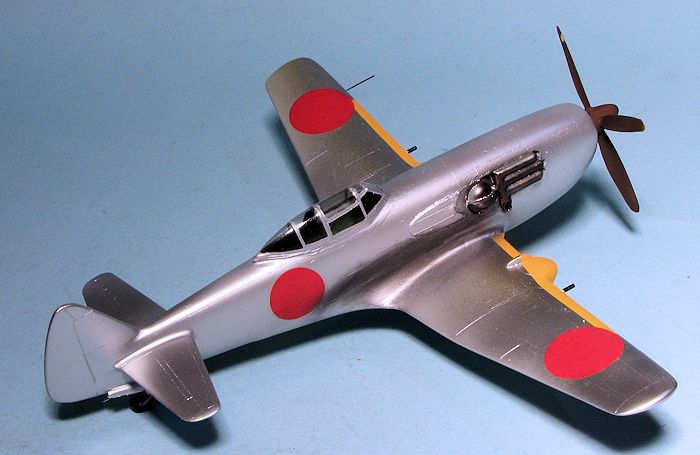
With all the bits on, I gave the overall airframe a good spray with Tamiya extra fine grey primer to find any horrendous goofs that might need repaired. Generally things looked OK so I painted the leading edges of the wings with Tamiya gloss white followed by some Testors RLM 04 for the wing leading edge ID bands. That was then masked off and the rest of the airframe painted with Alclad II aluminum. Though the painting instructions shows a black anti-glare panel, this plane never had one.
 I used the
kit decals and for the most part, these were still viable even after all this
time. These were basically insignia and the prop stripes. I had one lower wing
insignia splinter on me and had to resort to robbing another sheet to make
repairs. The decals are very thin and I had no issues using Microsol on them.
I used the
kit decals and for the most part, these were still viable even after all this
time. These were basically insignia and the prop stripes. I had one lower wing
insignia splinter on me and had to resort to robbing another sheet to make
repairs. The decals are very thin and I had no issues using Microsol on them.
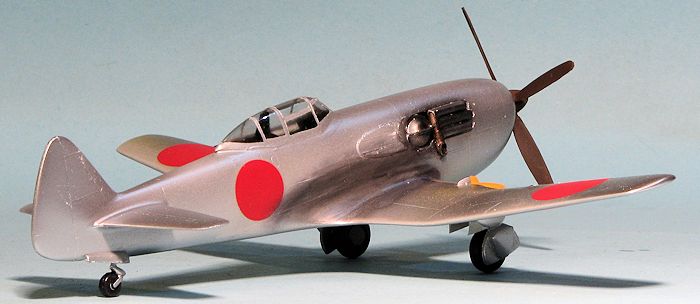
If you recall, I had a prop blade break off removing the prop from the sprue. After a long time cleaning up the rest of the prop, I found that the blade was too thin to drill into so I could install a small section of wire. Instead, I used regular glue on it after sanding the mating surface flat. Once that dried, I reinforced the join with super glue and it seems to have done the job as I've not had it break off. This was painted Japanese primer brown using what was left in a bottle of Aeromaster acrylic that I had. A hole needed to be drilled into the metal fan section on the front of the cowling and it was then glued on. I also glued on the main gear doors. Like all the plastic doors, they are stupidly thick, and a butt join.
With the doors in place, I then cut some tubing for the outer gun barrels and inserted those in the holes I had drilled. A thin piece was then attached to another hole drilled in the wing. I used some pastels to goober up the side where the exhaust was on the plane. I have to say that drilling out an exhaust in the metal was a real PITA, but it just looked odd without an opening of some sort. A bit of touch up painting, the masking removed from the canopy and that was it.
| CONCLUSIONS |
 This
is one of several Japanese prototype planes molded by Pavla that I have in my
collection. All of them are early Pavla kits and about as rough as this one was.
As it was unlikely that I'd ever see anyone else produce this one, I decided to
see what I could do with it. The journey was not simple nor easy and it did
exercise a lot of modeling skills. I'm sure some of you reading this could do a
much better job, but the end results meets my low standards and it adds another
JAAF fighter to the collection. Recommended only for those who have a goodly
number of other very short run kits under your belt.
This
is one of several Japanese prototype planes molded by Pavla that I have in my
collection. All of them are early Pavla kits and about as rough as this one was.
As it was unlikely that I'd ever see anyone else produce this one, I decided to
see what I could do with it. The journey was not simple nor easy and it did
exercise a lot of modeling skills. I'm sure some of you reading this could do a
much better job, but the end results meets my low standards and it adds another
JAAF fighter to the collection. Recommended only for those who have a goodly
number of other very short run kits under your belt.
| REFERENCES |
http://en.wikipedia.org/wiki/Nakajima_Ki-87
April 2015
Thanks to me for picking this one up and slogging through it.
Copyright ModelingMadness.com. All rights reserved. No reproduction in part or in whole without express permission from the editor.
If you would like your product reviewed fairly and fairly quickly, please contact the editor or see other details in the Note to Contributors.