Hasegawa/NMC 1/48 Ki-61-III 'Hein'
| KIT #: | 09939/NMC48006 |
| PRICE: |
$34.35 $71.00 |
| DECALS: | Three/Two options |
| REVIEWER: | Scott Van Aken |
| NOTES: | NMC conversion set |
| HISTORY |
 The
Kawasaki Ki-61 Hien
(飛燕, roughly "flying swallow") was a Japanese World War II fighter aircraft used
by the Imperial Japanese Army Air Force. The first encounter reports claimed
Ki-61s were Messerschmitt Bf 109s: further reports claimed that the new aircraft
was an Italian design, which led to the Allied reporting name of "Tony",
assigned by the United States War Department. The Japanese Army designation was
"Army Type 3 Fighter" (三式戦闘機). It was the only mass-produced Japanese fighter of
the war to use a liquid-cooled inline V engine. Over 2.500 Ki-61s were produced,
first seeing action around New Guinea in 1943, and continuing to fly combat
missions throughout the war.
The
Kawasaki Ki-61 Hien
(飛燕, roughly "flying swallow") was a Japanese World War II fighter aircraft used
by the Imperial Japanese Army Air Force. The first encounter reports claimed
Ki-61s were Messerschmitt Bf 109s: further reports claimed that the new aircraft
was an Italian design, which led to the Allied reporting name of "Tony",
assigned by the United States War Department. The Japanese Army designation was
"Army Type 3 Fighter" (三式戦闘機). It was the only mass-produced Japanese fighter of
the war to use a liquid-cooled inline V engine. Over 2.500 Ki-61s were produced,
first seeing action around New Guinea in 1943, and continuing to fly combat
missions throughout the war.
The Ki-61-III and the Ki-61-II are frequently confused with each other as both types had the cut down rear fuselage and new 360 view canopy. Some sources state that only one Ki-61-III was built. Few Ki-61-IIs were accepted for service with the majority of the un-motored airframes being converted to Ki-100 standard. This was due to the destruction of the Akashi engine production plant that made the water-cooled Ha-140 power plant.
| THE KIT |
The Hasegawa kit is pretty basic as these things go. The
interior is fairly well done and should be OK for most. Those wanting greater
detail will need to go the after-market route. Instrument panels have nicely
raised detail and Hasegawa provides a decal as well, which will fit properly
over the dials if one takes care in application. The kit comes with a one-piece
canopy that is nice and clear. The clear sprue has some flash around the landing
light cover that will need removed. A nicely done one-piece lower wing helps
with alignment. The only option is to have drop tanks and the accompanying racks
installed. Most Ki-61 photos do not
 show these tanks so it is good that the
holes are not already opened as one finds on some newer kits. A five piece prop
and spinner are provided. I'm not a fan of separate prop blades, but Hasegawa
has them keyed to the backing plate so alignment isn't an issue.
show these tanks so it is good that the
holes are not already opened as one finds on some newer kits. A five piece prop
and spinner are provided. I'm not a fan of separate prop blades, but Hasegawa
has them keyed to the backing plate so alignment isn't an issue.
New wing Model Craft has done a number of conversions for other aircraft, but this is their first 1/48 fighter, from what I can gather. The set consists of new fuselage halves, new prop blades and spinner, new rudder, new canopy, new radio mast, new upper cowling, new intakes and vents, new inner rear bulkhead, and new inner gear doors. The rest of the kit will have to come from the Hasegawa kit. The box specifies that it must be the Type 3 Hein or the Ki-100 Otsu. I imagine this is to ensure the proper wing and armament for this kit. If one has both kits, the Ki-100 is the one recommended.
The molding on the resin is really top quality. The
engraved panel lines are very much like the Hasegawa kit. Though not shown, the
one-piece canopy is nicely molded though, of course, not quite a clear or thin
as the Hasegawa version would have been. Still, it is more than adequate. I compared
the resin prop and spinner with the one in a Type 3 kit. The blades looked to be
slightly wider and the spinner more of a cone shape and blunter on the tip. The
upper cowling piece on the resin conversion has small holes near the back where
the Hase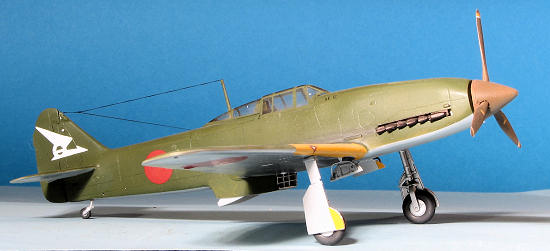 gawa one has oval vents. The
exhaust provided are molded down into the openings and have
greater detail than the plastic ones.
gawa one has oval vents. The
exhaust provided are molded down into the openings and have
greater detail than the plastic ones.
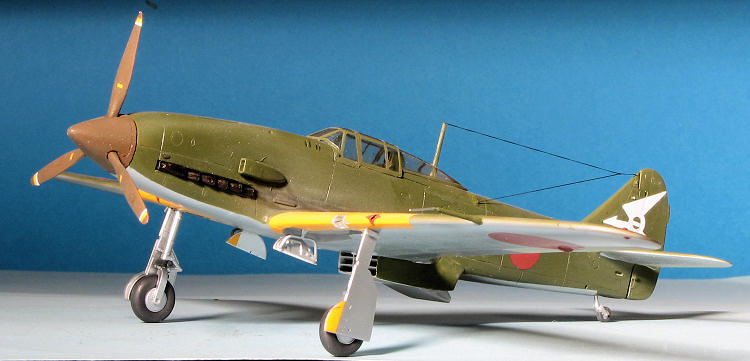
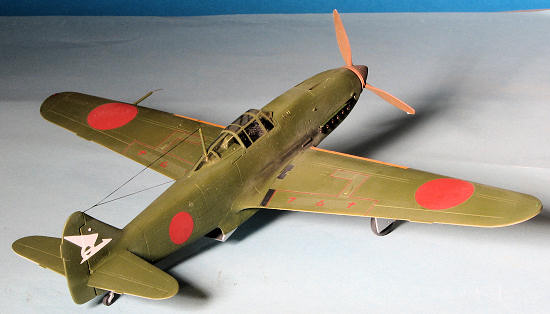
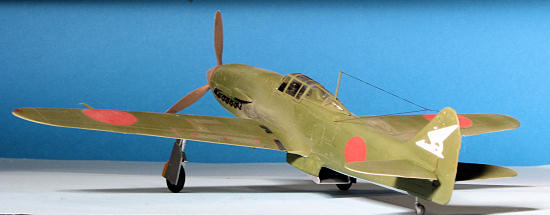
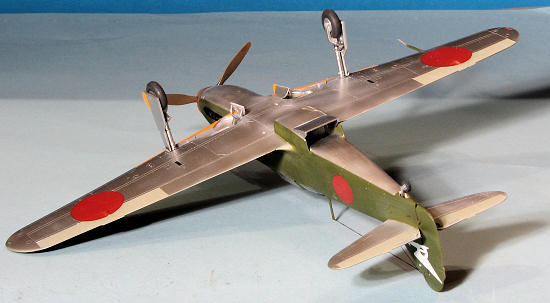
A nice touch is that the radio mast is cast with wire inside it. This makes it properly stiff, but also requires some care in removing it from the casting block. a small decal sheet that is basically just white fin markings is supplied for the 55th and 56th Sentai. These appear to be ALPS printed as the sheet has a single carrier. All other markings will need to come from the kit sheet. These two options are both in Kawasaki Dark Green over unpainted metal. These have the yellow leading edge ID bands as well. Further research may well locate images of this aircraft with other units.
Instructions are well printed and easy to read. The drawings provide Hasegawa kit numbers for those parts to be gleaned from the kit during fuselage assembly. There are also some paper masks that you could cut out and transfer to tape, but since this has a fairly simple canopy, standard masking procedures should be more than adequate. A full color painting and decal guide is provided, giving decal numbers from the two Hasegawa boxings for the majority of markings.
| CONSTRUCTION |
First order of business is to look over both the NMC and Hasegawa
instructions to see what parts I will need to replace. Nothing seems to need
modified so that is good. I built up the cockpit using the Hasegawa parts with
the rear bulkhead being replaced with the resin piece provided in the NMC kit.
This was painted Interior Green lightly oversprayed with black to darken it. I
picked out several details with various colors and then dry brushed it with
silver. A set of belts from a generic interior etched sets were then glued in
place. For the instrument panel. I used the Hasegawa decal. The interior
sidewalls were then glued into the new
 resin fuselage halves.
I then built up the ventral radiator and cemented it into place. While the Hasegawa kit provides little alignment lugs for this, those are not on the resin replacement. I also fit into place the upper radiator vent and the instrument panel. I found out later that this latter part needed to be sanded down on the ends or the fuselage halves will not fit totally flush around the panel. The radiator grille was cemented in place and then the interior was slotted into place.
Fuselage halves were then glued together in stages. Fit is fair, but one does have to do some squeezing and adjusting while the cement dries. I used accelerator for this and still did not get things perfectly aligned. This meant much filler work, first with superglue and later with Tamiya putty. While I know there are modelers out there that will get this right the first time, I am not one of them. During this, I cemented the wings together. I did not open the holes for the drop tanks as I think the Hein looks much nicer without them.
After the first few rounds of sanding and filler, I attached the resin rudder and upper cowling section. I also glued together the prop and spinner. My attempts at using the resin blades failed as I sanded the tips so thin while removing the pour stubs there, that they flaked away, resulting in my use of the Hasegawa blades. Fortunately, they fit well.
Next step was to attach the wings. These fit fairly well, but I did have a step at the front and needed to do some trimming to get it to fit properly. Tailplanes were then cemented in place. As I had a pretty complete airframe, I decided to do the paining bit.
| COLORS & MARKINGS |
As the area under the canopy was to be the upper
fuselage color, I taped that area off. First, the underside was painted using
Alclad II Aluminum. I used this shade on the gear doors, gear legs and the
cooler exhaust section. This was all then masked off and I used the last of my
Aeromaster Kawasaki Army Green acrylic for the rest of the airframe. Oh yes, the
un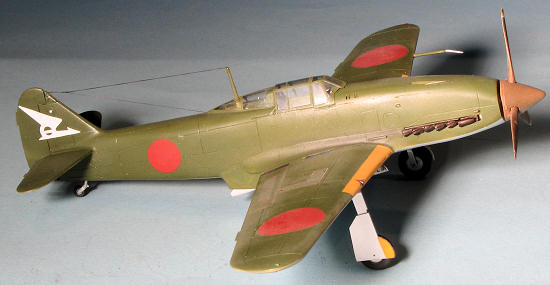 dersurface
control surfaces were painted the standard IJAAF Army Green Grey, using
Aeromaster Acrylics once again.
dersurface
control surfaces were painted the standard IJAAF Army Green Grey, using
Aeromaster Acrylics once again.
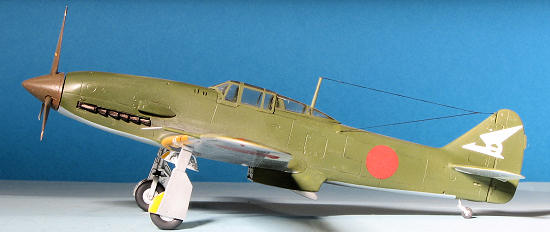
Once that was painted, I returned to the bench to install the canopy and main landing gear. The canopy had to be trimmed to fit the opening and it was masked. The main gear fit well but are a bit loose so one has to be careful to keep them aligned until the glue sets.
I returned to the paint shop to spray around the canopy. When dry, I applied a coat of Future to the upper side to assist in applying decals.
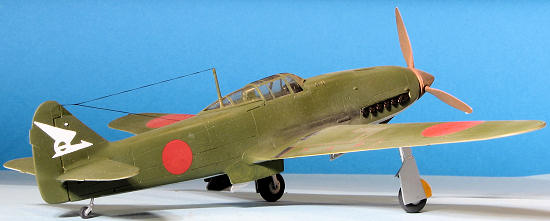
The only decals provided by the conversion kit are the tail flashes. Everything else came from theHasegawa kit sheet. Despite offering two different decal numbers for the markings, the kit I used matched none of them. I was also hoping for no worries in terms of silvering, but that was not to be as the largest decals on the wings did not cooperate, despite using setting solutions. I also used the decals for the wing ID bands and that turned out fairly well.
The fin decals were a bit different. I was instructed to cut close to the marking and then when done, to remove the clear bits from the decal and apply it. OK, that worked out fairly well. These decals did not cooperate when setting solutions were applied.
With the decals in place, the airframe was given a clear matte finish.
| FINAL CONSTRUCTION |
 Not really all that much was left. Attached
the main wheels and gear doors, drilled a hole through the opening in the
aft canopy for the radio mast, installed the pitot tube (which I must have
bent somehow), and glued on the landing light. The clear bits in the kit had
quite a bit of flash on them for some reason. The exhaust consist of the
backing and six separate exhaust pipes on each side. Once this was
assembled, I noticed that it would not fit the opening, being too broad. I
sanded on the lower portion of the assembly until it slipped into place.
A bit of touch up painting and some pastels for exhaust stains were next.
Finally, I decided to make a super glue mess by rigging some EZ-Line
antennas and then pressed the prop into place.
Not really all that much was left. Attached
the main wheels and gear doors, drilled a hole through the opening in the
aft canopy for the radio mast, installed the pitot tube (which I must have
bent somehow), and glued on the landing light. The clear bits in the kit had
quite a bit of flash on them for some reason. The exhaust consist of the
backing and six separate exhaust pipes on each side. Once this was
assembled, I noticed that it would not fit the opening, being too broad. I
sanded on the lower portion of the assembly until it slipped into place.
A bit of touch up painting and some pastels for exhaust stains were next.
Finally, I decided to make a super glue mess by rigging some EZ-Line
antennas and then pressed the prop into place.| CONCLUSIONS |
OK, so it is not a cheap conversion. Little actually is anymore. But the NMC kit is not beyond the abilities of most modelers and will provide a neat 'Tony' variant that I doubt you will see kitted in this scale by any of the majors.
| REFERENCES |
http://en.wikipedia.org/wiki/Ki-61
 Copyright ModelingMadness.com. All rights reserved. No reproduction in part or in whole without express permission from the editor.
November 2011
If you would like your product reviewed fairly and fairly quickly, please contact the editor or see other details in the Note to Contributors.