Mania 1/72 Ki-51 'Sonia'
| KIT #: | 01 |
| PRICE: | 800 yen in the early 1970s |
| DECALS: | Eight options |
| REVIEWER: | Scott Van Aken |
| NOTES: | Two kits in the box |
| HISTORY |
The Mitsubishi Ki-51 (Army designation "Type 99 Assault
Plane". Allied nickname "Sonia") was a light bomber/dive bomber in service with
the Imperial Japanese Army during World War II. It first flew in mid-1939.
Initially deployed against Chinese forces, it proved to be too slow to hold up
against the fighter aircraft of the other Allied powers. However,
 it performed a
useful ground-attack role in the China-Burma-India theatre, notably from
airfields too rough for many other aircraft. As the war drew to a close, they
began to be used in kamikaze
attacks. Total production was around 2,385 units.
it performed a
useful ground-attack role in the China-Burma-India theatre, notably from
airfields too rough for many other aircraft. As the war drew to a close, they
began to be used in kamikaze
attacks. Total production was around 2,385 units.
Charles Lindbergh, flying a P-38 Lightning shot down a Ki-51 after a vigorous dogfight in which the much slower Ki-51 utilized its low speed maneuverability and made a fight of it. The Ki-51 served on all fronts in which the Japanese served. They were used right up to the end of the war. Those left in the Dutch East Indies were used by the nascent Indonesian Air Force and the Communist Chinese used them until about 1953.
| THE KIT |
Back in the late
1960s and early 1970s, there was a Japanese kit company named Mania. At the
time, their molding was quite advanced. They produced kits that had engraved
panel lines, a rather nicely detailed cockpit and a complete engine to name a
few pluses. Their kits would look very much in place with today's kits.
Apparently the company either ran into money issues or were made an offer they
could not 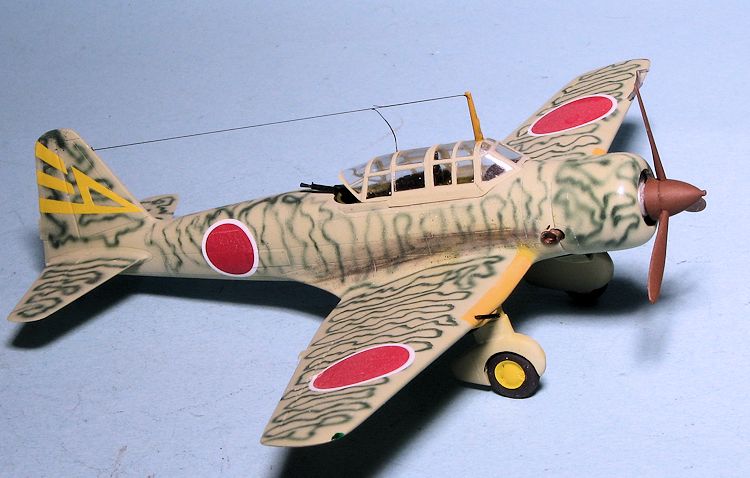 refuse and was purchased by Hasegawa. Even today, Hasegawa has no
qualms about reissuing most of their kits, especially the 1/72 ones.
refuse and was purchased by Hasegawa. Even today, Hasegawa has no
qualms about reissuing most of their kits, especially the 1/72 ones.
This is apparently an initial issue of the kit. The parts are completely flash free and are also without any inappropriate ejector pin marks or sink areas. There is a full cockpit that includes a floor with a number of boxes molded on it as well as the seat bottoms for the pilot and radio operator/gunner. There is an instrument panel with raised dial detail and a bulkhead that fits between the two seat positions. What looks like a camera is provided as well as replacement rear machine gun drums to fit on the interior wall. Depending on which plane you are doing, there are flashed over openings for lower fuselage side windows as well as one in the wing center section.
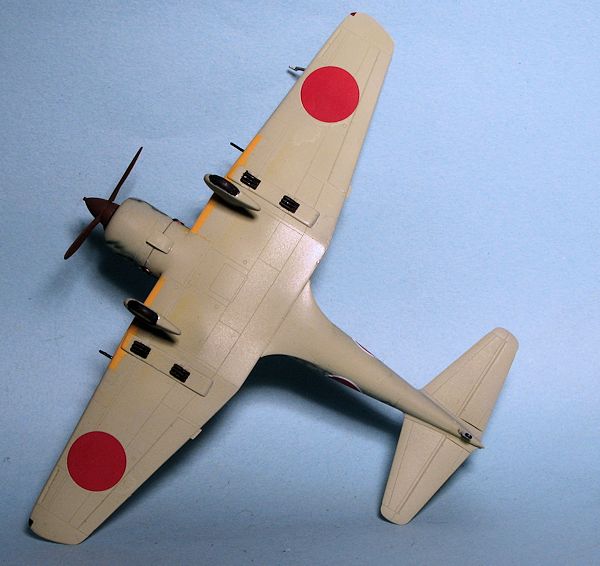
The kit provides the two row radial engine along with a three piece cowling. This has a single forward section and two side panels. A two piece prop fits on the front. The wing is a single lower section with two upper pieces. Tail planes are single mold items. The undercarriage has the wheel/tire molded on one half. There are bomb racks with small bombs provided. The holes for these racks have already been opened up in the lower wing. The kit includes a single piece canopy that has well defined frame lines, which should ease masking.
Instructions are completely in Japanese with well drawn construction steps. There is a complete set of full color painting and markings guides. While four options are provided, there seem to be more unit badges on the sheets than are shown in the instruction. Sure enough, when one looks on the side panels of the box, one sees two more.
 Now Mania has provided two complete kits. Each kit came with
its own set of decals and each sheet is different. Not only that, but each kit
is molded from a different color plastic. One is in silver plastic while the
other is in a light grey. My kit was one bought quite some time back for a
pittance (I forget how much), because it had become waterlogged. This pretty
well trashed the decals. I attempted to float one and it was impossible.
Fortunately, there are aftermarket decals that have been done, and if one has
one of the recent Hasegawa reboxings, there will be spares provided there.
Now Mania has provided two complete kits. Each kit came with
its own set of decals and each sheet is different. Not only that, but each kit
is molded from a different color plastic. One is in silver plastic while the
other is in a light grey. My kit was one bought quite some time back for a
pittance (I forget how much), because it had become waterlogged. This pretty
well trashed the decals. I attempted to float one and it was impossible.
Fortunately, there are aftermarket decals that have been done, and if one has
one of the recent Hasegawa reboxings, there will be spares provided there.
Another note is that apparently the assault version did not have all the lower and side windows opened up. The recce birds, however, did as the lower window was for the camera. It does seem, however, that even the recce birds had the lower wing bomb racks.
| CONSTRUCTION |
As nice as this kit may be, it is still not a product of the 21st century and has many of the features of its time. I started the build on this one by first installing the bits into the cockpit. Then I grabbed my trusty brush and painted the interior and fuselage side walls with ColourCoats Mitsubishi interior green. I should mention that if you are planning on installing the camera, you really should install it prior to gluing in the rear instrument panel.
While all that was drying, I built up a few subassemblies. The engine rows
were glued together and after first ensuring that I could fit it into the built
up cowling, put together the cowling halves. Note that you will not see the tops
of the engine cylinders so there is no need to remove the rather prominent mold
seams or sprue pips. I also glued together the wheel pants. These have some
ejector pin marks on the i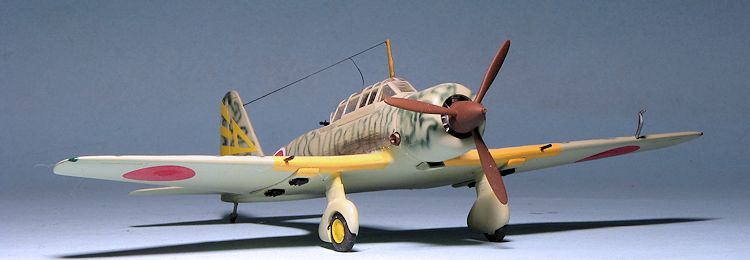 nside with some of them above the level of the plastic
so they'll need to be sanded down. I also assembled the props. For whatever
reason, Mania was unable to mold the entire spinner and blade assembly as one
piece. There is a separate rear spinner piece that fits half way up.
Unfortunately, the lower part of the molded on prop blades on the upper half are
shorter by quite a bit, leaving about a 1mm gap between this part of the blade
and the lower spinner. The dedicated can figure how to fill this, while I just
left the gap.
nside with some of them above the level of the plastic
so they'll need to be sanded down. I also assembled the props. For whatever
reason, Mania was unable to mold the entire spinner and blade assembly as one
piece. There is a separate rear spinner piece that fits half way up.
Unfortunately, the lower part of the molded on prop blades on the upper half are
shorter by quite a bit, leaving about a 1mm gap between this part of the blade
and the lower spinner. The dedicated can figure how to fill this, while I just
left the gap.
There is but one item to install on the fuselage side walls and that is a tray that holds additional ammunition drums for the rear machine gun. Into this fits seven replacement drums. This particular build will be of the attack variant so I did not open any of the windows on the side or the wing. Now I'm not positive that the recce version had side and lower windows and the bomber/attack version did not, but that is how I'm classifying things. I then glued the upper wings to the lower. One thing you'll notice about this kit is the lack of alignment pins and sockets. This has the benefit of not producing sink areas on the outer surface opposite them.
Once the interior was assembled and painted, the rack for the additional rear gun ammo cans was installed as were the cans themselves. Then the fuselage halves were glued together. Due to the lack of alignment pins, I found it easier to glue the front area first, and when dry, then glue the back, otherwise you might have difficulty keeping it all properly aligned.
While that was drying, I assembled the engines minus the ignition ring. I
also completed the engine cowling and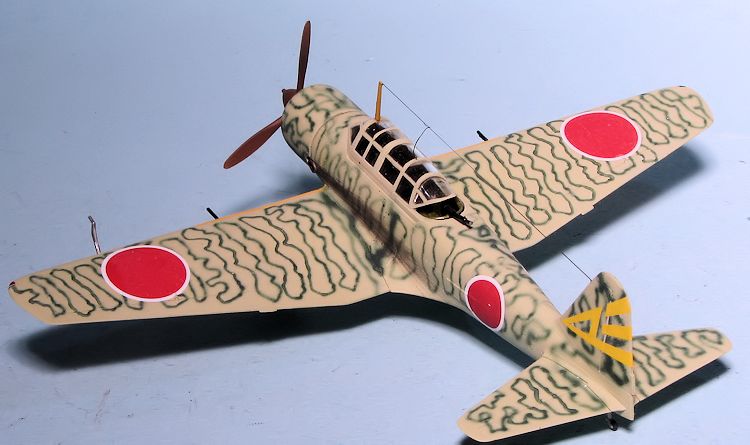 then placed the engine into it. There are
no locating tabs or guides, so one simply pushes the engine as far forward as
one can and then floods the area where the forward cylinders touch with glue.
Once that is done it is glued to the forward fuselage and all the seams can be
dealt with. Next the wings were attached. Fit here is rather good, though there
is a gap in the front that will need filler. Attaching the tailplanes was a
fairly easy task, but note that you'll need to do some trimming to get them to
fit all the way down.
then placed the engine into it. There are
no locating tabs or guides, so one simply pushes the engine as far forward as
one can and then floods the area where the forward cylinders touch with glue.
Once that is done it is glued to the forward fuselage and all the seams can be
dealt with. Next the wings were attached. Fit here is rather good, though there
is a gap in the front that will need filler. Attaching the tailplanes was a
fairly easy task, but note that you'll need to do some trimming to get them to
fit all the way down.
With all that done, it was time to attach the landing gear. The gear simply butt fits into recesses in the lower wing. You'll find that one of the gear legs will need some filler work on the forward part of the spat. The fit of the gear into the slots is also a bit loose. While that was drying, I thought I'd test fit the canopy. Mania was also quite advanced for its time in that the sprue attachment points for the cockpit canopy are on the mating surface rather than to the side of the part. This is something that most other manufacturers did not do for nearly forty years. Needless to say, the fit is quite good. This part was masked and the cockpit filled with tissue.
| COLORS & MARKINGS |
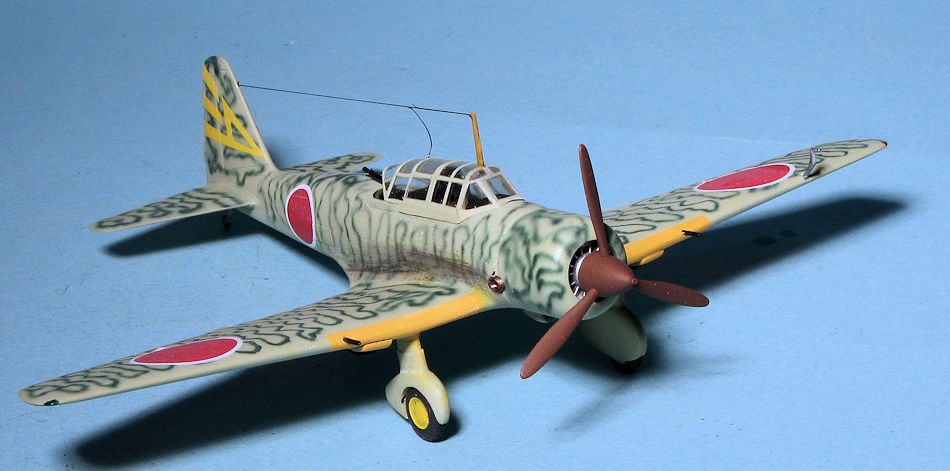
Apparently all the Ki-51s left the factory painted in overall IJAAF light grey. I happen to have some Tamiya paint (XF-14) that meets that description so that is what I used to paint this one. I did not have anymore of my Aeromaster Japanese primer brown left so I mixed some Vallejo saddle brown and burnt umber to provide an approximation of this reddish brown primer. This was used to paint the props.
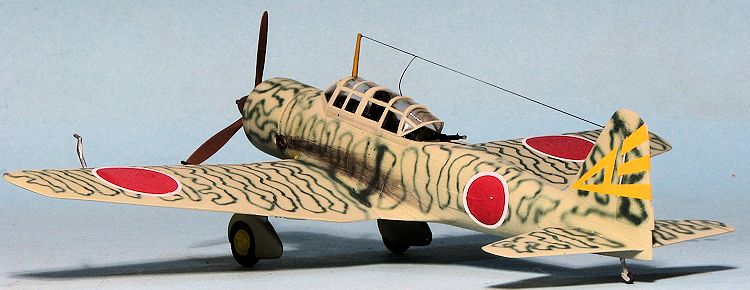
For this build, I went with one of the markings on Rising Decals 72060. All of these are late war planes so hadthe upper surfacespainted in either a solid or mottled green with yellow wing leading edge ID bands. I first painted the bands over the extant light grey and then masked this area. Then the airframe was painted with Aeromaster IJAAF green-grey acrylic. After that had dried I sprayed on the camouflage using a Nakajima Army dark green from the Colourcoats line. This was clear coated with Future.
 The decals were quite nice and quite thin so one does have to
take care in their application. There isn't much to markings on this one. I did
have a choice of yellow or blue tail markings and picked the yellow one. All
this was once again overcoated with clear matte.
The decals were quite nice and quite thin so one does have to
take care in their application. There isn't much to markings on this one. I did
have a choice of yellow or blue tail markings and picked the yellow one. All
this was once again overcoated with clear matte.
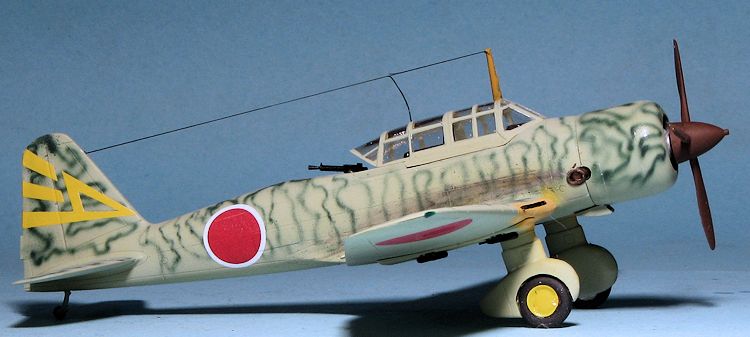
After the markings were on, I attached some of the final pieces. This included the pitot tube, the guns, the canopy, the engine wiring ring, the rear gun, the radio mast and the prop. There was a bit more painting to do as well, which included the wheels, tail gear strut, formation lights and the radio mast (which is wood). I did not get carried away with the exhaust and only used a bit of pastel for this. I also added some EZ line antenna.
Regarding the wheels, I am truly terrible at doing these when there are no raised ridges between the wheel and tire. So I cheated. About 30 years ago, I bought a series of decal sheets from a company called Plas-Tec. Each sheet has multiple rings and dots in various colors and has a single carrier over the entire sheet. These have proved invaluable over the years and I used some yellow dots for the wheels on this one. Perhaps not prototypical, but it matches the yellow in the unit marking on the fin so it could have happened. The last thing done was removing all the little window masks and the project was done.
| CONCLUSIONS |
Despite its age, this is a nice little kit and while not a 'fall together' project, looks quite nice when done. Since this was one of the original Mania boxings, the molds were still nice and crisp. Over the years, things have gotten a bit long in the tooth and the more recent releases have a bit more flash than this one. The Ki-51 is one of those aircraft overlooked by kit makers in both scales with only this one in 1/72 and the ancient Nichimo version in 1/48. It is really time for a new tool.
| REFERENCES |
http://en.wikipedia.org/wiki/Ki-51
Copyright ModelingMadness.com October 2015 Thanks to me for sharing this one with you.
If you would like your product reviewed fairly and fairly quickly, please contact the editor or see other details in the Note to Contributors.