Roden 1/144 C-47 Skytrain
| KIT #: | 308 |
| PRICE: | $24.99 SRP |
| DECALS: | One option |
| REVIEWER: | Scott Van Aken |
| NOTES: |
| HISTORY |
The C-47 was vital to the success of many Allied campaigns, in particular those at Guadalcanal and in the jungles of New Guinea and Burma where the C-47 (and its naval version, the R4D) made it possible for Allied troops to counter the mobility of the light-traveling Japanese army. Additionally, C-47s were used to airlift supplies to the embattled American forces during the Battle of Bastogne. Possibly its most influential role in military aviation, however, was flying "The Hump" from India into China. The expertise gained flying "The Hump" was later be used in the Berlin Airlift, in which the C-47 played a major role, until the aircraft were replaced by Douglas C-54 Skymasters.
 In Europe, the C-47 and a specialized paratroop variant, the
C-53 Skytrooper, were used in vast numbers in the later stages of the war,
particularly to tow gliders and drop paratroops. In the Pacific, with careful
use of the island landing strips of the Pacific Ocean, C-47s were even used for
ferrying soldiers serving in the Pacific theater back to the United States.
In Europe, the C-47 and a specialized paratroop variant, the
C-53 Skytrooper, were used in vast numbers in the later stages of the war,
particularly to tow gliders and drop paratroops. In the Pacific, with careful
use of the island landing strips of the Pacific Ocean, C-47s were even used for
ferrying soldiers serving in the Pacific theater back to the United States.
C-47s (approx. 2,000 received under lend-lease) in British and Commonwealth service took the name Dakota, from the acronym "DACoTA" for Douglas Aircraft Company Transport Aircraft. The C-47 also earned the informal nickname Gooney Bird in the European theater of operations.
Other sources (C-47/R4D Skytrain Units of the Pacific and CBI, David Isby, Osprey Combat Aircraft #66, Osprey Publishing Limited, 2007) attribute this name to the first plane, a USMC R2D - the military version of the DC-2 - being the first plane to land on Midway Island, previously home to the native long-winged albatross known as the Gooney Bird which was native to Midway.
The United States Air Force's Strategic Air Command had Skytrains in service from 1946 through 1967.
With all of the aircraft and pilots having been part of the Indian Air Force prior to Independence, both the Indian Air Force and Pakistan Air Force used C-47s to transport supplies to their soldiers fighting in the Indo-Pakistan War of 1947.
Several C-47 variations were used in the Vietnam War by the
United States Air Force, including three advanced electronic warfare variations,
which sometimes were called "Electric Gooneys" designated EC- 47N, EC-47P, or
EC-47Qs depending on the engine used. EC-47s were also operated by the
Vietnamese, Laotian and Cambodian Air Forces. A gunship variation, using three
7.62mm miniguns, designated AC-47 "Spooky" often nicknamed "Puff the Magic
Dragon" also was deployed.
47N, EC-47P, or
EC-47Qs depending on the engine used. EC-47s were also operated by the
Vietnamese, Laotian and Cambodian Air Forces. A gunship variation, using three
7.62mm miniguns, designated AC-47 "Spooky" often nicknamed "Puff the Magic
Dragon" also was deployed.
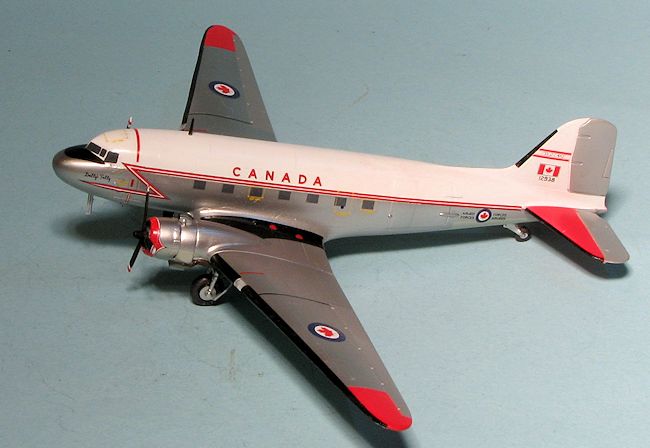
The Royal Canadian Air Force and later, the Canadian Armed Forces employed the C-47 for transportation, navigation, and radar training, as well as for search and rescue operations from the 1940s to the 1980s.
After World War II thousands of surplus C-47s were converted to civil airline use, some remaining in operation in 2012 as well as being used as private aircraft.
| THE KIT |
This is not the first time that the C-47 has been kitted in this scale. Minicraft, among perhaps others, has had one out for many years, but there were comments on how it could have been a better kit. I'll leave it to those who know more than I to come up with what wasn't right with it.
Roden's kit is a brand new tooling and has sharp, engraved
panel lines. The four olive green and single clear sprue are nicely detailed and
though I did note a tad bit of flash in places, it is something I have come to
expect from Roden, even on new kits. The clear windows insert from the inside
and judging by
 he need to trim a window from the cargo door side, I am thinking
that there will be a civil DC-3 version coming along soon. In fact, I expect a
bunch of different boxings.
he need to trim a window from the cargo door side, I am thinking
that there will be a civil DC-3 version coming along soon. In fact, I expect a
bunch of different boxings.
There is no cockpit at all, which will disappoint some. The windscreen section is molded in with part of the upper fuselage, a feature many like. The engine in nicely detailed as is the landing gear, which looks properly done. Wheels and stabilizers are a single piece with the tail wheel molded in with the strut. Props look to be the correct type for the C-47. There are antennas an an astrodome for the roof and holes need to be opened or drilled for these items. I should add that the kit comes with a complete tail cone, something not always found on wartime C-47s. The main instructions embarrasingly miss the instalation of the long upper cowling carb intakes, but this is taken care of by an addendum page. It appears that the short intakes are also included but not used.
Instructions are fairly well done with all of the color information noted on the back of the instructions. Vallejo paints are the main reference, but the colors are quite common in most paint lines. The lone markings option is with the "53rd Wing, 101st Airborne Division". OK. It is a D-Day marked plane with only the nose number and serial to differentiate it from other C-47s. The white and black bands will need to be painted on which, considering the reputation of Roden decals, may well be a good thing. I know that I would have liked several options, but this will be a good opportunity for the aftermarket folks to step up to the plate for us.
| CONSTRUCTION |
First thing I did on this one was to glue in the windows and the cargo door.
The decals I"m using on this one provide window decals so I then filled in the
outside of these windows with super glue and sanded
 that away when dry. The
windscreen part was also installed to mold that into the fuselage. This piece is
a bit narrower than the fuselage.
that away when dry. The
windscreen part was also installed to mold that into the fuselage. This piece is
a bit narrower than the fuselage.
The wing sections were also glued in place at this time. When dry, it was fit to the fuselage. This showed that the wing roots need to be sanded down a bit or you won't get the proper dihedral on the outer wing sections. With that done, the engine nacelles were installed along with the engine parts, followed by the cowlings. The tail planes were glued in place and it seemed like a good time to think about painting.
| COLORS & MARKINGS |
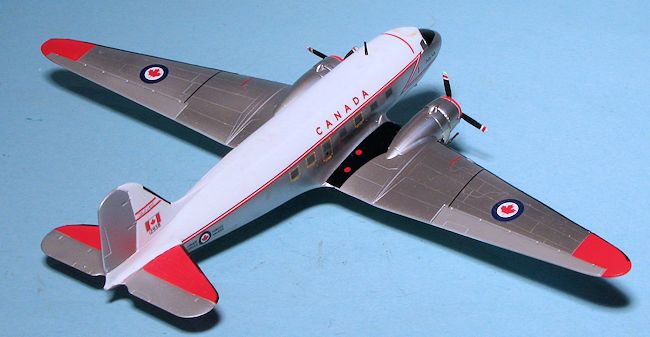
Aftern filling the engine cowlings with tissue, I painted the airframe white
with Tamiya white primer followed by Tamiya X-1 white paint. The upper surface
was masked then the wing tip and stab tips were
 painted red using Gunze H-3.
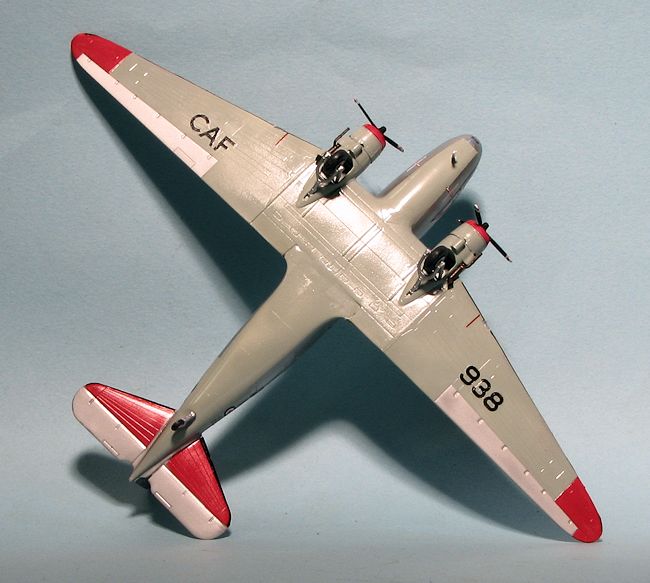
This was also used for the forward engine cowlings. Those areas were masked and
the underside was painted ADC Grey as it looked close to what was shown on the
instructions to the decal sheet. That was then masked off and the
control surfaces were painted in a darkish aluminum. Then those were masked and
the rest of the upper surface was painted aluminum. I used Alclad II for all the
metal finishes. While this sounds pretty simple, all this masking and painting
took a few weeks.
painted red using Gunze H-3.
This was also used for the forward engine cowlings. Those areas were masked and
the underside was painted ADC Grey as it looked close to what was shown on the
instructions to the decal sheet. That was then masked off and the
control surfaces were painted in a darkish aluminum. Then those were masked and
the rest of the upper surface was painted aluminum. I used Alclad II for all the
metal finishes. While this sounds pretty simple, all this masking and painting
took a few weeks.
I then attached the landing gear. I should have installed the tail gear when putting the fuselage halves together, but this would have gotten in the way of painting and I'd have broken it anyway (still did). The main gear was a bit of struggle as the attachment points are tiny near the wheels and the back of the retraction strut had to be sanded down to fit into the well. Once in place, it was time for decals.
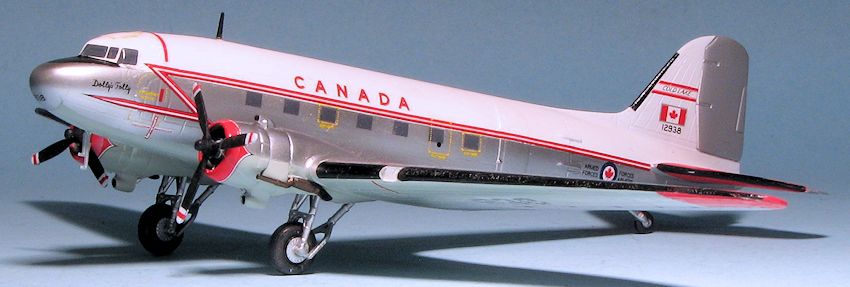
This kit got an old, out of production set from Leading Edge Models for a CAF
Dakota. The decals were rather old and I had some minor issues with fit and
cracking. Most troublesome for me were the de-icer boots. I should have painted
them on as the decals were not very cooperative, even with Solvaset setting
solution. One also has to consider that these decals were designed for the
Minicraft kit so the tail band
 was too long, the markings around the cowls were
designed for a tube, not the barrel shape of the Roden kit and so on. Nothing
that cannot be overcome, but it all takes time.
was too long, the markings around the cowls were
designed for a tube, not the barrel shape of the Roden kit and so on. Nothing
that cannot be overcome, but it all takes time.
Once that was done, there were still bits to attach. These included the pitot assembly and an upper fuselage antenna. The pitot assembly was taken from the Minicraft kit as the Roden version seemed a bit short and mine was rather misshapen as if someone had pushed a stick into the side of it before the plastic cooled. Both needed to have holes drilled. I also had to open the holes in the engine fronts to get the prop shafts in place. Surprisingly, the landing lights were not the major hassle on this one that they were with the Minicraft kit. That was the final parts installation I had a bit of touch up painting to do and once that was completed the kit was done.
| CONCLUSIONS |
Surprisingly, this one took pretty much the same
amount of time to complete as I spent on the Italeri 1/72 versions done earlier
this year. Just goes to show that smaller scale does not equal less build time
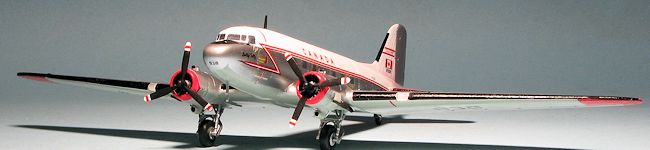
in all cases. I had wanted to do a Canadian C-47 fo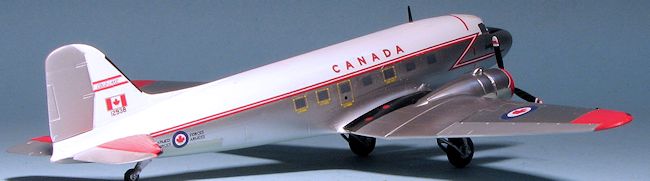 r
many years, but didn't want to 'waste' a nice set of decals on the Minicraft
kit. If one is to do a comparison between this kit and the one by Minicraft,
while they both have some issues, the Roden is, in my opinion, a far better
option. About the only benefit I can see to the Minicraft version is that it
comes with an airliner fuselage so you don't have to fill in the cargo door when
doing one of those versions. I also discovered that the Minicraft kit is shorter
by about a quarter inch in wingspan. I don't know which is correct, but that is
a bit of a difference.
r
many years, but didn't want to 'waste' a nice set of decals on the Minicraft
kit. If one is to do a comparison between this kit and the one by Minicraft,
while they both have some issues, the Roden is, in my opinion, a far better
option. About the only benefit I can see to the Minicraft version is that it
comes with an airliner fuselage so you don't have to fill in the cargo door when
doing one of those versions. I also discovered that the Minicraft kit is shorter
by about a quarter inch in wingspan. I don't know which is correct, but that is
a bit of a difference.
| REFERENCES |
http://en.wikipedia.org/wiki/C-47_Skytrain
September 2014
Thanks to me for getting this one on sale.
If you would like your product reviewed fairly and fairly quickly, please contact the editor or see other details in the Note to Contributors.