Revell 1/72 P-51B (Mustang III)
| KIT #: | 4133 |
| PRICE: | $4.75 MSRP when I bought it about 5 years ago |
| DECALS: | Two options |
| REVIEWER: | Scott Van Aken |
| NOTES: |
| HISTORY |
You don't know about the Mustang? Must be brand new to airplanes, so I'll recommend you go to www.google.com and spend about 100 hours reading about it because there is a LOT of material on this plane.
| THE KIT |
Now some of you may not log onto or visit the Reader's
Forum, but I decided to do a group build and after the voting had been tallied
for the second round, it was Revell Germany that got the nod. Figuring that the
masses would choose the Mustang, I pulled
 mine out and started cutting bits off
the sprue. Imagine my total surprise when not only was it NOT the chosen one,
but got zero votes! I was dumbfounded, but decided to press on with it anyway. Whoda thunk?
mine out and started cutting bits off
the sprue. Imagine my total surprise when not only was it NOT the chosen one,
but got zero votes! I was dumbfounded, but decided to press on with it anyway. Whoda thunk?
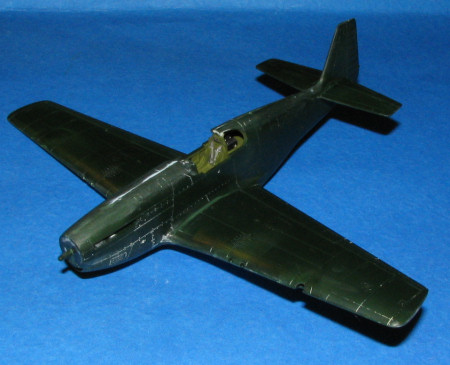
It comes in Revell's 'letter box' container where both ends open and provide two opportunities for bits to slide out of the container into oblivion. Knowing that, I did not open the polybag containing the bits until I sat down to build the kit.
Overall, the detail is quite good, especially for under $5 retail. The olive drab plastic has engraved detailing and a rather nice cockpit with detail on the side wall and instrument panel. The seat is a bit thick and the molded belts are somewhat indistinct, but it is an inexpensive kit. Fanatics will get an Eduard etched set and replace all these somewhat soft details with nice, crisp etched brass.
The kit has several options. You can choose to add or leave off the lower wing racks, and if you add them, you have a choice of two types of drop tank or bombs. Since this is the RAF boxing, an RAF style of 'paddle' control stick is offered. The only canopy option is for a Malcolm Hood. This is not the best molding I've seen of a canopy and, of course, no canopy rails are included to add to the airframe.
| CONSTRUCTION |
 This was all started in the cockpit. I like to glue as
many bits as possible that will be painted the same color so I had the chance to
attach a lot of pieces to the cockpit. It has a wood-grained floor that is the
norm for the Mustang. The interior and inner fuselage sidewalls were painted
using Testor's Interior Green. I painted the various radio boxes, control stick
head and instrument panel with black. I should note that I didn't want to do an
RAF Mustang so used the USAAF control stick that is also in the sprues.
This was all started in the cockpit. I like to glue as
many bits as possible that will be painted the same color so I had the chance to
attach a lot of pieces to the cockpit. It has a wood-grained floor that is the
norm for the Mustang. The interior and inner fuselage sidewalls were painted
using Testor's Interior Green. I painted the various radio boxes, control stick
head and instrument panel with black. I should note that I didn't want to do an
RAF Mustang so used the USAAF control stick that is also in the sprues.
I also glued together the wings and opened the holes in the wing for the pylons. The wings were cemented together and after cleaning up the seam, I started to remove the pylons. These are really poorly done. They have lots of flash and some of it is quite thick. After a lot of clean-up, they were glued in place.
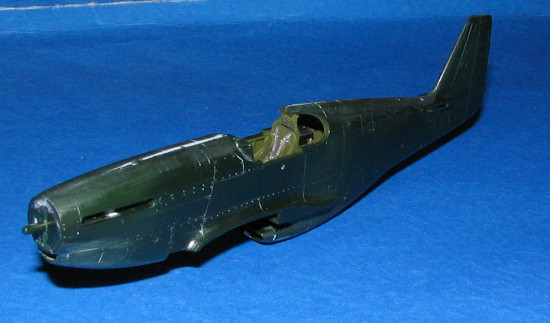 Meanwhile, with the interior done, it was glued into a
fuselage half and the halves cemented together. At this time I glued the forward
oil cooler intake and the lower radiator scoop as I knew I'd have to apply
filler to these. With those in place, I did apply the usual filler to the seams
and then sanded things smooth, replacing the lost panel line detail after that
was done.
Meanwhile, with the interior done, it was glued into a
fuselage half and the halves cemented together. At this time I glued the forward
oil cooler intake and the lower radiator scoop as I knew I'd have to apply
filler to these. With those in place, I did apply the usual filler to the seams
and then sanded things smooth, replacing the lost panel line detail after that
was done.
 Next, the stabilizers were glued in place and when I
was happy they were square, the wing was glued on. Filler was needed in the
front section of the wing where it met the fuselage, but aside from that, the
fit was good. I then got the canopy and masked it. This is not a great molding
as the frame lines are quite indistinct and the shape of the rear 'quarter'
windows is suspect as they come to a bit of a point. I reshaped these a bit and
then glued it in place. I also took the time to drill out the exhaust.
These were of a decent size and easy to do, unlike the downright tiny ones on
the Academy kit I'd done earlier. As I'd earlier sprayed the wheel wells with aluminum, I
masked these and headed for the paint shop.
Next, the stabilizers were glued in place and when I
was happy they were square, the wing was glued on. Filler was needed in the
front section of the wing where it met the fuselage, but aside from that, the
fit was good. I then got the canopy and masked it. This is not a great molding
as the frame lines are quite indistinct and the shape of the rear 'quarter'
windows is suspect as they come to a bit of a point. I reshaped these a bit and
then glued it in place. I also took the time to drill out the exhaust.
These were of a decent size and easy to do, unlike the downright tiny ones on
the Academy kit I'd done earlier. As I'd earlier sprayed the wheel wells with aluminum, I
masked these and headed for the paint shop.
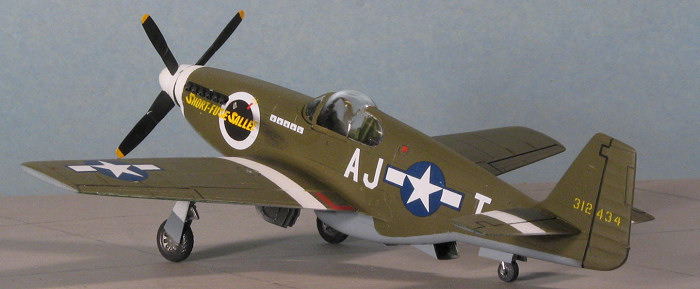
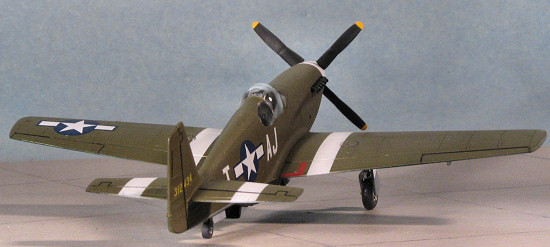
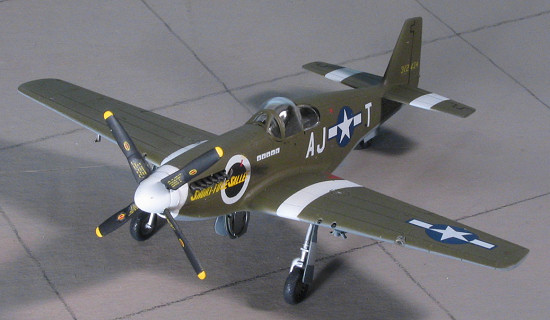
| COLORS & MARKINGS |
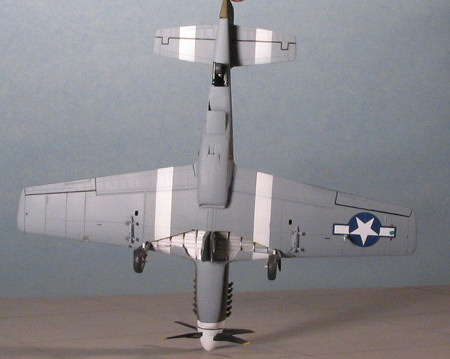
How about a nice OD over Neutral Grey? Good idea and so
I got some of my Testors ModelMaster enamels of the appropriate shade and after
thinning them with lacquer thinner to dramatically reduce dry time, I sprayed
the lower surfaces with the Neutral Grey. Then I masked the lower tail planes
and did the upper surfaces with OD. It was at this time that I discovered that
the decals I wanted to use did not come with the white wing and tailplane ID
stripes. Well, this wasn't good as it meant I'd have to paint them
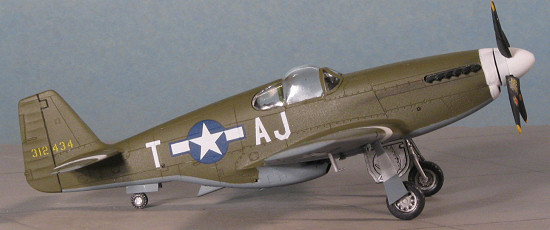 on. So,
grabbing my gloss white that I was using on another project, I crudely sprayed
the wings and tail planes in the general area where the stripes would go. I also
did the nose and prop spinner as they were to be white as well.
on. So,
grabbing my gloss white that I was using on another project, I crudely sprayed
the wings and tail planes in the general area where the stripes would go. I also
did the nose and prop spinner as they were to be white as well.
These stripes are supposed to be 15 inches wide, so doing some math in my brain while sitting on the 'throne', I realized that I'd need tape that was about 5.3mm wide. Tamiya makes tape that is 6 mm wide, and figuring "who'd notice the difference", I applied strips of this tape to what I hoped were the right spots. I also masked off the nose. Then the neutral grey was repainted and this was followed by the upper surface OD. I should point out that I hand painted the wing spar with Testors Chromate Yellow that comes in the 1/4 ounce bottles. The rest was left in Alclad II Aluminum.
But I wasn't done yet. After several unsuccessful
attempts to hand spray the demarcation lines (the overspray was just too much
for the scale), I resorted to masking these items and then spraying. Eventually
the painting was done and I returned to the work bench to install the landing
gear. This went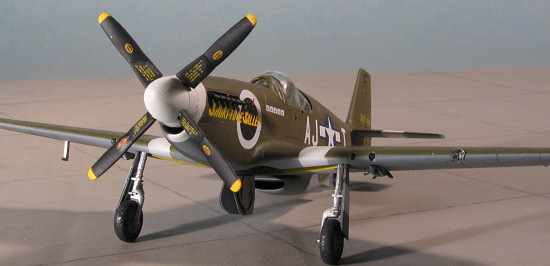 in with little
fuss, though the attachment holes are sloppy and one has to be careful to be
sure the gear dries evenly. The gear doors have to be installed along with the
struts or you'll not get them in later without some cutting. The airframe was
then given a clear acrylic gloss coat prior to decal application.
in with little
fuss, though the attachment holes are sloppy and one has to be careful to be
sure the gear dries evenly. The gear doors have to be installed along with the
struts or you'll not get them in later without some cutting. The airframe was
then given a clear acrylic gloss coat prior to decal application.
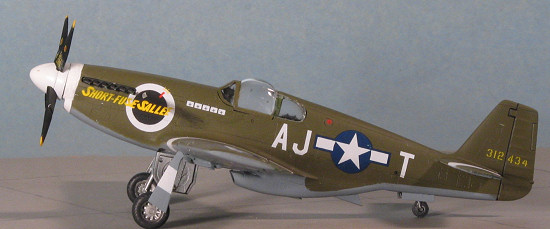
For decals, I used Superscale 72-874: 354 FG P-51B Mustangs. This has a nice pair of markings on it and I was using the other set on another build so figured I'd do the entire sheet. In this case it was 'Short Fuse Salle' of the 356 FS/354 FG. The decals went on without a glitch using little more than regular Microsol/set solutions. The only problem I found was that the kill markings were off register. I also chose to use the white circle decal instead of spraying that area white and giving it a less distinct outline. Since I'd used most of the data decals on another project, I had to find some source for a few of the more common data markings. I used the ones from an Academy Mustang. These were OK, but not as good as the Superscale ones as they took several applications of setting solution to settle down without silvering.
| FINAL CONSTRUCTION |
 Not much to the last pieces. I cut and glued the tail
wheel doors in place. I also attached the inner gear doors and the pitot tube.
The prop was assembled. This has separate blades and a very sloppy fit in the
spinner. I'd MUCH rather have the blades as one piece. There was a lot of flash
and crud on the lower spinner section that had to be cleaned up prior to fitting
it. I just glued it to the prop shaft and found that the shaft hole on the back
was a bit off center, making it difficult to get proper alignment. I'd suggest
cutting off the prop shaft and butt gluing the spinner. No drop tanks were used
as I'd assembled the 108 gallon paper ones. When they were painted, they looked
terrible so better to leave them off. A bit of exhaust staining and the airframe
was then given a coat of matte clear. The masking was removed from the canopy
and I found a bit of overspray that was not easy to remove. When you commit to
using lacquer thinner, you basically have lacquer paint, and it will not be as
easily removed from clear with a toothpick as you can a standard enamel or
acrylic. The poorly shaped and very flashy landing light cover was glued in
place after much muttering and grumbling. A bit of touch up painting was done
and that was it.
Not much to the last pieces. I cut and glued the tail
wheel doors in place. I also attached the inner gear doors and the pitot tube.
The prop was assembled. This has separate blades and a very sloppy fit in the
spinner. I'd MUCH rather have the blades as one piece. There was a lot of flash
and crud on the lower spinner section that had to be cleaned up prior to fitting
it. I just glued it to the prop shaft and found that the shaft hole on the back
was a bit off center, making it difficult to get proper alignment. I'd suggest
cutting off the prop shaft and butt gluing the spinner. No drop tanks were used
as I'd assembled the 108 gallon paper ones. When they were painted, they looked
terrible so better to leave them off. A bit of exhaust staining and the airframe
was then given a coat of matte clear. The masking was removed from the canopy
and I found a bit of overspray that was not easy to remove. When you commit to
using lacquer thinner, you basically have lacquer paint, and it will not be as
easily removed from clear with a toothpick as you can a standard enamel or
acrylic. The poorly shaped and very flashy landing light cover was glued in
place after much muttering and grumbling. A bit of touch up painting was done
and that was it.
| CONCLUSIONS |
 Though not a perfect P-51B, for under $5 retail (as it
was when I bought it), how can one go wrong. Even at the current double price,
it is still a good deal. It seems to be more accurate than the Academy Mustang
recently reviewed. It has a smaller oil cooler intake and the dog-leg in the
leading edge of the wings isn't as pronounced. It suffers from having
reinforcement plates on the wings (these items are a post war addition to
warbirds to improve the strength of the wings and are not found on wartime
planes), and a less than great canopy. Otherwise, the model is very nice and
though it has been run through a lot of mold cycles, is still relatively flash
free. It compares quite well when put up against the oldies by Monogram and
Airfix and, in my opinion, is a more accurate representation of the type than
what Academy provides, though it is close.
Though not a perfect P-51B, for under $5 retail (as it
was when I bought it), how can one go wrong. Even at the current double price,
it is still a good deal. It seems to be more accurate than the Academy Mustang
recently reviewed. It has a smaller oil cooler intake and the dog-leg in the
leading edge of the wings isn't as pronounced. It suffers from having
reinforcement plates on the wings (these items are a post war addition to
warbirds to improve the strength of the wings and are not found on wartime
planes), and a less than great canopy. Otherwise, the model is very nice and
though it has been run through a lot of mold cycles, is still relatively flash
free. It compares quite well when put up against the oldies by Monogram and
Airfix and, in my opinion, is a more accurate representation of the type than
what Academy provides, though it is close.
2006
#1404 in a series.
Review kit courtesy of me, because I really thought it would have been chosen for a group build. Silly me.
If you would like your product reviewed fairly and quickly, please contact me or see other details in the Note to Contributors.