| KIT #: | ? |
| PRICE: | $15.98 MSRP |
| DECALS: | Three options |
| REVIEWER: | Scott Van Aken |
| NOTES: | Very minor conversion |
| HISTORY |
Even 60 years after the end of World War 2, when someone mentions 'Mustang' a lot of people think "P-51". It really is amazing and it is that sort of popularity that makes the aircraft one of the top favorites amongst builders and collectors alike.
As most of you know, it was as a tactical
reconnaissance aircraft that the British were seeking when they approached North
 American to produce an aircraft for them. It performed superbly in that role and
the British really wished there were more of them built for them as they managed
to go through a lot of them during the course of the war. Often units had to
give away their Mustang Is and transition to something not quite as good in
order to keep other units flying.
American to produce an aircraft for them. It performed superbly in that role and
the British really wished there were more of them built for them as they managed
to go through a lot of them during the course of the war. Often units had to
give away their Mustang Is and transition to something not quite as good in
order to keep other units flying.
The switch to the Merlin did not make that much difference when it came to low level performance and both engine types operated about the same. What was a bit odd is that the USAAF took so long to realize what a great tac recon plane the Mustang was. Not that many earlier types were converted, probably because of the demand for them as high altitude escorts. But when P-51D production got going full steam, there were finally enough to fill the needs. In the coding of the time, photo recon planes were given the F (for Foto) prefix and rather than confuse things when it came to subtypes, a photo recon P-51D became an F-6D.
| THE KIT |
Tamiya's 1/72 P-51D has been produced in two boxings, one being an F-51D with a number of extra bits for a Korean War version. Other than these extra pieces and the decals, the two kits are the same. Those of us who like the Mustang buy the F-51D boxing just for the additional canopy, prop blades and under wing rockets. This kit has pretty well become the darling of the 1/72nd D model Mustang crowd and put the others out to pasture.
| CONSTRUCTION |
 If there
was ever an easy kit to build, this is it. It isn't perfect as most of us will
still need filler and still need to be careful when assembling it, but unless we
do something really stupid, it is near impossible to goof. Tamiya has gone as
far as to make parts nigh impossible to put in wrong or to get like-looking
If there
was ever an easy kit to build, this is it. It isn't perfect as most of us will
still need filler and still need to be careful when assembling it, but unless we
do something really stupid, it is near impossible to goof. Tamiya has gone as
far as to make parts nigh impossible to put in wrong or to get like-looking
 parts
switched. Construction went quickly and since I'd planned on doing an F-51D, I
opened the holes in the lower wing. The rest of the parts assembled well, though
I did have to use filler on most of the fuselage joins and especially on the
piece that goes in the very front for the oil cooler intake. I know there are
people who "Didn't use a bit of filler" on their kits, but I have never been one
of them!
parts
switched. Construction went quickly and since I'd planned on doing an F-51D, I
opened the holes in the lower wing. The rest of the parts assembled well, though
I did have to use filler on most of the fuselage joins and especially on the
piece that goes in the very front for the oil cooler intake. I know there are
people who "Didn't use a bit of filler" on their kits, but I have never been one
of them!
The wings were then assembled and glued into place after the interior was installed. Again, great fit as we have come to expect from Tamiya. I attached the tail planes and after masking them, the clear bits. It was then off to the paint shop.
| COLORS & MARKINGS |
Planning on a nice, shiny surface, I first sprayed
Alclad II gloss black undercoat. Then I applied the polished aluminum. For some
reason, I just didn't get the coverage I liked. It was nice and shiny from an
angle, but looked spotty from straight on. So I over-sprayed it with aluminum,
and sprayed the area around the exhaust with steel. It then looked too dark and
there it sat for nearly a year. In fact, you may recall that last March
and April I did an Academy and Revell 1/72 P-51B. I was building this one at the
same 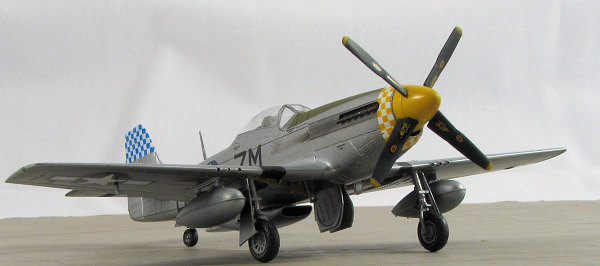 time. A few months back, Tom Ivie sent me some camera ports to do an F-6
variant. Thanks, Tom! Well, I finally installed them a few weeks ago, then realized that I'd
opened the holes for the rockets in the bottom of the wing to do an F-51D. The holes were
filled in and sanded smooth, then I decided to try some of the new SnJ Acrylic
Aluminum. Well, a couple of observations. One is that it took several coats to
cover up the area sanded down. The other is that the SnJ is gloss, while the
Alclad is more matte. Meant that I had to paint the entire model with the SnJ
acrylic. While this was a bit time consuming compared to the lacquer, I did
eventually get complete coverage, though its somewhat transparent nature meant
that the overall finish is still a bit darker than I'd like. Plus side is
that no gloss is needed prior to applying decals. I'm thinking that I need to
work more with this paint before making up my mind on it one way or the other.
One thing for sure, if you like SnJ enamel, then you'll like this new acrylic as
it seems to work about the same.
Using new products often has a learning curve with it. One of the reasons people
stick with what they are comfortable using and don't always jump on the latest
and greatest.
time. A few months back, Tom Ivie sent me some camera ports to do an F-6
variant. Thanks, Tom! Well, I finally installed them a few weeks ago, then realized that I'd
opened the holes for the rockets in the bottom of the wing to do an F-51D. The holes were
filled in and sanded smooth, then I decided to try some of the new SnJ Acrylic
Aluminum. Well, a couple of observations. One is that it took several coats to
cover up the area sanded down. The other is that the SnJ is gloss, while the
Alclad is more matte. Meant that I had to paint the entire model with the SnJ
acrylic. While this was a bit time consuming compared to the lacquer, I did
eventually get complete coverage, though its somewhat transparent nature meant
that the overall finish is still a bit darker than I'd like. Plus side is
that no gloss is needed prior to applying decals. I'm thinking that I need to
work more with this paint before making up my mind on it one way or the other.
One thing for sure, if you like SnJ enamel, then you'll like this new acrylic as
it seems to work about the same.
Using new products often has a learning curve with it. One of the reasons people
stick with what they are comfortable using and don't always jump on the latest
and greatest.
 With the
paint in place, I went to apply the decals. For this effort, I used an out of
production sheet, Aeromaster 72-216
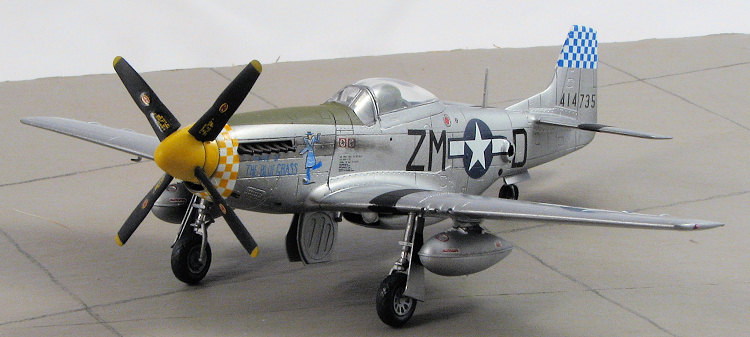
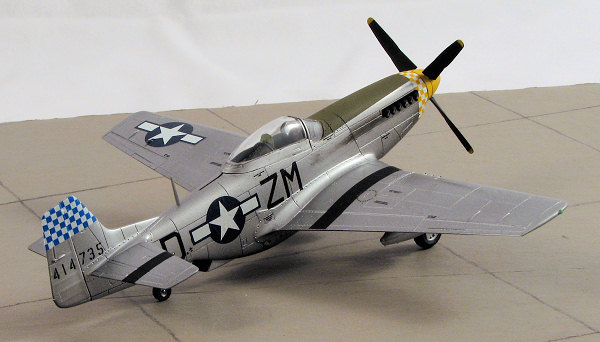
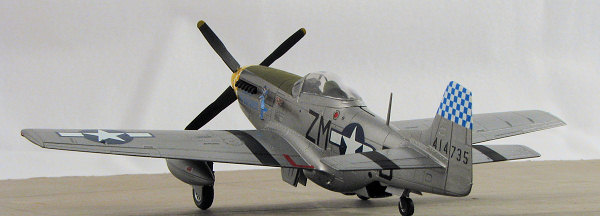
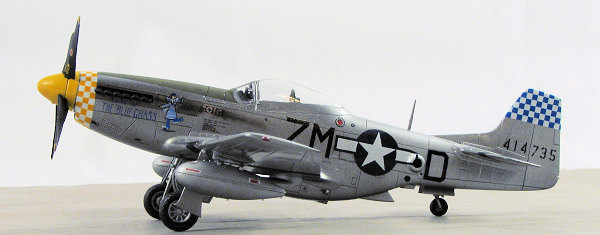
and chose 'Pride of the Bluegrass' from the 12th TRS. You may be interested to
know that the 12th RS was the last regular USAF recce squadron before it was
disbanded in 1994 or so. It was flying RF-4Cs at the time. Aeromaster decals can
be difficult to apply, depending on where they are printed. These were reluctant
to snuggle down, even with Solvaset, though after a couple of applications
everything worked in to place. I should have cut the fuselage insignia that went
over the camera bump as it didn't end up straight, but nothing major. No clear
coat on this so you have to be sure all is in place. I also found that the nose
decals were not a good fit as they didn't follow the contours of the nose as
well as I'd have liked. This was especially true of the small insert that went
into the oil cooler intake.
With the
paint in place, I went to apply the decals. For this effort, I used an out of
production sheet, Aeromaster 72-216
and chose 'Pride of the Bluegrass' from the 12th TRS. You may be interested to
know that the 12th RS was the last regular USAF recce squadron before it was
disbanded in 1994 or so. It was flying RF-4Cs at the time. Aeromaster decals can
be difficult to apply, depending on where they are printed. These were reluctant
to snuggle down, even with Solvaset, though after a couple of applications
everything worked in to place. I should have cut the fuselage insignia that went
over the camera bump as it didn't end up straight, but nothing major. No clear
coat on this so you have to be sure all is in place. I also found that the nose
decals were not a good fit as they didn't follow the contours of the nose as
well as I'd have liked. This was especially true of the small insert that went
into the oil cooler intake.
| FINAL CONSTRUCTION |
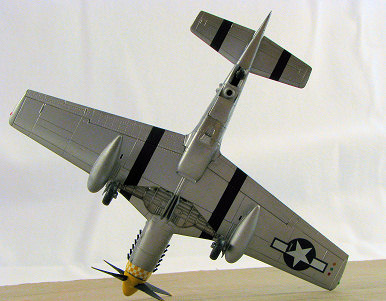
While applying the decals, it dawned on me that there
were no ID stripes for the wings and the horizontal stabs. Nothing to do but
carefully mask things and paint them on. Fortunately, I'd not glued in the
landing gear as is my norm, so I was able to put the gear doors in place and get
them properly painted as well. Fortunately, no problems with overspray or
pulling up decals. 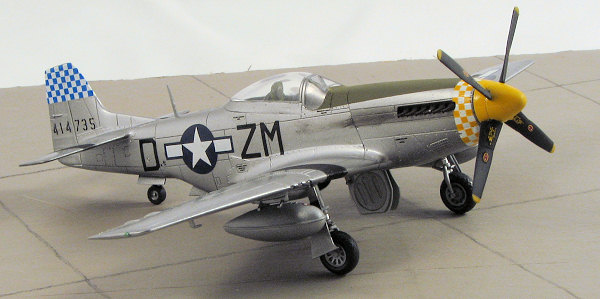
I then started adding all the other bits. The prop spinner was painted white then insignia yellow and the blades were trapped between the two halves. Be sure to remove all the sprue stubs as it is a tight fit. I also attached the main gear. First the wheels were glued on after wrapping the oleos with Bare Metal foil. Then the gear doors were glued on. This is a bit of a fussy construct, but once in place and left to dry, turned out well. The tail gear was also glued on.
After a day to dry, I attached the inner gear doors. The retraction struts are too long to fit into the slots on the doors so you'll have to do as I and attach them 'higher' than you'd like. Other option is to clip off the lower section of the struts till they fit, but you lose the positive locator when doing so. I also attached the radio mast and pitot tube at this time. I also glued on the landing light, finding this piece to be quite fiddly to get into place. Exhaust stains were added with a Tamiya weathering set and the exhaust then glued in place after being painted burnt iron. Insides of the camera ports (which are probably too large) were painted black and I put a black dot just below the side one as the decal drawings showed one. Various colors were used for the ID lights on the underside of the wing and formation lights. Then the prop was pushed in place (it is held by a poly cap), masking removed and that was it.
| CONCLUSIONS |
 You'd
think it wouldn't take a year to finish a Tamiya 1/72 Mustang, but these things
do happen. The end result is pleasing to me, though I'm sure there are
inaccuracies. I found the SnJ Talon acrylic aluminum to be pretty good paint and
those looking for a non-petroleum based metallic will find it very useful
indeed. I also liked the Tamiya weathering set because the materials are a bit
sticky so will adhere to glossy surfaces, something that pastels will not do.
You'd
think it wouldn't take a year to finish a Tamiya 1/72 Mustang, but these things
do happen. The end result is pleasing to me, though I'm sure there are
inaccuracies. I found the SnJ Talon acrylic aluminum to be pretty good paint and
those looking for a non-petroleum based metallic will find it very useful
indeed. I also liked the Tamiya weathering set because the materials are a bit
sticky so will adhere to glossy surfaces, something that pastels will not do.
April 2007
# 1463 in a series
Copyright ModelingMadness.com. All rights reserved.
Now for the thanks. Thanks to me for the kit, Aeromaster for the decals, Hawkeyes Hobbies for the SnJ Talon paint, and Great Models for the Tamiya weathering set.
If you would like your product reviewed fairly and fairly quickly, please contact the editor or see other details in the Note to Contributors.