|
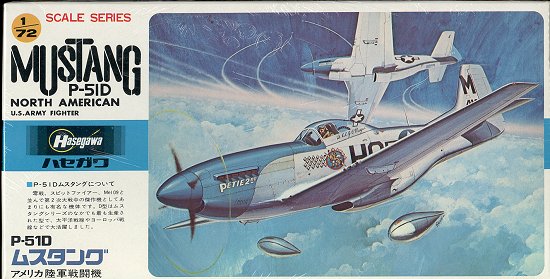
KIT: |
Hasegawa 1/72 P-51D Mustang |
|
KIT # |
A 12 |
|
PRICE: |
¥250 (about 80¢ in 1975) |
|
DECALS: |
One aircraft: John Myers 'Petie 2nd' |
|
REVIEW BY: |
|
|
NOTES: |
|
HISTORY |

Although not the most widely built American aircraft of WW2, it is the one that most Americans can name when asked about WW2 aircraft. Despite the fact that they were designed for a maximum of 400 flight hours, there are literally hundreds of them still in existence around the world. Many of them are still flying. They can be seen at Airshows around the world during the summer months.
Like the modern day F-16, the Mustang was not only used by the United States, but by dozens of countries around the world. They were front-line equipment for many of the smaller air forces. The last military Mustangs were operated by the air force of the Dominican Republic and retired in the early 1980's, over 40 years since it was first designed!

|
THE KIT |
This kit is probably one of Hasegawa's biggest sellers. I doubt if it has ever been out of production since it was first molded in the early 1970's. I know that I built my first one around 1974 when I bought it in a small hobby shop in Yamato, Japan for the then princely sum of ¥250. At that time it was about 80¢. How things have changed. It is molded in silver plastic and gives you the option of putting bombs or drop tanks under the wings. It also includes two canopies; the earlier, more curved variety or the one with a bit of a 'notch' in the front section. It had a pretty decent interior for the time and included a nice decal for the instrument panel. Overall detailing was mostly raised panel lines, but even today, it is better molded than a number of kits that I have recently bought!

|
CONSTRUCTION |

With such a simple kit, construction is very straightforward. One installs the control stick into the interior section (actually the only part other than the instrument panel as the rest is molded into one piece). Then paint the interior and instrument panel as well as the sidewalls interior green. Apply the decal. Glue the fuselage halves together.
You'll need some filler in a lot of places. The underfuselage exhaust doors are molded open and you need to clean these up. They are solid so if you want any depth to them you need to do some drilling. Most just paint the area black. Next the nose piece is glued on. This bit is too large for the surrounding fuselage. You need to file it down to fit.

Turning to the wings. Glue the upper and lower parts together. The lower section is one piece and has pretty decent wheel well detail. BTW, there is no detail in the tail wheel well. Then when that is dry, glue it to the fuselage. You'll need some filler at the front of the wings where it meets the fuselage. You then install the under wing radiator. This piece fits just as poorly as the nose piece so fill away.
The tailplanes are a good fit as are the landing gear and tail wheel. The gear doors are molded in the closed position and need to be cut apart for a wheels down version. The center gear doors were up when power was on the plane, but after a while would droop down as the hydraulics lost pressure. Paint your aircraft and attach the decals of choice. Most Mustangs were in natural metal. One thing I didn't learn until a few years ago is that the wings were always painted aluminum to keep the smooth laminar flow over them. Last step is to glue on the bombs or drop tanks. I always had to reglue the radio antenna as I would invariably break it off.
|
PAINT & DECALS |
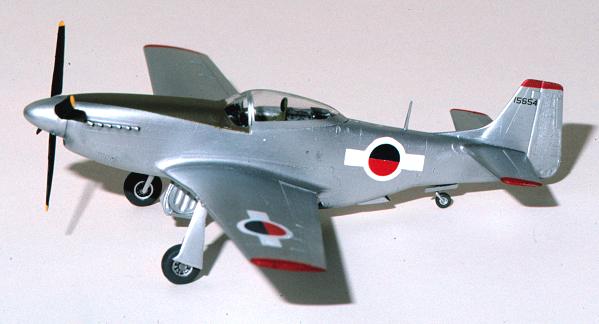
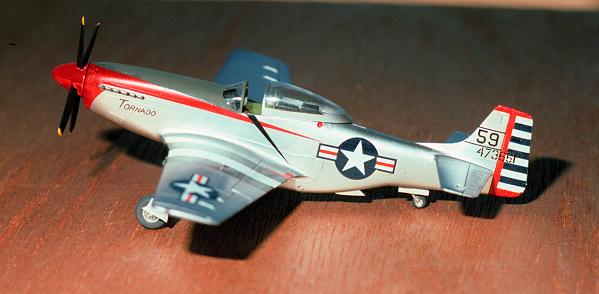
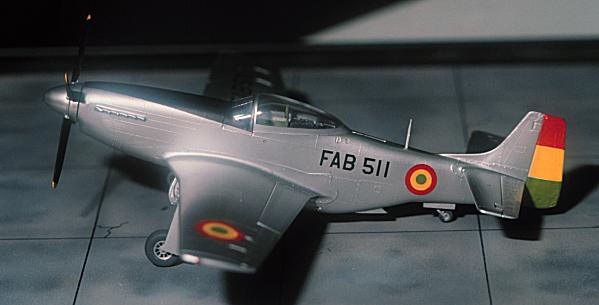
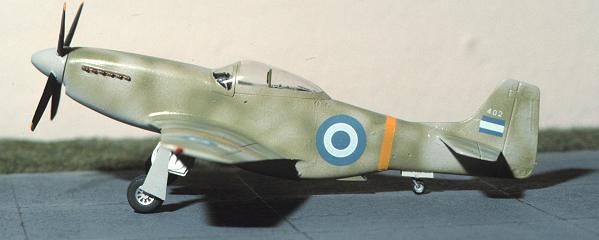
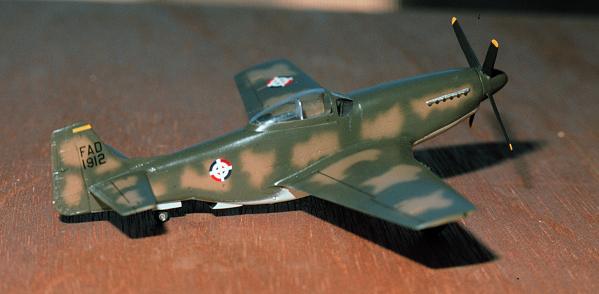
As you can see by the accompanying images, there are a number of schemes that you can paint the aircraft in. I have done a bunch of them over the years. My basement has a display of 30 of the surviving aircraft, and many of them still look quite nice, even after 20 years!
There is a logic in the order in which the images are displayed. The first ones are WW2 aircraft, followed by post-war US, then those in use by other nations and finally the Dominican Mustangs. Several of these kits have home made decals, like those on the Haitian aircraft. See if you can guess what some of these countries are. Most were painted with Testors non-buffing aluminum.
|
CONCLUSIONS |
A really simple and easy to build kit. It does require the use of some hobby skills to properly complete, but makes a very satisfying kit. I would bet that many of you who have been in the hobby for a few years have built this very kit and enjoyed it. Definitely an oldie but goodie.