| KIT #: | 4428 |
| PRICE: | $24.95 SRP |
| DECALS: | Six options |
| REVIEWER: | Scott Van Aken |
| NOTES: | Two kits per box |
| HISTORY |
 The Spitfire IX was supposed to be a stop gap fighter while
the Spitfire VIII was fully developed. The IX initially was the new Merlin in an
older airframe. As so often happens, the stop gap version became that which was
the most widely built. The number of variations in terms of wings, rudder and
elevator designs, for instance, is almost as bewildering as Bf-109G variants.
Yet these planes were widely used in the last years of the war, even as newer
planes came into RAF service. Such was their popularity, that the type, mostly
late builts, was adopted by a number of air forces just after the end of WWII
and into the early 1950s. Several are still flying the warbird circuit and many
others are in museums around the world.
The Spitfire IX was supposed to be a stop gap fighter while
the Spitfire VIII was fully developed. The IX initially was the new Merlin in an
older airframe. As so often happens, the stop gap version became that which was
the most widely built. The number of variations in terms of wings, rudder and
elevator designs, for instance, is almost as bewildering as Bf-109G variants.
Yet these planes were widely used in the last years of the war, even as newer
planes came into RAF service. Such was their popularity, that the type, mostly
late builts, was adopted by a number of air forces just after the end of WWII
and into the early 1950s. Several are still flying the warbird circuit and many
others are in museums around the world.
| THE KIT |
 Eduard
sure knows how to get the most out of its design work and has made a foray into
1/144 by offering a pair of Spit IXe kits for enthusiasts. This is not their
first 1/144 kit, but judging by their release of the MiG-15 in this scale as
well, it may become a staple of Eduard production to give the enthusiast a small
version of their larger kits. I hope so.
Eduard
sure knows how to get the most out of its design work and has made a foray into
1/144 by offering a pair of Spit IXe kits for enthusiasts. This is not their
first 1/144 kit, but judging by their release of the MiG-15 in this scale as
well, it may become a staple of Eduard production to give the enthusiast a small
version of their larger kits. I hope so.
Each of the two kits consists of just under 20 parts. There is no cockpit, as that is a bit of a rarity when it comes to small fighters in this scale. Each of the wing options is a single casting as are the tail planes. Interestingly, the prop is in three sections; backing plate, prop, and spinner. The same goes for the landing gear which has separate wheels and gear doors. The tail gear is molded in place as is the radio mast. There is a single clear part to cover the top and there are twin under wing radiators and exhaust stacks.
Included in my kit, but not shown in the instructions or parts layout, is a set of Lilliputian masks for the canopy and wheel hubs. As you can see, the wings are a set of clipped wings and a set of standard wings. This allows you a choice of three of the six markings options for each wing type. I guess you could do two clipped wing planes with a bit of surgery. Instruction are basically a single sheet providing Gunze paint references.
 Eduard
provides a nice variety of markings options on this one with five of the six
options in the standard European WWII camouflage scheme. I have to say that the
colors on the painting diagram are so close to each other for the upper surface
as to make them nearly indistinguishable. Not a zing at Eduard as others do this
as well, but it would really be more useful to make each camo color distinct,
even if the shades shown are not correct. Heck, I'd be happy with greyscale if
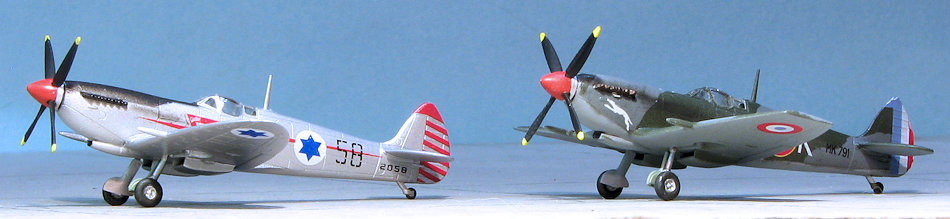
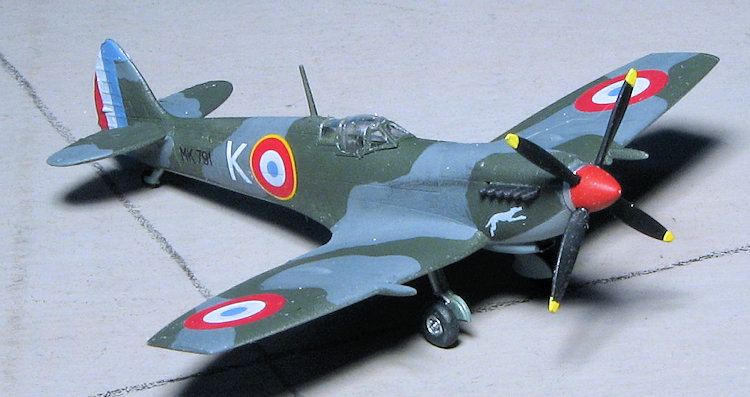
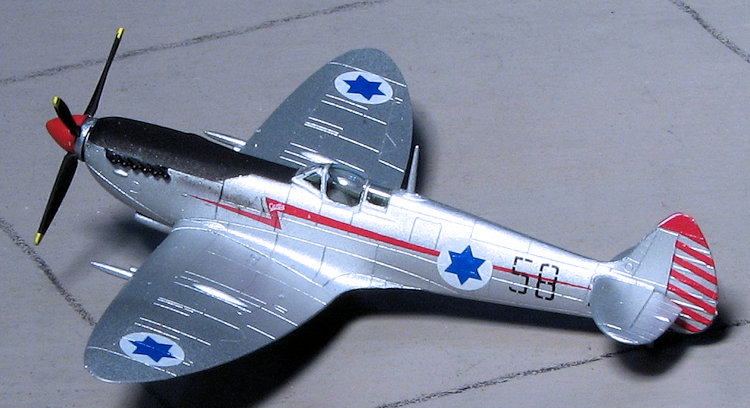
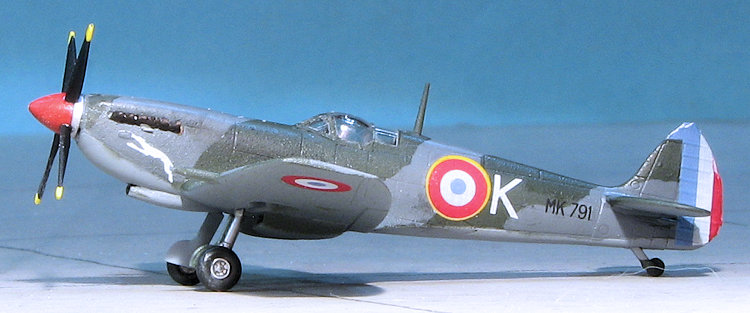
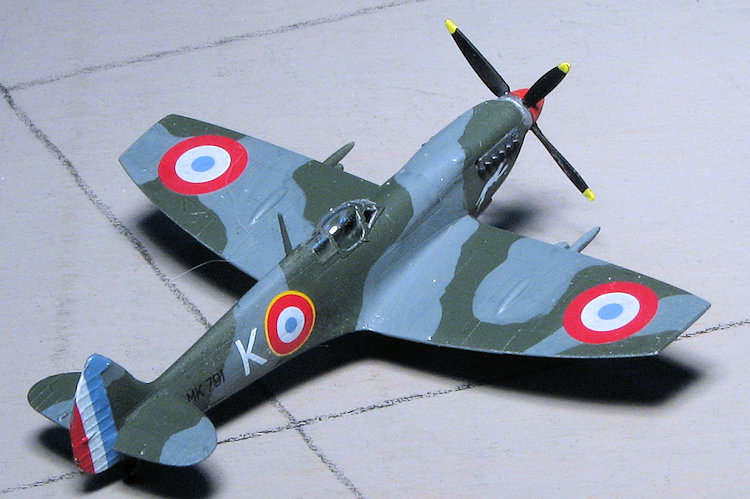
it would help. There are two British, one Czech, one French, one Norwegian, and
a lone high speed silver painted Israeli plane in the mix. Some of these planes
have yellow wing leading edges and sky fuselage bands which the modeler will
have to paint. The decal sheet is very nicely printed and offers all your
insignia and such. Many of the insignia are in sections to help with dealing
with registration issues. The instruction booklet itself is in full color since
85% of it deals with painting and markings!
Eduard
provides a nice variety of markings options on this one with five of the six
options in the standard European WWII camouflage scheme. I have to say that the
colors on the painting diagram are so close to each other for the upper surface
as to make them nearly indistinguishable. Not a zing at Eduard as others do this
as well, but it would really be more useful to make each camo color distinct,
even if the shades shown are not correct. Heck, I'd be happy with greyscale if
it would help. There are two British, one Czech, one French, one Norwegian, and
a lone high speed silver painted Israeli plane in the mix. Some of these planes
have yellow wing leading edges and sky fuselage bands which the modeler will
have to paint. The decal sheet is very nicely printed and offers all your
insignia and such. Many of the insignia are in sections to help with dealing
with registration issues. The instruction booklet itself is in full color since
85% of it deals with painting and markings!
| CONSTRUCTION |
 together (step 1), that I needed to
thin the inside of the right fuselage's upper fin or it would not fit flush.
There is also a rather prominent lip on the lower left fuselage that would
best be removed to get a good fit.
together (step 1), that I needed to
thin the inside of the right fuselage's upper fin or it would not fit flush.
There is also a rather prominent lip on the lower left fuselage that would
best be removed to get a good fit. | COLORS & MARKINGS |
 ern so used a nice brush to paint
on the ocean grey. I used Agama acrylics for the upper grey and it went on
beautifully. The Israeli plane had the anti-glare panel area masked and
sprayed with black. For both planes the prop spinner is red and backing
plate aluminum. Aluminum was used for the landing gear.
ern so used a nice brush to paint
on the ocean grey. I used Agama acrylics for the upper grey and it went on
beautifully. The Israeli plane had the anti-glare panel area masked and
sprayed with black. For both planes the prop spinner is red and backing
plate aluminum. Aluminum was used for the landing gear. | CONCLUSIONS |
I was looking for a kit that I could finish in a relatively short time as my
other projects were taking longer than expected. While these were not, for me,
week end builds, they were not difficult and did not offer
February 2016 Copyright ModelingMadness.com Thanks to your editor
for the preview kit. If you would like your product reviewed fairly and fairly quickly, please
contact
the editor or see other details in the
Note to
Contributors.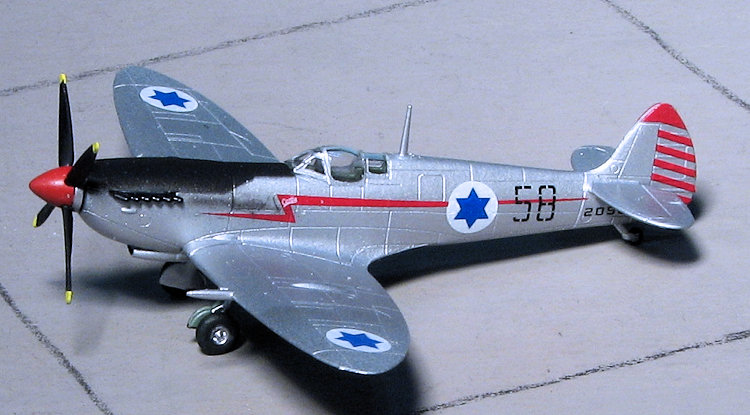 much in the way of
issues. One thing for sure, these kits are a lot nicer than their earlier Bf-109F. I was less than happy about having to replace the broken blade and radio
mast, but having these separate would have been a bit much. The canopy masks are
a must-have so it was nice to have them included, even if Eduard didn't tell you
how to attach them. I also appreciated the multiple markings options as it would
encourage some to buy multiples of the kit to do them all. While the small and
somewhat fragile bits are not for youngsters or beginners (the overall models
are about 3 inches), most will find these
a nice deviation from the usual aftermarket-crammed build.
much in the way of
issues. One thing for sure, these kits are a lot nicer than their earlier Bf-109F. I was less than happy about having to replace the broken blade and radio
mast, but having these separate would have been a bit much. The canopy masks are
a must-have so it was nice to have them included, even if Eduard didn't tell you
how to attach them. I also appreciated the multiple markings options as it would
encourage some to buy multiples of the kit to do them all. While the small and
somewhat fragile bits are not for youngsters or beginners (the overall models
are about 3 inches), most will find these
a nice deviation from the usual aftermarket-crammed build.