| KIT #: | 09059 |
| PRICE: | 2400 yen when new |
| DECALS: | Two options |
| REVIEWER: | Scott Van Aken |
| NOTES: | 1998 boxing |
| HISTORY |
The Hawker Typhoon (Tiffy in RAF slang), was a British single-seat fighter-bomber, produced by Hawker Aircraft. It was intended to be a medium–high altitude interceptor, as a replacement for the Hawker Hurricane but several design problems were encountered and it never completely satisfied this requirement.
The Typhoon was originally designed to mount
twelve .303 inch (7.7 mm) Browning machine guns and be powered by the latest
2000 hp engines. Its service introduction in mid-1941 was plagued with problems
and for s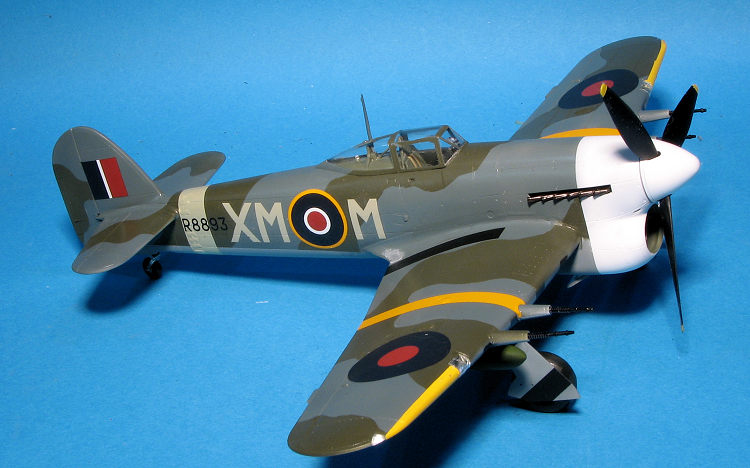 everal months the aircraft faced a doubtful future.
When the Luftwaffe
brought the formidable Focke-Wulf Fw 190 into service in 1941, the Typhoon was
the only RAF fighter capable of catching it at low altitudes; as a result it
secured a new role as a low-altitude interceptor.
everal months the aircraft faced a doubtful future.
When the Luftwaffe
brought the formidable Focke-Wulf Fw 190 into service in 1941, the Typhoon was
the only RAF fighter capable of catching it at low altitudes; as a result it
secured a new role as a low-altitude interceptor.
Through the support of pilots such as Roland Beamont it became established in roles such as night-time intruder and long-range fighter. From late 1942 the Typhoon was equipped with bombs and later RP-3 ground attack rockets were added to its armoury. With those weapons and its four 20mm Hispano cannon, the Typhoon became one of the Second World War's most successful ground-attack aircraft.
A major change in the airframe started with November 1943 production and aircraft serial JR333 when the 'car door' canopy was replaced with a clear vision bubble canopy. Many older variants still in service were retrofit but the upgrade required considerable modification to the airframe and the process was very slow with many aircraft assigned to 2 TAF still operating with the old canopy. Other upgrades include rocket rails, first equipping squadrons in October 1943, a four bladed prop, and larger tailplanes being installed from early 1944.
| THE KIT |
This boxing of the car door Typhoon IB comes from 1998 and I believe it is the basic boxing of this variant. The cockpit is nicely done with interior framework helping to make up the cockpit set. You get decals for the instruments if you don't wish to paint what is molded in place. Not surprisingly, there is a large insert for the upper fuselage to handle the differences between the car door and bubble canopy variations.
 Wings are a single lower section with
upper halves. Holes in the lower wing need to be opened for the bomb racks,
this kit not providing the rocket rails used later in the plane's career. I
would like to think that this boxing also has the shorter tail planes as it
does have the rear fuselage reinforcements. Gear wells are molded into the
lower wings and the landing gear are nicely detailed. with actuators
for the inner doors provided as well. Below the radiator bath is a separate
exhaust door that can be posed open if you so wish.
Wings are a single lower section with
upper halves. Holes in the lower wing need to be opened for the bomb racks,
this kit not providing the rocket rails used later in the plane's career. I
would like to think that this boxing also has the shorter tail planes as it
does have the rear fuselage reinforcements. Gear wells are molded into the
lower wings and the landing gear are nicely detailed. with actuators
for the inner doors provided as well. Below the radiator bath is a separate
exhaust door that can be posed open if you so wish.
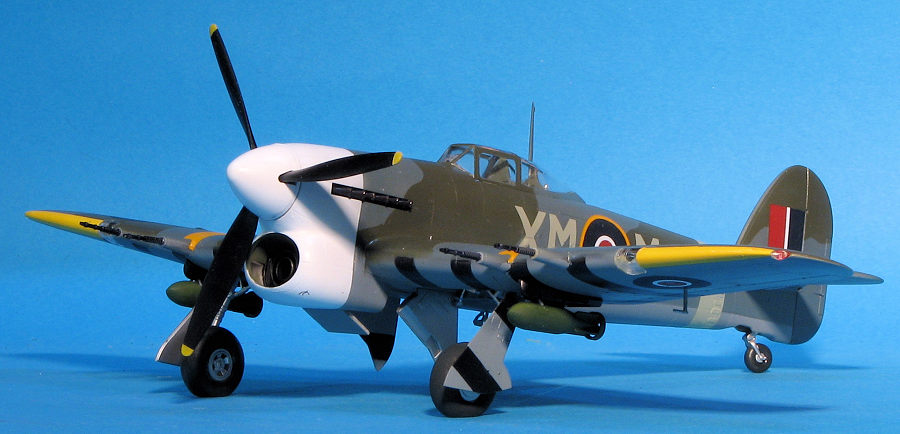
Wheels are flat spotted and you get shackles to go along with the bombs. The gun barrels are separate items. You get two separate canopies, one with a cut out if you wish to have the separate door open. For the closed position, a fully enclosed canopy and different door are provided. You also get both shrouded and unshrouded exhaust. The prop in this boxing is the three bladed version.
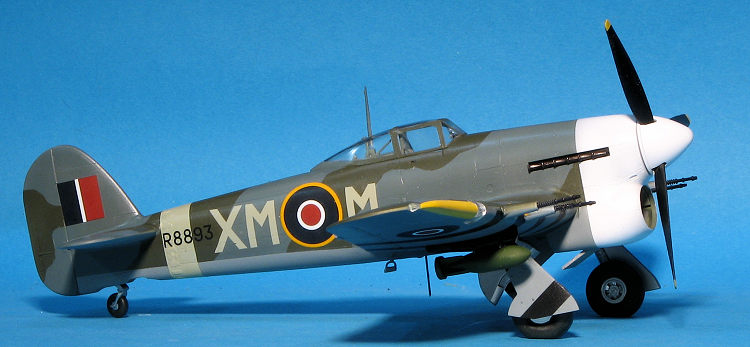
Markings are provided for two planes. Both have the black and white stripes on the lower fuselage that were typical of this aircraft during this time. Hasegawa provides the black stripes and leaves you to paint the white area. THe box art plane is from 175 Squadron, while the second option, TP*R is with 198 Squadron. Both are painted dark green and ocean grey over medium sea grey. Decals are nicely printed and as long as you use hot water, should work perfectly.
| CONSTRUCTION |
 As often happens, this is a kit I was not planning to build,
but it just sort of happened. It was a kit that did not sell at a recent show,
so I thought I'd go ahead and give it a go. The last 1/48 Typhoon I built was a
later version that was produced by Monogram. I slightly backdated that one with
a three blade prop to match the decals I had planned on using. In honesty, the
Monogram kit is still a very nice one and if building a later Typhoon, I'd have
no qualms at all about recommending it, raised panel lines and all.
As often happens, this is a kit I was not planning to build,
but it just sort of happened. It was a kit that did not sell at a recent show,
so I thought I'd go ahead and give it a go. The last 1/48 Typhoon I built was a
later version that was produced by Monogram. I slightly backdated that one with
a three blade prop to match the decals I had planned on using. In honesty, the
Monogram kit is still a very nice one and if building a later Typhoon, I'd have
no qualms at all about recommending it, raised panel lines and all.
Since Hasegawa has released this in a number of sub-variants, it was not surprising that there were a lot of subassemblies and inserts. I began this one by opening the holes in the lower wing for the bomb racks and then started on subassemblies. This consisted of the tail planes, wheels, bombs and such.
I then began construction of the cockpit.
Everything that was to be interior green was glued together and then
painted. I used a set of Eduard belts to the seat as, though the canopy
would be closed, this would be very visible. The rest of it; not so muc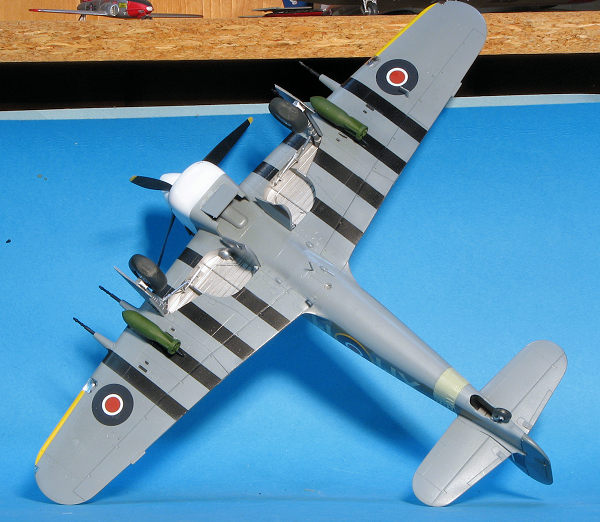 h.
The radiator assembly was put together and it, along with the cockpit were
trapped in the fuselage halves. I must say that getting the cockpit in there
just right was a bit of work as was installing the instrument panel into the
cockpit. The two small side consoles were especially tricky as there is no
good guide for attaching these. I looked at a lot of photos and eventually
attached them to the instrument panel and one of the angled braces on the
cockpit sides.
h.
The radiator assembly was put together and it, along with the cockpit were
trapped in the fuselage halves. I must say that getting the cockpit in there
just right was a bit of work as was installing the instrument panel into the
cockpit. The two small side consoles were especially tricky as there is no
good guide for attaching these. I looked at a lot of photos and eventually
attached them to the instrument panel and one of the angled braces on the
cockpit sides.
For me, this was not a filler free kit. The installation of the inserts for the canopy (one on the left and three on the right) did not go smoothly on the right where getting all three bits properly installed took some smushing around. I glued the wings together which proved to be a mistake as I ended up with a rather large step on the left fuselage/wing join. There was also a gap of 1-2mm on both sides. Next time (yes, the famous 'next time'), I'll attach the upper wings first.
With all that done, the tailplanes were slotted into place some detail painting done to the interior, the canopy masked and attached. I then stuffed the wheel wells and intake with Silly Putty. Atop the putty in the gear wells, I put the doors. It was then ready for some paint.
| COLORS & MARKINGS |
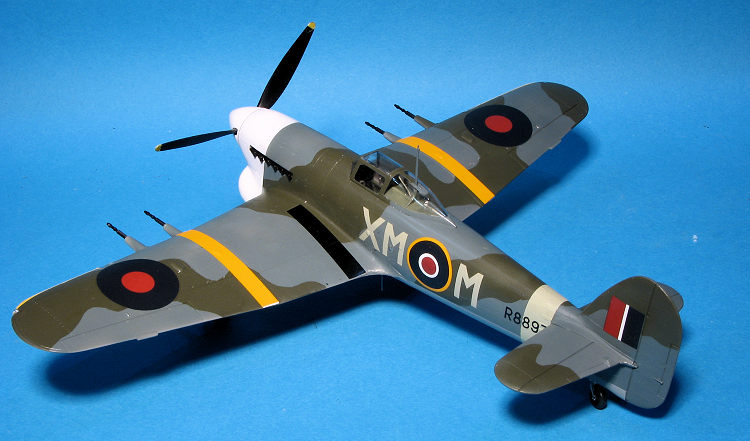
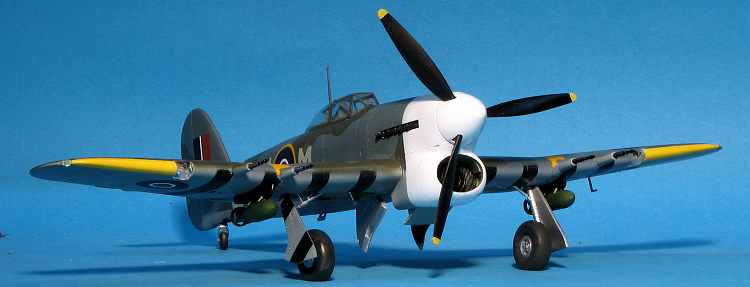 Painting began with the white nose and spinner. This was also put on the
wing leading edges, followed by yellow. The instructions show the yellow
leading edge markings going clear from the tip to the outer gun barrel, but
photos of the real deal showed that on the car door plane, these stopped at
the landing lights. I decided to use the decal in the kit for the fuselage
band. After painting the two greys, I painted the lower wings black and used
Tamiya 6mm tape to form the black stripes. The lower wing was then repainted
with the medium sea grey. The demarcation lines between the colors was
extremely tight so masking was the way to go, even in this scale. It was a
case of 3 hours of careful masking followed by a few minutes of painting and
a goodly amount of time removing the masking.
Painting began with the white nose and spinner. This was also put on the
wing leading edges, followed by yellow. The instructions show the yellow
leading edge markings going clear from the tip to the outer gun barrel, but
photos of the real deal showed that on the car door plane, these stopped at
the landing lights. I decided to use the decal in the kit for the fuselage
band. After painting the two greys, I painted the lower wings black and used
Tamiya 6mm tape to form the black stripes. The lower wing was then repainted
with the medium sea grey. The demarcation lines between the colors was
extremely tight so masking was the way to go, even in this scale. It was a
case of 3 hours of careful masking followed by a few minutes of painting and
a goodly amount of time removing the masking. 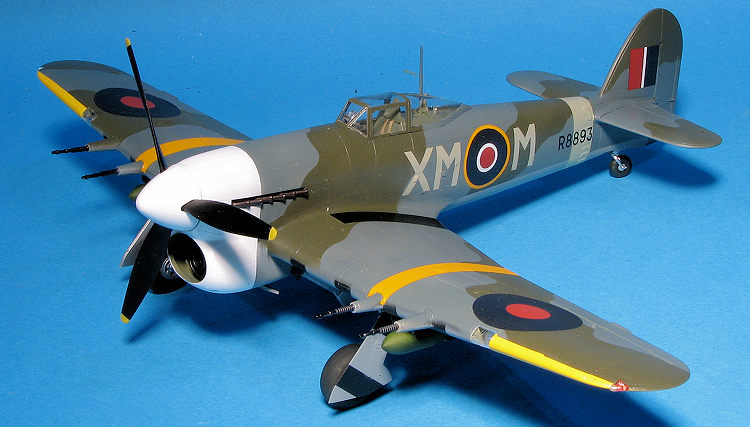 w minutes to release from the
backing, but worked without any issues. I also peeled off the wing walk
areas. The rest of the markings from the Aeromaster sheet went on with mixed
results. All stuck, but some wrinkled a bit and refused to straighten out.
One thing I noticed is that I need to look for a more orange-yellow shade
than Chrome Yellow for British wing ID markings.
w minutes to release from the
backing, but worked without any issues. I also peeled off the wing walk
areas. The rest of the markings from the Aeromaster sheet went on with mixed
results. All stuck, but some wrinkled a bit and refused to straighten out.
One thing I noticed is that I need to look for a more orange-yellow shade
than Chrome Yellow for British wing ID markings.| CONCLUSIONS |
 I have to
admit that the Typhoon is pretty low on my interest scale. Just nothing really
remarkable about them, however, finding a paint scheme a bit different than the
norm did inspire me to build this one. It took quite a bit longer than I'd have
thought, but much of that was the issue with the wing/fuselage fit and making
sure I didn't screw up the fiddly bits. I have another in the stash that I may
well build in the near future as the decal sheet has other fairly interesting
schemes.
I have to
admit that the Typhoon is pretty low on my interest scale. Just nothing really
remarkable about them, however, finding a paint scheme a bit different than the
norm did inspire me to build this one. It took quite a bit longer than I'd have
thought, but much of that was the issue with the wing/fuselage fit and making
sure I didn't screw up the fiddly bits. I have another in the stash that I may
well build in the near future as the decal sheet has other fairly interesting
schemes.
| REFERENCES |
https://en.wikipedia.org/wiki/Hawker_Typhoon
6 October 2017
Copyright ModelingMadness.com. All rights reserved.
If you would like your product reviewed fairly and fairly quickly, please
contact
the editor or see other details in the
Note to
Contributors.
Back to the Main Page
Back to the Review
Index Page
Back to the Previews Index Page