| KIT #: | 09052 (Jt52) |
| PRICE: | 2200 yen SRP |
| DECALS: | Two options |
| REVIEWER: | Scott Van Aken |
| NOTES: |
1998 limited edition boxing |
| HISTORY |
 single Browning machine gun in each
wing loaded with tracers for aiming purposes. The first aircraft flew on 18
September 1941 and deliveries started in 1942. Serial built aircraft had
additional armour for the pilot, radiator and engine, and were armed with a
Rolls-Royce gun with 12 rounds, later changed to the 40 mm (1.57 in) Vickers S
gun with 15 rounds. The outer wing attachments were strengthened so that 4G
could be pulled at a weight of 8,540 lb (3,874 kg). The weight of guns and
armour protection marginally impacted the aircraft's performance. These
Hurricanes were nicknamed "Flying Can Openers", perhaps a play on the No. 6
Squadron's logo which flew the Hurricane starting in 1941.
single Browning machine gun in each
wing loaded with tracers for aiming purposes. The first aircraft flew on 18
September 1941 and deliveries started in 1942. Serial built aircraft had
additional armour for the pilot, radiator and engine, and were armed with a
Rolls-Royce gun with 12 rounds, later changed to the 40 mm (1.57 in) Vickers S
gun with 15 rounds. The outer wing attachments were strengthened so that 4G
could be pulled at a weight of 8,540 lb (3,874 kg). The weight of guns and
armour protection marginally impacted the aircraft's performance. These
Hurricanes were nicknamed "Flying Can Openers", perhaps a play on the No. 6
Squadron's logo which flew the Hurricane starting in 1941.| THE KIT |
 The cockpit is actually quite well done with side frame work and open floor,
seat, armor plating, control stick, rudder pedals and instrument panel. Various
controls are molded into the framework and on the inside of the fuselage halves.
The cockpit is actually quite well done with side frame work and open floor,
seat, armor plating, control stick, rudder pedals and instrument panel. Various
controls are molded into the framework and on the inside of the fuselage halves.
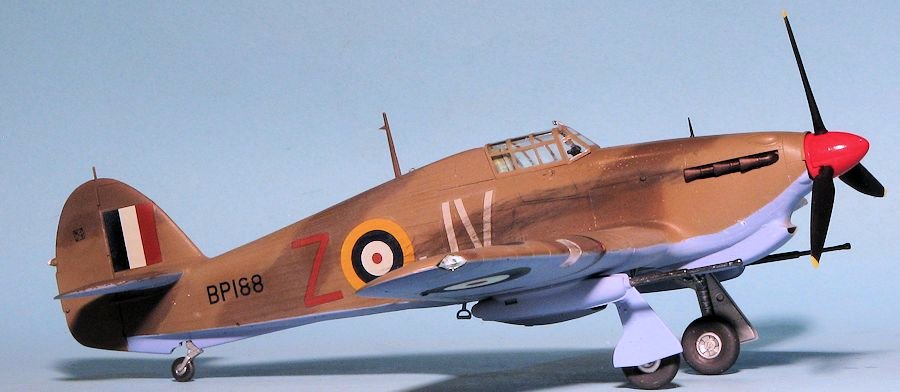
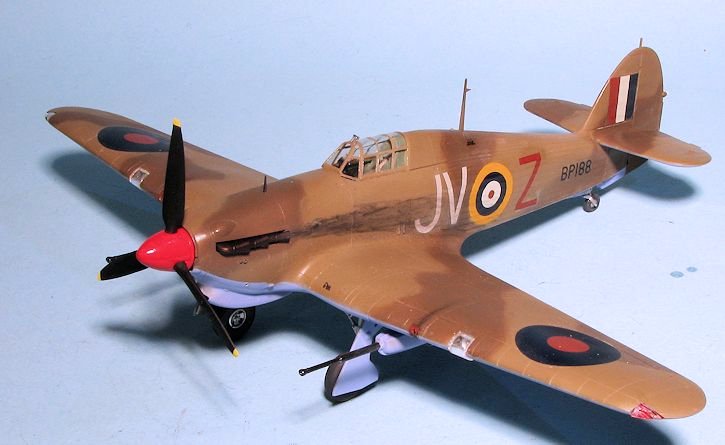
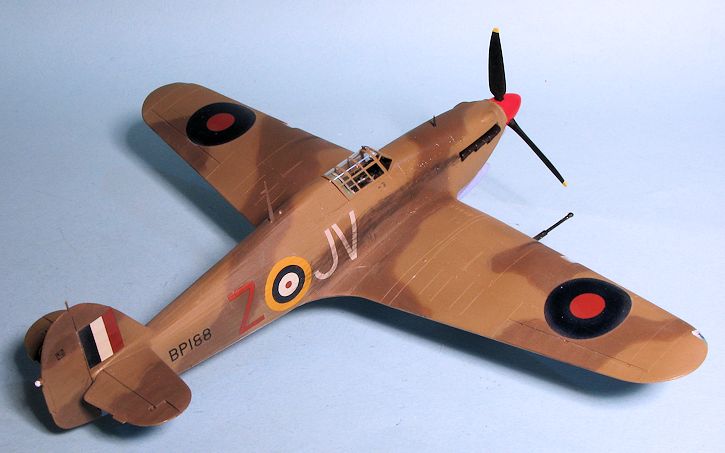
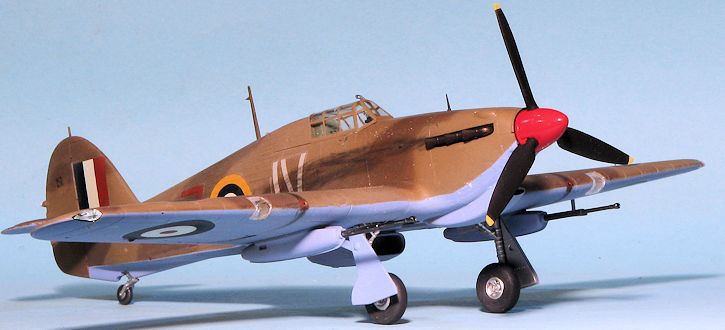
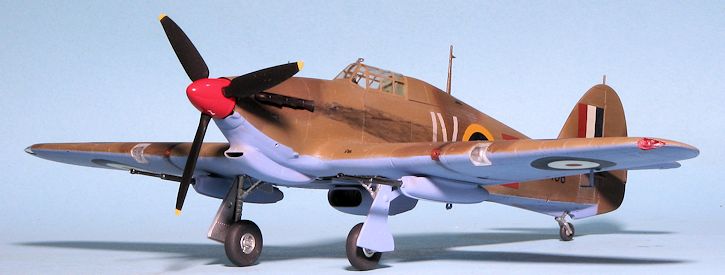
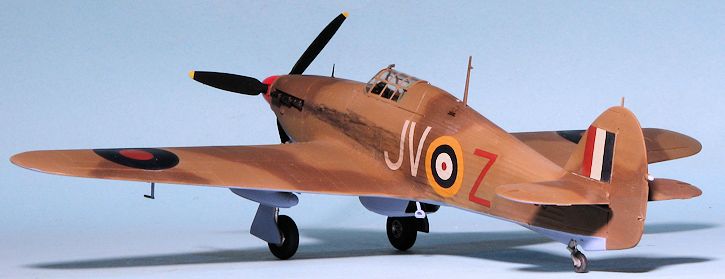 Kit markings are for two planes, both with 6 Squadron RAF. One is the box art
plane while the other has later insignia and just an aircraft number on the
fuselage. Both are in the desert scheme of dark earth, middlestone and azure
blue. The azure blue shows as needing mixed as apparently Gunze does not carry
that shade. The decals are nicely printed and include an instrument and side
panel decal as well as the wing walk areas.
Kit markings are for two planes, both with 6 Squadron RAF. One is the box art
plane while the other has later insignia and just an aircraft number on the
fuselage. Both are in the desert scheme of dark earth, middlestone and azure
blue. The azure blue shows as needing mixed as apparently Gunze does not carry
that shade. The decals are nicely printed and include an instrument and side
panel decal as well as the wing walk areas. | CONSTRUCTION |
First thing I did was to clean up all the interior components and the landing gear bits and paint them aluminum. Then I started assembling the wings. There are two inserts that fit into the leading edge and they are a tight fit. They also don't fit perfectly so you'll need to either apply filler or sand things down a bit. It was while doing this that I assembled the gun pods and realized I hadn't opened the holes in the wing for them. No way to fix that now so I cut off the pins and set these aside for later installation.
 Back at the interior, I painted the inside of the cockpit
British interior green then added some of the various bits to the inside and
painted some of the details black as stated in the instructions. With the
framework part already painted, I began to assemble the interior bits. I had
painted the armor plating section interior green as shown in several
restorations. After assembling and painting the seat, I installed Eduard's
Sutton harness. Once that was all together, the control stick, rudder pedals and
instrument panel bits were glued in. I had to bend down the supports to the
instrument panel until they would fit into the holes in the floor. Once it was
assembled, I glued into one half of the fuselage and taped on the other half
until the glue dried. Then the other fuselage half was attached and I attended
to the seams.
Back at the interior, I painted the inside of the cockpit
British interior green then added some of the various bits to the inside and
painted some of the details black as stated in the instructions. With the
framework part already painted, I began to assemble the interior bits. I had
painted the armor plating section interior green as shown in several
restorations. After assembling and painting the seat, I installed Eduard's
Sutton harness. Once that was all together, the control stick, rudder pedals and
instrument panel bits were glued in. I had to bend down the supports to the
instrument panel until they would fit into the holes in the floor. Once it was
assembled, I glued into one half of the fuselage and taped on the other half
until the glue dried. Then the other fuselage half was attached and I attended
to the seams.
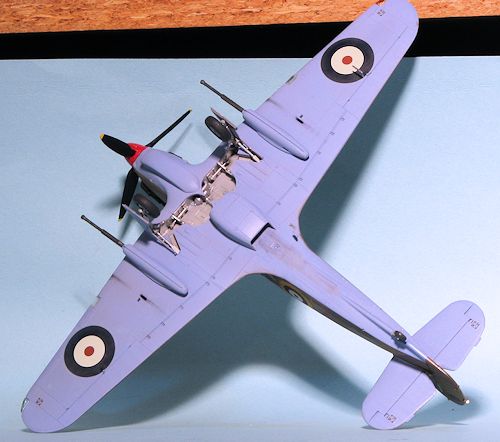
The wing was the next part to glue into place. This actually fit rather well aside from the lower wing/fuselage join, which has a rather large gap. Fixing that required sanding away a lot of the fabric effect, but much of that was replaced using a round file. The tailplanes were attached and then I glued on the canopy after masking it. The radiator bits were painted aluminum and given a wash once they were attached. I glued the housing parts then painted the insides aluminum and glued those in place. There are a pair of rear coolant door actuating rods that are a bit tricky to get into place. The sand filter was attached next and then I glued on the gun pods. This seemed like a good time to apply some paint so I stuffed the wheel wells with tissue and headed to the paint shop.
| COLORS & MARKINGS |
 For this kit I went the acrylic route as I didn't have any enamels in the
require shades. The underside Azure Blue was painted with Pollyscale and
once dry, was masked off. For the upper colors I used Agama Middlestone and
Dark Earth. First the Middlestone and I have to say it looked rather dark.
Next I hand sprayed the Dark Earth pattern. This was rather frustrating as I
was constantly cleaning the tip, the main reason I prefer enamels. I'm not
sure if at this stage of the war masks would have been used or even if the
Middlestone would not have been applied locally. Anyway, it looks nice
enough and so there it is. One of the positive features of acrylics is that
any brush touch up later will generally not be noticeable as a different
shade, a situation that often happens when using enamels.
For this kit I went the acrylic route as I didn't have any enamels in the
require shades. The underside Azure Blue was painted with Pollyscale and
once dry, was masked off. For the upper colors I used Agama Middlestone and
Dark Earth. First the Middlestone and I have to say it looked rather dark.
Next I hand sprayed the Dark Earth pattern. This was rather frustrating as I
was constantly cleaning the tip, the main reason I prefer enamels. I'm not
sure if at this stage of the war masks would have been used or even if the
Middlestone would not have been applied locally. Anyway, it looks nice
enough and so there it is. One of the positive features of acrylics is that
any brush touch up later will generally not be noticeable as a different
shade, a situation that often happens when using enamels. 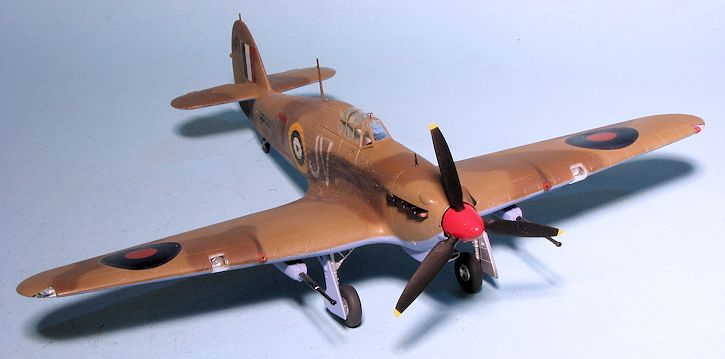 Aftermarket sheets for the IID are few and far between and this left the kit
markings. I chose the box art scheme and applied the markings. I had issues
with the decals silvering, despite applying them to a gloss surface and
pressing them in place.
Aftermarket sheets for the IID are few and far between and this left the kit
markings. I chose the box art scheme and applied the markings. I had issues
with the decals silvering, despite applying them to a gloss surface and
pressing them in place. | CONCLUSIONS |
 I thought that with all the current
mania over the new Airfix Hurricane I
release, it might be worthwhile to look at the other major offering. To be
sure, the Airfix kit has the benefit of 20 years of advancements in the
hobby, but really, it is not a quantum leap, just one of providing a bit
more detail. I found the Hasegawa kit to be a fairly easy build as things go
and it certainly adds a variant that was not already in the collection. I
really do not have the penchant for WWII RAF types as others, so I find that
this kit meets my requirements as much as any other. There is nothing
'horribly wrong' with it according to the boffins so is still worth the time
put into building it. If you are one who cannot stomach having something
'old and outdated' in your stash, rather than trash your Hasegawa Hurricanes
in favor of the Airfix offering, send them to me! I'll give them a nice
home.
I thought that with all the current
mania over the new Airfix Hurricane I
release, it might be worthwhile to look at the other major offering. To be
sure, the Airfix kit has the benefit of 20 years of advancements in the
hobby, but really, it is not a quantum leap, just one of providing a bit
more detail. I found the Hasegawa kit to be a fairly easy build as things go
and it certainly adds a variant that was not already in the collection. I
really do not have the penchant for WWII RAF types as others, so I find that
this kit meets my requirements as much as any other. There is nothing
'horribly wrong' with it according to the boffins so is still worth the time
put into building it. If you are one who cannot stomach having something
'old and outdated' in your stash, rather than trash your Hasegawa Hurricanes
in favor of the Airfix offering, send them to me! I'll give them a nice
home. | REFERENCES |
https://en.wikipedia.org/wiki/Hawker_Hurricane
August 2015
If you would like your product reviewed fairly and fairly quickly, please contact the editor or see other details in the Note to Contributors.