| KIT: | Hasegawa 1/72 Mustang III "Malcolm Hood" |
| KIT #: | 51608 |
| PRICE: | $13.98 at the time |
| DECALS: | Three options |
| REVIEWER: | Scott Van Aken |
| NOTES: |
| HISTORY |
 After
the RAF developed the initial Merlin Mustang, an order was placed with North
American for a refined variant that was designated Mustang III. It is basically
the same as a P-51B/C except for having some British installed equipment, like
radios, instruments, harness and a few other things. One of the biggest problems
with the aircraft is that the USAAF kept much of the production of these
aircraft for themselves only allowing a trickle of planes to the RAF until all
USAAF requirements were met.
After
the RAF developed the initial Merlin Mustang, an order was placed with North
American for a refined variant that was designated Mustang III. It is basically
the same as a P-51B/C except for having some British installed equipment, like
radios, instruments, harness and a few other things. One of the biggest problems
with the aircraft is that the USAAF kept much of the production of these
aircraft for themselves only allowing a trickle of planes to the RAF until all
USAAF requirements were met.
The RAF provided these aircraft to the Polish squadrons where they new they'd get the best use and biggest work-out. Though not getting the tons of kills they'd have liked (as most German fighters were used to attack the bomber streams guarded by USAAF Mustangs), they gave excellent service and proved to be good fighter-bombers, though prone to damage from ground fire, thanks to its liquid cooled engine.
| THE KIT |
Molded in Hasegawa's usual light grey plastic, the
parts are well formed with nicely engraved panel lines. It has the distinction
of having the wrong wing for a P-51B/Mustang III. Apparently Hasegawa thought
we'd not notice and used their P-51D wing in with
 the kit. A cost saving measure
to be sure, but not something that most will appreciate. Some have said that the
wing can be sanded down but by doing that, you'll sand into the wheel well.
the kit. A cost saving measure
to be sure, but not something that most will appreciate. Some have said that the
wing can be sanded down but by doing that, you'll sand into the wheel well.
Still, the kit is nicely done and provides several options in terms of under wing ordnance. Basically drop tanks and bombs are given. The cockpit is typical of Hasegawa 1/72 kit and while somewhat complete, is rather Spartan, using decals in place of raised detail for the instrument panel, for instance. As this is the Malcolm Hood boxing, no standard canopy was provided.
Markings are for several Polish squadrons and while I don't remember what units were on the sheet, the decals were nicely printed and provide all the markings needed, including D-day stripes. Sorry that I don't remember more, but it has been about 10 years since I built this one and I can't remember all of the details.
| CONSTRUCTION |
 Again,
I'll be a bit brief on the building of this one as it was so long ago. I do
recall several items of concern. One is that the fit of the wing wasn't bad, but
wasn't great either. The front fuselage/wing join needed filler to overcome a
step. I know that because all the detail is gone from that area! In line with
almost every Mustang kit I've ever built, the forward piece of the air scoop
under the belly needed work. Not only that, but there is a seam in the secondary
exhaust outlet before the main one that every Mustang kit has and it is nigh
near impossible to get to. I'd very much like to see that little bit as a
separate piece.
Again,
I'll be a bit brief on the building of this one as it was so long ago. I do
recall several items of concern. One is that the fit of the wing wasn't bad, but
wasn't great either. The front fuselage/wing join needed filler to overcome a
step. I know that because all the detail is gone from that area! In line with
almost every Mustang kit I've ever built, the forward piece of the air scoop
under the belly needed work. Not only that, but there is a seam in the secondary
exhaust outlet before the main one that every Mustang kit has and it is nigh
near impossible to get to. I'd very much like to see that little bit as a
separate piece.
Masking the canopy was fairly straight-forward, though the Malcolm hood generally causes headaches in one's inability to keep spray from sneaking under a few edges. The landing gear were left off until after painting. I did manage to get the rest of the kit together without any real traumas.
| COLORS & MARKINGS |
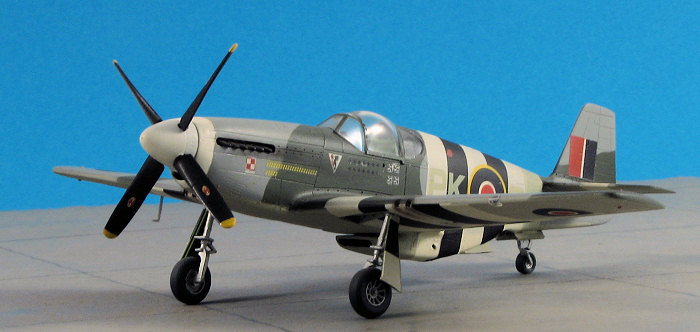
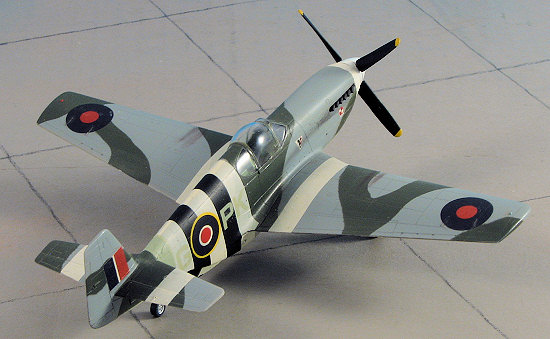
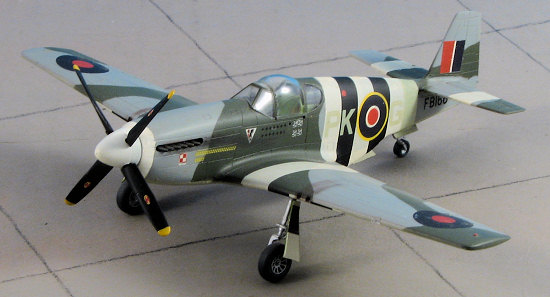 Once I masked things off, I
used Testors Model Master enamels for the paints. Standard RAF colors for the
time which I believe are Dark Green/Ocean Grey on the upper surface with Medium
Sea Grey undersides. I did not paint the yellow wing leading edge ID stripes for
some reason. It could be that I was going to use decals and they didn't work or
perhaps the plane didn't use them. Whatever the reason, they aren't on the
model.
Once I masked things off, I
used Testors Model Master enamels for the paints. Standard RAF colors for the
time which I believe are Dark Green/Ocean Grey on the upper surface with Medium
Sea Grey undersides. I did not paint the yellow wing leading edge ID stripes for
some reason. It could be that I was going to use decals and they didn't work or
perhaps the plane didn't use them. Whatever the reason, they aren't on the
model.
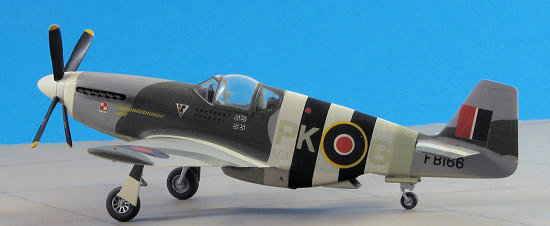
The kit decals were fairly nice and aside from the white being a bit transparent, went on without too much grief, though the area around the lower scoop was a major pain. The Sky fuselage codes may well be too light as they nearly disappear against the invasion stripes.
| FINAL CONSTRUCTION |
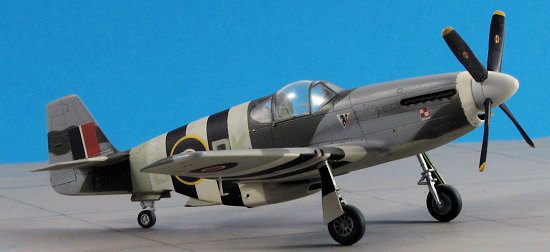
Last bits were attaching the props and putting on the
landing gear. I had the gear attached to the lower fuselage so I could get the
invasion stripes on straight. The fit of the main gear was a bit sloppy and I
probably have the jutting out too far. I also did not
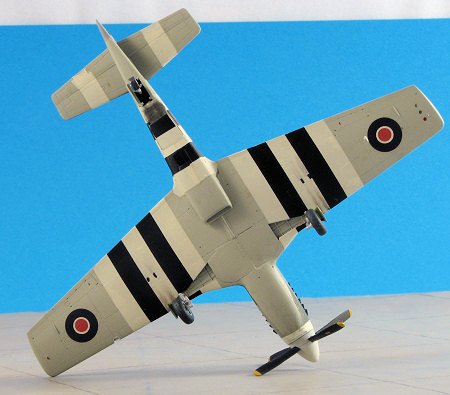 attach the lower wing pylons.
It may well be that I forgot to drill out the holes for them as that would be in
character. I also glued the inner gear doors up as if the plane had just
recently shut down the engine and the hydraulics had not had a chance to bleed
down. A bit of pastel work, the masking was removed from the clear bits
(and the paint creep cleaned up) and the kit was done.
attach the lower wing pylons.
It may well be that I forgot to drill out the holes for them as that would be in
character. I also glued the inner gear doors up as if the plane had just
recently shut down the engine and the hydraulics had not had a chance to bleed
down. A bit of pastel work, the masking was removed from the clear bits
(and the paint creep cleaned up) and the kit was done.
| CONCLUSIONS |
It is a very nice kit that makes into an equally nice model. I've had folks tell me that it is the best 1/72 P-51B on the market and while that may be true, it isn't that much better than the Revell AG one, just different. The D wing is a major gaffe and I'm surprised that Hasegawa has done nothing to correct that. There used to be a replacement wing, but at a list price of about what the kit costs, I don't think it sold that well. Regardless, if you have the opportunity to buy one of these and don't mind the wing situation, go for it.
Late note: It has been pointed out that I put the prop blades on wrong and at too great an angle. Hey, we all make stupid mistakes and that one is mine for this kit!
Reviewed June 2007- built in 1995
#992 in a series
If you would like your product reviewed fairly and quickly by a site that has over 350,000 visitors a month, please contact me or see other details in the Note to Contributors.