1/72 Lloyd 40.08 Triplane
| KIT #: | |
| PRICE: | No price except my sanity |
| DECALS: | Spares bin |
| REVIEWER: | Chris Peachment |
| NOTES: | Scratchbuilt using plastic card and strut/rod. |
| HISTORY |
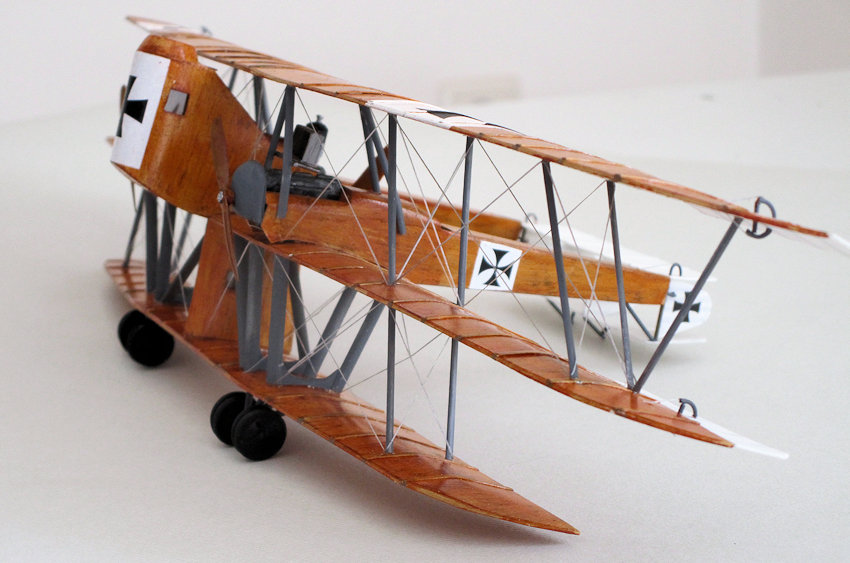
The Lloyd 40.08 Luftkreuzer (Sky Cruiser) was a three engine triplane bomber, which did not get past the prototype stage. In August 1915, the Austro-Hungarian Imperial and Royal Aviation Troops (Luftfahrttruppen) gave Lloyd funding for construction of a heavy bomber which could carry a 400lb bomb-load, with an endurance of 6 hours.
The centre section housed a 300hp Austro-Daimler
V-12, with a large two-bladed pusher propeller. The twin booms were constructed
from modified Lloyd C.II fuselages with 160hp in-line six engines, with two
smaller wooden propellers. Between the middle and lower wings, was a fully
enclosed compartment with windows for the bomb aimer. The forward pulpit between
the middle and upper wings also had windows a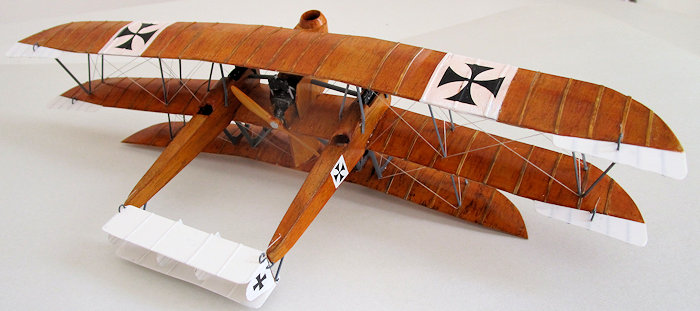 nd enough space for two gunners
with good fields of fire in all directions. The pilot's position was set in the
rear of the centre fuselage and had very poor forward visibility. Defensive
armament consisted of two machine guns in the nose gunners' station and one in
each boom.
nd enough space for two gunners
with good fields of fire in all directions. The pilot's position was set in the
rear of the centre fuselage and had very poor forward visibility. Defensive
armament consisted of two machine guns in the nose gunners' station and one in
each boom.
In October 1916 a first flight was attempted but the aircraft was unable to leave the ground. The bomb load was reduced, and in December additional chassis rails were added to the main undercarriage. Development continued slowly but the basic design flaws would never be solved. Work was halted in March 1917, the Luftkreuzer was placed in storage and in January 1918 it was scrapped.
After finally completing the Caproni Ca 4 triplane bomber, which some readers remarked upon kindly without suggesting that I was in need of mental help, I still had triplane fever raging through my veins. Casting around for a suitable subject, I ran through all the triplanes that I knew of, most of which I had already built. But then fate dropped an old Windsock magazine into my view, and lo, there was the Lloyd 40.08. I had originally bought it because it was a serious contender for the ugliest aircraft of all time. And also for the worst designed. Time however can work wonders on the affections, and after a long friendship, I have come to love the beast, in much the same way that I imagine a mother warthog can love her young.
The Austro Hungarian company of Lloyd already had a series of unusual designs, some of which had even managed to get into the air. Their signature mark was skinning their aircraft in plywood. Although it is hard to believe, this made their aircraft lighter than the rib and linen construction of their compatriots. However, there were complications, and the design feature was not popular. Any battle damage meant that the whole aircraft had to be shipped back to the factory for repair, unlike the usual field repairs of other aircraft which was a patch and glue affair.
 Moisture began to be trapped inside the skin and
resulted in the top layer of plywood peeling off, which is not a sight a pilot
wants to see in the middle of a mission. So by and large Lloyd were a small and
dark cul de sac in the history of aviation, down which few ventured. Then they
thought of this beast, and became a dead end.
Moisture began to be trapped inside the skin and
resulted in the top layer of plywood peeling off, which is not a sight a pilot
wants to see in the middle of a mission. So by and large Lloyd were a small and
dark cul de sac in the history of aviation, down which few ventured. Then they
thought of this beast, and became a dead end.
The idea behind it was for a sky-cruiser which might fly in formation with fighters and lay into the enemy with a large array of machine gunnery. Unquestionably, that pulpit on the nose would have given the gunner an excellent field of fire. However one glance at the thing would tell anyone with the most basic knowledge of aeronautical design that it was a dog.
Sure enough, on its first ground tests the thing proved nose heavy and tipped over head-first into the mud. A longer fuselage might have helped. As might placing the pulpit at the rear, or putting the pilot where he could see anything. As might not having thought of the thing in the first place.
All of which meant I had to have one. As usual with any scratch build I begin with the hardest part. This is in case I cannot complete it, and can thus save time by not bothering with the rest. That nose was thumbing its nose at me, so that is where I plunged in.
| CONSTRUCTION |
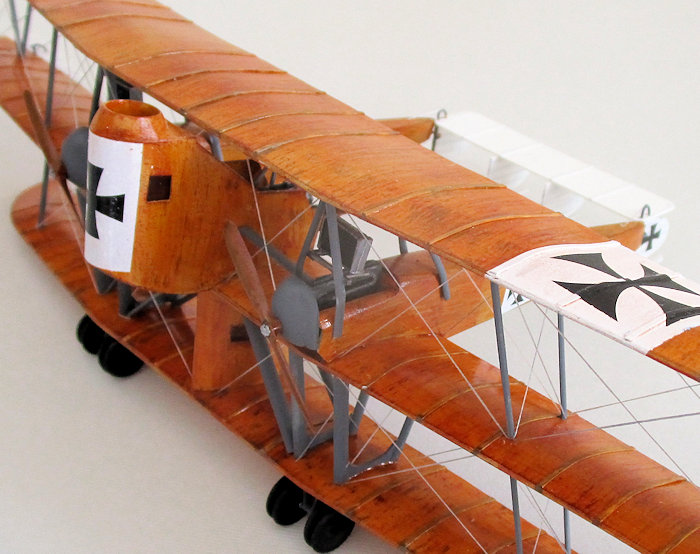
The floor plate was cut out of 20 thou, and then the sides and front were cut from one continuous piece of 10 thou card and wrapped around the floor. It took a couple of goes to get it right. But once that was done I knew I was on my way.
 Before glueing it down however the side windows
should be cut out or else you will succumb to sobs of idiotic frustration. By
such means do we learn. The top part of the superstructure came from an old
machine gunners nest on some forgotten aircraft which had long since gone to the
boneyard.
Before glueing it down however the side windows
should be cut out or else you will succumb to sobs of idiotic frustration. By
such means do we learn. The top part of the superstructure came from an old
machine gunners nest on some forgotten aircraft which had long since gone to the
boneyard.
The one thing that is missing from the plans is any idea of what the cockpit and rear fuselage might look like. The few extant photos are of no use either, so there is a little speculation here on my part. If anyone can tell me any better, please don't write to me, I couldn't bear it.
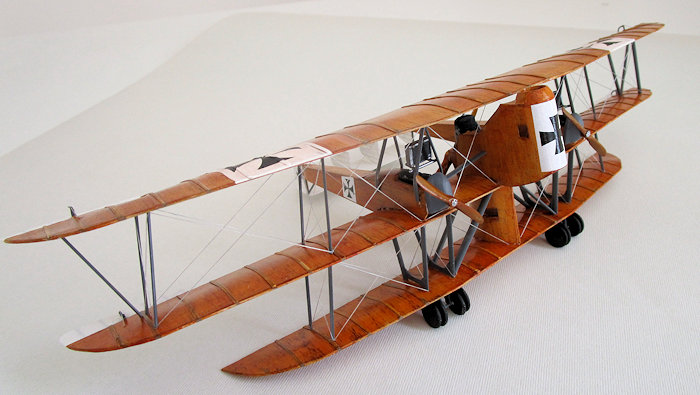
After that the wings were run off in the usual method. A 20 thou under side, a rib placed spanwise at about one third back from the leading edge, and an upper surface from 10 thou card. There is no need to score for ribs for once, as this is all plywood. You will however nearly die of tedium while doing all the panel joints in thin strips of five thou card. The twin booms can be run off in no time with 20 thou card. And now comes the joys of painting wood grain.
| COLORS & MARKINGS |
Wood grain is a little
like a French dressing for salad. Ask 100 different people their favourite
method of doing either, and you will get 100 different answers. One error that I
had been prone to in the past was in p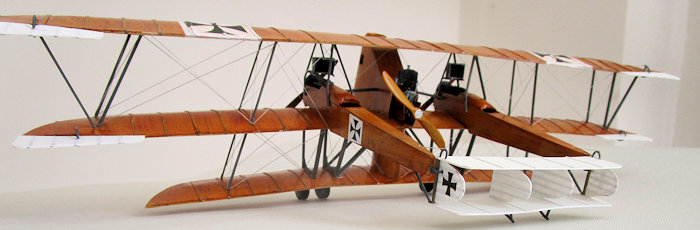 ainting the wood grain in different
directions for different panels, just for a little variation. After examining
photos long and hard, it becomes apparent that the carpenters at Lloyd laid the
grain all in one direction, which in this case was fore and aft, in line with
the airflow.
ainting the wood grain in different
directions for different panels, just for a little variation. After examining
photos long and hard, it becomes apparent that the carpenters at Lloyd laid the
grain all in one direction, which in this case was fore and aft, in line with
the airflow.
So the whole lot got a coat of mid stone from the Lifecolor range, and then swiped with a dry brush of dark earth. I did rather more of the grain than usual because it is clear from the pictures that the wood on this beast was darker than most. After that a coat of Tamiya Clear Orange finished it off.
Please use whatever method you favour. Some people like to use artists' oil paints for the grain, and are happy to wait for several weeks for it to dry. I believe there are even wood decals for the lazy or the timid. One other thing which I noticed in the photos is that the grain is not always even, and there are plenty of knot holes and swirls. No doubt this is good news for the super-detailer. My failing eyesight and elderly fingers mean that I am not one of them.
| FINAL CONSTRUCTION |
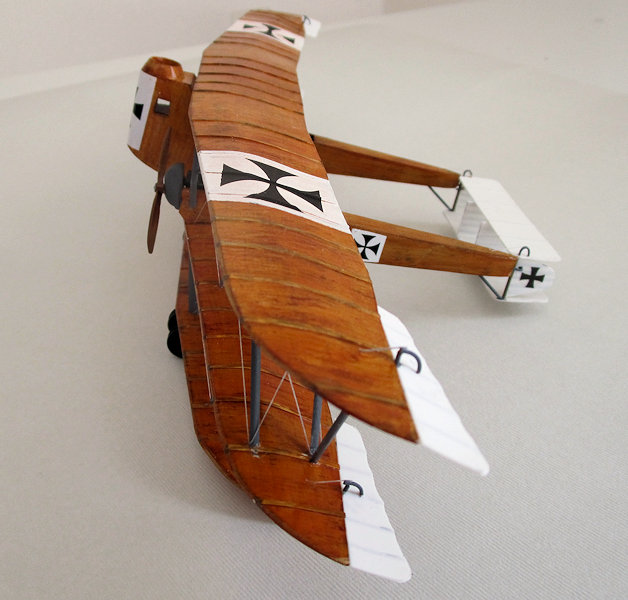
The eagle-eyed among you will have spotted that there is a squashed dustbin between the middle and lower wings. This is for the bomb aimer. Although Lloyd did not see fit to allow him any forward view and only a sideways view limited to a couple of portholes. I couldn't find any mention of a downward view, but since he was the bomb aimer, he must have had a hatch though which to drop his bombs. A rectangular hole was duly cut and filled in with a hinged door.
The bottom wing was fix to the middle wing, using the handy bomb aimer's compartment. The struts were then measured using a pair of dividers up close, and cut to length. Note that the inboard set are quite wide, and have fairings top and bottom. Once that is all set, the central fuselage can be fixed to the middle wing, along with the two booms. Some judicious fettling is needed here.
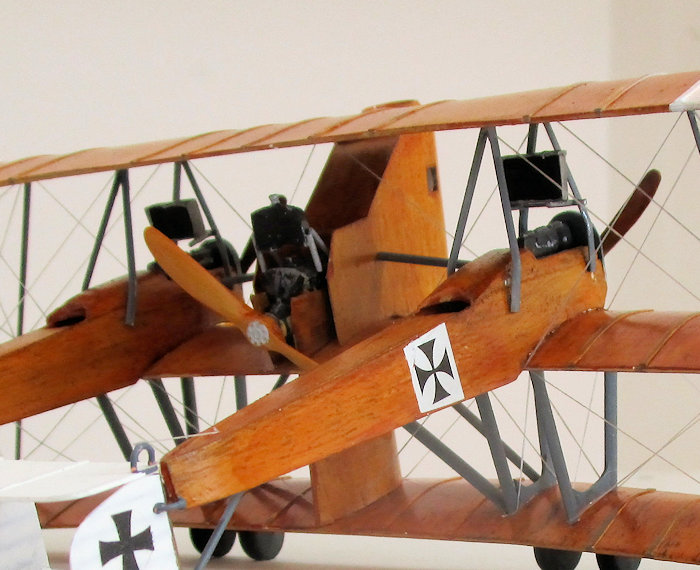 I used an old V-12 in the
centre fuselage and two in-line sixes in the booms, both engines coming from the
Big Bag of Dead Engines. Having to scratch build engines is my least favourite
activity and can take up as much time as the rest of the aircraft. Fortunately
all my Big Bags of Dead Things go back at least 40 years. Radiator mesh came came from old radiators, with
some new skinning around them of 20 thou card. These are mounted on thin struts
above the engines and some tubing connects the two.
I used an old V-12 in the
centre fuselage and two in-line sixes in the booms, both engines coming from the
Big Bag of Dead Engines. Having to scratch build engines is my least favourite
activity and can take up as much time as the rest of the aircraft. Fortunately
all my Big Bags of Dead Things go back at least 40 years. Radiator mesh came came from old radiators, with
some new skinning around them of 20 thou card. These are mounted on thin struts
above the engines and some tubing connects the two.
The nose pieces of each boom were carved from solid plastic, which took a while and small amounts of flesh from my fingertips. The cockpit has a seat and a stick and some pedals, though if they are accurate is anybody's guess. They couldn't even be seen by an expert with some fibre optic cable and a remote control micro-camera. Something which I am sure they will get around to using some time soon at exhibitions. Though not on my aircraft. The wheels are all from the Bag of Dead Wheels.
The most ticklish part of the construction was the tailplane, not because of its shape, which is easy enough, but because of the fact that it sits on the ends of the booms with only the tiniest of joints. It needs very careful measuring to make sure it just squeezes between the booms. Then some patient glueing with styrene cement to ensure a welded joint, then strengthened with superglue, because the rear of the aircraft rest on it.
Finally, we come to the control surfaces and the second reason that I wanted to make the aircraft. It was those semi-circular control horns which won me over when I first looked at it. I could not imagine how I was going to make them, and I like something to brood on while beavering away at boring parts.
 Eventually I lighted on using thin solder, bent
around a paint brush handle and inserted into drilled holes in the ailerons and
tail surfaces. The vertical diameter rods were then made from plastic rid and
inserted and super-glued in place.
Eventually I lighted on using thin solder, bent
around a paint brush handle and inserted into drilled holes in the ailerons and
tail surfaces. The vertical diameter rods were then made from plastic rid and
inserted and super-glued in place.
After all that, rigging was a milk run. As usual, elastic thread, coloured with a silver gel pan, glued in place using spots of super-glue gel, applied with a sharpened toothpick. Decals came from the spares box.
Once it was all almost finished I stepped back to admire my handwork, and realised that what I had on my hands was a highly polished piece of antique furniture, rather than an aircraft. So I ground up some pastel chalks of varying darkness and rubbed them in, just to take the edge off it all. Especially round the white panels of the markings which were shining in the sun like handkerchiefs on a lawn. I don't usually weather my aircraft much, but this time it was necessary.
Incidentally, I have noticed that weathering on a model seems to vary from country to country. American modellers don't seem to do much weathering. But I have seen models in the UK which look like they have just been through a blizzard in the Roaring Forties. One admires the technique all right, but one can't escape the feeling that you are looking an example of expert weathering rather than an aircraft.
Finally, the propellers. One big one for the pusher, and two smaller ones for the pullers, all in dark wood, all varnished in clear orange, all set at ten to four.
| CONCLUSIONS |
An unnecessary aircraft if ever there was one. But at least they built it and tried it out, before it was found wanting. Thus leaving us with an excellent contender for Ugliest and Most Useless Aircraft of All Time stakes. It isn't quite as ugly as the Avro Bison, but I would say it is in the top ten, and I am growing more and more fond of it as the days pass.
| REFERENCES |
http://www.dieselpunks.org/profiles/blogs/knights-of-the-air-made-in
http://www.wwiaviation.com/popup/Lloyd-40-08.html
http://www.airwar.ru/enc/bww1/lloyd4008.html
http://combatace.com/topic/63087-the-museum-of-diseased-imaginings/
February 2016
Copyright ModelingMadness.com
If you would like your product reviewed fairly and fairly quickly, please contact the editor or see other details in the Note to Contributors.