Pegasus 1/72 Vickers FB5 'Gunbus'
| KIT #: | 3009 |
| PRICE: | About $10 when new |
| DECALS: | One option |
| REVIEWER: | Brian Baker |
| NOTES: | Early short run. Rare kit, very difficult build, but worth it for an experienced modeler. |
| HISTORY |
Before the outbreak
of World War I, the Vickers firm was already experimenting with an armed
airplane. This was exhibited in the 1913 British Olympia Aero Show, and had a
Vickers gun in the nose. The later FB4 had a drum fed Lewis gun. The production
version, designated FB5, was a two seater powered by a 100 hp. Gnome Monosoupape
rotary engine, again with a machine gun mounted in the nose. Early in 1914,
Vickers began production of 50 FB5’s, anticipating that war would break out
soon. RFC and RNAS tests were successful, and by July, 1914, FB5’s were ordered
in small numbers by both services, and in late 1914, the type was issued
individually to units as an escort fighter for reconnaissance aircraft. These
managed to shoot down a number of German aircraft, and by July, 1915, some were
issued to No. 11 Squadron, RFC, where they were used briefly as fighters,
although by that time, they were completely outclassed by built-for-the-purpose
fighters such as the Fokker Eindekkers. In addition, the French firm,
 Darracq,
produced 99 of them, some of which went to the RFC. Later, a few experimental
models were produced, but by the middle of 1916, the FB5’s had been replaced by
more modern aircraft and were used as trainers. The Danish government was also
interested in the type, and 12 were built in Denmark.
Darracq,
produced 99 of them, some of which went to the RFC. Later, a few experimental
models were produced, but by the middle of 1916, the FB5’s had been replaced by
more modern aircraft and were used as trainers. The Danish government was also
interested in the type, and 12 were built in Denmark.
The instructions consist of one sheet of paper with an exploded view on one side and verbal suggestions on the other. These are more like commands rather than instructions, and it is up to the modeler to figure out how to actually put the thing together. Color and marking details are on the back of the box.
 Markings
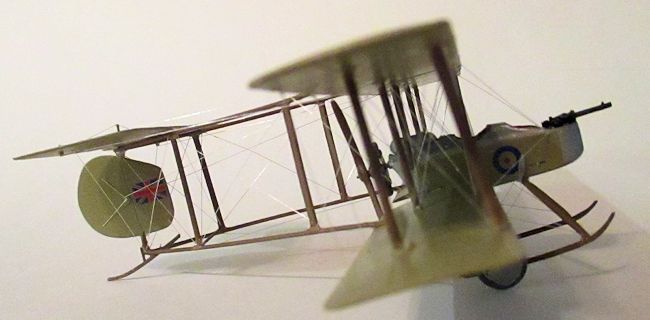
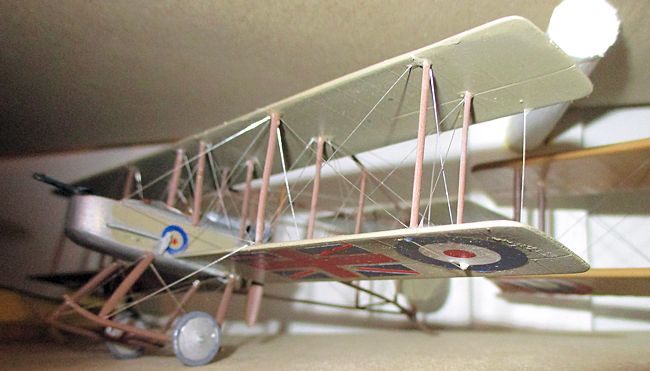
are provided for one aircraft. The particular aircraft, apparently one of the
early combat versions, carries roundels and a Union Jack on the undersides of
the wings, a Union Jack on the vertical stabilizer, and a small roundel on the
sides of the fuselage in between the cockpits. My large Union Jack decals
disintegrated when I tried to use them, requiring a “monkey jack” scratch built
decal of red and blue decal sheet. I sprayed the remaining decals with glosscote,
and they worked fine. Be careful with the decals, and test them before trying to
use them. Mine were bad probably because I’ve had the kit for a long time. They
do tend to dry out over time.
Markings
are provided for one aircraft. The particular aircraft, apparently one of the
early combat versions, carries roundels and a Union Jack on the undersides of
the wings, a Union Jack on the vertical stabilizer, and a small roundel on the
sides of the fuselage in between the cockpits. My large Union Jack decals
disintegrated when I tried to use them, requiring a “monkey jack” scratch built
decal of red and blue decal sheet. I sprayed the remaining decals with glosscote,
and they worked fine. Be careful with the decals, and test them before trying to
use them. Mine were bad probably because I’ve had the kit for a long time. They
do tend to dry out over time.
| THE KIT |
 This is a
limited run kit, consisting of 16 parts cast in blue-grey styrene, and 12 white
metal castings. In addition, the kit contains several airfoil shaped strut
blanks and 5 pieces of steel rod. The plastic parts are mounted on heavy sprues,
but the detail is good. Fabric and rib texture is excellent, and there is an
attempt to include some cockpit details, such as a floorboard, seats, and even
side wall structure. The white metal parts include a highly detailed rotary
engine, a propeller, and wheels. There is also a kit of this aircraft by Merlin,
but it is probably the same kit. In addition, I’ve seen a review on line by a
guy who used an Airfix Avro 504 and a DH-4 to scratchbuild one (That was right here in Modeling Madness. Ed). Where there’s a
will,…..
This is a
limited run kit, consisting of 16 parts cast in blue-grey styrene, and 12 white
metal castings. In addition, the kit contains several airfoil shaped strut
blanks and 5 pieces of steel rod. The plastic parts are mounted on heavy sprues,
but the detail is good. Fabric and rib texture is excellent, and there is an
attempt to include some cockpit details, such as a floorboard, seats, and even
side wall structure. The white metal parts include a highly detailed rotary
engine, a propeller, and wheels. There is also a kit of this aircraft by Merlin,
but it is probably the same kit. In addition, I’ve seen a review on line by a
guy who used an Airfix Avro 504 and a DH-4 to scratchbuild one (That was right here in Modeling Madness. Ed). Where there’s a
will,…..
| CONSTRUCTION |
Frankly, this kit is a very difficult model to build, mainly because of its complexity and structural form. The main parts are the fuselage, wings, and tail unit, and these are connected by a series of struts such as I’ve never seen before. The wing struts are useful, and the instructions tell you most of the lengths you need to cut the struts. After assembling and detailing the fuselage, I attached the lower wings with a zero dihedral angle. I then cut the wing struts to size, and superglued them to the upper surfaces of the lower wings. Needless to say, all parts should be painted and completely detailed before assembly. When the struts had set up, I attached the upper wing and let it set until it was firmly in place. Then the fun began.
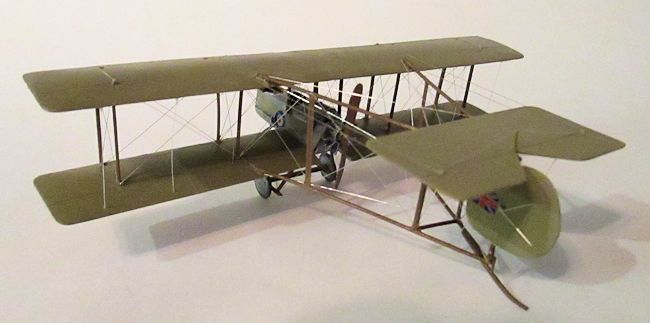
 The wire
pieces were meant to be used for the longerons which connected the tail unit to
the biplane wings. I found three view 1/72 scale drawing from one of the
Harleyford books on World War I aircraft which provided the lengths and angles.
I opted to use regular plastic rod instead of the wire provided, as this was
easier to work with and probably a little stronger. Attaching the forward ends
of the longerons to the wing surfaces was a bit dicey, but after several tried
and exhaustion of my “Sailor’s Vocabulary”, I managed to get them attached at
the proper angles. Once the tail units were attached, I went on to the landing
gear, which is entirely white metal. This went on easily.
The wire
pieces were meant to be used for the longerons which connected the tail unit to
the biplane wings. I found three view 1/72 scale drawing from one of the
Harleyford books on World War I aircraft which provided the lengths and angles.
I opted to use regular plastic rod instead of the wire provided, as this was
easier to work with and probably a little stronger. Attaching the forward ends
of the longerons to the wing surfaces was a bit dicey, but after several tried
and exhaustion of my “Sailor’s Vocabulary”, I managed to get them attached at
the proper angles. Once the tail units were attached, I went on to the landing
gear, which is entirely white metal. This went on easily.
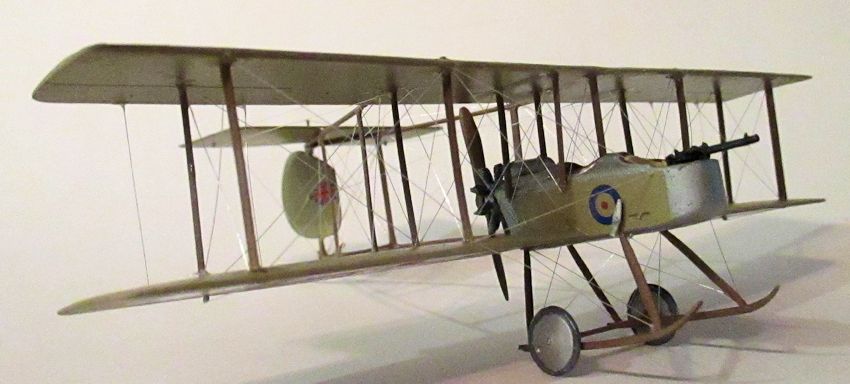
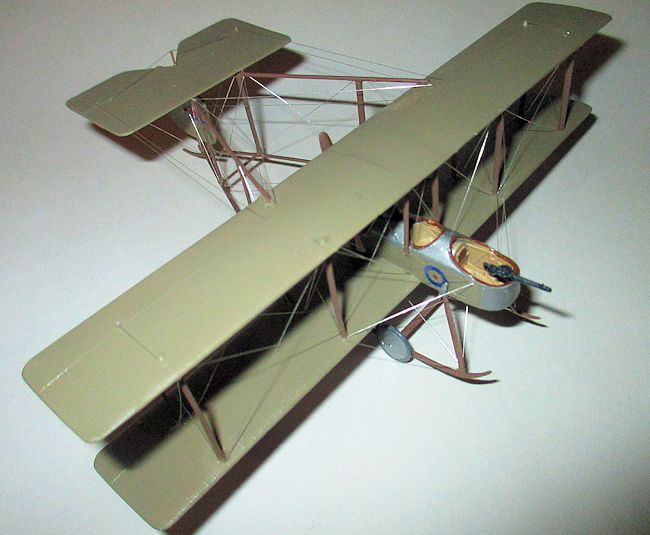
The entire airplane is a beige, linen color, with aluminum colored panels on the cockpit. The struts are a dark brown wood color, as is the prop and landing gear. Decals should be applied before attempting to rig the airplane.
I used unstranded electronic wire to rig this model, and it took a LOT of wire to complete the job. I began with the interplane struts, followed by the flying and landing wires. I usually do these wires with ordinary white glue, but for this model, I opted for superglue, mainly because I wanted the extra strength in the structure. Just about everything on this model has wires connected to it, and this must have been the airplane the pilots were referring to when they said that if you let a bird loose in between the wings, and it got out, there was a wire missing somewhere. The rear longerons and struts are all crossbraced, and the tailplane also is wire braced. To top it off, the control cables all have to be added, and these seem to go all over the place. A good three view is essential for this task. Even the landing gear is braced, and there are drag wires between the first forward interplane struts and the fuselage.
| CONCLUSIONS |
 Even
though this was a very complicated and difficult model to build, I have always
wanted a model of this aircraft, and am glad that I took the time and effort to
do this one, as it adds to my World War I collection. It is not impossible to
build, and while it is certainly not a kit for beginners, after a few years of
modeling experience, and the development of the skills required for biplanes
with wire rigging, any competent modeler should be able to build this one, if
you can find one. Pegasus has issued a number of kits of airplanes nobody else
seems to want to touch, and there are a number of others I have in my stash. But
they will all be easier to do than this one. Recommended for serious modelers
who really want a model of this aircraft. I can’t imagine any other kit producer
ever issuing a kit of this type.
Even
though this was a very complicated and difficult model to build, I have always
wanted a model of this aircraft, and am glad that I took the time and effort to
do this one, as it adds to my World War I collection. It is not impossible to
build, and while it is certainly not a kit for beginners, after a few years of
modeling experience, and the development of the skills required for biplanes
with wire rigging, any competent modeler should be able to build this one, if
you can find one. Pegasus has issued a number of kits of airplanes nobody else
seems to want to touch, and there are a number of others I have in my stash. But
they will all be easier to do than this one. Recommended for serious modelers
who really want a model of this aircraft. I can’t imagine any other kit producer
ever issuing a kit of this type.
August 2015
If you would like your product reviewed fairly and fairly quickly, please contact the editor or see other details in the Note to Contributors.