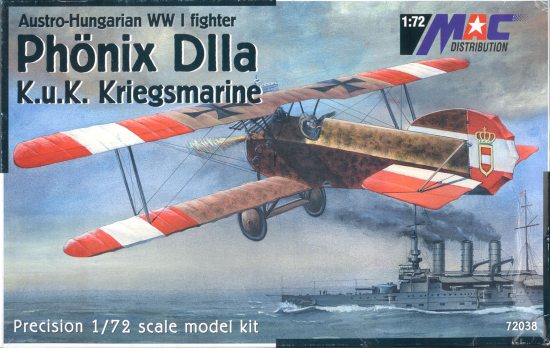
MAC 1/72 Phonix D.IIa
|
KIT # |
72038 |
|
PRICE: |
$17.98 |
|
DECALS: |
Two Aircraft |
|
REVIEWER: |
Kyle Bodily |
|
NOTES: |
Best MAC kit I have built. |
|
HISTORY |
Austria-Hungry started to look for an indigenous built fighter in 1916 since Germany was not too keen on giving its best aircraft to other countries. Austria-Hungry started this process with the Phonix built Hansa-Brandenburg D.I. The Brandenburg was quite tricky to fly and Flars ordered improvements that were not successful. The performance of the Brandenburg was universally discouraging.
Phonix used their experience building the Brandedburg to
build the Phonix D.I. The Phonix D.I was a great improvement over the
Brandenburg, in fact a German Idflieg reported stated “it possesses totally
amazing qualities, especially the
 quickness of maneuver and stability when
throttled down. The pilot can stall the aircraft virtually on the spot and drop
several hundred meters without losing control”.
quickness of maneuver and stability when
throttled down. The pilot can stall the aircraft virtually on the spot and drop
several hundred meters without losing control”.
The Phonix D.II was designed to improve performance and maneuverability of the D.I. It was basically a lightened version of the D.I. Some 50 kg (110lbs) were shaved from the airframe without changing the basic layout. The wing was lengthened and high aspect ailerons were added to it. The interplane struts were now vertical instead of pinched in at the top as on the D.I, and a redesigned horizontal stabilizer and balanced elevator were the obvious changes.
In March 1918 Flars ordered 48 of the new Phonix D.IIa fighters. They looked on the outside the same as the D.II but they had the 230 hp Hiero engine. This was a very fast fighter 180-185 km/hr (112-115mph) and a time of 17min.20 sec. to climb to 3000 meters (16,405 ft). It was quite liked by its pilots who appreciated the extra speed and rugged construction. Flik 1/J at Igalo Navel air station pronounced the D.IIa and the Aviatik D.I Series 338 the only aircraft that were capable of performing interception work. On 1 August 1918 Flars listed 34 Phonix D.IIa fighters in front line service.
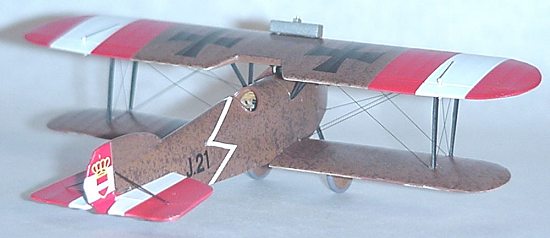
Ten D.IIa were transferred to the Kaiserlich und Koninglich Kriegsmarine. The K.u.K. gave these Aircraft designations J.21 to J.30.
|
THE KIT |
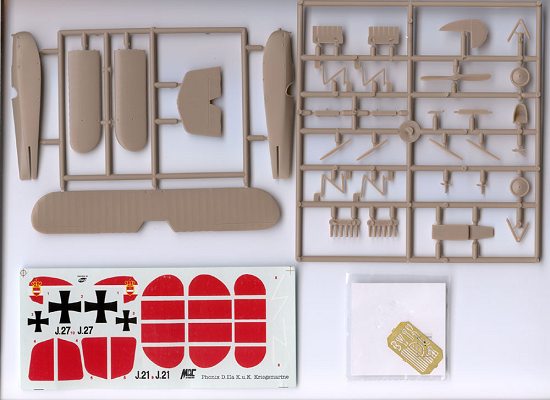
In the box you will find two parts trees molded in tan, one sheet of photo-etch parts and decals for two different aircraft. The instructions are quite adequate and have nice line drawings. This is the first time that I’ve seen MAC show decal placement. In the past they tell you to get a Datafile to place decals. While it is a good idea to get some good reference to build a kit I personally don’t like the idea of making it necessary to get a reference only to place decals.
The injection molded parts are very well done. Wing detail looks good. The engine is a little devoid of detail but most of it will be hidden in the fuselage. The fuselage halves have the internal framework molded into them and look to make a very convincing cockpit.
The photo-etch sheet has some nice looking parts including gunsight rings and an instrument panel. A piece of film has been provided to put on the back of the instrument panel to make convincing instruments.
All in all this kit looks nice in the box.
|
CONSTRUCTION |
 I’ve built four other MAC offerings in the past and was not very impressed with
the alignment of the parts. It seemed like symmetry was not their first
thought. In other words all the attachment points for the struts were offset by
about .5 millimeters making it necessary to fill all the strut attachment holes
and making new ones. This was not the case with this kit as it went together
very well. In fact I would say one of the best fitting kits I’ve done in recent
times. The only things that I did to make it look better was add control horns
made of brass and build up the cylinder heads, cooling system and hoses. I
didn’t even have to lengthen or shorten the interplane or cabane struts.
I’ve built four other MAC offerings in the past and was not very impressed with
the alignment of the parts. It seemed like symmetry was not their first
thought. In other words all the attachment points for the struts were offset by
about .5 millimeters making it necessary to fill all the strut attachment holes
and making new ones. This was not the case with this kit as it went together
very well. In fact I would say one of the best fitting kits I’ve done in recent
times. The only things that I did to make it look better was add control horns
made of brass and build up the cylinder heads, cooling system and hoses. I
didn’t even have to lengthen or shorten the interplane or cabane struts.
What I do to get everything all lined up and square is, first get a good reference and take it to the local copy center and make a copy of the three view drawings in scale. Place this on a flat surface and assemble the components on the drawings. With the help from some old paint bottles and coins you can get every thing lined up quite well. I do the interplain struts first and after they dry I do the cabane struts. I've found that if you are going to have problems it is with the cabanes. Just let every thing dry and you will be ready to rig.
I think that this kit was about as easy as any Eduard kit that I’ve done. I had no fit or alignment problems at all.
|
CAMO & MARKINGS |
The kit comes with decals to make two different navel aircraft, 422.21 and
422.27. Both were assigned to defend the navel bases at Altura (Pola) and Igalo.
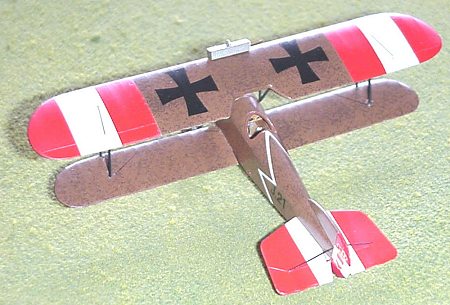
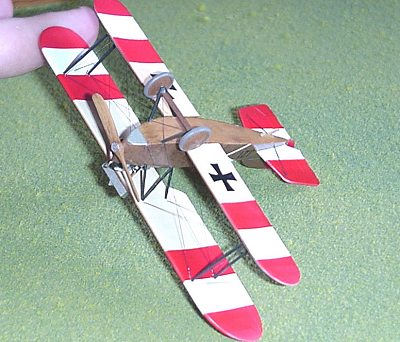
The aircraft of the Kaiserlich und Koninglich Kriegsmarine were very colorful.
The warring powers were very aware of the danger posed by only one enemy
aircraft getting into the airspace around their capital ships. So both Italy
and Austria-Hungary painted their aircraft that operated in the Adriatic
brightly so they could be
 identified fast and action could be taken without
delay. Austria-Hungary painted their national colors of red white red stripes
on the wings and tail surfaces of their navy aircraft. The need for immediate
identification was not that critical for Army aircraft so this practice was
abandoned early on in the war.
identified fast and action could be taken without
delay. Austria-Hungary painted their national colors of red white red stripes
on the wings and tail surfaces of their navy aircraft. The need for immediate
identification was not that critical for Army aircraft so this practice was
abandoned early on in the war.
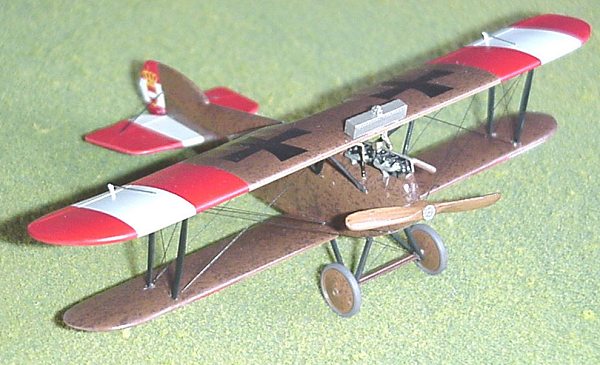
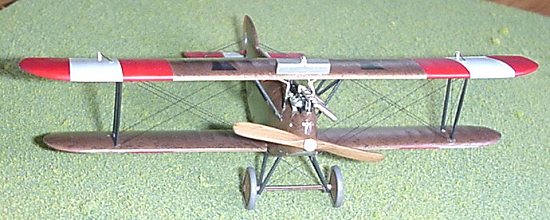
After I assembled as much as was practicable I painted the under side of the fuselage Testers Model Masters Wood and used oil paints to simulate the wood grain. The under sides of the wings were painted Radome tan. The upper surfaces were then painted Military Brown. The Red White Red stripes were masked off and painted before I did the stippling effect. After the RWR stripes had dried I masked them off to do the stippling effect. To do this I dabbed the darker brown on with a chunk of foam. I found that the paint needs to be thinned quite considerably and you need to test/practice on something first to make sure that you get the coverage you want. Then just dab away till you get the desired effect. Be careful not to over or under do it and don’t push too hard or instead of the stipple effect you will get a glob effect. Also if you don’t thin the paint well enough you will get a lumpy effect that does not look very convincing.
|
CONCLUSIONS |
 I am very happy with this kit and I think,
in the words of my youngest daughter, that it “Looks Cool”. I can recommend it
to anyone with moderate skills. If you’ve got a few W.W.I kits under your belt
I think that you would find this kit a real treat to build. I myself plan to
build more of these kits in other guises. I’ve just bought some Blue Rider
decal sheets and want to build a little fleet of them.
I am very happy with this kit and I think,
in the words of my youngest daughter, that it “Looks Cool”. I can recommend it
to anyone with moderate skills. If you’ve got a few W.W.I kits under your belt
I think that you would find this kit a real treat to build. I myself plan to
build more of these kits in other guises. I’ve just bought some Blue Rider
decal sheets and want to build a little fleet of them.
I am glad to see more of the Austro-Hungarian aircraft in injection molded media. Up until quite recently you had to be acquainted with Vac-u-form kits if you wanted to build many of these aircraft.
November 2002
|
REFERENCES |
Profile #174 (The Phonix Scouts)
Austro-Hungarian Army Aircraft of World War One by Peter M. Grosz, George Haddow and Peter Schiemer
Air Aces of the Austro-Hungarian Empire 1914-1918 by the late Dr. Martin O’Conner
Copyright ModelingMadness.com. All rights reserved. No reproduction in part or in whole without express permission from the editor.
If you would like your product reviewed fairly and quickly, please contact the editor or see other details in the Note to Contributors.