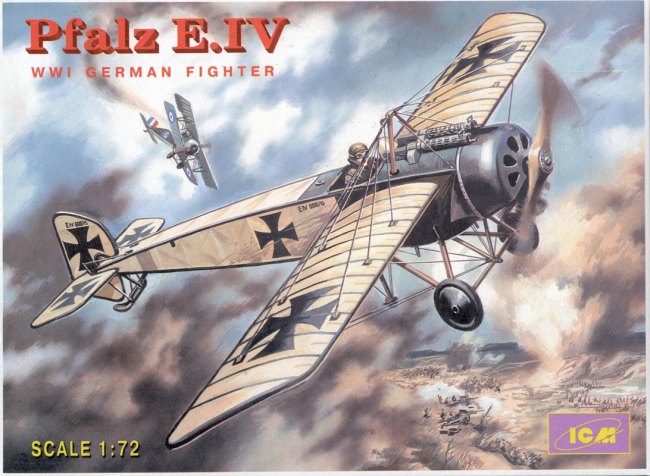
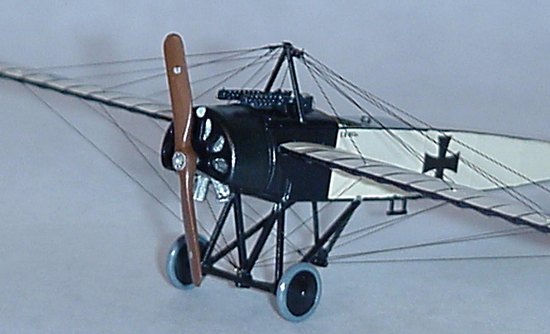
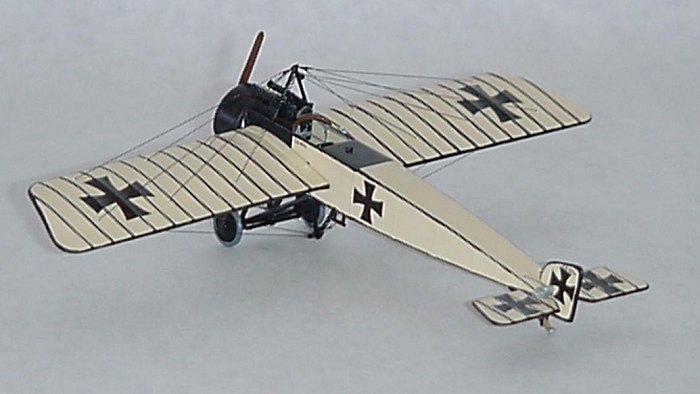
ICM 1/72 Pfalz E.IV
|
KIT # |
72121 |
|
PRICE: |
$7.98 |
|
DECALS: |
One aircraft |
|
REVIEW : |
Kyle Bodily |
|
NOTES: |
|
|
HISTORY |

This is a hard Aircraft to research and I understand that Windsock has a datafile on the Pfalz E series but at this time I don’t have access to one, so here is what I know. The Pfalz Eindeckers were always overshadowed by Fokker built monoplanes, for that matter Pfalz Flugzeugwerke was always overshadowed by other aircraft manufacturers. This should not distract from the fact that Pfalz did shoulder a large portion of the German Aircraft industry throughout the war.
The Pfalz Flugzeugwarke began life producing the Otto pusher biplanes under license from the Otto Company and later acquired the rights to produce Morane Saulnier Type H and L fighters; the French tail is an obvious sign of its ancestry as opposed to the Fokkers comma shaped tail. Pfalz E types were used mostly by Bavarian units. An estimated 300 Aircraft (E.I through E.V) were built before the company started to build Roland D series fighters. This led directly to the very rugged Pfalz D.III, but that’s another story.
|
THE KIT |
 First the
box is much too big for the parts it contains, however the large three view
drawings on the back of the box will come in handy. For your $7.98 you get four
trees of injection molded parts Three dark green trees with 50 parts and one
tree of 2 clear parts. The molding is good with nice detail, all in all a
good-looking kit except for the proverbial starving cow wing rib detail. The
instructions are adequate, easy to read with good detail. The painting table in
the instructions is for Humbrol colors, not too much of a drawback.
First the
box is much too big for the parts it contains, however the large three view
drawings on the back of the box will come in handy. For your $7.98 you get four
trees of injection molded parts Three dark green trees with 50 parts and one
tree of 2 clear parts. The molding is good with nice detail, all in all a
good-looking kit except for the proverbial starving cow wing rib detail. The
instructions are adequate, easy to read with good detail. The painting table in
the instructions is for Humbrol colors, not too much of a drawback.
Make sure that you save the box because the instructions don’t have pictures showing the placement of decals or overall painting. The clear parts are not that clear, but work. You may want to replace them with parts made out of film. The instructions also include painting information for all the small parts. The decals are nice and very thin; they adhere well with little decal solvent. The kit comes with decal options for two Aircraft, the first flown by Lt. F.Grunzweig, summer 1916 and Hptm. Rudolf Berthold who got three of his 28 victories in the Pfalz E.IV. I chose to build Bertholds Plane.
|
CONSTRUCTION |
First things first, it seems that the ICM kits have a lot of mold release oils on them that I found difficult to remove with warm soap and water and ended up using a soft toothbrush and alcohol to scrub the plastic parts. After letting the parts dry overnight, I decided to skip step one (engine construction) and move directly to step two, the fuselage. I removed all parts from the trees and assembled the fuel tank in preparation for painting. I then sprayed all internal surfaces with Testors Model Master Radome Tan to simulate the linen used to cover the airplane. The kit has nice detail on the cockpit sides simulating tube steel construction that was painted gray on the originals. I then painted the seat and the fuel tank and placed the instrument panel decal on the instrument panel and was ready to assemble the fuselage sections.
 The
fuselage is in four parts that did not fit together especially well. Test
fitting at this point is essential. I then filled the seams with putty and tried
very hard not to destroy the outer detail when I sanded the putty smooth. I then
removed all parts from trees and prepared them for painting. I used a very small
drill bit (approximate size 80) to drill all the holes in the wings for the
rigging. The only reference I could find that showed the position of these holes
was the three view drawing on the back of the box. Now I drilled the other holes
in fuselage and supports. Next I had to find a way to reproduce the pulley
attachment that was in front of the pilot and on top of the support post (part #
C-10) this had to be done to facilitate rigging.
The
fuselage is in four parts that did not fit together especially well. Test
fitting at this point is essential. I then filled the seams with putty and tried
very hard not to destroy the outer detail when I sanded the putty smooth. I then
removed all parts from trees and prepared them for painting. I used a very small
drill bit (approximate size 80) to drill all the holes in the wings for the
rigging. The only reference I could find that showed the position of these holes
was the three view drawing on the back of the box. Now I drilled the other holes
in fuselage and supports. Next I had to find a way to reproduce the pulley
attachment that was in front of the pilot and on top of the support post (part #
C-10) this had to be done to facilitate rigging.
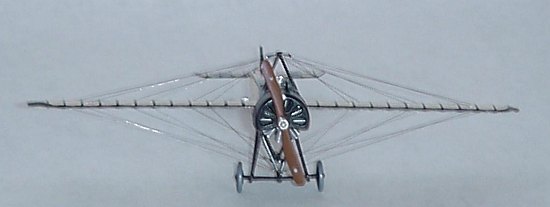
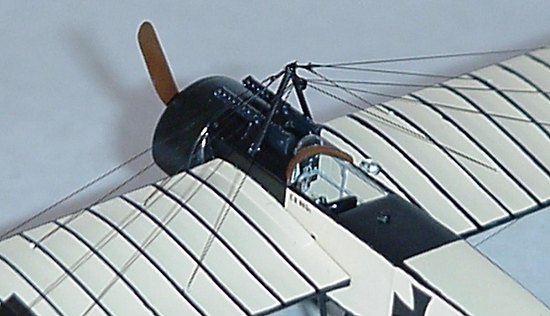
Since the aircraft did not have ailerons, a process of wing warping was used to change it’s roll axis, and the pulley was used allow the wings to warp in opposite directions. I heated a piece of sprue, stretched it, then cut a disk to represent the pulley and drilled a hole in it for a small piece of wire (.008 brass) to attach it to the post and allow the rigging to pass through. On the top of the support post were two turnbuckles and to simulate these, I once again used brass wire (.008) bent it into two loops and super glued it on top of the support. The only other thing that I did was make a small loop out of the same brass wire and place it at the bottom of the lower center support (part # C-13). Now I paint!!!!
After painting and decals it’s time for final assembly. I carefully removed the paint from the areas to be glued on all remaining parts. Every thing went together great. The only hard part was the landing gear. Put parts C-3 C-13 and C-4 together and then put the wheel axles in place then put the spreaders in place, making sure that all is square. I tried to put this component together before I attached it to the fuselage and gave myself a headache and a lot of touchup work.
|
PAINT & MARKINGS |
 Painting
was relatively easy since all parts were either painted black or Radome Tan (to
simulate the CDL or clear doped linen). First I painted the fabric parts tan,
all the metal portions were painted black on the original, so I masked off the
forward portion of the fuselage and painted it black along with all the other
parts (I.E. the struts, landing gear, wheels, supports and tail skid braces). I
painted the tires my own shade of gray mixed with a touch if purple to simulate
the color of turn of the century tires. The tailskid was painted dark brown with
steel hardware (most wood tailskids had a steel plate on the bottom to lengthen
service life of the skid). Now for a coat of clear semi-gloss paint on all the
parts and its time for the decals. The decals went on great and with out
problem.
Painting
was relatively easy since all parts were either painted black or Radome Tan (to
simulate the CDL or clear doped linen). First I painted the fabric parts tan,
all the metal portions were painted black on the original, so I masked off the
forward portion of the fuselage and painted it black along with all the other
parts (I.E. the struts, landing gear, wheels, supports and tail skid braces). I
painted the tires my own shade of gray mixed with a touch if purple to simulate
the color of turn of the century tires. The tailskid was painted dark brown with
steel hardware (most wood tailskids had a steel plate on the bottom to lengthen
service life of the skid). Now for a coat of clear semi-gloss paint on all the
parts and its time for the decals. The decals went on great and with out
problem.
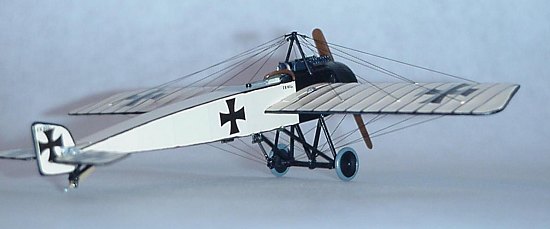
You may now be asking "What about the rib tape. How
did you do that??". Well that is one of the more simple parts of
building this kit. I use a Staedtler lumocolor permanent marker with a medium
tip for the edging and a fine tip for the tapes that are over the ribs. Because
the decal solvent will cause the marker to bleed I save it till the decals are
in place. All you need is a strait edge that is flexible so you can follow the
curves of the wings. I just draw the rib tapes on, that is it. You can also use
the brown marker for Aircraft that used CDL ribtapes and then use a light tan
paint to fade them out to the texture that you want. One last coat of semi-gloss
clear and you are ready to wrap this thing up (I have had no problems with the
marker bleeding under the paint or clear coat just the decal solvent).
After the final assembly I let the plane sit for a day or two. This time I use to let the glue harden/cure and to get the rigging plan clear in my mind. It can’t be stressed enough "you have to have a plan before you rig the kit", this is the make or break part of this kind of kit, it can turn a very enjoyable, exciting and rewarding build in to your worst nightmare. Don’t let this scare you off, it is just important to work smart. I like to work from the inside out; this keeps me from having to work under something that I’ve already done. I prefer to use 2 lbs. fishing line for 1:72 scale kits and 4 lbs. line for 1:48 scale. I color it black using a waterproof marker and thread the rigging through the predrilled holes. I pull it tight as I go and superglue being careful not to put glue on a hole that will get another line.
|
CONCLUSIONS |
If you like World War One kits I think you would like this one. ICM did a good job with this kit and I like the rigging. I would not recommend this kit to the beginner but if you have some rigging experience this is a good kit. Because the kit is of a monoplane I think that the rigging is easier than most biplane kits and looks great, it even looks good without rigging. Don’t let the rigging scare you away from these kits, just take your time and have fun. Sit back and feel the ice-cold November wind on your face. Smell the exhaust and caster oil spray and listen the sputtering of your engine as you climb through 200 meters chasing down enemy bombers as they make their way to your airfield!!!
|
REFERENCES |
Squadron/signal publications "Fokker Eindecker in action No.158"
Windsock "WWI Warplanes GreatWar classics in profile Vol.1"
Copyright ModelingMadness. com. All rights reserved. No reproduction in part or in whole without express permission from the editor.
If you would like your product reviewed fairly and quickly, please contact the editor or see other details in the Note to Contributors.
Back to Reviews Page 2024