| KIT #: | 00924 |
| PRICE: | $58.95 SRP |
| DECALS: | Two options |
| REVIEWER: | Dan Lee |
| NOTES: |
| HISTORY |
The Douglas A-3
Skywarrior (or Whale) was originally designed to be a nuclear strike bomber as
part of the Single Integrated Operational Plan aka SIOP.
However, the Navy soon realized that the SSBN equipped wi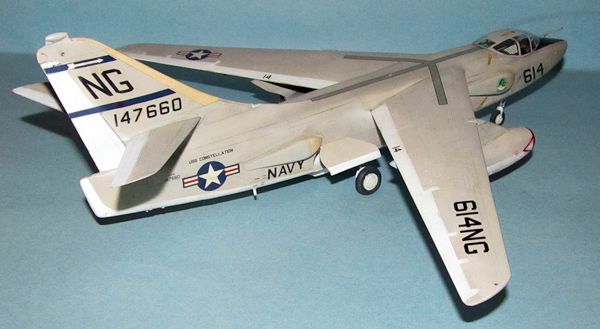 th Polaris
missiles was a better naval option and the carrier wing was removed from SIOP.
The Skywarrior did drop some mines and bombs in the early part of the
Vietnam war, but were taken out of combat roles by 1967.
th Polaris
missiles was a better naval option and the carrier wing was removed from SIOP.
The Skywarrior did drop some mines and bombs in the early part of the
Vietnam war, but were taken out of combat roles by 1967.
Stuck with a huge
aircraft without a real mission, the Navy realized that the Skywarrior could be
used as for electronic intelligence ELINT, electronic warfare ECM and/or
refueling tanker.
With the EKA-3B,
the Navy had two missions in one as it was large enough to handle both the
refueling and electronic warfare roles.
The EKA-3B served till it was replaced by the EA-6B Prowler and reverted
to the tanker role till they were retired in the late 80s/early 90s.
The longest serving variant of the Whale was the EA-3B ELINT version till
it was replaced by the ES-3A Viking.
| THE KIT |
See Scott’s preview of the plastic here.
| CONSTRUCTION |
 As with most aircraft,
construction began with the cockpit.
The Hasegawa cockpit is simplified compared to real thing, but I didn’t
do much except paint it mostly Dark Gull Grey and the remaining portions black,
put on the instrument panel/console decals and add Tamiya tape harnesses
considering that most of the detail is hidden by the canopy and it is 1/72
scale.
As with most aircraft,
construction began with the cockpit.
The Hasegawa cockpit is simplified compared to real thing, but I didn’t
do much except paint it mostly Dark Gull Grey and the remaining portions black,
put on the instrument panel/console decals and add Tamiya tape harnesses
considering that most of the detail is hidden by the canopy and it is 1/72
scale.
While the cockpit
paint was drying, I added five pennies to the area just behind the cockpit to
keep it from being a tail sitter.
It was more than needed but I did it because I could not put the pennies in the
nose which is why I added more weight due to its closeness to the center of
gravity.
The fuselage and wings
were glued together.
Once done, I
threw them into a box and let it sit for a couple of weeks.
The fit of the wings wasn’t all that good especially at the wing tips and
the fuselage had some unexpected fit issues.
My copy of the model had a slight warp in the area behind the cockpit of
the port fuselage so I was unhappy about that.
The engine pods were
something else.
I read Bob
Laskodi’s build of this kit and followed what he did.
I scored the intakes with a sharp blade till they came off.
I glued the halves of the remaining engine pods and intakes together and
left them in the box too.
 After a couple of
weeks, I glued the wings to the fuselage and
proceeded to fill the seams of the wings and fuselage.
I ended up using Mr Surfacer 500 for the area just behind the cockpit
while the other gaps were filled using CA glue.
For some reason that seam wouldn’t disappear.
I used Tamiya Surface Primer, Tamiya Fine Primer from the spray can, CA
glue and even Squadron Green putty.
It got to the point where after sanding/polishing the seam several times that I
got fed up and said something akin to “screw it.”
The other fiddly areas but not as fiddly as behind the cockpit were the
wing/fuselage join, the port side wingtip and the forward lip of the bomb bay.
After a couple of
weeks, I glued the wings to the fuselage and
proceeded to fill the seams of the wings and fuselage.
I ended up using Mr Surfacer 500 for the area just behind the cockpit
while the other gaps were filled using CA glue.
For some reason that seam wouldn’t disappear.
I used Tamiya Surface Primer, Tamiya Fine Primer from the spray can, CA
glue and even Squadron Green putty.
It got to the point where after sanding/polishing the seam several times that I
got fed up and said something akin to “screw it.”
The other fiddly areas but not as fiddly as behind the cockpit were the
wing/fuselage join, the port side wingtip and the forward lip of the bomb bay.
I had to be careful
with the intakes as they were really thin plastic, but I filled, sanded and
polished the inside and outside of each intake without incident.
I did not add the exhaust nozzles to the engine pods till just before
painting so as not to damage the protruding lip.
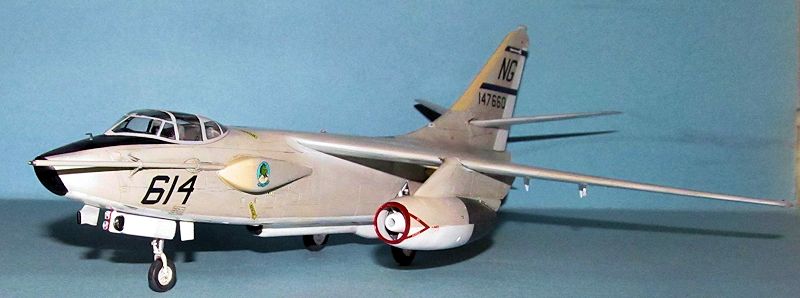
At this point I added
all of the external bits except the fuel dump because I wanted to.
| COLORS & MARKINGS |
The first thing I
painted was the engine pods and the intakes.
The bottom exterior and the interior of the intakes were first painted
Tamiya flat white and the top exterior sections were painted Gunze light gull
grey.
Next I masked off the inside
and outside lips and painted them Insignia Red.
Hasegawa provides a decal to use for the lip but I don’t like using those
decals as they never fold the way you want.
The engine pods were preshaded using flat black and when dry, masked and
painted metallic grey, flat white and light gull grey.
I glued the intak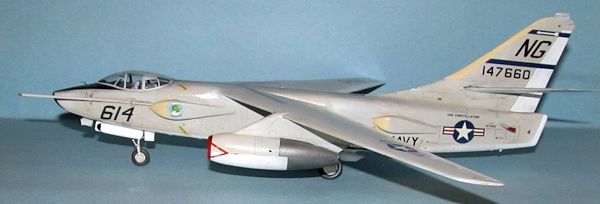 es to the engine pods, but instead of the smooth gap I
envisioned I had a jagged mess that ruined the smooth lines of the engine pods.
Those seams required another round of seam filling using CA glue and
careful sanding/polishing several times.
I had to mask and paint those areas again.
es to the engine pods, but instead of the smooth gap I
envisioned I had a jagged mess that ruined the smooth lines of the engine pods.
Those seams required another round of seam filling using CA glue and
careful sanding/polishing several times.
I had to mask and paint those areas again.
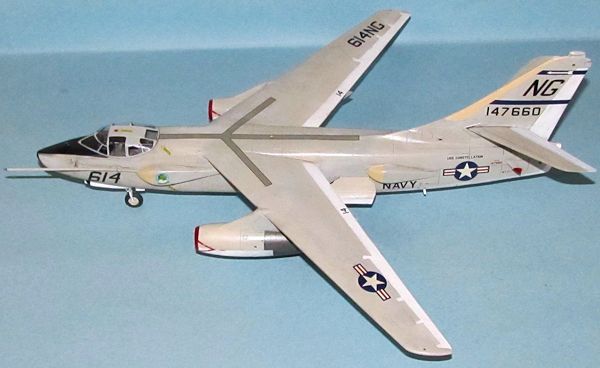
Next up was the plane
and canopy itself.
The greenhouse
canopy was masked off and both it and the plane was preshaded using flat black.
When that was dry, I sprayed the underside and the topsides of the moving
surfaces flat white.
When that was
dry, the white areas were carefully masked off and the topside surfaces were
sprayed with Gunze Gloss Light Gull Grey.
I was horrified to discover that the white paint peeled off when I
removed the Tamiya tape.
I had to
repeat masking and painting a couple of times to fix everything.
Next I masked off the radome tan areas and the glare panel/black nose and
sprayed the respective colors in the areas.
I had to redo those too because I had both bleed through and the white
paint lifted.
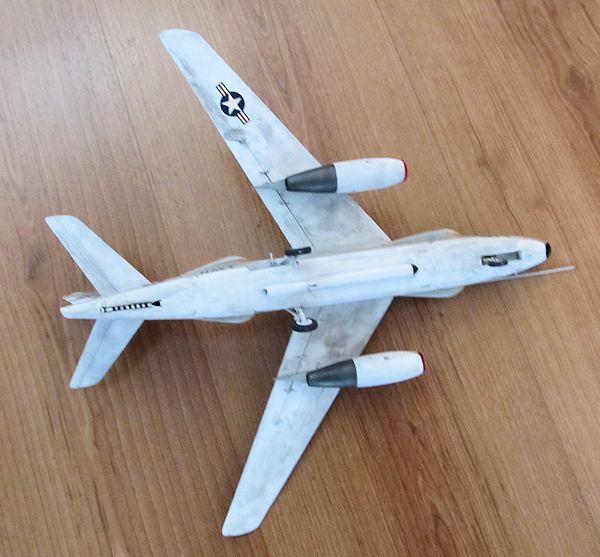
Several more rounds
of masking and painting were done before I was finally happy.
The only good thing that this did was make the paint blotchy and uneven
which is what I wanted (sort of.)
Little did I realize that this crappy jar of white paint would haunt me in the wash stage.
I originally wanted to
use the VAQ-131 decals because the color scheme was more interesting than the
VAQ-130 one.
However, I had some
trouble before with wrap around decals, especially big ones so I eventually
changed my mind and went with the VAQ-130 markings.
The Hasegawa decals went on reasonably well with a just little bit of
Micro Sol for most of the decals and a touch of Solvaset in one area.
The best part was that I discovered that seemingly unfixable seam was
covered up by the walkway decal.
 Wash and Final Coat
I used my non
reactive, easy to remove watercolor wash mix which also included a drop of
dishwasher soap which turned into a massive headache.
For some reason, this particular bottle of Tamiya flat white had
something wrong with it (I encountered a similar problem with the FJ-4B Fury
that I had recently finished but not this bad) as the wash stuck to the paint
and would not come off unlike all the other previous times.
I was pretty upset when I realized that my once excellent paint job was
reduced to a black and burnt sienna mess.
I removed what I could and then did the painful job of masking and
repainting the affected areas which included the stabilators, the rudder, most
of the underside and the engine pods.
This took a couple of days including touch ups and a lot of post-it notes
to protect the decals.
I was not
happy to find out I had put paint on some of the decals.
It took some careful scrubbing with damp Q-tips to remove most of the
paint.
At this point, part of
me wanted to hurl the model over the fence.
However, the more mature part of me just wanted to finish this so I did.
After the paint and decals were touched up barely to my satisfaction, I
used two or three coats for the final semi-gloss coat made up of a mix of 90%
Tamiya Clear and 10% Tamiya flat.
| FINAL CONSTRUCTION |
The landing gear were
painted flat white and when dry, I added tinfoil on the oleos using MicroFoil
glue.
The ejection pin marks on the
wheels were filled with CA glue and then sanded smooth.
Next the landing gear wheels were carefully hand painted RLM66.
Once dry they were glued on just after the rest of the plane was painted
and before the decals were added.
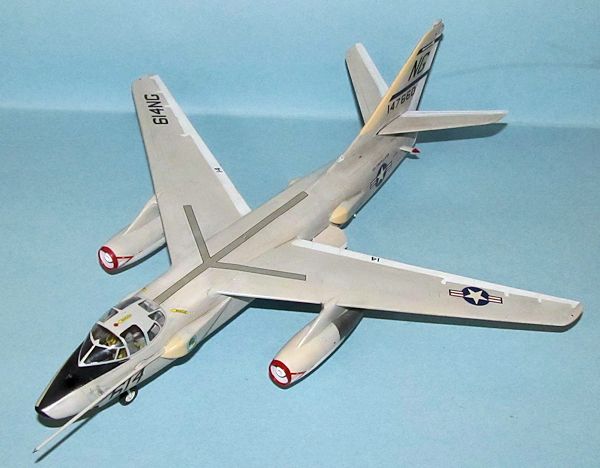
Next to be done were
the various antennas.
These were
painted gloss white and glued in place.
The
 refueling probe was sanded smooth and painted light gull grey.
When it was dry, the tip was hand painted what used to be known as
Citadel Steel then it was added just before the decals were added.
refueling probe was sanded smooth and painted light gull grey.
When it was dry, the tip was hand painted what used to be known as
Citadel Steel then it was added just before the decals were added.
The landing gear bay
doors were painted and then hand painted insignia red for the edging.
I had to do some touch up there as well as my brush control wasn’t that
good in places.
They were secured
in their positions with a tiny drop of CA glue.
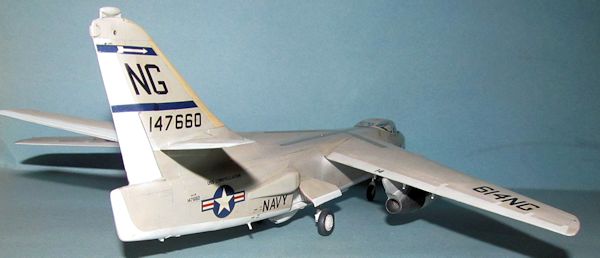
I sprayed the arrestor hook flat white, hand painted the black stripes
and glued it on with a drop of CA glue.
I removed the masking off the canopy and added to the “Whale” using Elmers White glue. Next I added a drop of white glue to the light positions and when dry they were hand painted the prospective clear colors. The plane was put on the shelf and done.
| CONCLUSIONS |
I am not entirely
happy with the model thanks to my usually infallible wash.
I did a lot of touch ups but they did not look as good as what was
originally there.
Otherwise, the
Hasegawa Skywarrior would have been a decent model outside of the seam that
wouldn’t go away.
It does require a
bit more work than one would think especially regarding the engine pods, but it
is not too difficult for an average modeler to fix.
Thanks to our editor for helping with a couple of questions.
If you would like your product reviewed fairly and fairly quickly, please contact the editor or see other details in the Note to Contributors.