Academy/Minicraft 1/300 XB-70 Valkyrie
| KIT #: | 2101 |
| PRICE: | AU$1.00 |
| DECALS: | One option (two would have been nice) |
| REVIEWER: | George Oh |
| NOTES: | Is this a toy kit? |
| HISTORY |
But in 1960, a fast,
high-flying U-2 spy-plane was downed by a Soviet S-75 Dvina (aka a Sam-2
Guideline) Surface-to-Air missile. As high-speed and high-altitude would no
longer protect an aircraft from ground-base defences, the US went for the
even-faster SR.71 Blackbird for reconnaissance, and switch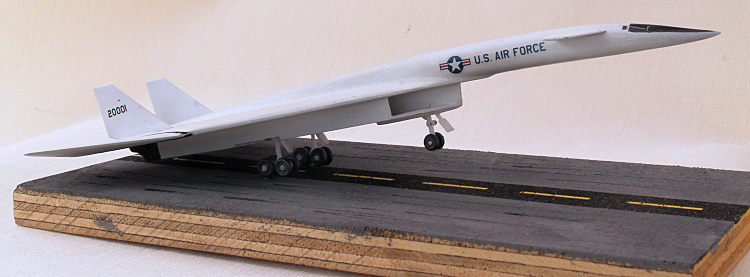 ed their bombers to
attacks at low-level (less than 2,000 feet) where the XB.70 offered no
improvement over the extant B.52 Stratofortress. This killed the XB-70 as a
viable project.
ed their bombers to
attacks at low-level (less than 2,000 feet) where the XB.70 offered no
improvement over the extant B.52 Stratofortress. This killed the XB-70 as a
viable project.
So, only two aircraft, dubbed Air Vehicles AV-1 and AV-2, were authorised to be built. AV-1 first flew in Sep 1964. AV-2 was built to a higher quality due to lessons learnt from building AV-1. Both were to be used for research into sustained high-speed flight. But tragically, AV-2 was involved in a midair collision with an F.104 chase-plane. It lost a rudder and crashed. AV-1 went on to conduct the research, even during its flight to its final resting place in the National Museum of the USA in Daytona, Ohio.
To me, the XB.70 Valkyrie, is the most impressive of all aircraft. The Russians must have thought so too, because they built the similar Sukhoi T-4. The Valkyrie has many design innovations including the 6-pack of jet engines, a rearward-sliding bomb-door, a hinged nose to give the pilots an unobstructed view during landing and take-off, and lowering wingtips that would contain, and allow the aircraft to ride, the shock-wave generated by the high-speed. This is termed ‘compression lift’.
| THE KIT |
The XB.70 Valkyrie is quite
my favourite aircraft. It is also a large aircraft, so my son’s in-progress
72-scale AMT/Italeri model (but that is another story) is large – unfortunately,
too large for any of my display cases. An XB.70 is (was?) available
 in 144-scale
from Anigrand, 1/169-scale from Oldmodel/Lindberg/(Aurora?), and from Academy/Minicraft
in 1/300-scale.
in 144-scale
from Anigrand, 1/169-scale from Oldmodel/Lindberg/(Aurora?), and from Academy/Minicraft
in 1/300-scale.
This is the A/M 300-scale kit. When I saw them going for only AU$1-00, I bought two - because it is a manageable size, and the cost wouldn’t break the bank. I built them because it looked like a quick and easy build of my favourite aircraft. The kit is modelled in a hard glossy-white plastic. The fit was close in most places but there were also some large gaps. The edges of parts are either very thick (eg, the intake lips) or thin (the trailing edges). The decal sheet has only the markings for AV-1 and considering that there were only two ever built, I believe that it wouldn’t have hurt the manufacturers to include the serial number for AV-2 – Rats!!
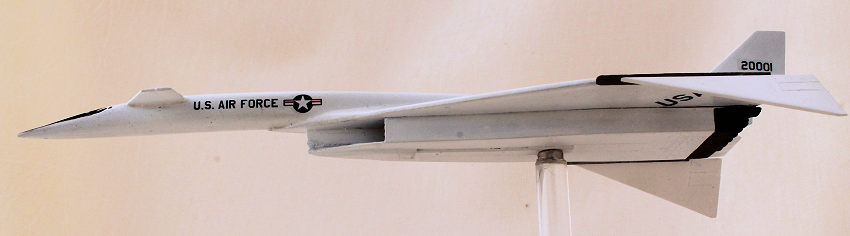
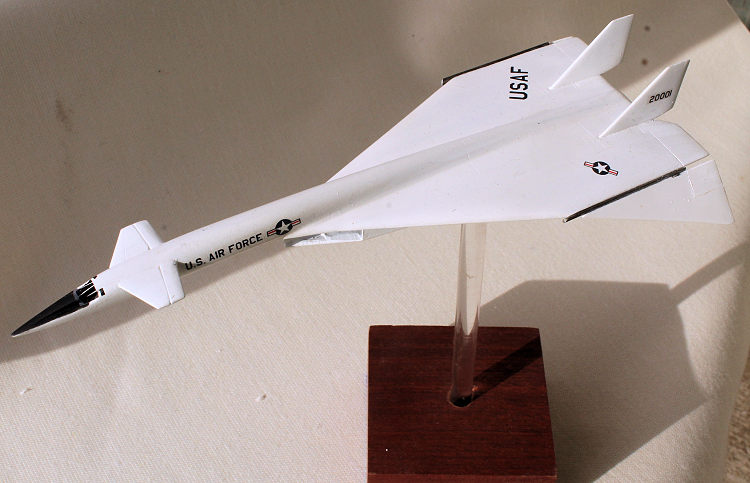
I built both in parallel and OOB. One (which I’ll call Model No. 1) will be built on its wheels, and the other (which I’ll call Model No. 2) will be built with wheels up and in tri-sonic mode.
| CONSTRUCTION |
In no-time flat, the
fuselage halves were jointed and mounted atop the three-piece wing. Filler (to
varying degrees) was needed everywhere. What a pity that the mo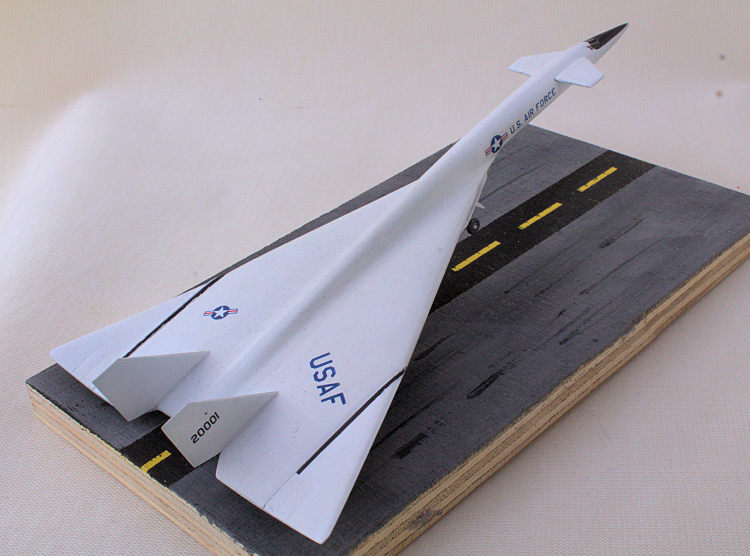 del didn’t come
with alternate nose-straight or nose-lowered parts. The wingtips of 2 were
scribed-off for later attachment. The must-do was to reduce the lips of the
intake and its splitter plate to a razors-edge to be more in-keeping with the
scale. Where they joined onto each other, filler was needed too.
del didn’t come
with alternate nose-straight or nose-lowered parts. The wingtips of 2 were
scribed-off for later attachment. The must-do was to reduce the lips of the
intake and its splitter plate to a razors-edge to be more in-keeping with the
scale. Where they joined onto each other, filler was needed too.
On the inside of the single-piece intake-and-engine underside piece of 2, I Dremeled-off the intruding undercarriage wells, then glued-in a large, flat-enough, rare-earth bar magnet. Both models received their belly bit, then the splitter plate/fuselage join had to be filled (and sanded), too. Naturally the undercarriage doors of 2 were glued in place, and – surprise, surprise – they were a very-good fit. The canards and tail rudders were attached, then some painting was in-order.
| COLORS & MARKINGS |
When AV-1 first landed, a
lot of its paint had been burnt-off by the heat generated by the speed, so it
w as looking rather ratty. But MY XB.70s would appear pristine. The whole model
(and unattached bits) was sprayed with Citadel Miniatures skull white because of
its capability to etch onto smooth hard plastic. Then, after masking, the
relevant underside portions, wheels and anti-dazzle pattern were brush-painted
with Citadel Miniatures (CM) chaos black. A coat of Future followed as a
foundation for the decals. I’d drilled-out the nozzles of the exhausts to make
the edges a bit thinner. Then they were dry-brushed to reveal what little moulded-in detail there was. I masked the wings and painted the hinge mechanisms
with CM boltgun metal.
as looking rather ratty. But MY XB.70s would appear pristine. The whole model
(and unattached bits) was sprayed with Citadel Miniatures skull white because of
its capability to etch onto smooth hard plastic. Then, after masking, the
relevant underside portions, wheels and anti-dazzle pattern were brush-painted
with Citadel Miniatures (CM) chaos black. A coat of Future followed as a
foundation for the decals. I’d drilled-out the nozzles of the exhausts to make
the edges a bit thinner. Then they were dry-brushed to reveal what little moulded-in detail there was. I masked the wings and painted the hinge mechanisms
with CM boltgun metal.
The deals went-on without fuss. The only one that really needed care was the piece that replicates the cockpit canopy. Because of the contours in that area, the decal needed settling into them. The decal sheet has the serial number for AV-1. What a pity that the manufacturer didn’t see fit to include two additional decals with the serial numbers of AV-2.
| FINAL CONSTRUCTION |
Model No. 1 - For some
reason, the main undercarriage legs had front and rear oleo scissor links.
These are probably to reinforce the legs, but they weren’t present on the
real aircraft, so off they came. The rear-most outer wheels went on (reason
later) to their corresponding axle of their bogies, and after they were dry,
the legs were attached vertically under the model. When they were dry, the
front leg with its front wheels went under the nose. This put the model onto
a stable platform around-w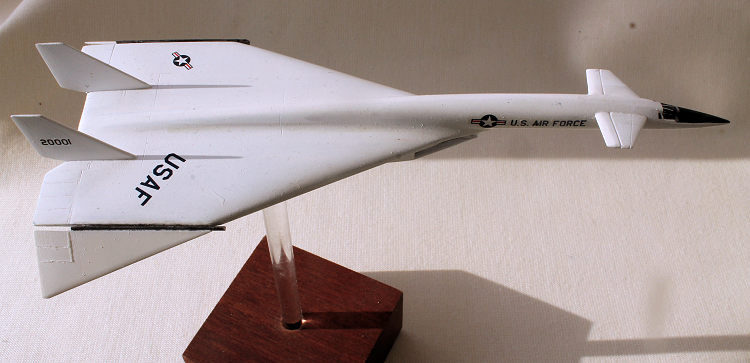 hich the rest of the wheels were attached so that
they all touched the ground. The only hitch was that the axles were all too
long, so I lopped them off level with the outer edges of the wheels. Add the
doors (note that the larger ones close after the legs extend) and 1 was
done.
hich the rest of the wheels were attached so that
they all touched the ground. The only hitch was that the axles were all too
long, so I lopped them off level with the outer edges of the wheels. Add the
doors (note that the larger ones close after the legs extend) and 1 was
done.
The funny thing with this model is that it will happily sit on its three legs, or it will sit back on its four back wheels and its exhaust pots. Because of this artifact, I went a little silly and decided to mount it onto a base. The base was a piece of scrap pine board that I found in the garage. I painted the centre-line yellow then masked it with tape. The black came next, but it looked too stark, so I masked it with a carefully-placed length of tape and painted the rest with a guess-work grey. It still looked too stark, so I broke-up the plainness with a whole lot of skid-marks – not near as many as a real runway, but enough to give you the idea that it IS the landing end of a runway. The back end of the model is held about 1mm above the runway by a really-thin, nearly-invisible wire. This wire also serves to give the model a 3rd point of contact with the base.
Model No. 2 – After an
extensive detailed search (on and off) over several years, I am still unable to
locate the excised wingtips for 2 – Double Rats!! So I had to resort to
scratch-building a pair. Good thing that they are merely flat triangles with
thin trailing edges and scribed-on control surfaces. The hinge mechanisms are
very exposed when the wingtips were dropped, so I replicated them with lengths
o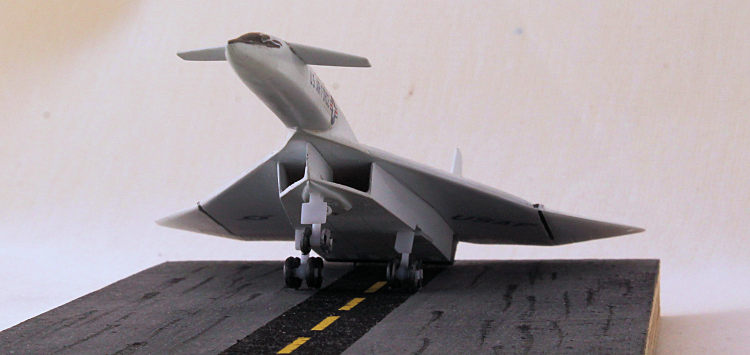 f aerofoil-shaped Contrail strut, also painted CM boltgun metal. The dicey bit
was to get them glued-on, each with the same degree of droop. The trick was to
support the model level on small block of wood. This let me glue-on the wingtips
with their tips touching the ground, thus imparting the same amount of droop to
each. But I had to support the forward points of the wingtips so that the
wingtips remained in contact with the hinges while they dried. Using Tamiya
quick-set cement helped a lot. It seems to have worked, so I can call this one
(No. 2) finished as well.
f aerofoil-shaped Contrail strut, also painted CM boltgun metal. The dicey bit
was to get them glued-on, each with the same degree of droop. The trick was to
support the model level on small block of wood. This let me glue-on the wingtips
with their tips touching the ground, thus imparting the same amount of droop to
each. But I had to support the forward points of the wingtips so that the
wingtips remained in contact with the hinges while they dried. Using Tamiya
quick-set cement helped a lot. It seems to have worked, so I can call this one
(No. 2) finished as well.
This model will be mounted on a clear acrylic rod topped with a rare-earth button magnet. It will connect with the bar magnet inside the engine pod. This avoids a need to drill a dirty-great hole in the model’s belly into which the rod would be inserted. Be careful when inserting the magnets as you’ll have a 1-in-4 chance to get it right, and they’ll let you know if/when you get it wrong (but only when you try to connect them). So, like model parts, dry-fit them first (then mark them). Rare-earth magnets are VERY strong, and if bought in quantity, really cost peanuts.
| CONCLUSIONS |
Despite being a small-scale model, it doesn’t scrub-up too badly. I do not doubt that there are better modellers out there who could build it quicker and better than I did. I’m happy to recommend it to any other modeller because it is recognisable as an XB.70 AND because it doesn’t take-up heaps of room.
19 June 2017
Copyright ModelingMadness.com
If you would like your product reviewed fairly and fairly quickly, please contact the editor or see other details in the Note to Contributors.
Back to the Main Page Back to the Review Index Page Back to the Previews Index Page