Italeri 1/72 A-7D Corsair II
| KIT #: | 1237 |
| PRICE: | $10.00 at the bargain bin |
| DECALS: | Three options |
| REVIEWER: | John Anthony |
| NOTES: | Ex-ESCI mold |
| HISTORY |
“The A-7
is not very fast, but it sure is slow.” Such was the verdict of many a pilot
that flew the “short little ugly fat fellow”, or SLUFF. But the Corsair IIs were
never buil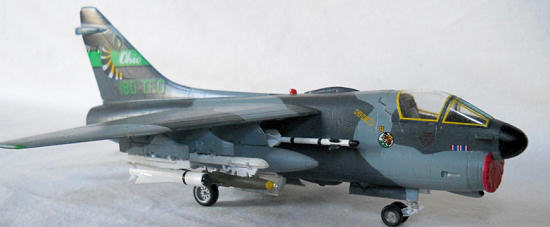 t for speed like their sleek, sexy cousins the Thunderchiefs and Super
Sabres – the A-7s were the plodding, steady, and reliable pack horses of
t for speed like their sleek, sexy cousins the Thunderchiefs and Super
Sabres – the A-7s were the plodding, steady, and reliable pack horses of
An exhaustive survey of this ubiquitous aircraft can be found in numerous sources so I’ll dispense with any history. The Wikipedia “A-7” article is a good place to start for a general overview, and it lists a number of references for further reading.
| THE KIT |
Friends
of mine that closely follow the vicissitudes of plastic from one boxing to
another assure me that this Sluff has gotten
 around, being offered at various
times by
around, being offered at various
times by
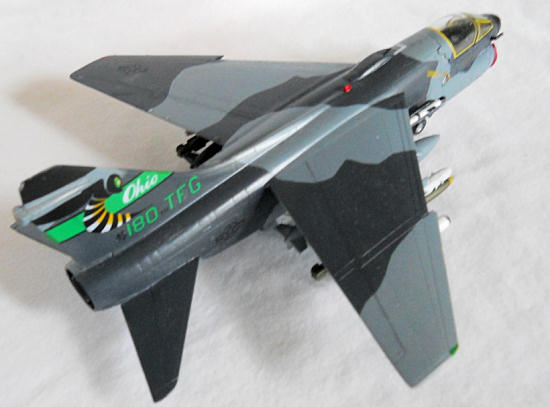
Before we get into the construction I should say that if you are a rivet-counter and concerned with the exactitude of certain details, this is not the kit for you. I superimposed an image of the model over Vought’s line drawings of the D variant and discovered that the horizontal stabilizers are incorrectly shaped, and the wings are a bit too narrow as they move outboard. Despite those flaws however, this kit builds into a decent representation of the aircraft in most of its features, and only the most erudite of aerophiles will notice the discrepancies. It certainly walks like a Sluff and talks like a Sluff.
| CONSTRUCTION |
 I tried
to devise a creative way to say that construction begins with the cockpit but
came up empty-handed. Well, let’s
pretend I did and get on with it. This is a rather Spartan tub – the assembly of
a few pieces, a dab of paint, some decals, and you’re done. The decals for the
instrument panels are crisp and more than sufficient to the cause in 1/72. I
toyed with the idea of replacing the simplistic ejection seat with some resin,
but decided to save my spare parts for a better kit. Now all that remained of
the innards was to paint the exhaust and add some weight to the nose – this
model is a tail-dragger and needs a good dose of lead. While the paint and glue
dried on these parts I assembled the wings – they consist of two pieces each:
the main section, and an inset on the underside with holes to receive the
pylons. These insets don’t follow panel lines on the original aircraft so the
gaps have to be filled and sanded.
I tried
to devise a creative way to say that construction begins with the cockpit but
came up empty-handed. Well, let’s
pretend I did and get on with it. This is a rather Spartan tub – the assembly of
a few pieces, a dab of paint, some decals, and you’re done. The decals for the
instrument panels are crisp and more than sufficient to the cause in 1/72. I
toyed with the idea of replacing the simplistic ejection seat with some resin,
but decided to save my spare parts for a better kit. Now all that remained of
the innards was to paint the exhaust and add some weight to the nose – this
model is a tail-dragger and needs a good dose of lead. While the paint and glue
dried on these parts I assembled the wings – they consist of two pieces each:
the main section, and an inset on the underside with holes to receive the
pylons. These insets don’t follow panel lines on the original aircraft so the
gaps have to be filled and sanded.
After I
mated the fuselage halves a bit of sanding removed the seams on the topside but
the underside had more serious issues – the pieces met with a slightly concave
join that would have required some deft surfacing work to correct. I opted to
simply apply a bead of putty and sand it out, leaving well enough alone. I was
approaching this project as a purely recreational build, a joy-of-modeling sort
of thing, and wasn’t at all concerned with churning out a show-quality product.
I then attached the wings and horizontal stabilizers and filled the gaps between
those pieces and the fuselage – my airframe was ready for the addition of the
external tidbits.
This kit has a decent amount of detail when it comes to externals: a refueling probe, radome, pitot tube, various intakes etc., but the instructions are vague when it comes to their placement – often all you get is an arrow pointing to a general location on the fuselage. Photographs of the aircraft are indispensible when attaching these parts, and you can also find Vought’s own cutaway schematics of the A-7D with a Google search. Once I attached all of these external parts, I ran a small bead of Tenax-7R into the joins with a 0/5 brush to close the gaps, and checked my work with a coat of Tamiya Gray Primer.
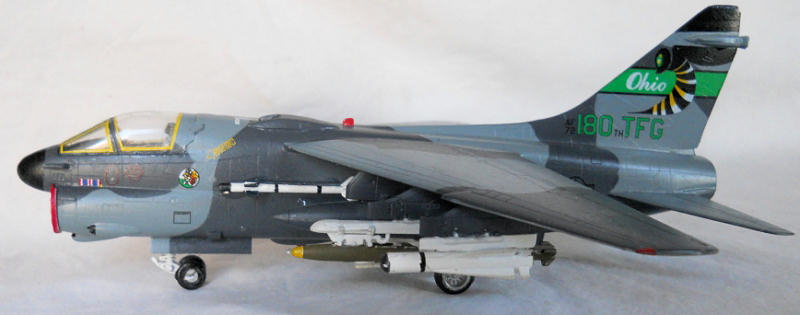
| COLORS & MARKINGS |
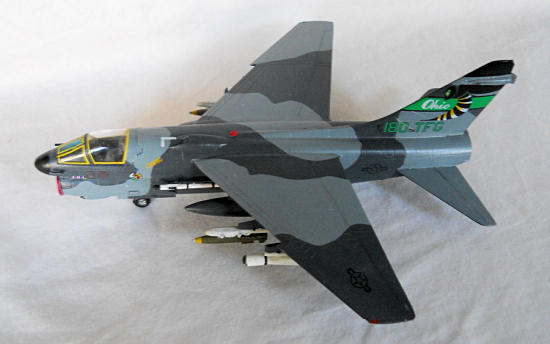
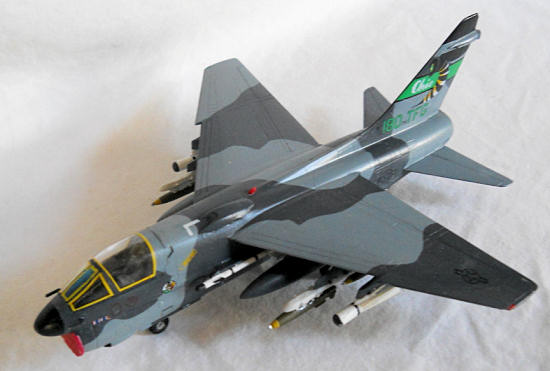 I chose
the scheme pictured on the box, partly because of the distinctive tail art,
partly as a tribute to the all-but defunct
I chose
the scheme pictured on the box, partly because of the distinctive tail art,
partly as a tribute to the all-but defunct
This kit is quite old and the decals were dry and brittle – they needed a generous bath in hot water to coax them loose. They are beautifully printed however, and they settled quite well with an application of Solvaset. Only one roundel on the underside silvered.
| FINAL CONSTRUCTION |
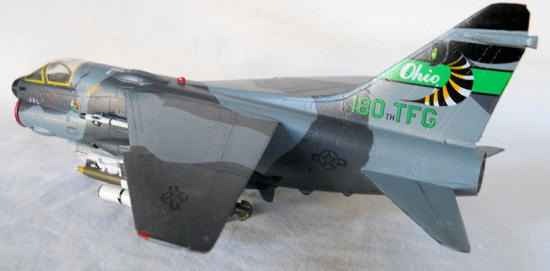
I now
painted and assembled the landing gear, doors, external stores, and canopy
without any ado. The A-7s have rather complicated gear door systems that utilize
four separate covers – installing them all at the correct angles in the open
position 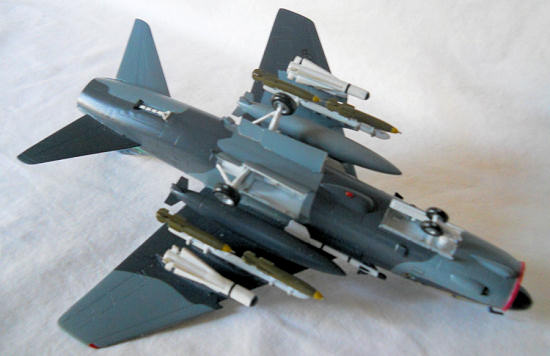 isn’t difficult but it takes some time. I propped them up with bits of
clay as they dried so that they wouldn’t move around, then I installed the gear.
The instructions include a front view of the open gear doors that can be
referenced for their placement.
isn’t difficult but it takes some time. I propped them up with bits of
clay as they dried so that they wouldn’t move around, then I installed the gear.
The instructions include a front view of the open gear doors that can be
referenced for their placement.
The external stores only needed a bit of
sanding to remove the seams. I then painted the stores and used homemade decals
for the various stripes. (I can never seem to paint a straight line around
ordnance in this scale.) There are a number of armament options suggested in the
instructions and I chose a full load-out with Sidewinders, drop tanks, Mk. 82s,
and Mavericks. This bird was built to carry a substantial amount of payload, and
I wanted it to look the part. (A complete list of the external stores offered in
the kit is as follows: 2 Aim 9Bs, 10 Mk. 82 Snakeyes, 2 500 gallon fuel tanks, 2
Finally
the canopy pieces were painted and attached. The Corsair II canopies had a
yellowish sealer between the frames and glass and I simulated that with more
homemade decals. They are admittedly too thick but in 1/72 mine are already
about half a millimeter wide and frankly, that’s the best I can do. Perhaps a
better solution would have been tracing the frames with a pointed felt pen.
I used
the FOD cover supplied with the kit as there is a total lack of intake trunking.
| CONCLUSIONS |
 one – as usual, education is expensive, and
hindsight is 50/50. That being said, this kit does build into a reasonable
representation of an A-7D, and it doesn’t present the average modeler (like
myself) any insurmountable challenges. Furthermore it’s a brief, facile build
that yields a pleasing result – I spent about 10 days working on it, an hour
here and an hour there, and enjoyed every minute.
one – as usual, education is expensive, and
hindsight is 50/50. That being said, this kit does build into a reasonable
representation of an A-7D, and it doesn’t present the average modeler (like
myself) any insurmountable challenges. Furthermore it’s a brief, facile build
that yields a pleasing result – I spent about 10 days working on it, an hour
here and an hour there, and enjoyed every minute.
I built
this kit a while ago, when I was just beginning to take up the hobby as an
adult. I would definitely build it again. But as a slightly more experienced
modeler, I would forgo the paint scheme in the instructions and use the
wrap-around scheme provided in Hobbyboss kits and various decal sheets, as they
appear to be more accurate. I would also fade the colors, not only for the scale
effect, but because in real life these aircraft mostly weathered by
sun-bleaching. The Hasegawa weapons kit would also make a nice addition,
upgrading the external stores. (A number of modelers on the internet have done a
fabulous job building and modifying this kit, and it’s worth searching those
projects out if you’re interested in building it yourself.)
As a final note, I had this model displayed on the mantle until a few days ago, when the kids got into a scuffle and sent it on its maiden flight. I thought it faired quite well, dropping a few Mk. 82s and decimating a village of pernicious dust bunnies. Once its stores were replenished, the model was safely stowed in an area where children are NOT allowed upon pain of lengthy grounding. Happy modeling!
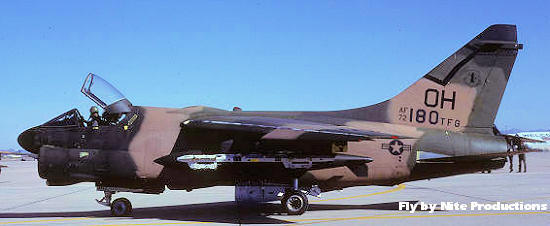 (I
looked for a slide of this plane in these markings, but apparently that one is
already gone so here is one of the same aircraft at an earlier time in the SEA
Wrap camo. As you can see, not only do ANG units keep the same plane for most of
their lives, but they keep them in superb condition as well. Ed)
(I
looked for a slide of this plane in these markings, but apparently that one is
already gone so here is one of the same aircraft at an earlier time in the SEA
Wrap camo. As you can see, not only do ANG units keep the same plane for most of
their lives, but they keep them in superb condition as well. Ed)
November 2010
If you would like your product reviewed fairly and quickly, please contact me or see other details in the Note to Contributors.