Sword 1/48 Lightning T.4
| KIT #: | SW 48008 |
| PRICE: | @$65.00 |
| DECALS: | Two options |
| REVIEWER: | Tom Cleaver |
| NOTES: | Xtradecal 48151 |
| HISTORY |
Once the English
Electric Lightning made it into production and squadron service, it was soon
apparent that the airplane was a huge “step up” for a pilot coming to the
airplane from the Hunter or something s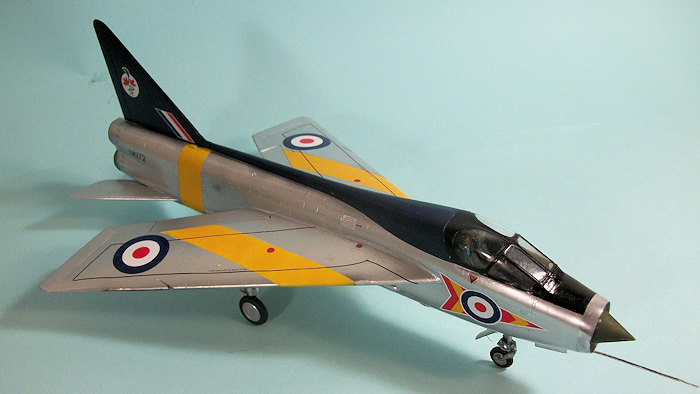 imilar.
Even with an experienced Lightning pilot in the second seat of a Hunter trainer,
a first flight in the Lightning could be a “thriller” for a new pilot.
imilar.
Even with an experienced Lightning pilot in the second seat of a Hunter trainer,
a first flight in the Lightning could be a “thriller” for a new pilot.
As a result, the Lightning trainer was developed. The new cockpit structure with side-by-side seating was designed in such a way that it did not increase drag, and the trainer had the same outstanding performance as the single-seater and could also carry missile armament for operational flights.
The Lighting T.4 was developed from the Lightning F.1A, with two prototypes and 20 production examples. These were ultimately prototypes for the T.5, based on the F.3 airframe. The final trainer, the T.56 used by Saudi Arabia and Kuwait, was based on the F.6 airframe and had the F.6 wing with cambered leading edge and extended outer leading edge.
Lightning trainers equipped the Lighting OCU, and also one was used by each operational Lightning squadron.
| THE KIT |
 This kit by
Sword is the first injection-molded kit of the Lightning trainer (in this scale.
Ed). Previously, one could accomplish creation of such a model using a resin
conversion for the Airfix kit. While T.4 and T.5 kits are marketed, inside the
kit is the same, since both vertical fins are provided. Two resin ejection seats
make a good-looking cockpit. Decals are provided for the trainer that flew with
56 Squadron’s Firebirds and the 92 Squadron aircraft in later camouflage.
This kit by
Sword is the first injection-molded kit of the Lightning trainer (in this scale.
Ed). Previously, one could accomplish creation of such a model using a resin
conversion for the Airfix kit. While T.4 and T.5 kits are marketed, inside the
kit is the same, since both vertical fins are provided. Two resin ejection seats
make a good-looking cockpit. Decals are provided for the trainer that flew with
56 Squadron’s Firebirds and the 92 Squadron aircraft in later camouflage.
The kit supplied decals are very thing and will fold like a cheap suit on the first opportunity. Fortunately, Xtradecal has produced two sheets, 43151 for the T.4 and 48152 for the T.5. One still has to use the kit decals for the stenciling, which is problematic.
| CONSTRUCTION |
The kit obviously
relies on creation from the Airfix kit for the original molds, but the parts do
not fit as well as the Airfix kit. Filler was required for the fuselage
centerline joints, the vertical fin/fuselage joint, and the wing/fuselage joint,
with extra putty required to fill the gaps on the lower surface of the
wing/fuselage joint.
 This results
in a lot of sanding down, then sanding down again, then sanding down again with
progressively finer grits, followed by Mr. Surfacer and more sanding down,
followed by a lot of polishing out, if one is interested in doing the model in a
natural metal finish. Those with a NMF-aversion should consider the camouflage
alternatives.
This results
in a lot of sanding down, then sanding down again, then sanding down again with
progressively finer grits, followed by Mr. Surfacer and more sanding down,
followed by a lot of polishing out, if one is interested in doing the model in a
natural metal finish. Those with a NMF-aversion should consider the camouflage
alternatives.
That said, the model goes together nicely. The horizontal stabs are butt-joined and should not be attached prior to all the sanding-down/polishing-out described above.
The cockpit can be poised open for those who want to add a bit more detail to the cockpit, but since it is black overall, the two very nice resin seats are really all that is noticed, and they look good through the closed canopy. Closing the canopy keeps the sleek shape.
Missiles and launch rails are provided, but the missiles are wrong, being Redstreak Firetop versions (i.e., with their noses reversed). Since the trainers were generally flown without armament, leaving these off solves that problem. The refueling boom is provided with no indication as to placement. Again, the trainers frequently did not use this, so leaving it off solves that problem.
| COLORS & MARKINGS |
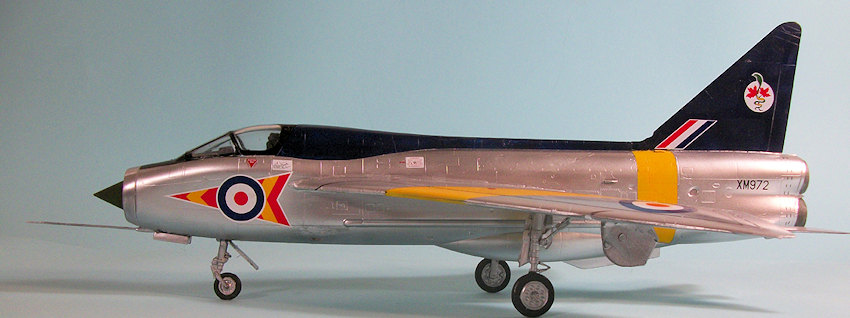
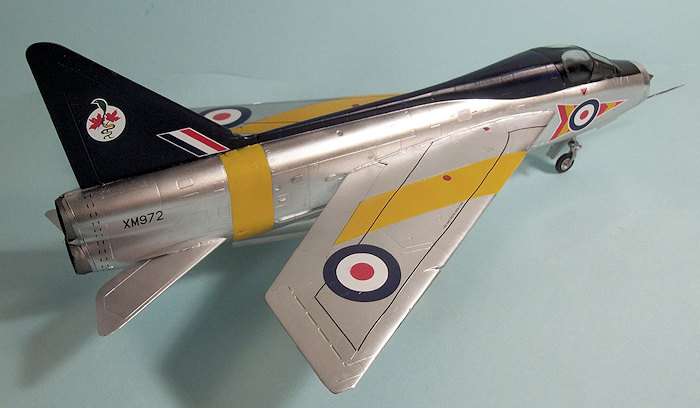
I first painted the yellow trainer stripes, then masked them off, then painted the fin and spine Tamiya Royal Blue and masked that off, then painted the canopy and anti-glare panel black and masked that off. The nose cone was painted dark green and masked off.
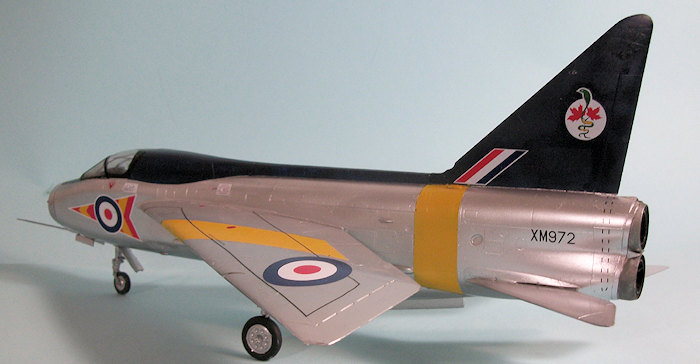 I then
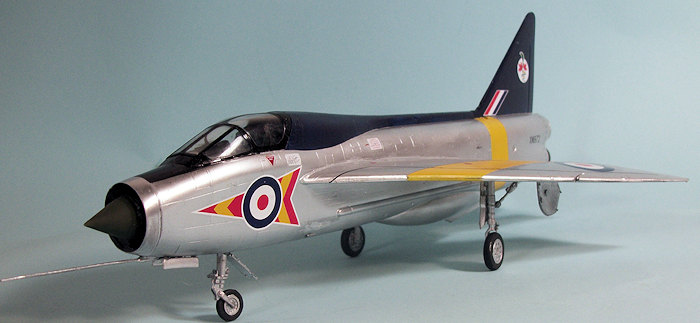
airbrushed the model overall with Tamiya Gloss Black, then broke out the Vallejo
metalizer paints. I painted the model over all Aluminum, then masked off various
areas and painted them with different shades of metalizer. These differences may
not appear that different in the photos, but they are noticeable in person.
I then
airbrushed the model overall with Tamiya Gloss Black, then broke out the Vallejo
metalizer paints. I painted the model over all Aluminum, then masked off various
areas and painted them with different shades of metalizer. These differences may
not appear that different in the photos, but they are noticeable in person.
I used the Xtradecal sheet for the Lightning T.4 and did the airplane from 92 Squadron. Unfortunately, the decal sheet has you use the kit decal for the lower wing code. The first one folded up and could not be floated back to use, so this model has the wrong serial number on it since I used the decals that worked on the Xtradecal sheet. Using the kit decals for the wing walkways was problematic, and eventually I only used half the stencil decals due to this problem.
| CONCLUSIONS |
I’ve always thought the Lightning trainer was an interesting airframe, so I am glad to have this model in the collection. If you take your time with sanding down, polishing out, and rescribing detail, it looks very good sitting next to the Airfix kits. Just remember, it’s a limited-run kit. Recommended for Lightning fans with limited-run kit experience, and don’t do the 92 Squadron option if you want the serials right.
April 2016
Copyright ModelingMadness.com
Thanks to David Hannant for the review kit and the decals.
If you would like your product reviewed fairly and fairly quickly, please contact the editor or see other details in the Note to Contributors.