KP 1/72 MiG-21MF
| KIT #: | 19 |
| PRICE: | AU$5.00 |
| DECALS: | Two options |
| REVIEWER: | George Oh |
| NOTES: | In the top 96% of the best available MiG.21 kits. |
| HISTORY |
 Early
versions are considered second-generation jet fighters, while later versions are
considered to be third-generation jet fighters. Approximately 60 countries over
four continents have flown various iterations of the MiG-21, and it still serves
many nations a half-century after its maiden flight. Teeth-wise, the MiG.21
usually had an internal 23mm cannon and five external hard points that could be
fitted with bombs, rocket launchers, drop tanks or AA missiles such as the AA-8
APHID, AA-10 ALAMO, AA-11 ARCHER or AA-12 ADDER.
Early
versions are considered second-generation jet fighters, while later versions are
considered to be third-generation jet fighters. Approximately 60 countries over
four continents have flown various iterations of the MiG-21, and it still serves
many nations a half-century after its maiden flight. Teeth-wise, the MiG.21
usually had an internal 23mm cannon and five external hard points that could be
fitted with bombs, rocket launchers, drop tanks or AA missiles such as the AA-8
APHID, AA-10 ALAMO, AA-11 ARCHER or AA-12 ADDER.
My 12 y-o son loves the History Channel series “Dogfight”. When he was with me in our LHS, he spied this model (and a PM Nesher – but that is another story) and asked me to buy them for him. As neither cost a lot, I said OK. If I’d known that he’d be getting me to complete the build for him, I would have directed his attention to a better MiG.21 (and Nesher). We built them in parallel.
| THE KIT |
This kit was moulded from a hard glossy brittle white plastic with raised detail. The parts had a fair amount of flash and showed signs of mould-slip. Fit of the parts was fair. However, it assembles onto a resemblance of a MiG.12 – close enough to satisfy my son.
| CONSTRUCTION |
I oversaw my son as he
removed and smoothed parts, then (after I refined some of his smoothing) rapidly
built the sub-assemblies of this kit - cockpit, drop tanks and intakes. Because
he wanted to recreate a dogfight, the aircraft had to be in flight, so I had to
find a pilot (Easy!), and assist my son to close the undercarriage doors (not so
easy!). Closing the fuselage (included trappin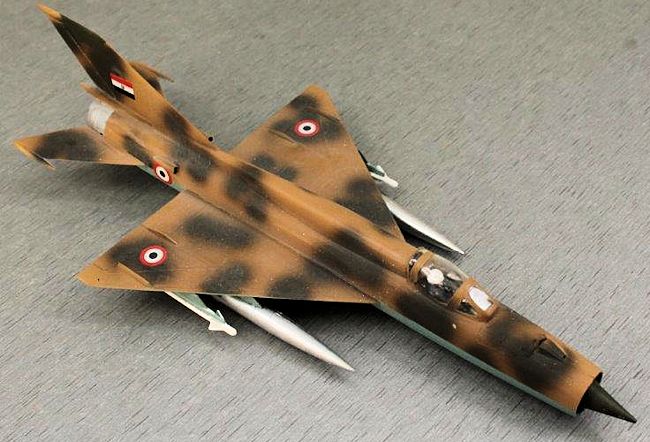 g
the pre-painting the nose cone and the tail turbine plate) was easy, but
aligning the two fuselage halves was not. The wings fit tightly into the
fuselage, and we got them level (and flat) with the help of an improvised jig. I
quietly hid the nose ring because dry-fitting told me that it was much too big
to fit the front aperture.
g
the pre-painting the nose cone and the tail turbine plate) was easy, but
aligning the two fuselage halves was not. The wings fit tightly into the
fuselage, and we got them level (and flat) with the help of an improvised jig. I
quietly hid the nose ring because dry-fitting told me that it was much too big
to fit the front aperture.
At this point, my son deferred to my ability to apply the filler and render it smooth. This was the longest part of the whole build. Meanwhile, we waited for an after-market set of decals to arrive, (and worked on the Nesher, but that is another story).
As this was a cheapie kit (and not mine), I trialled a new (for me) canopy masking theory. The plan was to cut thin strips of Tamiya tape with-which I covered the framing. This pointed-up the clear areas to be masked – which I did with short lengths of a cheaper blue masking tape (often overlapped and layered). Strip-off the yellow tape and the framing is exposed and ready for painting. Attach the canopy with white glue, because it doubles as filler, and he (Russian machines are masculine) is ready for painting.
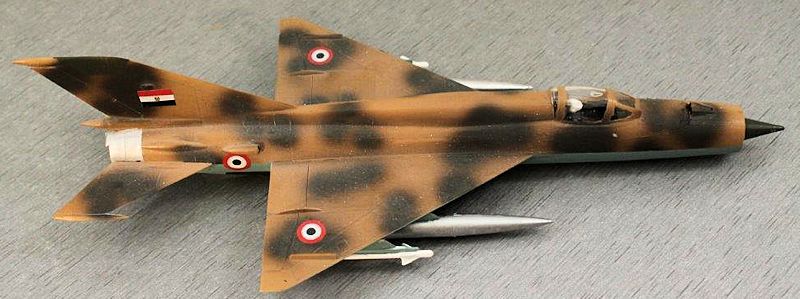
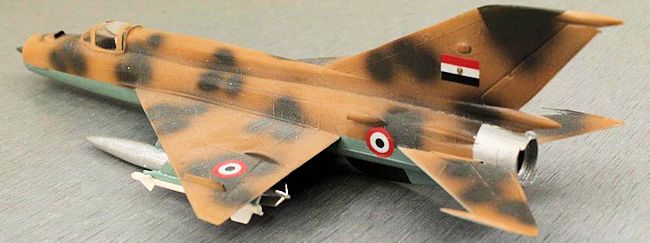
| COLORS & MARKINGS |
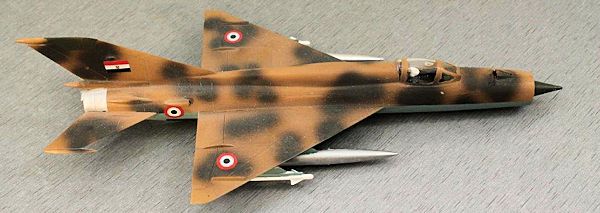
I painted the Nesher at the same time as this MiG. To get them looking distinctly different, I selected three different shades of brown – the lightest and the darkest for the Nesher, and the middle one (Tamiya XF?? ) for the base coat of the MiG. This was sprayed on, and was to be followed by a cam of (Tamiya XF??) dark green blotches. Note – I stink at doing mottled cam.
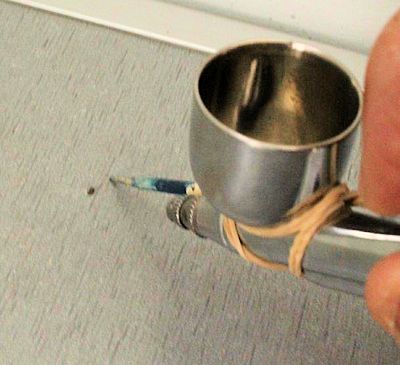 In a flash of
inspiration I devised, and experimented with, a method to do the cam (without
pain or frustration to me). I rubber-banded a long bamboo skewer to the side of
my AB, so that the skewer could be easily lengthened (or shortened) as it poked
beyond the tip of the AB. Then I experimented with distance to get a
perfect-sized blotch. These experiments also told me the offset distance of the
skewer point from a known point to get the blotch exactly on the target. With a
black felt pen, I dotted the brown coat to indicate where I wanted the green
blotches. This was a mistake because some spots can be seen through the paint.
With the aid of the pointer, I was able to precisely position each blotch over
its spot, and get them all the same(ish) size. I wonder if this technique will
work for spraying a scribble-pattern cam, mottled cam or for spraying free-hand?
In a flash of
inspiration I devised, and experimented with, a method to do the cam (without
pain or frustration to me). I rubber-banded a long bamboo skewer to the side of
my AB, so that the skewer could be easily lengthened (or shortened) as it poked
beyond the tip of the AB. Then I experimented with distance to get a
perfect-sized blotch. These experiments also told me the offset distance of the
skewer point from a known point to get the blotch exactly on the target. With a
black felt pen, I dotted the brown coat to indicate where I wanted the green
blotches. This was a mistake because some spots can be seen through the paint.
With the aid of the pointer, I was able to precisely position each blotch over
its spot, and get them all the same(ish) size. I wonder if this technique will
work for spraying a scribble-pattern cam, mottled cam or for spraying free-hand?
Eventually, I masked the airframe and sprayed the
underside and yet-to-be-added bits with (Tamiya XF??)
 light blue.
Further masking let me spray the silver tail ring and one drop tank (the other
was brush-painted with Citadel mithril silver for a different hue). The antenna
areas were masked-off and brush-painted with Citadel castellan green. Finally, a
coat of Future was brushed-on as a foundation for the decals.
light blue.
Further masking let me spray the silver tail ring and one drop tank (the other
was brush-painted with Citadel mithril silver for a different hue). The antenna
areas were masked-off and brush-painted with Citadel castellan green. Finally, a
coat of Future was brushed-on as a foundation for the decals.
My son wanted Syrian markings, so I bought a Print/Scale set (No. 72-126) of decals for Mig-19s and 21s of the Arab Air Forces from BNA, a local internet shop, and received them within three days. The set contained markings for seven different MiG-21s from the UARAF and the EAF. They settled onto the Future without a need for setting solution/s. Gunze H 20 clear flat sealed them in and dealt with the glossy Future. I dunno how good the kit decals are.
| FINAL CONSTRUCTION |
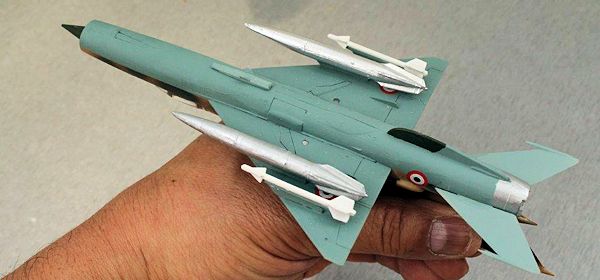 All I had
to add were the tailplanes and the pylons (with their attached loads). The
instructions identified that the large drop tanks are to be positioned way
out under the wingtips, while the smaller lighter missiles are placed nearer
to the fuselage. This layout must surely have a detrimental effect on the
aircraft’s agility, so I placed them the other way round. It looks better
(to me) and echoes the lay-out of the Nesher. Unfortunately (for me), they
went down over the underwing decals. Anyway, we called this one finished.
(Yes – I know that I’ve yet to replace the long nose probe with a stainless
steel tube (I have it in stock) because the plastic bit will be fragile).
All I had
to add were the tailplanes and the pylons (with their attached loads). The
instructions identified that the large drop tanks are to be positioned way
out under the wingtips, while the smaller lighter missiles are placed nearer
to the fuselage. This layout must surely have a detrimental effect on the
aircraft’s agility, so I placed them the other way round. It looks better
(to me) and echoes the lay-out of the Nesher. Unfortunately (for me), they
went down over the underwing decals. Anyway, we called this one finished.
(Yes – I know that I’ve yet to replace the long nose probe with a stainless
steel tube (I have it in stock) because the plastic bit will be fragile).
| CONCLUSIONS |
 Well, my son
is pleased with his MiG (to battle against his Nesher), and I now have another
technique that I can use on other models. So I was successful on two fronts –
three, because, after reading this article, you know about my
spray-painter-pointer, too.
Well, my son
is pleased with his MiG (to battle against his Nesher), and I now have another
technique that I can use on other models. So I was successful on two fronts –
three, because, after reading this article, you know about my
spray-painter-pointer, too.
This MiG.21 ‘aint a great kit – there are surely better ones available – so I cannot, in all honesty, recommend it to anyone who wants a nice easy MiG. That said, it can be made to look like a MiG.21, if you are willing to do the work, and it won’t cost you a packet. Oh – I must apologise for not being able to remember which Tamiya paints I used.
| REFERENCES |
Just the instructions and the decal placement guide.
Copyright ModelingMadness.com October 2015
If you would like your product reviewed fairly and fairly quickly, please contact the editor or see other details in the Note to Contributors.