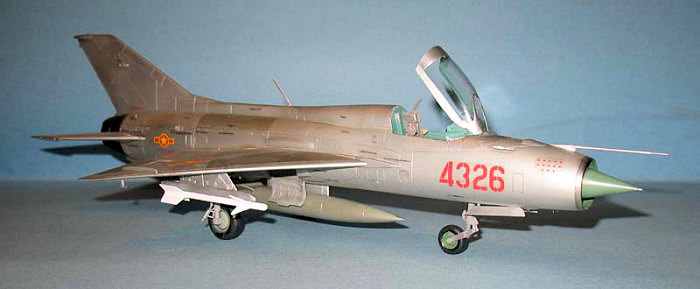
Academy 1/48 MiG-21 PFM
| KIT #: | 2166 |
| PRICE: | $25.00 MSRP |
| DECALS: | Five options |
| REVIEWER: | Dan Lee |
| NOTES: | Items used: Terry Dean nose weight, Pavla cockpit, Aeromaster stencils, Begemont decals. |
| HISTORY |
The Mig-21 was designed to be a Mach 2 point defense interceptor that was guided onto the target by Ground Control Interception. The original Mig-21 was a day fighter with limited range and armed with two Atoll AAMs (Soviet copies of the original Sidewinder.)
 The PF model was upgraded with
radar, limited all weather capability, longer range and more powerful engine
(later models included a twin barreled 23mm cannon.) A variant of this model,
the PFM, was sold the North Vietnam to defend their nation from the constant US
airstrikes of Operations Rolling Thunder, Linebacker, etc. This plane gave the
USN and USAF fits when introduced in 1967 and continued to do so till the end of
the war.
The PF model was upgraded with
radar, limited all weather capability, longer range and more powerful engine
(later models included a twin barreled 23mm cannon.) A variant of this model,
the PFM, was sold the North Vietnam to defend their nation from the constant US
airstrikes of Operations Rolling Thunder, Linebacker, etc. This plane gave the
USN and USAF fits when introduced in 1967 and continued to do so till the end of
the war.
This particular Mig-21 is the oft modeled 4326 (see Kevin Thompson’s build of the Fujimi 1/72 Mig-21 for a more detailed history of the plane.)
Later versions of the Mig-21 still fly today. Upgrades offered by the Israelis, Indians and the Russians can give this plane a Beyond Visual Range sting and upgraded avionics/ECM. It was reported that the Indian upgraded Bisons gave the USAF and USN fits in exercises over the Indian Ocean in the early 2000s.
| THE KIT |
Academy’s Mig-21 PF is the only currently available 1/48 scale model of this plane. See Scott’s preview of the kit at this link.
| CONSTRUCTION |
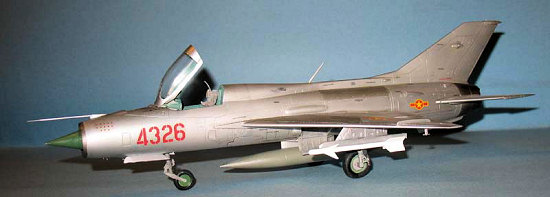
The first step was to use the Terry Dean Noseweight which drops right into the Mig-21’s shock cone/radome and it was then sprayed along with the wheels using Gunze H319 Green and set aside.
 I took one look at the cockpit and
decided to buy the Pavla replacement cockpit which contains a lot more detail
than the Academy pit. As far as resin cockpits go, this Pavla cockpit was
relatively painless. Only PITA moment was the Mig 21 HUD (?) which proved to be
rather fragile. The resin parts were sprayed MM enamel USSR interior blue
green, a rarity as I use less toxic acrylics while the ejection seat was painted
with Tamiya XF-19 Sky Grey.
I took one look at the cockpit and
decided to buy the Pavla replacement cockpit which contains a lot more detail
than the Academy pit. As far as resin cockpits go, this Pavla cockpit was
relatively painless. Only PITA moment was the Mig 21 HUD (?) which proved to be
rather fragile. The resin parts were sprayed MM enamel USSR interior blue
green, a rarity as I use less toxic acrylics while the ejection seat was painted
with Tamiya XF-19 Sky Grey.
I installed the resin cockpit and shock cone into the forward section and did not encounter any fit problems, a rarity. I mated the fuselage sections together and shook my head as I noticed the step where the two fuselage halves met.
I then attached the wings with a slight (4 degree) anhedrial as per instructions. This might seem stupid with the seam in the center of the fuselage unfinished, but that was how I did it. The tail planes were attached at this point and then I let the model sit for a couple of weeks to give the glue time to cure and reduce those phantom divots caused by out gassing. One thing I do not like about Academy models is their annoying habit of putting delicate details on the seams which is usually destroyed in the sanding filling process. I removed all the RWR antennas on the chin and tail and marked the locations.
I have to say that the Academy
Mig-21 is not NMF friendly thanks to the way the kit was engineered and fitted.
All those extra seams made for lots of unnecessary headaches which caused about
six weekends of filling, sanding and polishing with various
 fillers till I got
something I could live with. Six weeks of hard tedious work boiled down to one
sentence as I wanted to save the readers of this review trying to read through
four pages filled with words like CA glue, Mr Surfacer, pinholes, sanding,
filling and profanity.
fillers till I got
something I could live with. Six weeks of hard tedious work boiled down to one
sentence as I wanted to save the readers of this review trying to read through
four pages filled with words like CA glue, Mr Surfacer, pinholes, sanding,
filling and profanity.
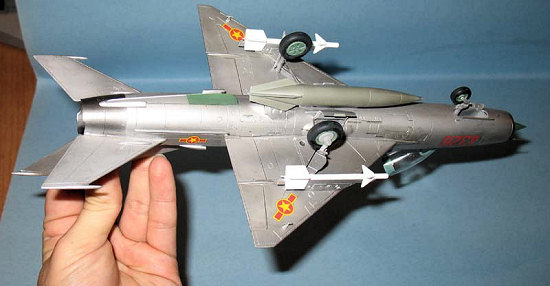
It is not perfect as one can see slight sink marks (which I could not or did not have the patience anymore to fix) where the front fuselage met the aft fuselage. Photos of Mig-21s on the ground mostly showed that the airbrakes were closed up so that is what I did. I also did it out of laziness as that the centerline seam went right thru the underside brake wells and did not want to do all that extra work for a minor detail.
Once the first wave of sanding and filling was done, I attached all the air scoops as per instructions.
Finally, I painted the landing gear parts and the wheel wells Tam XF-19 Sky Grey while the wheel hubs were painted with Gunze H319 Green.
| COLORS & MARKINGS |
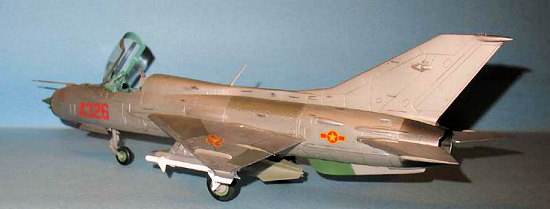
I wanted to build a NMF Mig-21 because I think a Mig-21 looks best in NMF (and that I’m a glutton for punishment.) I selected the markings for famous 4326 of the 921st VNAF.
The NMF coat took a long time (even
for my NMF builds.) I spent some two months (overlapped with redoing the seams
many many times) to complete it. The base NMF coat was done several thin coats
of TS-30 Tamiya spray can lacquer. Each layer had to
 be wet sanded/polished
using Micro Mesh polishing pads to keep the surface relatively smooth. This was
a frustrating experience to say the least as each coat exposed more filling
flaws that needed to be fixed. However, this was expected so I did not throw a hissy fit when things didn’t work out for the 15th time. The pylons,
gear doors and fuel tank were a little easier.
be wet sanded/polished
using Micro Mesh polishing pads to keep the surface relatively smooth. This was
a frustrating experience to say the least as each coat exposed more filling
flaws that needed to be fixed. However, this was expected so I did not throw a hissy fit when things didn’t work out for the 15th time. The pylons,
gear doors and fuel tank were a little easier.
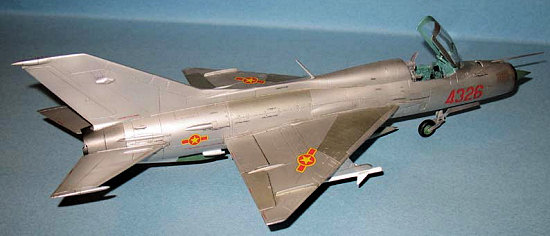
Once I had finished/polished the base coat to my satisfaction/frustration, I post shaded the NMF using Talon Dark Aluminum to vary the metal tones within panels of the same metallic tinit. Talon can bead up, but if you run your airbrush at low pressure 10-15 PSI and spray in really light coats you won’t run into that problem. The effect is subtle and not noticeable from the photos. I masked off selected sections and sprayed with Tamiya Platinum acrylic and the engine nozzle with Gunze Red Steel.
After my past experiences with
Academy decals, I pitched the kit’s sheet into the garbage and looked for an
aftermarket substitute. This took a while as Mig-21 decals are not as common as
Bf-109s or F-16s decals. Fortunately, Hanants sells Begemeont, a Russian decal
company, that specializes in decals or Russian/USSR/Warsaw Pact aircraft sold a
large 1/48 Mig-21 sheet that contained the markings I was looking for. I bought the Aerom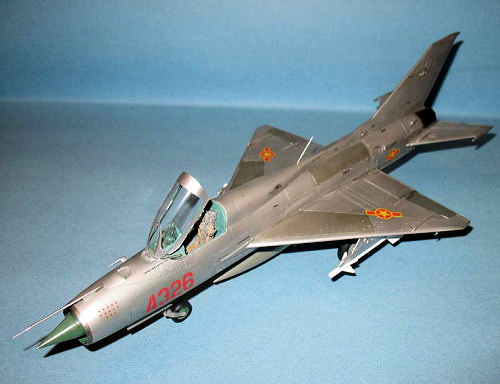 aster Mig-21 stencil sheet in the masochistic “desire” to place 50 rather
tiny decals in hard to reach places.
aster Mig-21 stencil sheet in the masochistic “desire” to place 50 rather
tiny decals in hard to reach places.
The Begemont decals went on well using Micro Set while I had more difficulty with the Aeromaster ones as they were 11 years old and sometimes broke when immersed in water. I admit that I had a hard time with the stencils as the decal numbers didn’t really line up with what was on the sheet. At the end, I just slapped the stencils wherever I thought they looked right as I’m not gunning for museum quality here.
Once the decals were dry, I wiped down the model with a wet rag to remove the decal solution residue. I then used a raw umber/black water color wash to bring out the surface detail. After that dried, I cleaned the excess wash with slightly wet Q-tips and then sprayed the model with Gunze Flat for the final coat.
The Atoll missiles were sprayed with Tamiya Fine Primer and then a final coat of Tamiya Flat White was added for final effect. The fuel tank was painted Tamiya Platinum Silver which accounts for the odd color in the photos.
| CONSTRUCTION CONTINUES |
The ejection seat was painted with various colors then cut away from its casting block and inserted into the cockpit. It was a very snug fit, but I still put a drop of CA glue on the bottom to keep it in place.
The already painted probes, undercarriage, doors, fuel tanks, weapons, various tubes and protrusions were added afterwards with no glitches. The canopy was glued in place with CA glue and underwing landing lights were done with Micro Krystal Kleer.
The last items were the ECM antenna replacements using pre cut lengths of steel wire and a tiny bead of Krystal Kleer glue.
| CONCLUSIONS |
The Academy Mig-21 proved to be a
difficult build as I fought this model kit during most of the assembly and
painting phases which is a shame as it had the beginnings of being a very good
kit. The Mig-21 also proved to be a rather expensive build thanks to all
the aftermarket goodies I put into it to replace parts/decals that I thought
were inadequate. Unfortunately, this has been a common experience
(expensive and painful) with all the Academy 1/48 s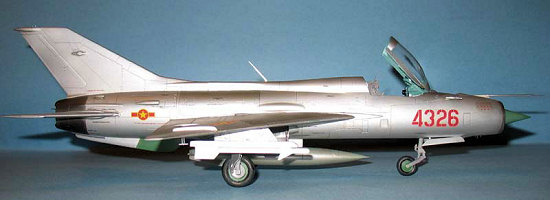 cale
jets I’ve built or attempted to build so far.
cale
jets I’ve built or attempted to build so far.
I will cut Academy a bit of slack as the Mig 21 design itself (especially the nose cone) does not lend itself to easy model kit design. If I were to improve this kit, the three major things I would do is make the fuselage into two pieces (instead of trying to emulate Hasegawa by maximizing the number of variants out of one mold leading to the four existing pieces with a not so well located seam), make a new cockpit as the kit cockpit is pretty weak and finally, get a new decal vendor! If Academy had done that then is kit would have been a much better one although I’m sure that Mig-21 experts have a list of things they would like to change with this kit.
If you really want to build a 1/48 scale Mig-21 PF(M) then this is the only game in town for now. Eduard recently announced that they were going to make a series of 1/48 Mig-21 kits in 2008/9.
February 2008
Copyright ModelingMadness.com. All rights reserved. No reproduction in part or in whole without express permission.
If you would like your product reviewed fairly and fairly quickly, please contact the editor or see other details in the Note to Contributors.