| HISTORY |
| KIT #: | ? |
| PRICE: | 49 Euros |
| DECALS: | One option |
| REVIEWER: | Carmel J. Attard |
| NOTES: | Injection moulded with brass etch detail parts and Soviet AF decals. |

| HISTORY |
The aircraft that
became the Tu-16 was actually based on the fuselage and systems of the Tu-4
‘Bull’, an unlicensed copy of the wartime B-29-married to a newly-designed swept
wing, rugged undercarriage and twin jet engines of revolutionary new design. The
Type 88 prototype made its maiden flight on
 The
Tu-16 was Tupolev’s most important post war production programme. The OKB
workshops and factories at
The
Tu-16 was rather less dramatic and futuristic than the B-47 but its more
conservative design in the end proved more durable. The Tu-16 entered service in
1954 and 54 aircraft flew over
The Red
Arrow scale model of the Tu-16KS Badger B is a AV-MF missile carrier with
provision for under wing KS-1 Komet (AS-1 Kennel) stand off air-to-surface
missiles, Kobart-N Guidance transmitter installed, glazed nose retained.; The
Tu-16K-10 Badger C was an AV-MF missile carrier. There were other varieties of
Tu-16 both A and K versions refitted with Rubin radar under nose and with
provision for KSR-11 or KSR-2 cruise missile.
The
Badger A could carry a bomb load of up to 19,800 Lb. Naval version carried
air-to-surface stand-off missiles. For defense the Tu-16 had forward and rear
ventral barbettes each containing two 23mm NR-23 guns and two similar weapons in
tail position.
| THE KIT |
Injection moulded in cream coloured plastic to limited run standard with extensive flash and very crude joints. It was released before the Trumpeter kit and at the time was very welcomed back in 1988. The moulds appear to have been hand made with non-uniform thick cross sections across all the fuselage parts, which was made out of 6 pieces to give a full fuselage length.
| CONSTRUCTION |
 Parts had poor fit and the build
was more of a challenge than fun to build. There was lack of refinement even on
the surface finish of main parts. Joining the parts to make the fuselage gave
the most non-symmetrical cross sections of the different sections. Joint at the
flying surfaces was also poor and this resulted in a pronounced and excessive
gap in trailing edge. The problematic situation was made good with considerable
sanding of the inner parts on a flat surface. The positive thing is that the
thick plastic was very robust, soft and no sign of brittleness.
The
wing joint slot is an arduous task, as it requires a drammel to open or else a
considerable time for shaping with files. The rear and forward fuselage parts
are separate halves from the central section. The joint is very crude and
requires considerable care to align correctly to satisfy the final appearance
and conformance to the 1/72 scale plan view drawing issued.
The rather huge tail unit signaled to me that I should play safe and get
the model balance on its wheels, so I added sufficient weight to the nose
section.
A large
quantity of brass etch parts comes with the kit. This appears to be very
accurate and a considerable time must have been devoted to produce them to such
fine detail. The instructions are a headache in spite of the pictorial hand
sketches intended to assist one to locate the tiny metal etch items. It is of
poor printing and you will be lucky if you manage 50% as the numerical
references with respect to the parts as these could hardly be read on the
instructions.
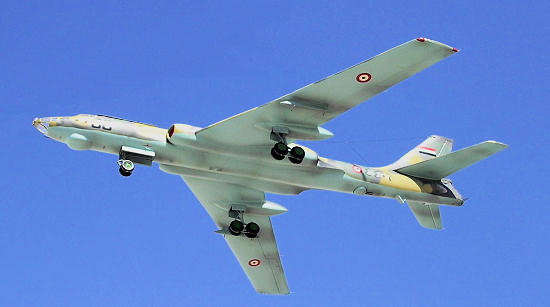 When it
comes to the transparencies these are again thick and crude and one may replace
them with a new set of molded ones from acetate or one will loose the scope of
detailing the cockpit interior with brass etch parts issued. Still it can be
described as modest. The thick kit flat canopy and nose Perspex could serve
perfectly as a vac-form master for those willing to take that step. The wheels
are of rough finish and if best are replaced but I have managed to refined them
with a flat file and plenty of wet and dry. Be very sure that the undercarriage
legs are aligned and exactly like you want them when it comes to fix them. In
order to produce a good firm joint of the main undercarriage legs inside the
wing wheel well I used super glue, avoiding excess and in fact used capillary
action to get the glue into the seam and in doing so ensuring a firm and fast
dry.
With the kit in a basic one huge piece and the interior cockpit detail painted in black, blue green and light gray the clear parts were fixed in place and carefully masked with yellow Tamiya masking tape that I got from ‘K-Hobbies’ of Fgura in Malta.
| COLORS & MARKINGS |
I first
gave the model an overall undercoat of Humbrol enamel matt light gray. This
revealed several tiny imperfections at different localities, which were attended
to using soft Revell Plasto and subsequently smoothened using wet and dry.
The
decals provide for three different Russian AF bombers, all in metal upper
fuselage with white lower. There is a pretty green curled crocodile on one of
the schemes for a Tu-16 that served in
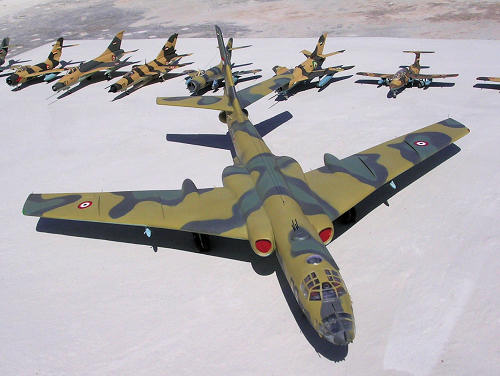 The
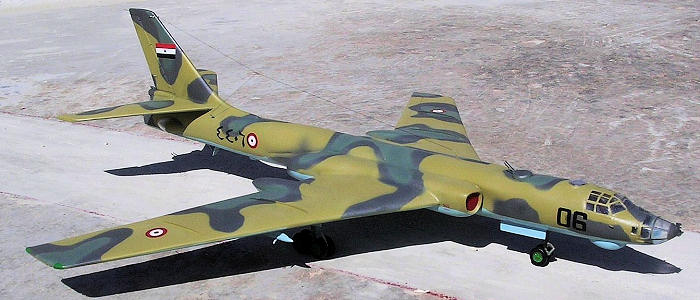
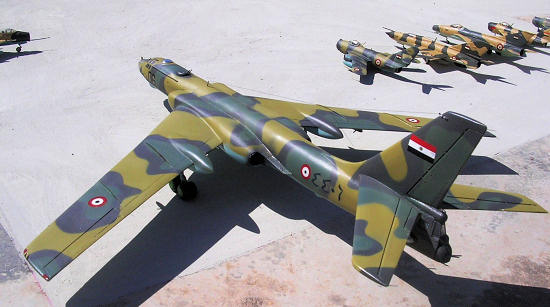
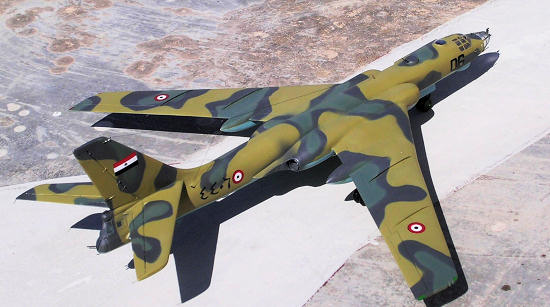
Tu-16K was however completed in Egyptian AF camouflage finish. There were
varieties of this camouflage scheme. I made reference to photos of the type that
appeared in a past issue of ‘Aircraft Illustrated’ and other detail that I
accumulated over time. I have used Humbrol enamel paints, mixing the appropriate
shades to conform as close as possible to the following FS colors:
Underside blue grey FS 25526
Sand
FS 20400
Dark
olive–gray
FS 34050
Grey-green
FS36251
There
were also variations in shades of the camouflage colors as the Tu-16 were
subjected to both intense hot weather at the desert bases in Egypt and also
continual exposure to erosion operating low over the Eastern Mediterranean sea.
Egyptian Air Force decals were acquired from an old
The Red
Wings kit of the Tu-16 was built as a Tu-16 K-26 and this required a new nose
antenna, which was made from plastic card. The Kingfish ASM missiles were
removed from the under wing pylons as it was not sure if the Egyptian AF had
them in service.
| CONCLUSIONS |
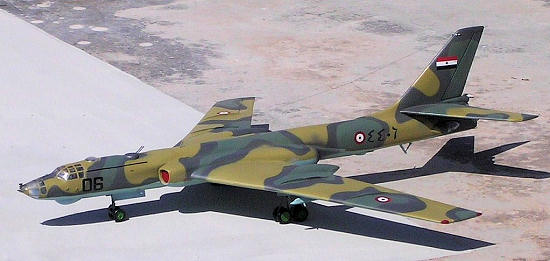 This
was the only kit available at the time. It is not a kit intended for one who is
new to the hobby in view of the size and quality of the product as explained
above. It took me around 46 hours to build, typical for a big model of certain
complexity in its issue. I was eager to add a Badger to my model collection and
the Trumpeter kit was 2 years away before it emerged in shops. I was impressed
by the size of the model, and the extra detail in form of brass etch components
made me more than willing to start on the kit right away and in the end finding
that some 50% of the tiny items could not be located anywhere on the kit. The
rest mostly went hidden into the cockpit and some on the gun barbettes.
Nevertheless this kit should appeal for those with a special interest in Warsaw
pact aircraft during the cold war era.
| REFERENCES |
The Encyclopedia of World Aircraft by Paul Eden and Soph Moeng.
November 2009 If you would like your product reviewed fairly and quickly, please
contact
me or see other details in the
Note to
Contributors.