ESCI 1/48 Impala Mk.1
| KIT #: | 4063 |
| PRICE: | €20 |
| DECALS: | Four options |
| REVIEWER: | Spiros Pendedekas |
| NOTES: | Still the only game in town |
| HISTORY |
South Africa obtained a license to produce the Aermacchi MB-326M, as the Impala Mk I in 1964 with production starting in 1966. It received a number (40 or 16, with sources varying) Italian-built aircraft followed by about 125 (135) built locally by the Atlas Aircraft Corporation. The type was used both as a trainer and as a strike aircraft.
In the latter configuration, the aircraft had many advantages over more expensive fast-jets. Although slower, it could operate from primitive, short airfields and strike within minutes. The flying school for Impalas was Flying Training School at Langebaanweg, while operational squadrons were 4, 5, 6, 7 and 8 Squadrons. The 85 Combat Flying School also had a small number of Impalas to supplement their Mirage trainers.
| THE KIT |
For a description of the kit contents, as well as a generalized history of the MB-326, please refer to this kit’s preview in the archives.
| CONSTRUCTION |
I started by attaching the two instrument panels
onto the cockpit tub, then joined the fuselage halves with the cockpit and rear
turbine face trapped in between. Having somehow managed to lose the cockpit rear
bulkhead, I fabricated one out of a flat scrap styrene piece. It is true that
the exhaust innard is neither deep enough nor realistically rendered. Modifying
it would involve some serious scratch building, so I decided to leave it “as
is”, hoping that dark "burned metal" paint will somehow hide it.
 The 4-piece
seats were assembled, with their main shape looking acceptable. The Martin Baker
type AS-O6A worn by the Impala MK1 is a very colorful and busy looking seat, so
I decided to perform some extra work there. By studying net pics, the seat
frames were painted black (and dry-brushed with silver) and their top, middle
and lower cushions khaki, dark gray and light green respectively.
The 4-piece
seats were assembled, with their main shape looking acceptable. The Martin Baker
type AS-O6A worn by the Impala MK1 is a very colorful and busy looking seat, so
I decided to perform some extra work there. By studying net pics, the seat
frames were painted black (and dry-brushed with silver) and their top, middle
and lower cushions khaki, dark gray and light green respectively.
The molded on upper seat
belts were painted olive green, whereas I added lower ones from masking tape,
painted French blue. No lower ejection handles were supplied, so I fabricated
them from stretched sprue. All emergency handles were painted with yellow/black
stripes. Finally, two tiny bits of clay were added on top of each seat head and
painted green, to represent the parachute tops.
The main wing is a beautiful 9-piece subassembly: after drilling the appropriate
holes at its lower surface for the version I am building, I attached the upper
halves, followed by the tip tanks (2-piece each) and the lower intake duct
sections. Since the intakes' bottomless innards looked unrealistic, I affixed
some clay at their back "end" and painted it black, in order to blank
the emptiness.
The main wing was subsequently attached onto the fuselage, followed by the tail
planes. Fit of all the above, though not perfect, was quite good, with some gaps
arising at the wing roots, the intake lower areas and, expectedly, at the area
where the aft wing part meets the fuselage.
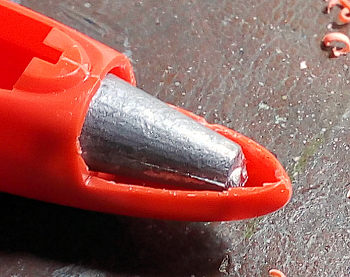 Being
pretty obvious that the model would be a severe tail sitter, I decided to delete
the option of an open front electronics bay: after shaving off its (nevertheless
simplistic) inner details and removed its “floor”, I secured a sizable fishing
weight with modeling clay in the now empty space and attached the top cover.
Being
pretty obvious that the model would be a severe tail sitter, I decided to delete
the option of an open front electronics bay: after shaving off its (nevertheless
simplistic) inner details and removed its “floor”, I secured a sizable fishing
weight with modeling clay in the now empty space and attached the top cover.
The model then received an initial coarse sanding, followed by filling and
smooth sanding. It was at this time that, by studying reference pics, I realized
that almost always, parked Impalas had their flaps, as well as their airbrake,
lowered. The latter would not be a problem, since that option is provided by the
kit. For the former, I decided to separate the flaps by carefully running the
back of my hobby knife repeatedly through their recessed borders. Of course, the
resulting separated flaps would be shorter in length than the area they are
supposed to be attached to, since the blade
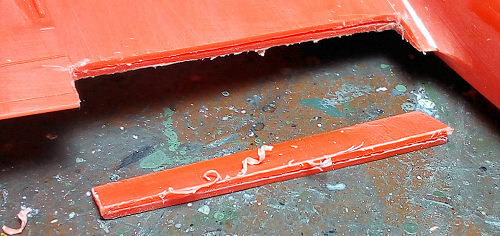 thickness
would have removed some material. Being too lazy to build up the lost material,
I deemed that discrepancy passable. The gaps that arose at the wing and flap
areas during this process were filled with liquefied styrene and sanded smooth.
The flaps were then attached at “down” position.
thickness
would have removed some material. Being too lazy to build up the lost material,
I deemed that discrepancy passable. The gaps that arose at the wing and flap
areas during this process were filled with liquefied styrene and sanded smooth.
The flaps were then attached at “down” position.
The MLG wells featured some passable detail, but the NLG one was plain, so it
was "busied-up" with some stretched sprue pieces. Impalas featured quite a few
NACA intakes at various fuselage places that are rendered by Esci as indents:
those were carefully drilled out for extra realism. After a fine 1000grit
sanding, the model headed to the paint shop!
| COLORS & MARKINGS |
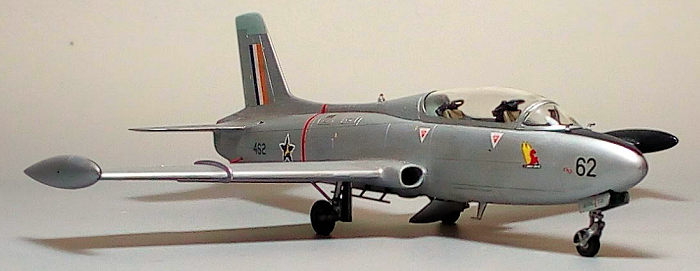
I gave the whole model a
coat of Hu11 Silver, which revealed some areas still needing attention, meaning
another filling, sanding and painting loop. Then, the front anti-glare panel, as
well as the tip tanks anti-glare areas were masked and painted matt black per
the instructions. The fin top area and the intake lips were painted Hu127 light
gray, as this shade was evident by studying
 seasonal
pics. The same gray was used as the basic cockpit color, with four “tan” stripes
carefully painted at the floor foot rest areas. The exhaust bare metal area was
painted Testors burned metal inside and out.
seasonal
pics. The same gray was used as the basic cockpit color, with four “tan” stripes
carefully painted at the floor foot rest areas. The exhaust bare metal area was
painted Testors burned metal inside and out.
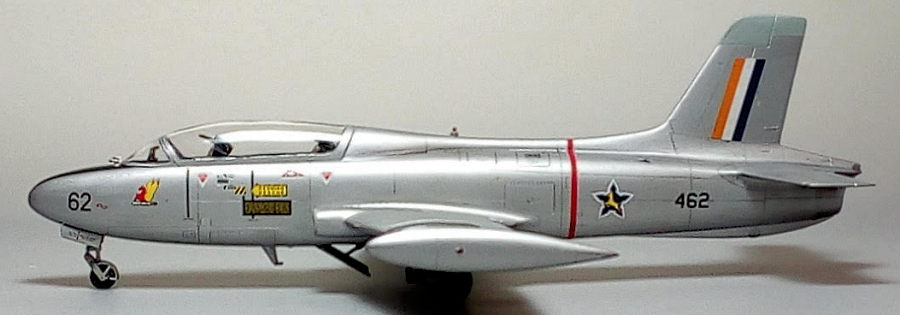
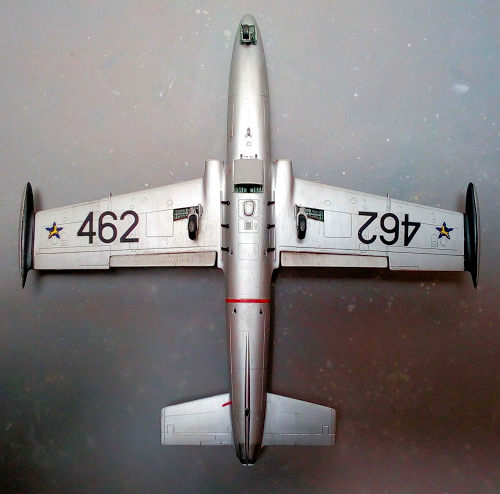
After a coat of Future, I proceeded to decals application. I used the kit
decals, in order to represent SAAF “462” Impala, as it supposedly stood sometime
in the early 70s. The Cartograf decals were superbly printed and, despite being
almost 40 (!) years old, behaved flawlessly: they detached from their backing
paper within seconds and adhered perfectly to the surfaces. The only area
needing attention was the top of the red warning stripe for the turbine, where
the decal could not follow the spine curvature and I had to cut it in small
pieces that I sequentially attached.
It was at this time that
the cockpit decals were also attached: though two-dimensional, they did not look
too bad. Finally, due to yet another yours truly (mis)handling error, I managed
to destroy the aft code numbers, which were replaced by similar looking ones
from my spares. A coat of Future sealed the decals.
| FINAL CONSTRUCTION |
The control sticks were
painted gray with black grips and gaiters and attached in position, followed by
the seats and gun sight transparency, which had its frame painted black.
Onto the landing gear, the main wheels were tad filed to look “weighted”. The
gear legs were assembled, with the main ones receiving brake lines made of
stretched sprue and routed as witnessed in reference pics. All three gear
legs were then attached in position. While the kit provides MLG retraction
links, it does not provide the quite prominent NLG ones, so I made two from
stretched sprue and added them bilaterally on the nose leg base. The gear doors
were then attached and all were left to dry.
As a note, instructions want you to trap the wheels within the gear legs as you
assemble them. I decided to add them at later stages, as it would not only allow
for an easier painting, but also for a good alignment of the “weighted” wheels
once attached, which was exactly the case. The airbrake was also attached “open”
at this time. All landing gear parts, including wheel rims, were painted silver.
Tires, brake lines and air brake retraction cylinder body were painted black.
Wheel and air brake wells and doors innards were painted Hu78 green.
 Final
“bits and pieces” installation included the front and the (correct for this
version) pair of middle array-type underbelly antennas, the two tiny pitots
(that are interestingly mounted within the front anti-glare area), the shoulder
mounted beacon, the nose wheel headlight and the tiny aft mounted fuel drain
tube (the latter was painted red).
Final
“bits and pieces” installation included the front and the (correct for this
version) pair of middle array-type underbelly antennas, the two tiny pitots
(that are interestingly mounted within the front anti-glare area), the shoulder
mounted beacon, the nose wheel headlight and the tiny aft mounted fuel drain
tube (the latter was painted red).
A weird ring-looking part is supposed to be affixed
in front of the nose. This ring is not evident at any reference pic, let alone
the fact that it is deleted from the modern “improved” Italeri instructions.
Suffice to say, I left it off… (That item sounds like part of the ILS system
that was not installed on all aircraft. Ed)
Then it was time for some weathering. This included a black wash (heavier in the
landing gear and inside the wells) that accentuated all structural details,
followed by application of dark brown/black pastels to simulate dirt, grim, or
staining that might at places formulate. Some chipping that would have been
caused by personnel stepping was applied at the top part of the tip tanks
anti-glare areas as well.
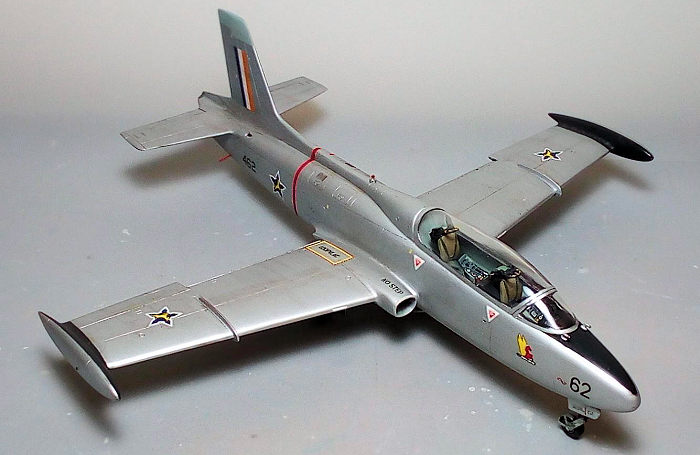
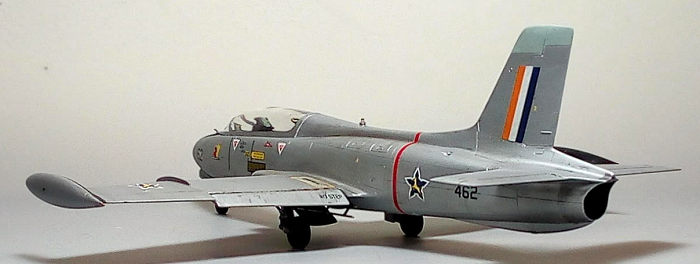
The model then received its final semi-matt coating, in order to obtain a sort
of dull aluminum final shade, as witnessed by net pics. Upon drying, the dorsal
beacon and tip mounted lights were represented by tiny blobs of Humbrol red and
green clear paints.
The well-defined windscreen and canopy frames were easily hand painted and were
attached in position. The resulting tiny gaps were faired with white glue,
before calling this elegant bird done!
| CONCLUSIONS |
If you want a quarter scale kit of this important trainer/strike jet,
this is still the only game in town. Though elderly, it offers correct general
shape, nice surface engraved details, good fit and excellent decals (especially
true for the latest Italeri reboxes).
 On the
other hand, the key areas of cockpit, landing gear (especially the nose one) and
exhaust are simplistically represented, something to be expected from a 1982 kit
which would possibly had to be done at a certain budget. Luckily, a great
variety of aftermarket stuff seems to be available, addressing most of the kit’s
shortcomings. As noted by the Editor, earlier kit versions (like mine) that
included the Argentinean scheme, lacked the distinctive wing mounted anchors on
their decal sheets. The current Italeri versions seem to have taken care of this
omission.
On the
other hand, the key areas of cockpit, landing gear (especially the nose one) and
exhaust are simplistically represented, something to be expected from a 1982 kit
which would possibly had to be done at a certain budget. Luckily, a great
variety of aftermarket stuff seems to be available, addressing most of the kit’s
shortcomings. As noted by the Editor, earlier kit versions (like mine) that
included the Argentinean scheme, lacked the distinctive wing mounted anchors on
their decal sheets. The current Italeri versions seem to have taken care of this
omission.
The good fit, low parts count and clear instructions promise a pleasant,
uncomplicated build and I would not hesitate to recommend this kit to a novice
modeler as his first quarter scale build. The experienced modeler might, of
course, address the kits shortcomings, in order to come up with his usual
masterpiece.
The kit is regularly reboxed by Italeri at both dual and single seater versions,
with even better instructions and superb decal sheets of very interesting
schemes, at very reasonable prices. If you fancy building this elegant Italian
bird, you should by all means tackle this kit.
Happy modeling!
Spiros
Pendedekas
18 July 2022
Copyright ModelingMadness.com. All rights reserved. No reproduction in part or in whole without express permission.
If you would like your product reviewed fairly and fairly quickly, please contact the editor or see other details in the Note to Contributors.