Airfix 1/72 Hawker P.1127
| KIT: | Airfix 1/72 Hawker P.1127 |
| KIT #: | 00033 |
| PRICE: | AUD $6.25 |
| DECALS: | Two prototypes |
| REVIEWER: | Steven S. Pietrobon |
| NOTES: | Scratch built intake trunking |
| HISTORY |
 The Hawker P.1127 is the prototype that led to the famous Harrier jump jet.
Development started in 1957 using the Bristol Pegasus 2 engine with 50.3 kN
thrust. The first prototype XP831 made its first tethered flight on 21 October
1960, with the engine only having enough thrust to just lift the aircraft. A
total of six prototypes were constructed, with XP831 being damaged at the Paris
Air Show in June 1963. XP831 was later fitted with inflatable bag-type intake
lips for better performance at low altitudes. The Pegasus 3 was later fitted
with 60.1 kN thrust.
The Hawker P.1127 is the prototype that led to the famous Harrier jump jet.
Development started in 1957 using the Bristol Pegasus 2 engine with 50.3 kN
thrust. The first prototype XP831 made its first tethered flight on 21 October
1960, with the engine only having enough thrust to just lift the aircraft. A
total of six prototypes were constructed, with XP831 being damaged at the Paris
Air Show in June 1963. XP831 was later fitted with inflatable bag-type intake
lips for better performance at low altitudes. The Pegasus 3 was later fitted
with 60.1 kN thrust.
| THE KIT |
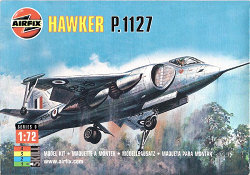 This kit was first issued in 1963 with pattern number
113. I first bought the kit in the early 1970's in a Type 3 bag. As I did with
all my kits back then, I put it together unpainted. I bought a reissue of the
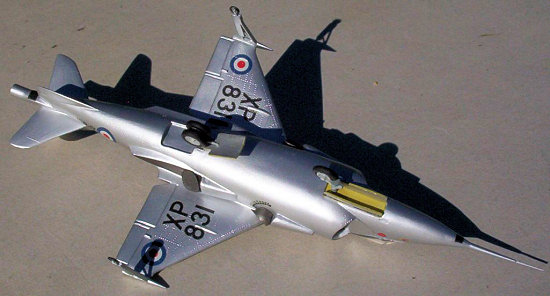
kit in 2002 and put it together in 2007. The kit includes decals for the first
two prototypes XP831 and XP836.
This kit was first issued in 1963 with pattern number
113. I first bought the kit in the early 1970's in a Type 3 bag. As I did with
all my kits back then, I put it together unpainted. I bought a reissue of the
kit in 2002 and put it together in 2007. The kit includes decals for the first
two prototypes XP831 and XP836.
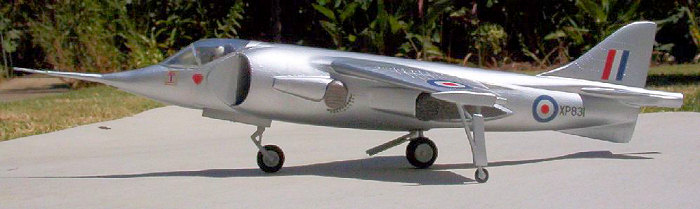
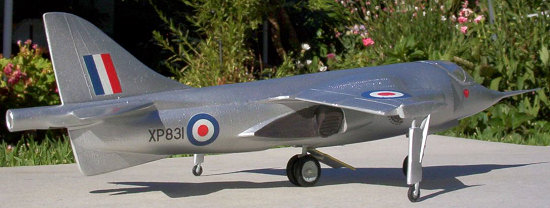
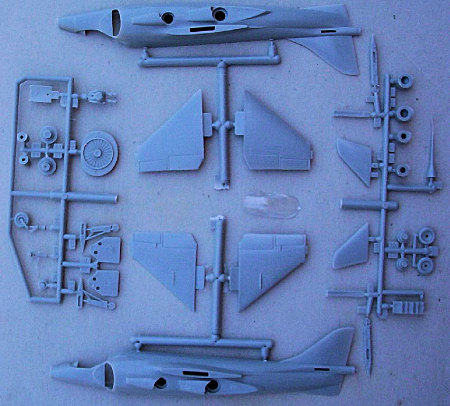
As per normal for Airfix kits of this vintage, there are plenty of sink marks and a bit of clean-up is required for each part. I'm glad of the Airfix reissue as original kits were going for quite a lot of money on eBay. The kit also includes parts for the round nose of the later Kestrel and a rounded tail, which was not used. I decided to build the kit as XP831, before the inflatable intake lips were fitted.
| CONSTRUCTION |
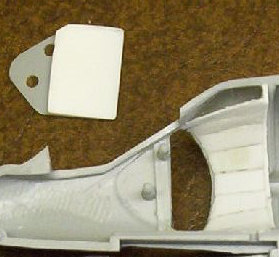 There is no intake trunking in the kit and the two intake plates (parts 1 and 3)
should be bent inwards. I decided to add the intake trunking and modify the
intake plates. I first added plastic card just in front of the engine. From the
intake lips to the card, I added thin strips of card, trying to make a rounded
surface. Multiple applications of filler and sanding, with a few coats of Klear
(Future in the US) resulted in a smooth finish. I removed the rear intake plates
and added card at an angle. The ends of a Chuppa-Chup stick were sliced off at
an angle and added to the back of the platee. I then sprayed Humbrol 27002
polished aluminium and sealed this with Klear.
There is no intake trunking in the kit and the two intake plates (parts 1 and 3)
should be bent inwards. I decided to add the intake trunking and modify the
intake plates. I first added plastic card just in front of the engine. From the
intake lips to the card, I added thin strips of card, trying to make a rounded
surface. Multiple applications of filler and sanding, with a few coats of Klear
(Future in the US) resulted in a smooth finish. I removed the rear intake plates
and added card at an angle. The ends of a Chuppa-Chup stick were sliced off at
an angle and added to the back of the platee. I then sprayed Humbrol 27002
polished aluminium and sealed this with Klear.
I painted the cockpit H64 Light Grey, with the flat area under the canopy H33
Matt Black. The pilot's uniform was painted in H34 Matt White as per the
instructions. Presumably this was what British test pilots wore, although I
could not find any photos showing this. The forward thrusters (7 and 9) were
painted Steel with the rear thrusters (11 and 13) painted as per the
instructions (¾H53+¼H171). The forward thrusters only pass cold air, and thus
should not be discoloured due to heat.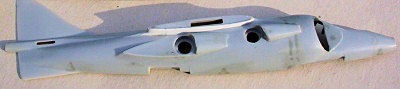
With the fuselage halves cemented together, the many sink marks were filled in
with putty and H1 Grey Primer. I don't like heavily scribed detail and try not
to remove the raised and rivet detail. Test fitting the wings showed the wing
root was too shallow underneath. I added plastic card, but created a gouge in
the body due to sanding. This was later filled in with putty and H1.
 After the
wings had been cemented, test fitting the outside legs showed that they were
about 1 mm too short. I sawed just above the wheel, adding plastic card. For
strength, I drilled holes into the card and wheel leg and superglued a steel
pin. The model now sits almost perfectly.
After the
wings had been cemented, test fitting the outside legs showed that they were
about 1 mm too short. I sawed just above the wheel, adding plastic card. For
strength, I drilled holes into the card and wheel leg and superglued a steel
pin. The model now sits almost perfectly.
I found the canopy to be too wide. I sanded down the sides of the canopy as much
as dared so that I could get a good fit. I used car polish to restore the canopy
clarity. The diameter of the tail cone was also too large. I added plastic card
in front of this part and used putty to fair in the tail cone.
| COLORS & MARKINGS |
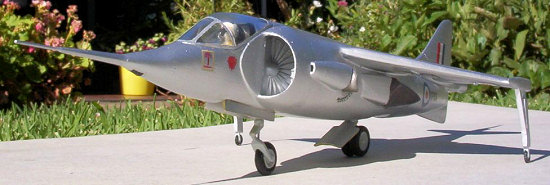
 To get a smooth finish, I first sprayed with H1, sanding away any imperfections,
and then respraying. This was followed by several coats of Klear, and then
finally H27002 Polished Aluminium. The decals went on no problem. I initially
put on the black and white round markers, but in looking at photos, these were
not used in the configuration I built. Lots of patience, water and poking with a
brush was required to get these decals off.
To get a smooth finish, I first sprayed with H1, sanding away any imperfections,
and then respraying. This was followed by several coats of Klear, and then
finally H27002 Polished Aluminium. The decals went on no problem. I initially
put on the black and white round markers, but in looking at photos, these were
not used in the configuration I built. Lots of patience, water and poking with a
brush was required to get these decals off.
| CONCLUSIONS |
Shake and bake this is not. I like unusual subjects and this kit certainly fits the bill. It does take a bit of work, but that gives me more satisfaction when the kit is finished.
| REFERENCES |
Hawker P.1127/Kestrel/XV6A et P.1154
http://prototypes.free.fr/p1127/p1127-1.htm
January 2008
Copyright ModelingMadness.com. All rights reserved. No reproduction in part or in whole without express permission.
If you would like your product reviewed fairly and quickly, please contact the editor or see other details in the Note to Contributors.