Airfix 1/76 Bloodhound Missile
| KIT #: | 02309 |
| PRICE: | $6.99 MSRP |
| DECALS: | none in mine |
| REVIEWER: | Greg Ewald |
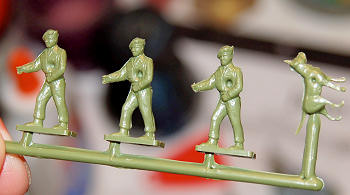
| NOTES: | Hey, it comes with some bad figures of Brits hitchiking, and even a dog ! Woof ! |
| HISTORY |
 Ah, the
cold war. Do you remember having to do the “under the desk” drills? Well, if you
don’t, they were a daily part of school life for those of us in the paranoid
west.
Of course, the western allies had
good reason to be somewhat spooked. The
Ah, the
cold war. Do you remember having to do the “under the desk” drills? Well, if you
don’t, they were a daily part of school life for those of us in the paranoid
west.
Of course, the western allies had
good reason to be somewhat spooked. The
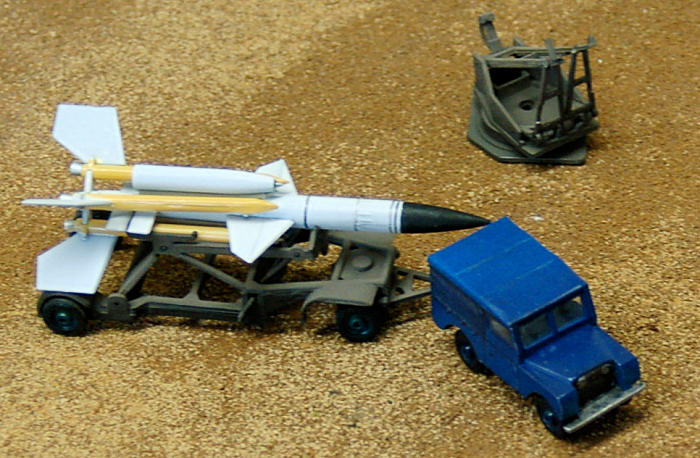
The west needed something to bolster confidence in the ability of our armed forces to repel the oncoming Soviet threat, a good defence (hey it is a Brit missile, so I’ll use their spelling, back off ) against the hordes of TU’s and ICBM’s that were going to “bury us”. They need to have looked no farther than to the engineers at Bristol and Ferranti, who came up with a small ramjet missile capable of speed exceeding Mach 2, and with a decent range of 60 or so miles.
The four rocket boosters power the missile off of the
launch ramp (fire in the hole!) until it attains enough speed for the ramjet
engine to take over. Jettisoned over the sea (presumably, though, if they landed
in your cabbage patch, you would be irritated), the boosters fall away, and the
speed of the beast increases, closing in on that soviet Bear who dares try to
invade
| THE KIT |
This is one of the older Airfix offerings, and you can tell by the short shot sprues, huge dimples in just about everything, and a complete lack of detail.
 That
being said, it is a kit of an interesting component of the cold war, and with
some scrap styrene and a little bit of PSR, has some potential.
That
being said, it is a kit of an interesting component of the cold war, and with
some scrap styrene and a little bit of PSR, has some potential.
No windows are included, so be sure to have some scrap clear or liquid clear plastic available.
The box states it is 1/72nd scale, but it is the old 76th, close enough for war gamers and people who squint a lot. (me)
Instructions are basic exploded illustrations, with not much of a “step by step” series of directions, which would have made this project less frustrating. Well, maybe.
| CONSTRUCTION |
I snagged this from the local shelf because of the odd subject matter, knowing I was in for a task. Whoooboy, was I right.
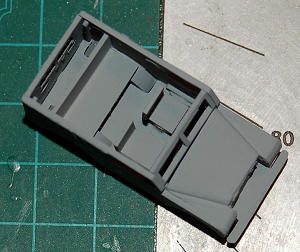
I started off on the Landrover,
meant to tow the missile system (?) , though it looks to be too light for the
task. I can just see the front end of a LR lifting off the ground trying to move
a loaded missile and launcher! I do believe a
The missile launcher is a logistical nightmare, like most British projects, I am sure the 1/1 scale dripped a lot of oil (hey, I am kidding). Lots of swirly lines supposedly show you how to put it together. I found that attaching one of the side plates, then putting in the launch assembly, then the other side plate, to be the easiest. This takes a lot of patience, and at some points, you might be tempted to add the construction to your wall spackle. My kit was very, very short shot, and would need a lot of scratchbuilding to make it even par.
The trailer, surprisingly, goes together very well, though you will want to glue the port side first, and fit in the middle pieces, then glue in the starboard. I would recommend using a slow setting glue, as you have to keep track of a number pieces going sideways between the two sides. Yikes.
A tow hitch-bar is on the front of the trailer, in scale, it would weigh about two hundred pounds, if you are doing this build for a diorama, remove it and scratch a new one.
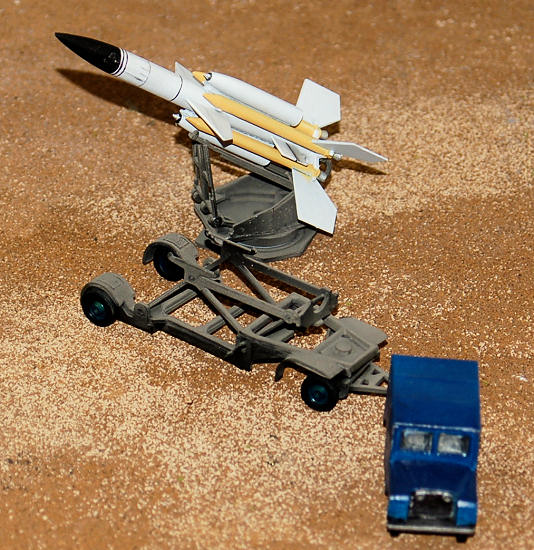
In a state of shock, I found the missile itself to be easy to assemble, and quite convincing. Yes, there is a bit of psr to do, but Mr. Surfacer took care of it easily. The tail was malformed, so I had to add some plastic card to make it look right, or at least as right as I could get it without screaming.
You do have to paint the assemblies as you go, so it is time to move on:
| COLORS & MARKINGS |
The box markings show a normal
test missile colour pattern, later schematics mostly called for an all over drab
green. Missile colours changed so much during the cold war, that it is almost
Hobbe’s choice. In this era, they were painted in all sorts of colours, from
solid white to sheer red. Most likely, test projects would be white with black
squares for camera identification, and missiles for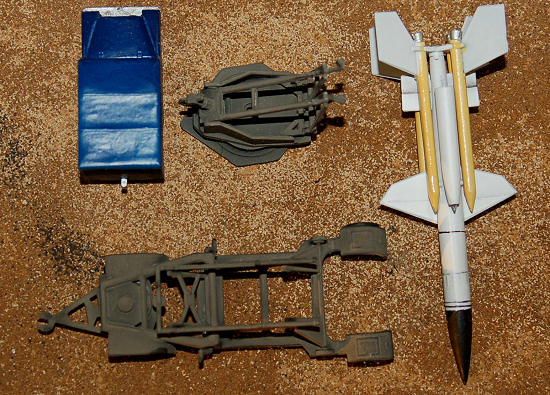 use in the field would be darker.
I went with white, simply to offset
the already drab and blue vehicles. For the lines on the missile, I used the
same trick I do with model rockets: mount a pen in a vise, and rotate the
missile around it. This gives you much more control than trying to work a pen
around the cylinder of the missile, and a lot less headache.
use in the field would be darker.
I went with white, simply to offset
the already drab and blue vehicles. For the lines on the missile, I used the
same trick I do with model rockets: mount a pen in a vise, and rotate the
missile around it. This gives you much more control than trying to work a pen
around the cylinder of the missile, and a lot less headache.
I did not have any decals in my box, though it does look like some could be used.
I painted the Land Rover interior in gray, and the outside in the standard Blue of the Royal Air Force in the 50’s, per the box art.
The
launcher and trailer were painted black, and then airbrushed into lighter olive
drab by segment, to make the detail (?) stand out as much as possible. This is a
technique that I picked up from the 72nd
Using Krystal Kleer, I built up the LR’s windows to a point where they looked passable. Sheet clear, as mentioned before, would probably be a better alternative. (Save those clear blister packages!)
| CONCLUSIONS |
Yeah, it is another Airfix offering of an odd military product. The detail is sketchy, but could be improved with a lot of elbow grease and scratchbuilding. The missile is fairly nice, the Landrover is almost worthless, except for wargaming (hey, it looks like a Landrover, I guess)
The figures are terrible, and should be tossed into the melting pot, except for the dog. It is hard to find a 1/76th scale dog, after all.
If you are into hard work for a moderate subject, this is the one for you. Best of luck.
| REFERENCES |
http://www.airforce.gov.au/raafmuseum/exhibitions/external/bloodhound.htm
August 2008
Copyright ModelingMadness.com.
If you would like your product reviewed fairly and quickly, please contact the editor or see other details in the Note to Contributors.