| KIT #: | 6790 |
| PRICE: | $ pretty cheap at swap meets |
| DECALS: | One option |
| REVIEWER: | Brian Baker |
| NOTES: | Mild conversion |

| HISTORY |
The Curtiss Hawk 75 became the
standard fighter of the U.S. Army Air Corps in the late thirties,
and although it was only used
in combat by 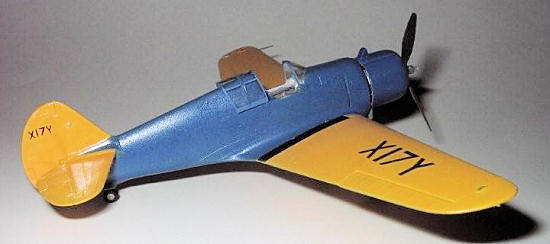 by the
Wright Cyclone or the Pratt and Whitney Twin Wasp,
were
used by France (some captured
examples
were used by the Luftwaffe or
sold to Finland, Britain, China, Norway (again, captured Hawks went to
Finland), the Netherlands East Indies, Iran, Thailand,
and Argentina.
Some export models had fixed
landing gear.
Curtiss Hawks were probably the
best and most reliable aircraft used by the French during the Battle of
France,
and Finnish pilots did
extremely well against the Soviet Air Force using their ex-French and
Norwegian mounts.
In
| THE KIT |
Monogramís kit of the Curtiss
P-36A has been around since 1967, the copyright date listed on the
instruction sheet and on the insides of the left upper wing panel on some
kits.
Although the box states that it
is a P-36A as shown on the box art, the kit also contains parts for the
P-36C version, which had four additional machine guns mounted in pairs in
the wings, along with external ammunition boxes underneath the wings.
To do the ďAĒ version, the
shell ejectors have to be filled in, and the gun barrels require removal.
This is not difficult, but this
is not mentioned in the instructions, so if you build the model straight
from the box, and use kit decals, you will have a P-36C in P-36A markings.
However,
I have built a number of these kits over the years, and the changes
 required
are relatively minor.
Cast in rather brittle silver plastic, this kit has withstood the test of time, although it is typical of the best state-of-the-art kits of the sixties and seventies. Panel lines are raised, and detail is a bit heavy by modern standards, but when these Monogram kits appeared, along with the F8F Bearcat and P-51B Mustang, they were as good as you could get, and they could hold their own against Airfix and were infinitely better than Revell offerings of the period. The kit contains a pretty good seat and instrument panel, but any other cockpit detail needs to be scratch built. The engine is detailed, but only contains the front row of cylinders, but it has a nice design featureóthe crankshaft fits into the case in such a way as to allow the propeller to be added after painting is completed. The prop is very nicely done, as are the landing gear and wheels, although the bracing struts on the main gear need to be replaced with individual struts. The tailwheel is accurate, but must be installed before the fuselage halves go together ior else it had to be trimmed down to fit, a simple task. The very thin and clear canopy is cast so that it can be installed in either opened or closed position, not common at the time.
All in all, this is still a nice kit, and with a little effort, it can be made into an excellent model. There are enough variants available to make at least a dozen without repetition, so if you are interested in this famous airplane, get several of them if you can find them.
| CONSTRUCTION |
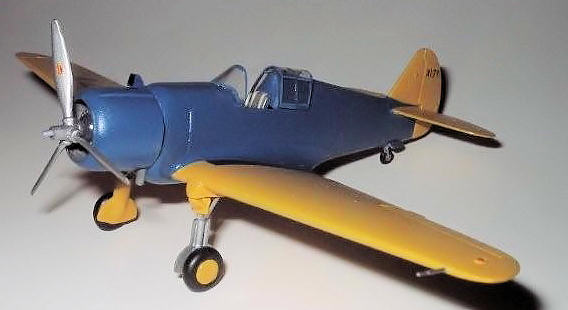
Iíve built quite a number of
these airplanes, and while going through my box of scrapped models, I can
across one of my earlier efforts, a model of the original prototype Hawk
Model 75, the one with the narrow twin row Wright R-1690 engine.
With this engine, the plane
lost out to the Seversky P-35 in 1935, but when equipped with the single row
Wright Cyclone, it faired a little
 better,
although the first production model ordered by the Air Corps had the Pratt
and Whitney R-1830 radial. It was this model that established Curtiss as a
major producer of fighters just prior to World War II, and the P-40 Warhawk
was mainly a modified upgrade of the P-36.
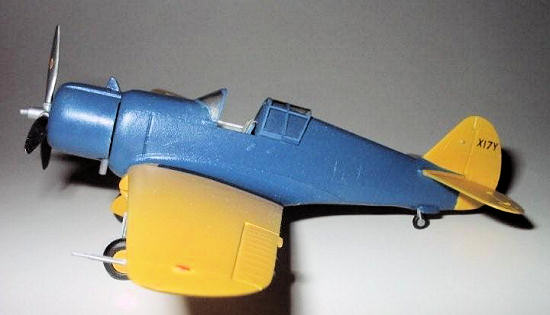
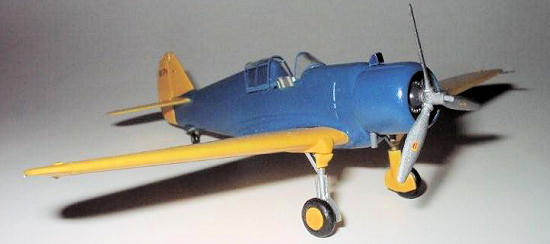
I decided to rebuild the model, but discovered that it would be easier to just build another one from the start, using a few parts from the original model. The major modification was the replacement of the engine with one from the spares box, along with one of the cowlings from the old Hasegawa Mitsubishi A6M2 Zero kits. This kit, incidentally, has three cowlings, and the A6M2 cowling can also be used to upgrade the old Airfix Fiat G.50, as its cowling is hopeless. A certain amount of filling and shaping was required around the firewall region, but it wasnít difficult to get the right profile. The gun troughs are exactly right, and a carburetor air scoop needs to be installed above the rear of the cowling. The kit prop is perfect, and the rest of the airframe is OK, except that the rear vision cutouts behind the cockpit canopy need to be filled in, but this can be done by merely installing the transparent pieces and filling them in. The raised panel lines and details can be sanded down somewhat if you so desire.
| COLORS & MARKINGS |
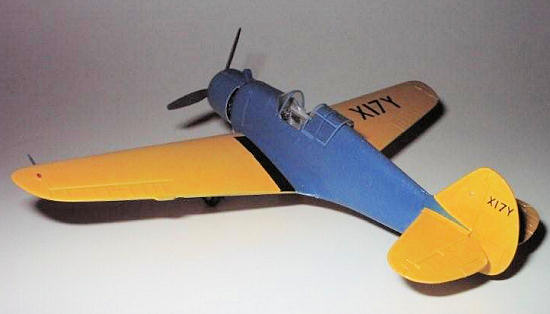 This
one was a no-brainer.
Being an Army competitor, the
fuselage was painted in Army blue with chrome yellow wings and tail
surfaces, just like Army planes of the period.
The experimental registration,
X17Y, appears on the rudder and wings in black in
standard
civilian fashion, and there are no other markings, except possibly the
Hamilton Standard decals on the faces of the propeller blades. Add the
carburetor air intake, pitot tube (the original could be used) and you are
finished.
The model is colorful, and an
interesting addition to my growing collection of Army fighters.
| CONCLUSIONS |
This is a very nice little kit, and there are enough variations available to build quite a number of them without repetition. They have certainly stood the test of time. Try one. Youíll enjoy it.
November 2008
Copyright ModelingMadness.com. All rights reserved. No reproduction in part or in whole without express permission.
If you would like your product reviewed fairly and quickly, please contact me or see other details in the Note to Contributors.