| HISTORY |
Pavla 1/72 P-26 'Peashooter'
| KIT #: | ? |
| PRICE: |
£9.99 |
| DECALS: | Four options |
| REVIEWER: | Carmel J. Attard |
| NOTES: |
Short run injection moulded kit with resin detail parts and decal option
for four
aircraft
liveries. |

| HISTORY |
Work on the company funded Boeing Model 248 prototype began in September
1931. Although the USAAC contracted to supply engines and instruments for three
trials aircraft which were designated XP936, the first of them could pass its
maiden flight on 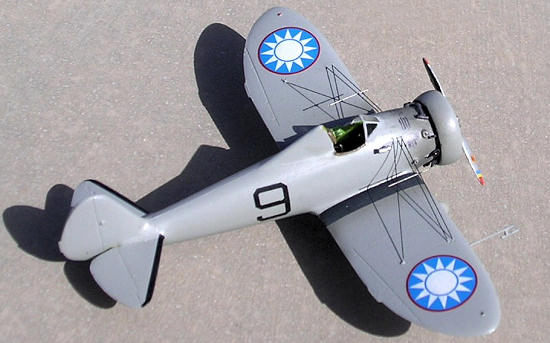 mprovements
including revised wing structure and the addition of floatation gear and radio,
later aircraft had higher head rest to protect the pilot in the event of a roll
over crash.
The first production P-26A made its maiden flight on
Production was completed for 12 export examples of the Boeing Model 281,
comprising 12 to
| THE KIT |
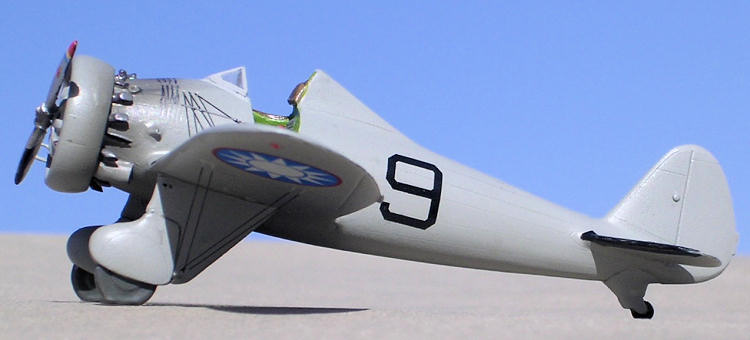
The P-26A was a most welcome kit from Pavla Models. This is a limited edition kit moulded in light grey plastic. There are two vac form canopies from which I could extract four front wind screens, which means there are 3 spare ones. There are 30 injection moulded kit parts that includes the main fuselage, wing parts, propeller, wheel spats, tail wheel and other tiny parts. Contained in a sealed bag are the fine recessed resin parts which include a detailed radial engine, 7 exhaust stabs, a separate engine front, an additional tail wheel, cockpit instruments, wheels, and firewall and crew seat with cast on seat straps. Decals cater for two P-26s USAAC pursuit fighters, a Model 281 as supplied to the Chinese F and a P-26A of the Philippines Army Air Force.
| CONSTRUCTION |
Kit build
starts with the cockpit interior sub-assembly which consists of a floor and a
back plate onto which is cemented the control column and pilot seat. The
assembly is painted as per instructions and cemented into the starboard fuselage
half. The hand painted two part instrument panel is assembled in place, a
firewall added and fuselage closed. The butt end of tail plane parts filed flat
to make a good butt joint to the fuselage. The one piece wing was slotted into
the lower fuselage. Two spatted wheel assemblies were then sl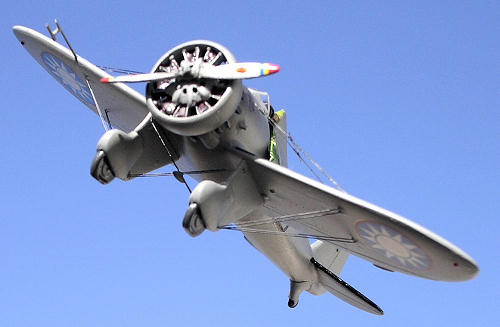 otted
to the underside of the wing.
Since I opted to build the Chinese AF model 281 this had the aerial mast omitted as also was the gun sight in front of the canopy. I assembled the two halves forming the front cowling and when set I fitted the resin engine inside which only needed a slight filing to the circumference to fit in snugly. The next step was adding the rigging. I often favoured invisible thread being a plain sailing job on this kit in particular. I drilled tiny holes at the forward fuselage and corresponding holes in the wings and wheel spats making frequent reference to the kit 9 page A5 size instructions which were accurate and useful.
To make the process easy I have left the front of the fuselage unplugged so that I could manipulate the thread easily using a steel wire bent in shape of a hook to draw out the thread from inside the fuselage. With the thread secured with tiny drop of super glue, I then fitted the resin wheel and the kit was almost complete. The only other addition I made to the kit was adding a small rectangular rudder trim tab which was missing from the kit. One should make a note here that while the assembly drawing shows the pitot tube to fit correctly on the starboard wing leading edge, the plan drawings showed this incorrectly fixed to the port wing leading edge.
| COLORS AND MARKINGS |
All the
painting unless noted was done with a Badger 100 internal mix double action
spray gun fitted with a fine tip, 15-18 psi pressure. Paints used were mainly
Humbrol enamel unless noted otherwise. When model was assembled and cockpit
masked it was given a light ghost grey overall as a primer. When this was cured,
some areas were given a light rub with a smooth wet and dry paper. Another coat
of light ghost grey was air brushed. Areas in way of wing walk ways we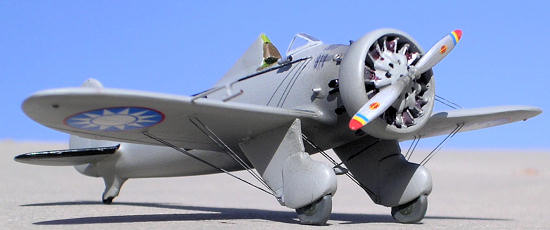 re
then over sprayed with a mix of varnish with a few drops of engine grey and this
produced a misty degree of greyish transparent thin coating to simulate exhaust
residue to aft of engine exhaust stabs and around walk way areas.
re
then over sprayed with a mix of varnish with a few drops of engine grey and this
produced a misty degree of greyish transparent thin coating to simulate exhaust
residue to aft of engine exhaust stabs and around walk way areas.
Cockpit
masking removed and the open side panel retouched with acrylic mix of chrome
yellow/green to conform to the rest of cockpit interior chrome green. Head rest
and edge of open cockpit was then painted leather brown. Vertical set of seat
straps added to back of seat. Wind screen fixed in place. Kit was given a coat
of Johnsons Klear, allowed to set for 4 hours and kit decals, trimmed from the
transparent outside film, were applied on the kit. My impression was that the
model was too small to apply any additional wash as the engraving was rather
shallow. The louvers
at the side of engine area were drawn using a technical pencil with its graphite
end sanded to a chisel point. This was drawn over a matt coat. The propeller was
hand painted silver and black and maker decal applied to the front of each blade
while the red yellow and blue decal applied to the extreme tips.
| CONCLUSIONS |
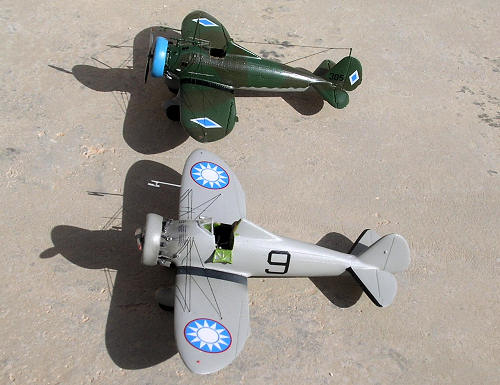 This was
a rather simple build and pleased with the final result especially to find the
painting and decaling stages of the kit very rewarding. I also found I can use
the spare decal with the kit an extra bonus and I made my old still unbuilt
Revell P-26, of 30 years ago completed in the 2 tone green camouflage
Philippines Army spare decal sheet. The only extra work that was needed with
this version was that one side of the wheel spats had the wheel cover on one
side removed so that the wheel on the outside is exposed. Well done Pavla, and
more kits from this era will be welcomed for future releases.
February 2009
If you would like your product reviewed fairly and quickly, please contact me or see other details in the Note to Contributors.