| KIT #: | ? |
| PRICE: | $20.00 each when new |
| DECALS: | ? |
| REVIEWER: | Joel Hamm |
| NOTES: | Short run, long out of production. |
| HISTORY |
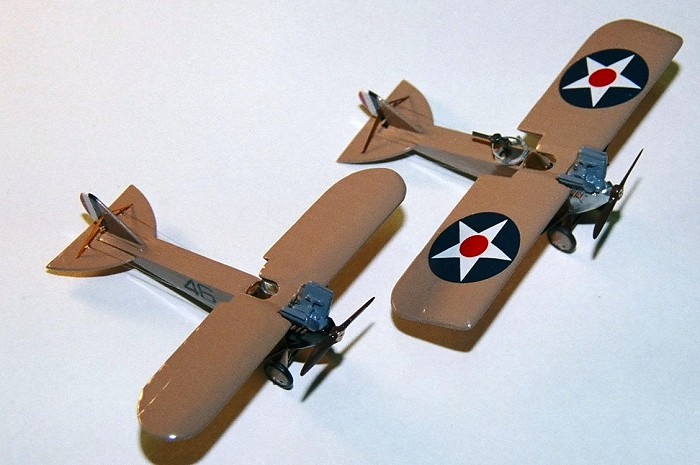
Nope. This is not the Olimp Pro-Resin kit recently released and reviewed on this site. This is an injection molded version – actually two separate kits – produced over ten years ago by the apparently now defunct Twelve Squared Company.
 Groever Loening’s name
doesn’t rank recognition-wise up there with the Wrights, Glenn Curtiss, or
Glenn L. Martin; but it ought to. He worked with or for most of the pioneer
manufacturers and continued cranking out designs well into the inter-war
years. After leaving the Wright Co. (reportedly peeved over Orville’s
management style) he eventually set up his own shop (N.Y.C. – 31st
St & East River) intending to concentrate on naval aircraft.
Groever Loening’s name
doesn’t rank recognition-wise up there with the Wrights, Glenn Curtiss, or
Glenn L. Martin; but it ought to. He worked with or for most of the pioneer
manufacturers and continued cranking out designs well into the inter-war
years. After leaving the Wright Co. (reportedly peeved over Orville’s
management style) he eventually set up his own shop (N.Y.C. – 31st
St & East River) intending to concentrate on naval aircraft.
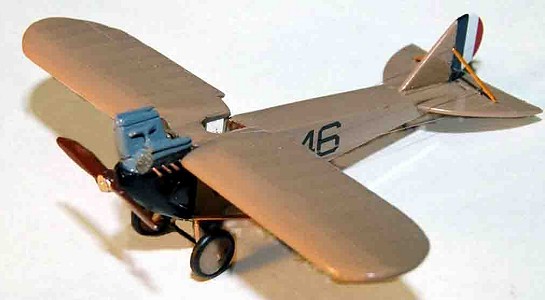
An early monoplane scout design, the diminutive “Kitten”, powered by a 3 cylinder radial, got a 300 hp Hisso engine and a dose of steroids, morphing into the M-8. Despite impressive performance, it, and most other domestic designs, were ignored in favor of the government’s wartime policy of reproducing a single European plane (DH-4). Eventually it got noticed, garnering an Army order for 5000, but the Armistice put the kibosh on that. The Navy, nevertheless, opted for 54, some on twin floats; and the basic configuration survived for a few years as the PW-4. I n 1919 an M-8 set a 21,000 ft altitude record, and the following year a clipped wing. Single seat version was entered in the Pulitzer race, but failed to distinguish itself.
| THE KITS |
The two separate kits shared perhaps only the tailplanes and engine, as wings, fuselage, gear, and whatever were highly modified in the racer. Twelve Squared liked to tightly stuff their models into plastic bags, which may have kept down movement and breakage. The waxy gray plastic was molded to a higher standard than the erstwhile norm. Surface detail was sharp; flash and distortions minimal. With the exception of the engine cylinder banks that had large sink holes and amorphous exhaust stubs.
| CONSTRUCTION |
Proceeded simultaneously on both versions. Before anything went together, holes had to be drilled for the rigging and control cables (monofilament thread). Snippets of stiff wire were super-glued into more holes drilled at the elevator and rudder hinge lines to serve as bell cranks. Cockpit floors and bulkheads were replaced with card stock; then everything fit together pretty well with just a few file strokes at the wing joint.
 New engine cylinder banks
were carved from the pour blocks saved from various resin parts. The stuff
shapes and sands easily – but watch out for the caustic dust. Exhaust
stacks stubs were fashioned by drilling, gluing in, and trimming bits of
Evergreen round stock. The kit-supplied carburetor/intake manifolds (or so
they appeared to be), once cleaned up, made a convincing engine; though
considerable trimming of the base, wings, and fuselage tub was needed to
get the assembly to nestle in and resemble the reference photos printed on
the instruction sheet. (Engine insertion was done post painting.)
New engine cylinder banks
were carved from the pour blocks saved from various resin parts. The stuff
shapes and sands easily – but watch out for the caustic dust. Exhaust
stacks stubs were fashioned by drilling, gluing in, and trimming bits of
Evergreen round stock. The kit-supplied carburetor/intake manifolds (or so
they appeared to be), once cleaned up, made a convincing engine; though
considerable trimming of the base, wings, and fuselage tub was needed to
get the assembly to nestle in and resemble the reference photos printed on
the instruction sheet. (Engine insertion was done post painting.)
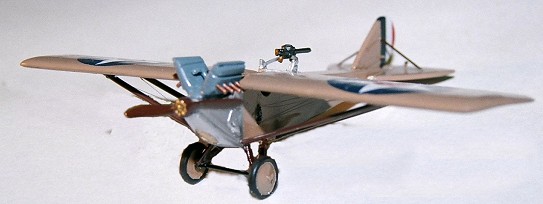
I was prepared to cut a windshield from clear acetate, but according to all photos, the pilot enjoyed no such luxury; relishing the mix of slipstream, exhaust, and oil spray with his goggle the only protection. The racer version had flat wide window panels below the cockpit. Parts that came with the kit were discarded in favor of acetate pieces, framed with bits of strips stock. New struts were cut from Plastruct strut stock, a useful product which seems no longer to be produced.
| COLORS & MARKINGS |
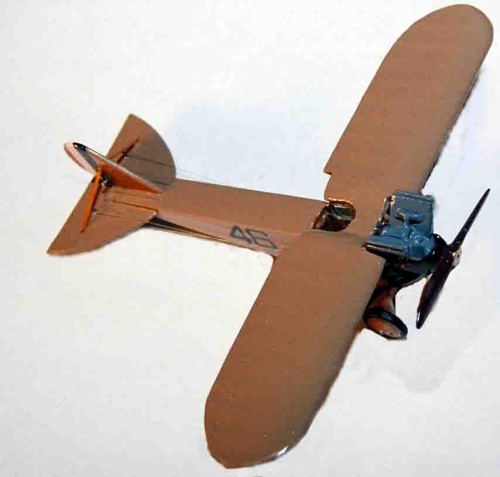
 Color photos are nowhere
available, so the instructions advised any shade resembling linen. I
settled for Testors “cream” enamel. Forward fuselage was supposed to be
silver on the fighter and black on the racer, but photos later found show
black on both versions. Small parts were bush painted in place. Radiators
(a novel “tunnel” design) got brass as the most likely color. Props and
struts were painted solid mahogany, since simulated graining in that scale
looks awful. Decals were high quality and went down without needed setting
fluid, but getting some anyway. Future floor gunk sealed everything.
Color photos are nowhere
available, so the instructions advised any shade resembling linen. I
settled for Testors “cream” enamel. Forward fuselage was supposed to be
silver on the fighter and black on the racer, but photos later found show
black on both versions. Small parts were bush painted in place. Radiators
(a novel “tunnel” design) got brass as the most likely color. Props and
struts were painted solid mahogany, since simulated graining in that scale
looks awful. Decals were high quality and went down without needed setting
fluid, but getting some anyway. Future floor gunk sealed everything.
| FINAL CONSTRUCTION |
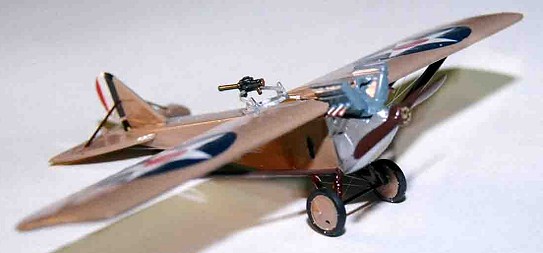
After engines, wheels, and seats were added, the projects came to conclusion with stretching of monofilament thread as control and rigging cables. Silver wire would be a better choice, but I can’t find any in a fine enough gauge. For the fighter, a Scarf ring mount had to be scratch built. References reported that it was armed with a pair of Lewis guns. I could locate only one in the spares box, but a later discovered photo (on the Web, or course) showed just such a configuration. One last part posed a problem – the radiator coolant reservoir cans.
 The kit designer, in the
instructions, confessed to lacking a right side photo, and not knowing
whether this was mounted externally or inside the engine compartment. The
ensuing question was obvious – how then did he know such an appurtenance
even existed? The lack of an answer, and inability to fit it to the
cowling, convinced me to omit it. While researching this review, I came
across the needed reference view (the Web didn’t exist when the kit was
produced) which showed that the can was indeed affixed outside on the
right. Low on my list, now, of “Someday” projects is fishing the parts out
of the spares bin, whittling them down, and sticking them where they
belong.
The kit designer, in the
instructions, confessed to lacking a right side photo, and not knowing
whether this was mounted externally or inside the engine compartment. The
ensuing question was obvious – how then did he know such an appurtenance
even existed? The lack of an answer, and inability to fit it to the
cowling, convinced me to omit it. While researching this review, I came
across the needed reference view (the Web didn’t exist when the kit was
produced) which showed that the can was indeed affixed outside on the
right. Low on my list, now, of “Someday” projects is fishing the parts out
of the spares bin, whittling them down, and sticking them where they
belong.
| CONCLUSIONS |
What a shame Twelve Squared and the other cottage industry kit injectors of weird and wonderful flugzeugs went belly up. Luckily we now have Olymp and the new generation of resin pourers, picking up where the pioneers left off.
August 2005
If you would like your product reviewed fairly and quickly, please contact me or see other details in the Note to Contributors.