Azur/Fromm 1/72 Vickers
Vildebeest Mk.
| KIT #: | FR017 |
| PRICE: | CDN $39.00 from www.westcoasthobbys.com |
| DECALS: | Four options |
| REVIEWER: | Mark Hiott |
| NOTES: |
Unspatted wheels
supplied in kit but no decal option for them |
| HISTORY |
The
Vickers Vildebeest was a land based torpedo bomber first flown in 1928 and
remaining in service until 1942, flying against the Japanese at
The prototype
Vildebeest, the Vickers Type 132, was first flown in April,1928 powered by a
Bristol Jupiter VIII. As the Jupiter VIII was prone to vibration, a second
prototype, the Vickers Type 204 was fitted with a Armstrong Siddeley
Panther engine. Engines
 problems
continued, however, which were solved by fitting a new version of the Jupiter,
which later became known as the Bristol Pegasus. The Vildebeest had an
all-metal, fabric-covered airframe, with single-bay unstaggered wings. An
initial production order was placed in 1931 for nine aircraft, with the first
production aircraft flying in September 1932. More production followed, with
major production being of the Vildebeest
problems
continued, however, which were solved by fitting a new version of the Jupiter,
which later became known as the Bristol Pegasus. The Vildebeest had an
all-metal, fabric-covered airframe, with single-bay unstaggered wings. An
initial production order was placed in 1931 for nine aircraft, with the first
production aircraft flying in September 1932. More production followed, with
major production being of the Vildebeest
On the outbreak of the Second World War, 101 Vildebeests were still in service with the RAF. The two British based squadrons flew coastal patrol and convoy escort missions until being replaced by the Bristol Beaufort in 1940. The two Singapore-based squadrons still awaited Beauforts, however, when Japan invaded Malaya in December 1941, and the now obsolete biplanes were forced to be deployed against the Japanese attackers, attempting unsuccessfully to torpedo a Japanese cruiser off Kota Bharu on 8 December. The last Vildebeests in RAF service, operated by 273 Squadron at Ceylon were retired in March 1942.
| THE KIT |
Molded in gray, the kit has a rather small parts count, but the level of detail
is quite nice. Resin is used for the engine, cockpit parts, oil cooler and 2
barrels for the forward firing gun. A small, but very nice, photo etch fret
gives all the appropriate cockpit
 details,
control linkages, torpedo details as well as parts for the Lewis machine gun.
details,
control linkages, torpedo details as well as parts for the Lewis machine gun.
The
instructions are nicely done and well laid out in 10 steps. A rigging layout is
also included. 3-views are given for all 4 decals options and a single 3-view is
given for the stencils. The instructions are not quite clear on how to bend some
of the p/e parts and I had to guess at a couple of them.
The
decals are sharp and in resister. They are done by a company called "Dead
Design" and are VERY thin. So thin that no setting solution was needed, even on
the wheel spats. Care must be taken, however, as I ruined a few stencils by
having them fold over. Being so small, I was unable to use them. Luckily, Azur
provides extras for most of the stencils.
| CONSTRUCTION |
I
started by painting the insides of the fuselage Brick Red with British Interior
Green framing. I followed the painting callouts for the most part and painted
the cockpit details Aluminum. I chose not to use the kit's windows and added a
small cross brace to the
 left
lower window. At this point I also drilled out the upper right window as called
for in the instructions. After installing the seatbelts, the cockpit and gunners
compartment were mounted to the fuselage and the fuselage closed up. Very little
of the interior detail can be seen once the fuselage is closed, so it's really
up to you to how much you put in. The rear gunners turret ring did not fit the
opening in the fuselage and a bit of modifying was needed. The fuselage didn't
require much filler, just a bit on the top and bottom of the nose.
left
lower window. At this point I also drilled out the upper right window as called
for in the instructions. After installing the seatbelts, the cockpit and gunners
compartment were mounted to the fuselage and the fuselage closed up. Very little
of the interior detail can be seen once the fuselage is closed, so it's really
up to you to how much you put in. The rear gunners turret ring did not fit the
opening in the fuselage and a bit of modifying was needed. The fuselage didn't
require much filler, just a bit on the top and bottom of the nose.
Next up were the wings and here the build gets a bit interesting. The lower wing fit very nicely into the fuselage, but the upper wing requires a bit of finesse. (A small note here: Azur provides what I would call locators where various parts mount. Very few of them are actual holes. I went over the whole plane and drilled holes where they were needed.) I suggest anyone who decides to build this make a jig for the upper wing. As it was, it still required about 3 hands to get it all together. I installed the outer struts first and allowed them to dry overnight. The wing will be very fragile until the inner struts are installed, so care is called for. The inner struts snapped into place neatly, in fact they may be too long, I'm not really sure. The instructions tell you to install the tail supports (parts L9, L10 or L11) in step 3. Don't... install them in step 7 after you have installed the tail control linkages.
The
engine is next in step 5. I found the resin engine to be quite nice, but the
plastic parts didn't fit. The front exhaust ring fit ok, but the rear intake
ring I had to cut in 3 parts to get it to match up with the engi nes
intake ports. Leave the engine off until later in the build. The gear is
installed next and I found that the inner gear struts don't match up with the
"locator" markings on the wing. As a result, my wheels had a pronounced positive
Camber that I had to fix on the fly. I suggest testing the fit of the wheel
struts and then drill the mounting holes. Azur gives you unspatted wheels but
none of the decals options offer unspatted wheels. Although, I suppose at some
point the spats may have been removed.
nes
intake ports. Leave the engine off until later in the build. The gear is
installed next and I found that the inner gear struts don't match up with the
"locator" markings on the wing. As a result, my wheels had a pronounced positive
Camber that I had to fix on the fly. I suggest testing the fit of the wheel
struts and then drill the mounting holes. Azur gives you unspatted wheels but
none of the decals options offer unspatted wheels. Although, I suppose at some
point the spats may have been removed.
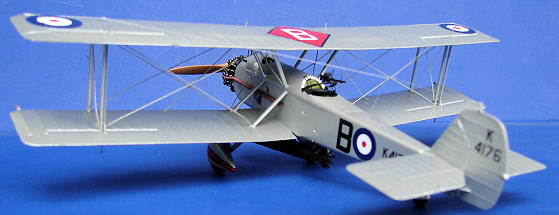
The
torpedo and its mount are a true thing of beauty. The p/e fret provides a very
nice cradle, that looks intimidating but folds perfectly. I completely assembled
the torpedo and its cradle before attaching it to the fuselage as I found
working between the wheels would be a bit of a hassle. I attached the torpedo as
the instructions show, but it's a bit farther forward then the 3-views show. I
tried to set it as the 3-view shows, but the tail fin hits the bottom of the
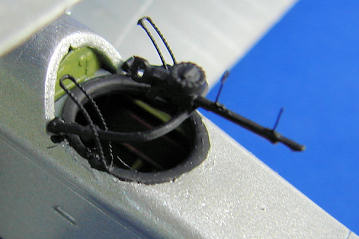
fuselage. The gunners Lewis machine gun is another thing best assembled and then
installed. The p/e sights and elevator rails are very small parts and are best
installed when you have lots of "elbow room".
Next
were all the various p/e parts the festoon the fuselage. These included the
aerial supports and the gunners ladder. The windows were then filled with
Kristal Klear. After painting I installed engine, exhaust and propeller. Before
mounting the engine, make sure that the nose of the fuselage is square. There
are no mounting holes for the engine and it's easy to get it off center.
| RIGGING |
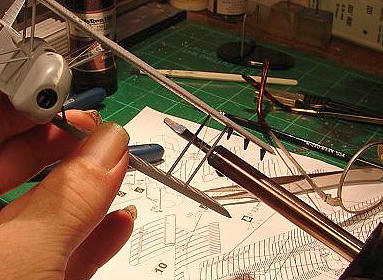 I chose
to rig the model before painting as that's how I normally do it. However, I
don't normally build a lot 1/72 biplanes and it turned out to be a bad idea. I
use the "point to point" style of rigging in that I don't drill holes through
the wings. I drill small "dimples" where the rigging attaches and use individual
pieces instead of one long line. The instructions call for .3mil line and I used
8lb nylon which is pretty close. One end of the line was attached with CA glue,
measured, cut and then the other end is glued into place. I rig 1 wing at a time
and any sag is taken out with a "pencil" type soldering iron.
I chose
to rig the model before painting as that's how I normally do it. However, I
don't normally build a lot 1/72 biplanes and it turned out to be a bad idea. I
use the "point to point" style of rigging in that I don't drill holes through
the wings. I drill small "dimples" where the rigging attaches and use individual
pieces instead of one long line. The instructions call for .3mil line and I used
8lb nylon which is pretty close. One end of the line was attached with CA glue,
measured, cut and then the other end is glued into place. I rig 1 wing at a time
and any sag is taken out with a "pencil" type soldering iron.
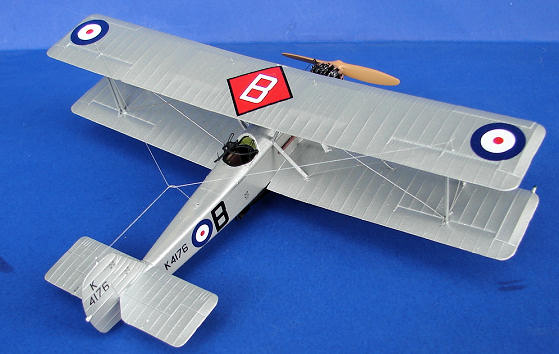
The
wing has a line running from the top of the inboard struts to the middle of the
lower wing. The instructions only show this line on the forward part of the
wing. Common sense would say that rigging is the same front to back, but I could
not find a photo that provided proof that this wire was on the back side as
well. Since this was a build review, I chose to follow the instructions. The
line could be added later with no trouble if I find out that it should have one.
| COLORS & MARKINGS |
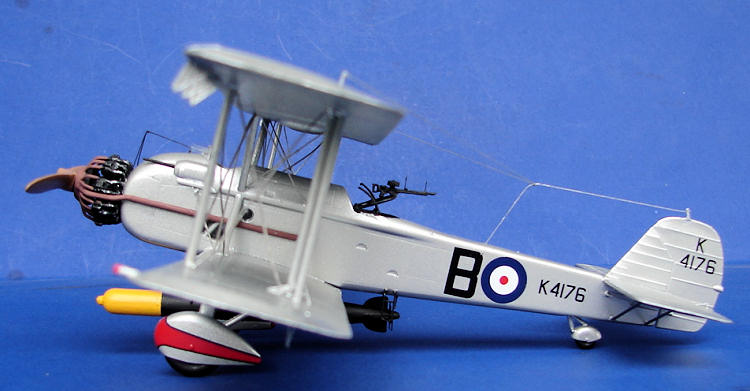
I
chose to do the Squadron 36 version at 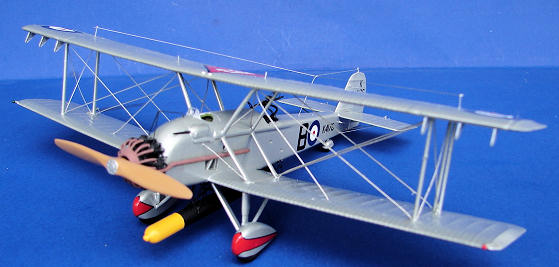 /black
torpedo! The plane was painted, as an assembly, MM German Aluminum Metallic. I
have found that this is a good representation of the doped aluminum color of the
period. The rigging was painted MM Steel. The engine was painted flat black with
a bit of silver dry brushing and the exhaust Humbrol Matt #70.
/black
torpedo! The plane was painted, as an assembly, MM German Aluminum Metallic. I
have found that this is a good representation of the doped aluminum color of the
period. The rigging was painted MM Steel. The engine was painted flat black with
a bit of silver dry brushing and the exhaust Humbrol Matt #70.
The
decals are nicely done and, if anything, are a bit too thin. When I went to
install the stencils, several of them folded over on me and were rendered
unusable. Thankfully Azur provides extras of most of them. However, the
instructions call for 4 of stencil #33 but the decals only provide 3. Through no
fault of the kit, I had a hard time installing the footprint decals so ended up
not using them. The main decals went on well and snuggled down with no trouble.
No setting solution was used, not even on the wheel spats! Even these decals
wanted to fold over, so take care, as there are no extras here. Care must also
be shown when trying to slide them into place on the model. They are very thin
and will tear quite easily.
| CONCLUSIONS |
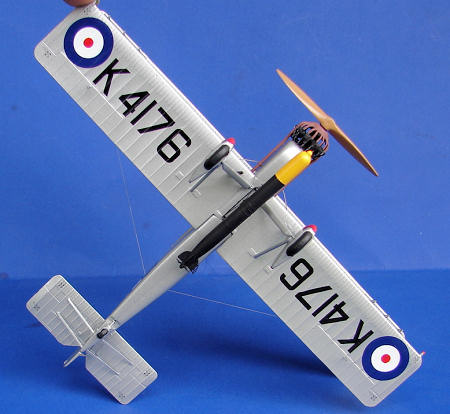 My
decision to build and rig the model before painting turned out to be more
trouble then it was worth. Because of this, I was unable to use the walkway
footprints on the lower wing. If I had read the instructions a bit more
carefully, I may have noticed the problem and done it a different way. An
observant reader will also notice that I installed the lower wing control links
backwards!
My
decision to build and rig the model before painting turned out to be more
trouble then it was worth. Because of this, I was unable to use the walkway
footprints on the lower wing. If I had read the instructions a bit more
carefully, I may have noticed the problem and done it a different way. An
observant reader will also notice that I installed the lower wing control links
backwards!
The
kit has a few fit problems, but nothing that an experienced modeler can't
handle. Someone who hasn't done them before may have trouble with the small p/e
parts. It builds into a well detailed, nice looking rendition of a rather
ungangly looking aircraft. A must for every biplane or interwar model lover.
| REFERENCES |
Wikipedia for the history
September 2011
My thanks to www.westcoasthobbys.com for the review kit. Get this and other neat kits and accessories at the link.
If you would like your product reviewed fairly and fairly quickly, please contact the editor or see other details in the Note to Contributors.