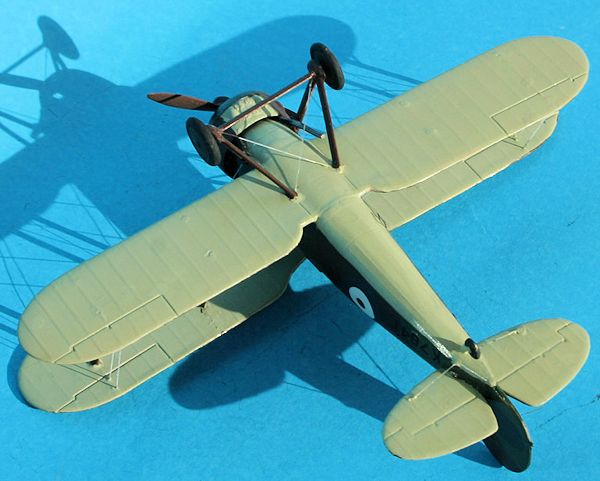
AZ Model 1/72 Gloster Gauntlet I
|
KIT #: |
AZ 7219 |
|
PRICE: |
$20.00 |
|
DECALS: |
Three options |
|
REVIEWER: |
Peter Burstow |
|
NOTES: |
Short run with photo etch and resin
parts |
Evolved through several prototypes with varying engine and armament,
the Gloster Gauntlet was a biplane fighter of the early 1930's. It was unusual
for a high performance fighter in being a two bay design. The Gauntlet Mark II,
was externally similar but structurally very different, using Hawker type
fabrication, instead of Gloster construction.
The
Gauntlet was the last and fastest, of the R.A.F.'s open cockpit biplanes, and
has the distinction of performing the first radar controlled interception in
November 1937.
Around 250 were built, including licence construction in Denmark. It was
operated by Australia, Denmark, Finland, Southern Rhodesia and South Africa as
well as the R.A.F. Some were operated by the R.A.A.F. 3 squadron in North Africa
and Syria during 1940. At least one restored example is flying in Finland.
The kit comes in a relatively large end opening box, well printed in
colour, with profiles of the three options provided printed on the back. My box
was damaged.
Moulded in caramel coloured soft plastic, there are around 30 parts to
make this small biplane. Both a two and three bladed propellers are provided.
There is a resin engine and cowling, and a small photo-etched fret has a number
of detail parts. A small printed clear film has the instrument panel and
windscreen.
The parts have fine moulded detail, with engraved lines on the fuselage,
and fabric detail on the flying surfaces. There are a number of ejector pin
marks, all hidden during construction, however they are so large that they will
interfere with the fit and several need to be removed. There is some flash
evident, and
 mould seams on some of the smaller parts will need cleaned up.
The cockpit has a seat, control column and rudder pedals to be attached
to the floor, and two part etched seat belts are provided. There is sidewall
detail moulded into the fuselage halves. The instrument panel is a sandwich of
photo-etched brass and printed film. There is also a PE rudder trim wheel
provided.
Strut positions are marked on the wings by small dimples, some of which
are almost invisible, and will be needed to be drilled out. No rigging
information for the wings is given, but some is shown on the box art. The
rigging is not complex, but there is a lot of it needed as this is a two bay
biplane. There is some detail of wire rigging for the tailplane shown in the
instructions.
A
telescopic gun sight has to be scratch built from plastic rod, which is not
supplied, but dimensions are given. Photo-etched supports and sight bead are
provided.
The decals have markings for three aircraft, a silver RAF aircraft, with the
blue checked markings of 19 Squadron. And two Royal Danish Air Force aircraft, a
silver doped example, and a camouflaged aircraft from 1940. The box
illustrations form the only painting and decalling guide. The instructions are
adequate for construction, but other references will be needed to do the
rigging, and to sort out placement of some parts as the instructions are vague
in details.
As usual, I started with the cockpit. Attaching the seat, control stick and
rudder bar to the floor, there was no positive location for the parts. I painted
the floor and cockpit sides light grey, then highlighted some details in black
and silver. I didn't use the photo-etched instrument panel, seatbelts and rudder
trim parts,
 instead making masking tape belts and the small instrument panel
with a piece of card. The rudder trimmer was invisible so I ignored it
completely. I then closed up the fuselage and tidied up the joint, which only
needed a slight scrape and a touch of Mr Surfacer.
instead making masking tape belts and the small instrument panel
with a piece of card. The rudder trimmer was invisible so I ignored it
completely. I then closed up the fuselage and tidied up the joint, which only
needed a slight scrape and a touch of Mr Surfacer.
I then drilled holes in the wings for the struts, they were all marked b
dimples. While doing that tedious job, 24 holes for the struts, another 36 for
the rigging, (shades of the Monogram Dauntless), I was trying to decide how to
do the rigging. I prefer to get as much preparation for the rigging as possible
done before adding the top wing, and access would be difficult with two bays on
a small aeroplane. The job was complicated by Gloster's method of hiding all the
rigging joints under the fabric of the wing, so I could not simply join the
lines to the ends of the struts.
Joining the one piece bottom wing to the fuselage left a large gap on the
underside, and a small gap at the roots. These were filled and sanded. The
tailplane position was marked, not very clearly, on the fuselage. I checked with
the references before adding the tailplane. One reference had five profiles, all
had different rigging of the tailplane, and none matched the few photographs I
could find. I joined the tailplane halves to the fuselage, with superglue, a bit
forward of the markings to match the photographs.
At this point I painted the fuselage and lower wing assembly, added the
fuselage roundels and the fin flash. Access would not be good once the upper
wing was in place. Gave it a coat of floor polish for protection during the rest
of the build.
 I
decided to add the rigging and struts to the top wing first, before assembly,
easier to jig, and would allow painting the rest of the model without the struts
interfering. I would then be left with the underside of the lower wing as the
only major clean-up area after assembly. I threaded lengths of 'invisible'
mending thread through the upper wing holes, two lengths through the four outer
holes, and three lengths through the eight inner holes. The thread was secured
on the top surface with drops of superglue. I then added the cabane struts and
set up my jig. I discovered that all the inter-plane struts were about 3mm too
short, so I delved into my rapidly diminishing stock of Contrail aerofoil strut
material to replace them.
I
decided to add the rigging and struts to the top wing first, before assembly,
easier to jig, and would allow painting the rest of the model without the struts
interfering. I would then be left with the underside of the lower wing as the
only major clean-up area after assembly. I threaded lengths of 'invisible'
mending thread through the upper wing holes, two lengths through the four outer
holes, and three lengths through the eight inner holes. The thread was secured
on the top surface with drops of superglue. I then added the cabane struts and
set up my jig. I discovered that all the inter-plane struts were about 3mm too
short, so I delved into my rapidly diminishing stock of Contrail aerofoil strut
material to replace them.
Fast forward six weeks or so. I finally got motivated enough to get going again.
Joined the upper wing at the cabane, then cut and fitted the eight inter-plane
struts. Then started threading the rigging. Started at the cabane and worked
outwards. Two long evening sessions and it was mostly done. Then added the tail
rigging. Cleaned up all the holes and stray rigging ends on the wings. Added the
undercarriage legs and struts and rigging.
I then added the resin engine and cowling.
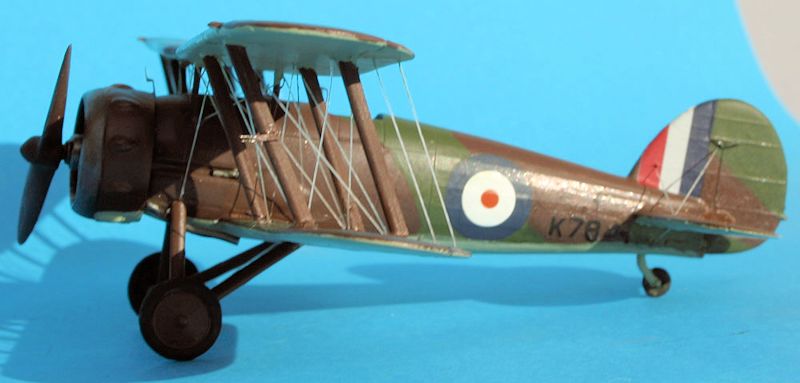
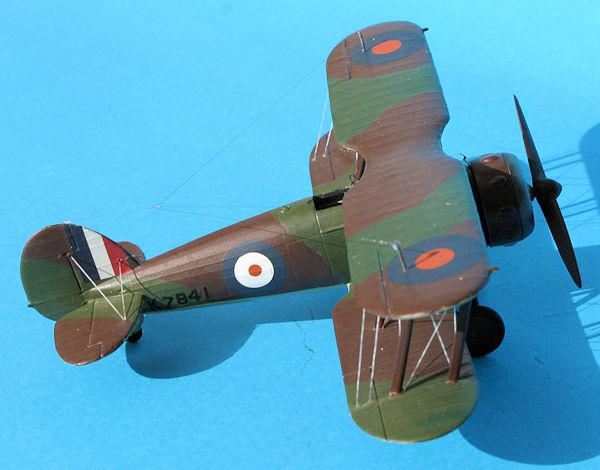
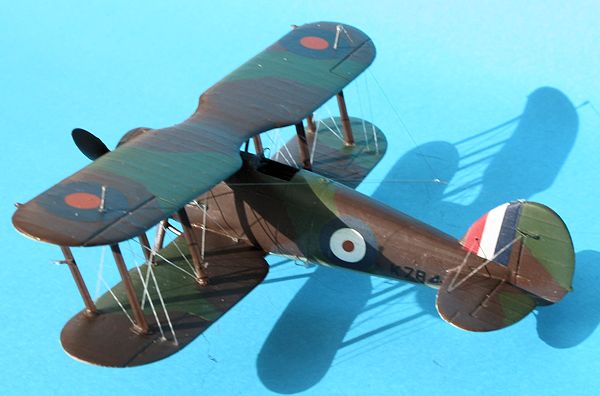
I decided to model a 3 squadron RAAF aircraft. I found only one, not very
good photograph, showing K7843, in very dark colours. K7843 was a Gauntlet II,
with a two bladed propeller. I guessed these colours to be dark green/dark
earth, there was no obvious demarcation between the colours. The underside was
not really visible in the photo, so I decided on sky, could have been left
silver dope, or even have the dark scheme wrapped around. This finish was most
probably done in the field, with whatever paint was
 available. I used
Tamiya acrylic dark green and flat brown, with sky undersides.
available. I used
Tamiya acrylic dark green and flat brown, with sky undersides.
A scrounge through the spares box found K8471, from the Frog Blackburn
Shark, decals looked OK and I could rearrange to K7841 which was close enough. I
used roundels from a generic Hasegawa sheet.
For the final bits, I
added
the exhausts, propeller, gun barrels and some PE details, several of which I
lost in the process. The windscreen framing was
a PE frame which needed bending to fit. Piece of clear film was supplied
for the windscreen, but I used Krystal Klear instead. A little touch up painting
and an overall coat of Testors Dull-cote to finish. Very much at the last minute
I added radio aerial posts and aerial wire.
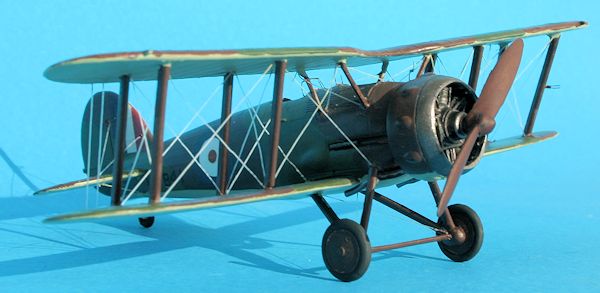
A difficult build, mainly due to the extensive rigging required and the
myriad of tiny parts. The dodgy fit in places was only a minor irritation.
However, the kit is a great improvement on the Pegasus offering. Not
recommended.
David Mondey, British Aircraft of World War II, Hamlyn,
London, 1982
http://en.wikipedia.org/wiki/Gloster_Gauntlet
Peter Burstow
August 2013
If you would like your product reviewed fairly and fairly quickly, please
contact
the editor or see other details in the
Note to
Contributors.
Back to the Main Page
Back to the Review
Index Page