| KIT #: | A027A |
| PRICE: | ~$15-20.00 |
| DECALS: | Three options |
| REVIEWER: | Brian Baker |
| NOTES: | Good kit of a very unusual airplane |
| HISTORY |
The Breguet 270 dates back to 1929, and was
originally a two seat all metal observation type powered by a 500 hp. Liquid
cooled Hispano-Suiza 12HB engine. The standard Type 27s had an open cockpit and
an ope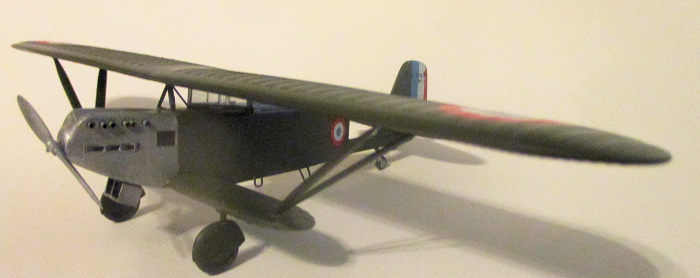 n
gunner’s position in the rear, with an unusual structure designed to improve the
gunner’s field of fire. A few Breguet 27’s were sold to Brazil and Venezuela,
and some slightly different Model 273’s were sold to China. The type entered
service in 1936 with the Armee de l’Aire, and some were still being used at the
beginning of World War II. Although the type was quite modern when it first
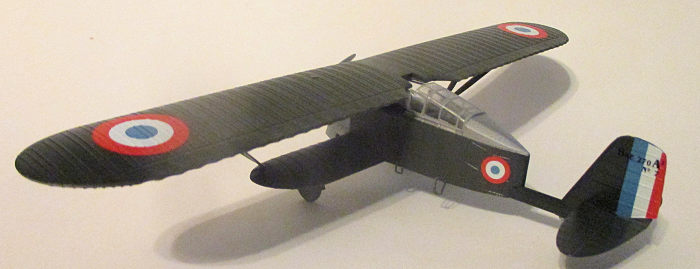
appeared, it was totally obsolete by 1940. The kit depicts a variant, the
Breguet 270 “Liaison” aircraft, with an enclosed cockpit and space for several
passengers, but no rear gun position. Apparently another Azur kit depicts the
armed version
n
gunner’s position in the rear, with an unusual structure designed to improve the
gunner’s field of fire. A few Breguet 27’s were sold to Brazil and Venezuela,
and some slightly different Model 273’s were sold to China. The type entered
service in 1936 with the Armee de l’Aire, and some were still being used at the
beginning of World War II. Although the type was quite modern when it first
appeared, it was totally obsolete by 1940. The kit depicts a variant, the
Breguet 270 “Liaison” aircraft, with an enclosed cockpit and space for several
passengers, but no rear gun position. Apparently another Azur kit depicts the
armed version
| THE KIT |
Molded in light grey styrene on 2 sprues, 22 parts in
all, with 5 clear vacuform plastic parts and 30 small resin parts, the kit
appears to be accurate and has very little flash. The fuselage has two main
sections and the wings are molded in two pieces each, top and bottom, with heavy
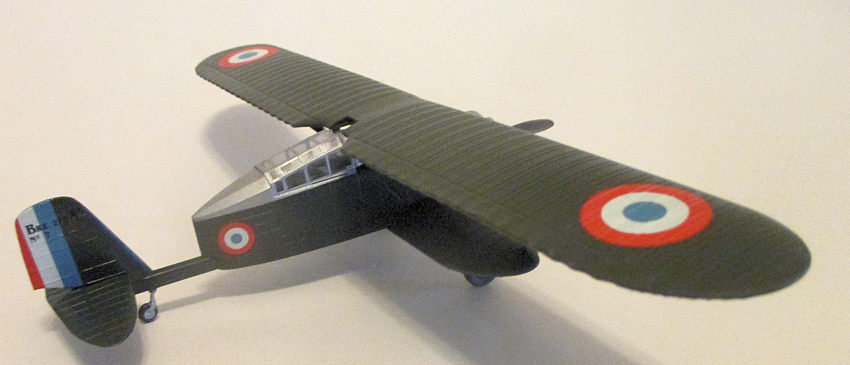
rib detail. This is a very strange looking airplane, with a large forward
fuselage, small rear fuselage, and a small tail section., somewhat resembling a
tadpole. It was a sesquiplane, with a large upper wing and small lower wing. The
wings are braced by triangular struts on the upper fuselage and large “vee”
struts 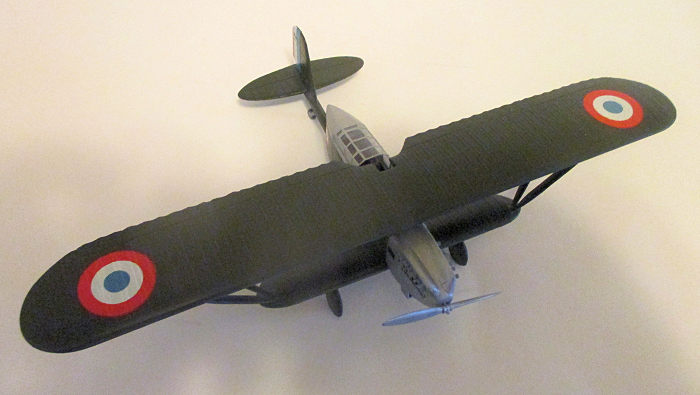 bracing
the wings.
bracing
the wings.
In this kit, the vacuformed fuselage had been changed, with an addition to the instructions, and some replacement parts. One vacuformed part, a little window that is located at the rear of the upper wing center section, Part 46, was missing, but this was easy to replace.
The instructions consist of two letter size sheets, with 8 pages overall. Page 1 gives a short history in four languages. Page 2 has an excellent sprue diagram. Pages 3 through 6 show exploded assembly drawings, while the last two pages give three profile and two plan views for painting and decal placement information. Good color information is provided, and these are some of the best instructions I’ve seen for a kit of this type.
| CONSTRUCTION |
After removing the parts from the sprues, the cockpit
interior needs to be detailed and painted. The resin parts provide adequate
detail, and the instructions clearly state the colors and locations. Once the
interior is assembled and attached to the fuselage parts, the halves can be
joined, and the vacuform canopy can be added. This is easier than it looks.
After it is dry, it can be masked and later painted silver, or green if you
prefer. Be sure to add the exhaust stacks and scoops on the cowling. You’ll
probably have to drill out the holes for the resin exhaust stacks, as mine were
a little small. I also slipped the stacks into place from inside of the cowling,
and placed the glue on the inside, where it wouldn’t show.
 Brass
tubing might also be better for the stacks, although I used the resin ones
provided in the kit. Be sure to face the scoops under the stacks forward, as
they are intakes.
Brass
tubing might also be better for the stacks, although I used the resin ones
provided in the kit. Be sure to face the scoops under the stacks forward, as
they are intakes.
Once the fuselage is assembled, the lower wings can be added. It is a very strong structure, and lining it up correctly will solve a lot of problems later. Then attach the small “vee” struts just ahead of the cockpit. I attached the tail unit before this step, as it is pretty easy to line up, and it would be much more tedious if you had to line up the tail unit after the wings are attached. At this time, I painted the tail stripes on the rudder, as I’m never satisfied with decals when I can paint the rudder.
The upper wings are not as difficult as they appear. I constructed a small jig from cardboard, and superglued the main struts into place, gluing the small “vee” struts last after everything was lined up. With the wing in place, the landing gear units can be installed. There are small attachment points that the struts fit into, and these are pretty sturdy.
| COLORS & MARKINGS |
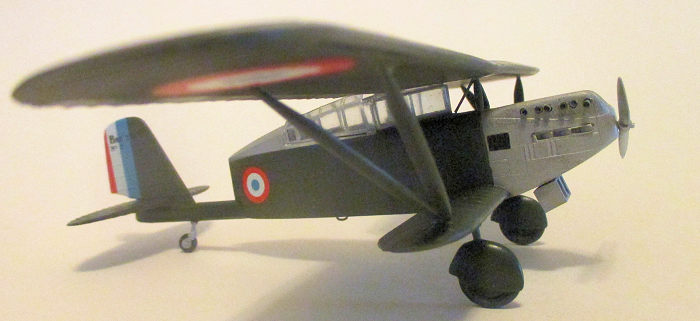 All three
versions of this aircraft have essentially the same camouflage scheme, with
silver cowling and window frames and the rest of the plane Frenck khaki green.
Incidentally, the drawings show the canopy frames to be dark, while the box art
shows them silver. I was unable to locate a photograph of the airplane, so I
opted for the silver. It adds to the color. The decals go on easily, and don’t
need softeners. There are no rigging wires on the airplane, so when the decals
are on, you’re basically finished. It is easier to build this model that you
would guess by looking in the box.
All three
versions of this aircraft have essentially the same camouflage scheme, with
silver cowling and window frames and the rest of the plane Frenck khaki green.
Incidentally, the drawings show the canopy frames to be dark, while the box art
shows them silver. I was unable to locate a photograph of the airplane, so I
opted for the silver. It adds to the color. The decals go on easily, and don’t
need softeners. There are no rigging wires on the airplane, so when the decals
are on, you’re basically finished. It is easier to build this model that you
would guess by looking in the box.
| CONCLUSIONS |
This is an unusual looking airplane, definitely French in appearance, and is probably the only kit that will ever be issued of this plane. It is certainly worth getting one if you can find one. Highly recommended.
Brian Baker
28 March 2017
Copyright ModelingMadness.com
If you would like your product reviewed fairly and fairly quickly, please contact the editor or see other details in the Note to Contributors.
Back to the Main Page Back to the Review Index Page Back to the Previews Index Page