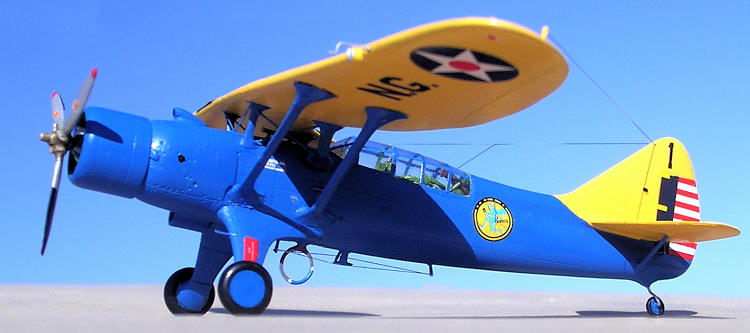
Pavla 1/72 Douglas O-46A
| KIT #: | ? |
| PRICE: | $? |
| DECALS: | Three options |
| REVIEWER: | Carmel J. Attard |
| NOTES: | Short run kit with resin parts |

| HISTORY |
The
Douglas O-46A was delivered to the US Army Air Corps in May 1936. A parasol wing
designed aircraft, powered by a single-engine Pratt and Whitney R-1535-7. The
O-46A was designed to operate from established airfields behind fairly static
battle lines
 as in World War I, however, in 1939 a report was issued on the
O-46A that stated it was too slow and heavy to outrun and outmaneuver enemy
pursuit planes, too heavy to operate from small, wet, unprepared fields, and too
large to conceal beneath trees. This report was a forecast of the future, for
World War II, with its rapidly changing battle lines proved the need for light,
maneuverable observation aircraft that could operate from unimproved airstrips.
The aircraft carried a crew of 2 and armed with two 0.3 cal Browning machine
guns, one in the wing and a flexible mounted gun in the observer’s cockpit.
The Air Corps ordered 90 O-46As in 1935. and served with the USAAC as an
observation aircraft until 1940. At least 11 saw overseas active duty; two were
destroyed in the Japanese raid on Clark Field in the
| THE KIT |
This is an
injection moulded kit in grey plastic containing 42 pieces and cream colour
resin detail parts, 20 items in all. These include engine parts, undercarriage
legs, gun items, crew seat main wheels, control panel etc etc. There is a 12
page size A5 instruction containing history, kit parts layou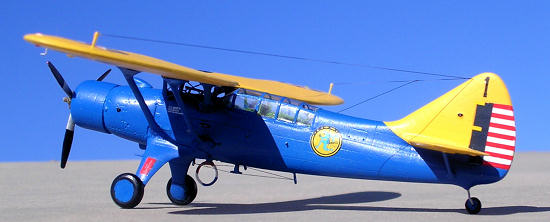 t, painting
information in Humbrol and Agama Authentic colour equivalent/guide and detail
assembly instructions in 18 stages. There are four views for each of the of
three decal options given. An O-46A of the 2nd
observation Squadron,4th Composite
Group USAAC, Clark Field, Philippines, December 1941; another belonging to the
118th Observation Squadron,
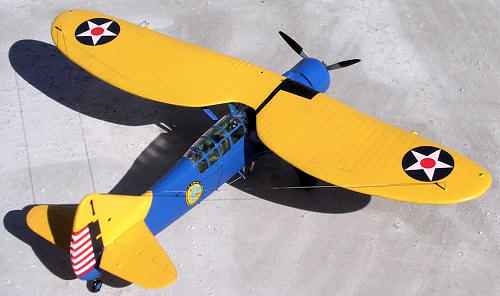
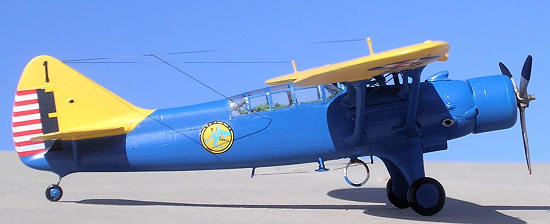
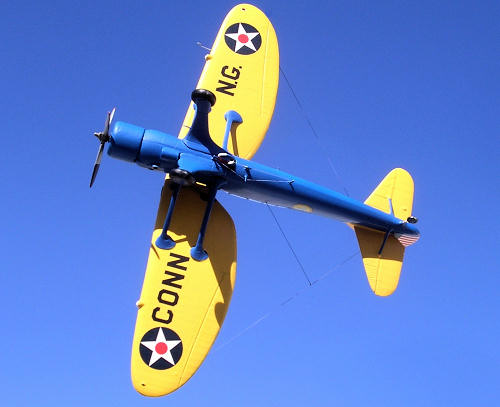
Connecticut National Guard stationed at Hartford 1938, which apparent carried no
external armament. The final scheme caters for an O-46A used as a hack aircraft
for the 21st Pursuit Squadron based
at the
| CONSTRUCTION |
Starting with the fuselage, this
needed a bit of re-scribing and filler at a few localities, but nothing
excessive. The tail planes have to be cut at a slight angle at the joining end
in order for the elevator hinges correspond to form a straight line. There are
two small square observation port holes on the underside that must be cut out
and these were glazed using Kristal Kleer. The resin undercarriage legs were
first parted from the runner using an Xacto saw. This way I prevented damaging
the kit if these were
 simply clipped off. These were a good fit once a half
round smooth file gives the required curvature to match that of the fuselage.
Their position on the fuselage was also marked on the kit itself.
The cabine wing struts appear to be identical
but the main wing struts have the end joining bit that required careful
reshaping to make them closer to the actual and also to an identical shape at
the attachment point. Their cross section needs some refining at the edges. The
tail wheel required a small amount of reshaping to make it look round. Tail
wheel required a locating hole to be drilled.
I
preferred to make a metal tail wheel strut as I thought that the one in the kit
had a thin section that would break at some time during assembly.
The crew mounting steps, pitot
tubes and under-fuselage antenna supports were also replaced with metal pin
parts cut to corresponding lengths
The
main wing parts that come in two whole wing halves had the plastic runner
removed from the back and sanded flat before joining the two wings halves
together. The periphery of the wings particularly the trailing edge needed
shaping by sanding smooth.
The
two rows of radial engine resin parts are first cut and sanded flush so that
they fit snugly inside the two piece engine cowling. This will leave just one mm
protruding prop hub housing from cowling front. When fitting the radial engine
parts one has to ensure the correct position as indicated in the illustration at
stage 7 so that the exhaust outlet is at the left side of the cowling.
 When
fitting the radial engine assembly and is inserted inside the cowling, there is
no recess inside the cowling to allow fuselage to fit. It is best to remove 2mm
from fuselage forward end so that the cowling can be fixed in front. In doing so
the overall fuselage length is brought to the correct dimensions.
The gun ring is sanded at the periphery so that it has
a smaller section and will allow to
fit inside the canopy when closed. In my case
the gun assembly may or may not be incorporated as it was to be an ANG aircraft.
There is a delicately produced resin air intake to fit on top of forward
fuselage and an exhaust outlet pipe to port side of nose. Both needs to be
carefully separated from the resin runner to avoid damage using exacto saw.
Two
observation windows of square shape were drilled and shaped at the base of the
cockpit. Fitting the canopy is best done before the wing is fixed in place. Two
canopies are supplied, one being spare. Once cut to required shape it is fixed
with white glue. I also found that it was best to airbrush the under wing centre
area and corresponding forward fuselage before the assembly was fixed since
these were to be in different colour, yellow and blue respectively.
Ideally when fitting the wings struts, the smaller inner struts are first fixed to the wings at the marked spots. The wing is then brought to fit on the fuselage, carefully aligned and then glued in place. The long struts are then fixed in place when the first stage of wing assembly has set firmly. These long struts may not rest on the exact position marked on the wings but near enough to look correct. Alternatively one may reduce the length of the struts by a little.
| COLORS & MARKINGS |
Painting was straightforward, and the decals proved to
be excellent, needing no setting or solvent solutions over the gloss Humbrol
paints I used. I then sprayed a semi-gloss clear to tone down the gloss for the
sake of scale appearance.
| FINAL CONSTRUCTION |
The underside of the O-46 carries a large DF loop and
an antenna array strung between four points. The DF loop was made from stretch
sprue which was wound around a former of required diameter while the plastic was
still warm. This was cut to size and
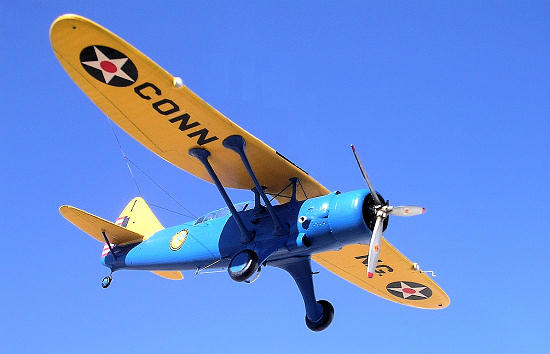 fitted in place. This loop had quadrants
painted in different colours as per instructions. The fuselage and wing-to-tail
antenna wire were added from invisible thread. I should explain at this point
that Pavla’s instructions point out that the colour scheme I chose was unarmed,
but I guess there was no harm in adding the telescopic sight in the event it is
used for training practice. Connecticut National Guard must have exercised
without guns at some stage; however I added the rear observer’s gun mounting for
the simple reason that the cabin would have been a rather empty space at the
rear.
| CONCLUSIONS |
The end result was quite surprisingly pleasing, and I have noticed this experience with most of the Pavla kits I have made in the past and hope to complete the range since it offers such a variety of decal options and versions within the same kit. This was a colorful model and should appeal to those keen on ‘between wars aircraft’
December 2008
Copyright ModelingMadness.com. All rights reserved. No reproduction in part or in whole without express permission from the editor.
If you would like your product reviewed fairly and quickly, please contact the editor or see other details in the Note to Contributors.