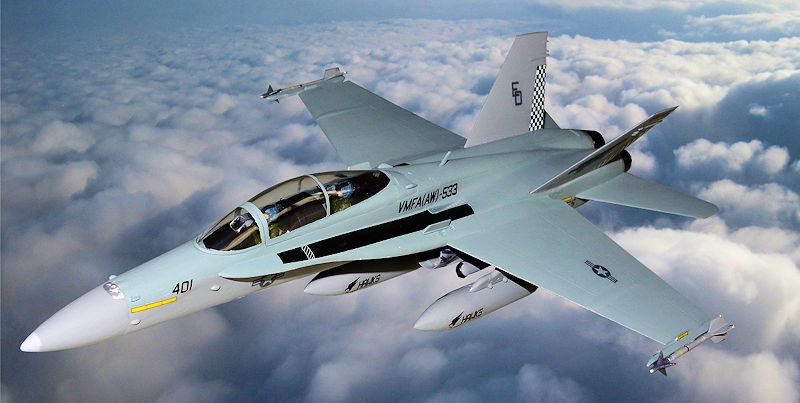
| KIT #: | 00439 |
| PRICE: | 52 yuan RMB |
| DECALS: | Two options |
| REVIEWER: | Richard F |
| NOTES: | Base boxing |

| HISTORY |
 generation,
namely the Mirage 2000 (really? Another delta, Dassault?) and, on the Soviet
side, the, uh… well, there isn't one. Maybe the Sukhoi, I guess. Of all of
them, the F-18 is the coolest in my opinion. Disagree? Then feel free to
build something else and write your own review!
generation,
namely the Mirage 2000 (really? Another delta, Dassault?) and, on the Soviet
side, the, uh… well, there isn't one. Maybe the Sukhoi, I guess. Of all of
them, the F-18 is the coolest in my opinion. Disagree? Then feel free to
build something else and write your own review!In the US, I think the F-18D only flies as an actual attacker with the Marines, for which it replaced the A-6 in the night/adverse weather attack role. Lots of people commented on this at the time, suggesting the Hornet didn't have the range of the Intruder. Well, maybe not, but then again the Intruder couldn't escort itself into a hot target zone. The Hornet demonstrated this capability in the Gulf War, shooting down MiGs en-route to hitting airfields with bombs. Also, for the moment at least, it’s not envisaged to do the same kind of missions the Intruder might have had to do (deep, probably one-way, penetrations with nukes into Soviet territory being the obvious redundant role). The US Navy chose to replace its own A-6 aircraft with the “Bombcat”, a tricked out F-14 Tomcat, until that was replaced by the Super Hornet. Apparently keen to get the F-35 (once known as the Joint Strike Fighter), the Marines chose to stick with their legacy Hornets rather than upgrade to Superbugs. Elsewhere, Malaysia, Kuwait, Switzerland and Finland have –D models in their squadrons. Australia replaced its F-111s with the two seater F model Super Hornet, which is a similar plane to the -D but more modern.
When used in the strike role, the F-18D has a high tech mission suite, and with guidance and navigation pods attached where the medium range air to air missiles normally go, it can fly high speed, low level penetrations at night or in bad weather. Whatever the merits from the point of view of war planners, for my amateur eyes it’s a great looking plane.
| THE KIT |
This cool kit is typical for Hasegawa in the late
years of last century, which is to say, it is still better than a lot of
kits that come out in this century. Although it only has a basic cockpit of
tub, seats and decals, it comes with two great pilot figures who go a long
way to make up for the simple detail. It comes also with
 nicely
engraved panel lines, detailed wheel bays, engine intake blank-off plates,
and nice clear canopy. It’s also better than more recent Hasegawa kits –
though here’s where it pales compared to other brands’ contemporary releases
– it comes with at least something to hang off the wings. You get a pair of
Sidewinders and a pair of Sparrows, plus a suite of fuel tanks. It also
comes with the AN/AAS-38 FLIR and AN/ASQ-173 LST/SCAM pods. The former is a
forward looking infrared pod which can designate a target, and the latter
picks up the laser beam (unless I misunderstand). The system was replaced
from about 2008 by the ATFLIR system which only uses a single pod. There are
no actual weapons in the kit for the air to ground mission, which is a bit
lame given the –D model is really a mud-mover. There is a third crewman,
too, who is standing with his arm out. Decals give you two USMC options –
one of the VMFA-224 squadron with orange tiger-stripe rudders, and one of
the VMFA-533 squadron, with black and white chequered rudders and a cool
black eagle (ok, hawk) motif on the tail. I bought this kit thinking I’d do
the colourful orange one, but in the end I thought the eagle looked a bit
cooler. Yeah, it's actually a hawk. Sorry.
For more, and a look at the sprues, visit the preview, which you'll find right here on MM.
| CONSTRUCTION |
The cockpit is quite easy and goes together nicely. There are decals
for both crew member's areas. I guess this is a more recent boxing than the
F-18C I built at the same time because the decals seemed a bit more
realistic looking - not that I checked online. Either way, the front seater
has a different instrument panel in this plane than the guy flying the
single seater.
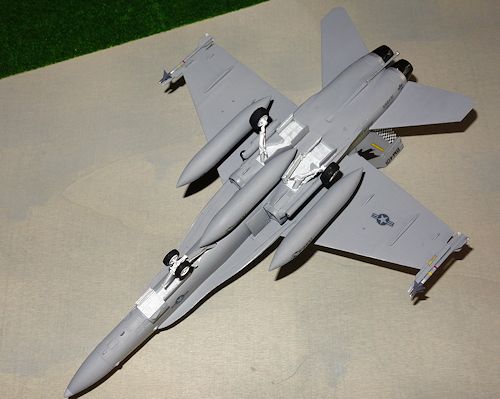
Where this kit lives up to its reputation for being a bit tricky is
in the rear of the fuselage, and the intakes. Despite careful test fitting,
the reality is that the intakes just aren't that good, and there was plenty
of sanding here to get it looking better. The area between th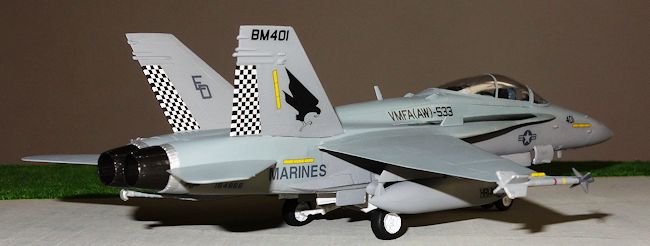 e
wing and the tail plane has a slightly complicated join which also needed
some filling and sanding (and it's inconvenient to do so because the
tailplanes are fixed in place). The vertical tails also needed some gap
filling. Last, under the wings, I needed to fill up a gap between the wings
and the fuselage, another area that's a bit hard to sand. All of that, but
especially the fuselage in the tail area, means the finished product is a
bit rough and ready on closer inspection. The nose area fits better but I
also had to crack out the sandpaper (but no filler) to smooth up the area.
e
wing and the tail plane has a slightly complicated join which also needed
some filling and sanding (and it's inconvenient to do so because the
tailplanes are fixed in place). The vertical tails also needed some gap
filling. Last, under the wings, I needed to fill up a gap between the wings
and the fuselage, another area that's a bit hard to sand. All of that, but
especially the fuselage in the tail area, means the finished product is a
bit rough and ready on closer inspection. The nose area fits better but I
also had to crack out the sandpaper (but no filler) to smooth up the area.
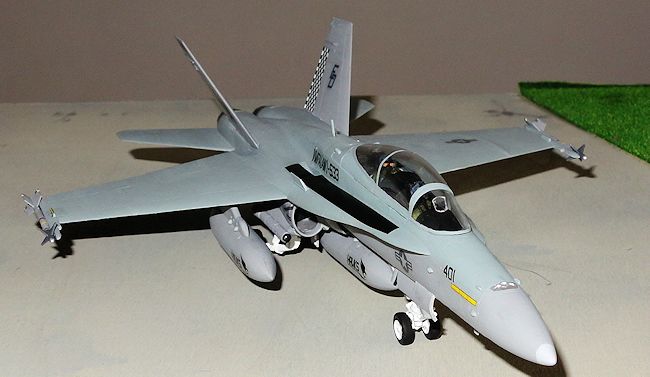
After I painted it - an episode in itself - and did the decals, it was time for final construction. The undercarriage is fairly straightforward on this plane. The nose gear strut is one piece. The rear gear is two pieces per side, plus the wheels. A main strut, which fits stiffly into the hole, and then a little extra strut which just kind of sits in place and doesn't actually take any load. For weapons, after spending a while looking at photos, I decided to just put three tanks on it and the two pods, as well as tip rail Sidewinders. Somewhere I have some AGM-65 Mavericks and I think I will put one of those on one side, and a LGB on the other. Until then, it's rigged for a training mission or perhaps it's flown home from a strike sortie. I really don't like the stupid Hasegawa idea of making you buy weapons kits to trick out what are already usually pretty expensive kits. Revell's Eurofighter, for example, comes with more ordnance than some small air forces have in real life. And Revell's Eurofighter is a good bit cheaper than your average Hasegawa kit. I know I am not alone among modellers in having this opinion.
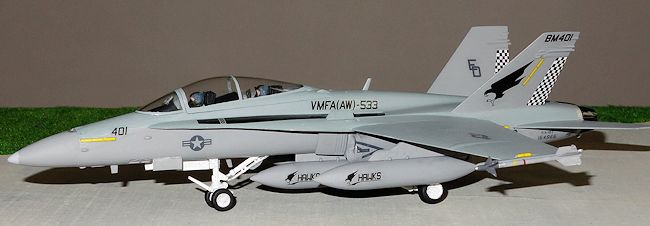
I always leave the ejection seats until last, for some reason, and so I put
those in at this point, along with the pilots. I really like the fact the
kit came with pilots - in my opinion every kit should have a pilot. These
guys - or girls, as of course the case could be these days - appear to have
night vision goggles on top of their helmets. At least, that's what I took
those lumps to be (after nearly trimming them off thinking they were a
moulding blemish). I put these two in this D model Hornet and saved the
other pilot (the one who came on the original sprue) for another model.
Hasegawa pilots are generally better than Airfix ones because you add their
arms separately, meaning the plane doesn't look like it's being flown by two
identical twins. The backseater is giving a thumbs up - booyah!
At the very end, I just added the last bits and pieces. The canopy fits very
well. There are various blade antenna and also the C/D model sensors on the
nose and behind the cockpit. I would have put those on earlier, in the
normal course of events, but I forgot. Undercarriage doors, tailpipes, and
finally, the jet was done.
| COLORS & MARKINGS |
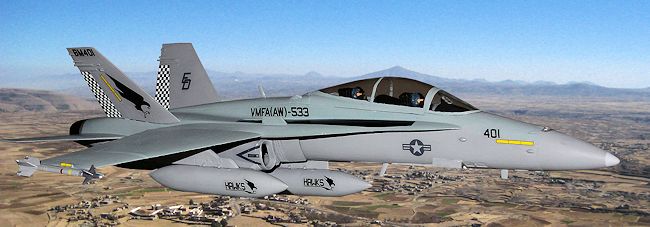 The
proper colour for the F-18 in US service is Dark Ghost Grey over Light Ghost
Grey. The former is FS36320 and the latter FS36375. In Mr Color, they're 307
and 308 respectively. I applied those colours and decided that the 307, Dark
Ghost Grey, was too dark and too blue compared to photos I'd seen online. So
then, over the top of the 307, I applied a Vallejo light grey which was
actually even lighter than 308. It looks like some of the pictures I'd seen,
but then I did another image search on Airliners.net, and came up with
several jets that had something approaching the blue hue. By then, of
course, my Hornet had so much paint it would struggle to get airborne. In
the end, I used the Vallejo for the radome.
Finally I decided on a mix of Tamiya XF-19 Sky Grey with some XF-24 Light Blue for the top side and plain XF-19 for the underside. It looks closer to the majority of the photos I see online, but doubtless it's not really correct. Still, you've got to move on at some point, right? So I gave each side two coats of those colours and declared it painted.
As I mentioned before I'd originally planned to do this one with the bright
orange tail fins as depicted on the box art. But then I thought about my
original aversion to boring grey jets. I mean, they are boring to
 look at,
but because I've though that for so long, there's hardly a grey jet on my
display shelf at all. Everything's bare metal, or aerobatic teams, or
complex camouflage. So I decided it was about time to inject some grey into
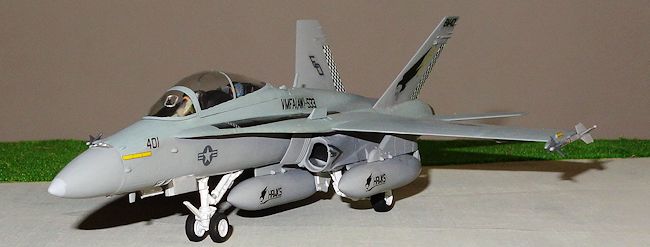
the mix. Also, I really like the cool hawk on the tail fin. So I went with
the markings for VMFA(AW)-533.
I applied them straight onto the matt surface - I know they'd work better over a gloss coat which could then be dulled down but I brush paint most of my models, including this one, so instead I just apply Mr Mark Softer liberally and photograph it without direct light bouncing off the decal into the lens. Actually it looks pretty good, so I was happy enough.
| CONCLUSIONS |
It's an older kit and the rear end construction isn't easy. But I got this and a C model for the same price as one Academy F-18 (meant to be good, though also tricky, especially around the nose area which is more obvious on the finished model than this one's dodgy tail area). If I was paying the normal price for Hasegawa kits I might have felt a bit miffed, especially for the lack of weapons, but for what I paid, I recommend this kit.
| REFERENCES |
http://en.wikipedia.org/wiki/
May 2015
If you would like your product reviewed fairly and fairly quickly, please contact the editor or see other details in the Note to Contributors.