| KIT #: | 04298 |
| PRICE: | 18 Euro |
| DECALS: | Two options |
| REVIEWER: | Carmel J Attard |
| NOTES: |
Italeri kit: 13.5 Euro |
| HISTORY |
The Boeing F/A-18E Super Hornet is
a single seat supersonic fighter/ground attack aircraft and flew for the first
time on  introduced
using new composite materials and improved aerodynamic shape. Stealth features
have also been added arising from the partially hidden air-intakes. The Super
Hornet replaced the F-14 Tomcat since 2006 and served alongside the F/A-18C
Hornet and the F/A-18F two seater in the combat roles. The roles of the Super
Hornet are so diverse that it takes the place of the retired F-14, A-6 Intruder,
S-3 Viking and KA-6D tanker.
introduced
using new composite materials and improved aerodynamic shape. Stealth features
have also been added arising from the partially hidden air-intakes. The Super
Hornet replaced the F-14 Tomcat since 2006 and served alongside the F/A-18C
Hornet and the F/A-18F two seater in the combat roles. The roles of the Super
Hornet are so diverse that it takes the place of the retired F-14, A-6 Intruder,
S-3 Viking and KA-6D tanker.
The Super Hornet is about 20%
larger, 3,000 Kg empty and 6,800Kg heavier at maximum weight than the original
Hornet. It also carries 33% more internal fuel, increasing mission range by 40%
on the earlier version. Boeing has delivered 367 Super Hornets to the
| THE KIT |
 With the
release of the fine model of the FA-18E Super Hornet by Revell I was able to
correct the FA-18E bought earlier made by Italeri which had a false dorsal air
brake among other items to correct. Reference will therefore be made to the
Italeri kit to indicate what it was required to bring to the Revell standard.
The Revell kit contains many parts moulded on 4 grey sprues and two clear sprues
for the window screen, canopy and HUD parts. Generally the kit is reasonably
detailed and has the option of either decorating the raised instrument panel or
applying decals issued in the kit box. There are also options for the armament
to be fitted under the wing pylons and also alternative decals for two fighter
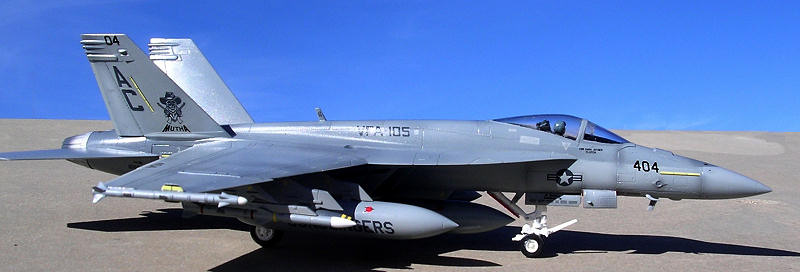
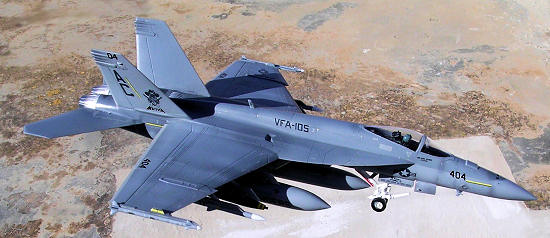
attack Navy squadrons, VFA-137 and VFA-105. The Super Hornet kits I made were
both finished in the Revell decal offering. Whereas the Revell kit is completed
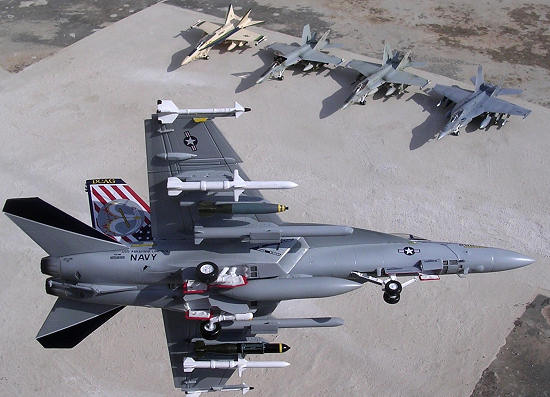
in markings of VFA-105, the Italeri kit is completed in the more colourful
Revell alternative decals option of VFA-137 both of which liveries appear
accurate.
With the
release of the fine model of the FA-18E Super Hornet by Revell I was able to
correct the FA-18E bought earlier made by Italeri which had a false dorsal air
brake among other items to correct. Reference will therefore be made to the
Italeri kit to indicate what it was required to bring to the Revell standard.
The Revell kit contains many parts moulded on 4 grey sprues and two clear sprues
for the window screen, canopy and HUD parts. Generally the kit is reasonably
detailed and has the option of either decorating the raised instrument panel or
applying decals issued in the kit box. There are also options for the armament
to be fitted under the wing pylons and also alternative decals for two fighter
attack Navy squadrons, VFA-137 and VFA-105. The Super Hornet kits I made were
both finished in the Revell decal offering. Whereas the Revell kit is completed
in markings of VFA-105, the Italeri kit is completed in the more colourful
Revell alternative decals option of VFA-137 both of which liveries appear
accurate.
| CONSTRUCTION |
 I
planned to build the kit with the landing gear in the down position in which
case the well doors had to be separated from each other using E-xacto blade and
carefully sanding the parts at the periphery. For the assembly I followed the
kit instructions finding the fit of parts to be perfect but with the exception
when arriving to stage 13. As displayed in the attached drawing, the rear
portion of the engine, which is part item 5 (marked in dark blue), this does not
fit through the rectangular opening indicated unless I had to remove a small
area (marked in red) to make way for the assembly to fit. The alternative will
be
I
planned to build the kit with the landing gear in the down position in which
case the well doors had to be separated from each other using E-xacto blade and
carefully sanding the parts at the periphery. For the assembly I followed the
kit instructions finding the fit of parts to be perfect but with the exception
when arriving to stage 13. As displayed in the attached drawing, the rear
portion of the engine, which is part item 5 (marked in dark blue), this does not
fit through the rectangular opening indicated unless I had to remove a small
area (marked in red) to make way for the assembly to fit. The alternative will
be 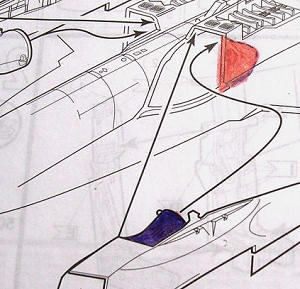 first
to assemble stage 5, miss stage 6 so that the rotor front part 12 is added when
stage 13 is complete. I opted for the first method and removed area marked red
sufficiently to allow the sub assembly 8 to fit in place. This is not
complicated as it may sound and is quickly done. The inner sidewalls of the air
intake have detail that comes in decal form and is done at a later stage when
paintwork is complete.
first
to assemble stage 5, miss stage 6 so that the rotor front part 12 is added when
stage 13 is complete. I opted for the first method and removed area marked red
sufficiently to allow the sub assembly 8 to fit in place. This is not
complicated as it may sound and is quickly done. The inner sidewalls of the air
intake have detail that comes in decal form and is done at a later stage when
paintwork is complete.
| COLORS & MARKINGS |
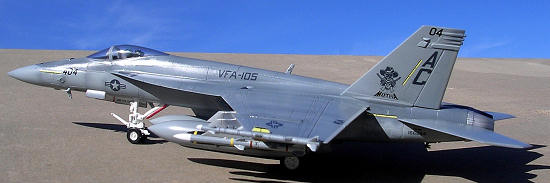 Both
kits had the inner half of the air intakes finished in gloss white, the rest of
the models were painted in Light Ghost Grey Model Master FS36375 for the
underside and dark ghost grey Model Master FS 36320 for all upper surfaces
except the outer side of both tail fins. Wheel wells and undercarriage were
white with outline of well doors in red. Finished models were given a coat of
Klear and the decals were applied. The Revell decal is indicated as made in
Italy, these were thin and of good quality. I also used some items from the
Italeri decal sheet on the Italeri kit. I followed the Revell instruction when
it came to colour the under wing armaments. With the decals set in place,
another uniform coat of Klear was hand brushed and in the end a final semi gloss
coat of MM lacquer was applied to both models.
Both
kits had the inner half of the air intakes finished in gloss white, the rest of
the models were painted in Light Ghost Grey Model Master FS36375 for the
underside and dark ghost grey Model Master FS 36320 for all upper surfaces
except the outer side of both tail fins. Wheel wells and undercarriage were
white with outline of well doors in red. Finished models were given a coat of
Klear and the decals were applied. The Revell decal is indicated as made in
Italy, these were thin and of good quality. I also used some items from the
Italeri decal sheet on the Italeri kit. I followed the Revell instruction when
it came to colour the under wing armaments. With the decals set in place,
another uniform coat of Klear was hand brushed and in the end a final semi gloss
coat of MM lacquer was applied to both models.
| CONCLUSIONS |
January 2011 If you would like your product reviewed fairly and quickly, please
contact
me or see other details in the
Note to
Contributors.