Trumpeter 1/32 AV-8B Harrier II
| KIT #: | 2229 |
| PRICE: | @$90.00 |
| DECALS: | Two options |
| REVIEWER: | Donald Zhou |
| NOTES: |
Advantages: Only Harrier II model of this scale, very
detailed, displayable Pegasus engine, plenty of weapons. Disadvantages: All sorts of detail discrepancies and mistakes. This version does not contain the sidewinder or maverick launch rails. |
| HISTORY |
The AV-8B project started in the
1970’s as a replacement for the AV-8A, the original Harrier. Despite the fact
the Marines loved the Harrier, its shortcomings were well known, the least of
which were the fact the engine is still anemic, especially in hot weather and
range is limited. The project was a collaboration between the British (British
Aerospace), the original developer of the Harrier and the U.S., specifically,
McDonnell Douglas, who produced the Harrier under license. The British later
abandoned the project due to budgetary reasons and let McD to develop the
Harrier II on its own (No escape the little irony of facts the British came up
with the original Harrier “Jump Jet” concept but aba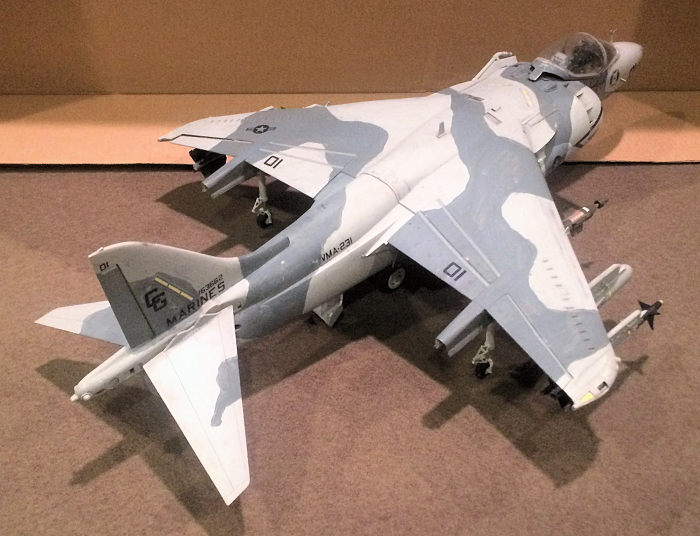 ndoned
its successor to the Americans. Though later on, tempted by the cheaper American
alternative, the British did jump back in).
ndoned
its successor to the Americans. Though later on, tempted by the cheaper American
alternative, the British did jump back in).
The Harrier II took flight in 1981. Despite the fact it looks outwardly similar to its predecessor, there are major differences. The forward fuselage was redesigned with a raised cockpit and a bigger engine space to house the bigger engine. The wings was bigger and beefier so more fuel and two more hard points can be carried. Composite materials were heavily used.
The biggest was the new engine, which offered better thrust to weight ratio and thus, more carrying capacity while the bigger airframe offer more fuel, thus more range. Despite this bigger size, the Harrier II still can land in an area no bigger than a tennis court (although of course, this is the barest of the BAREST minimum). The four swiveling nozzles along the centerline, the Harrier family’s calling card, and the reason why Harriers are able to V/STOL, or Vertical/Short Take-Off and Landing, are still present, with the front two now rectangular “scarf” nozzles. The aircraft went into service with the U.S. Marines in 1985 despite efforts to kill it and the British also. Later, the Italians and Spanish navy also bought the aircraft to operate on their own small carriers.
The aircraft baptism of fire came
in the Gulf War, where 5 Harrier II were lost. Most of the loses were due to the
fact the aircraft’s hottest point is along the center line of the aircraft, not
the tail. Despite this,
 the
Harrier II suffered one of the lowest attrition of the war and offered up to 90%
availability, one of the highest (per 1000 sorties flown). This success
attracted some interests and also majored planned upgrades, including the “Night
Attack” variant with a forward looking IR sensor and then the AV-8B+ variant
with an APG-65 radar in the nose.
the
Harrier II suffered one of the lowest attrition of the war and offered up to 90%
availability, one of the highest (per 1000 sorties flown). This success
attracted some interests and also majored planned upgrades, including the “Night
Attack” variant with a forward looking IR sensor and then the AV-8B+ variant
with an APG-65 radar in the nose.
Some 20 years later, the aircraft went back to the Gulf for the Gulf War II. Despite major success, it’s obvious the Harrier II was a bit long in the tooth. It’s time on station was still short, 15-20 minutes, and it suffered high accident rates, mainly due to the critical period of landing and takeoff, and transition from vertical to level flight. That, and also budget cuts to maintenance also did not help matters. The Harrier jump will eventually be replaced by the F-35B variant of the Lightning II and is slated to be retired in 2025 although it is already retired by the British.
| THE KIT |
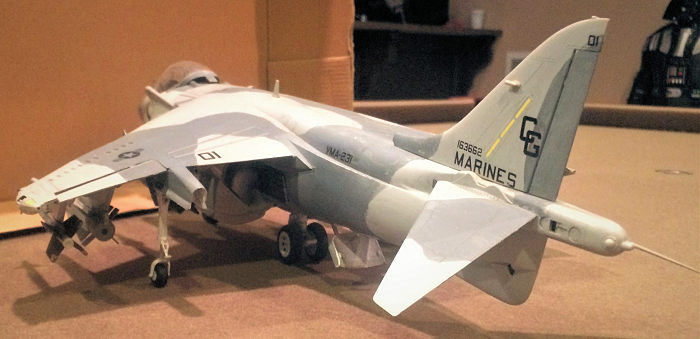
This kit was bought and build a long time ago with it first came out in 2009. This version is the original “basic” AV-8B Harrier II. When Trumpeter first announced the kit, it was a sensation since many modelers have wanted a 1/32 scale of the Harrier II. Revell offered a very basic Harrier I in 1/32 once, way back in 1970’s that’s now nowhere to be found, so this news was welcomed with open arm.
It was only after pics started to
show up that people realized Trumpeter’s “C” team probably were responsible for
this kit. There are detail discrepancies galore so much so, it’s way too much to
be mentioned here. The major one, however, is the nose. It’s too short and too
“bulgy”, resulting in a nos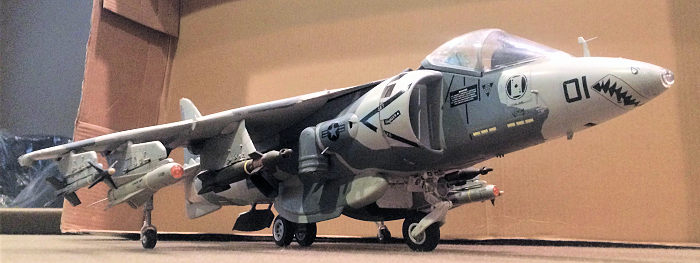 e
that is too blunted, short and a cockpit too high and wide. Other also includes
pylon mistakes and the wing “kinks” missing. Now, the second series, which I
bought did cure the nose somewhat and later versions also fixed this major
issue. The rest, however did not. This early version also did not include the
sidewinder and maverick launch rails even though the missiles are included in
the kit. So, it really comes down to how these faults will bother you and how
far you can go to ignore them. If you can swallow these faults and can source
some sidewinder and maverick rails from elsewhere, a good model of the Harrier
II can result.
e
that is too blunted, short and a cockpit too high and wide. Other also includes
pylon mistakes and the wing “kinks” missing. Now, the second series, which I
bought did cure the nose somewhat and later versions also fixed this major
issue. The rest, however did not. This early version also did not include the
sidewinder and maverick launch rails even though the missiles are included in
the kit. So, it really comes down to how these faults will bother you and how
far you can go to ignore them. If you can swallow these faults and can source
some sidewinder and maverick rails from elsewhere, a good model of the Harrier
II can result.
Despite the shortcomings, the kit is generally good with great construction and fit, and if you are smart enough, the detailed Pegasus engine can be displayed. Two markings are included, including one from Desert Storm with earlier camo and a marking in the later camo pattern.
| CONSTRUCTION |
Construction began with the cockpit strangely enough. The details here is generally good although people suffering from AMS will go for resin replacement. Like any other Harrier models, the forward fuselage is separate and after assembly, is inserted into the intake mouth, separating it. Because of the subject matter at hand, I guess this is the only practical solution to this. Before that can happen though, the forward nose wheel well was assembled and inserted below the cockpit. Just a note, the central hydraulic shock absorber/linkage did not want to go into the bottom slot and required some filing and opening to get it to go. Some people actually thought Trumpeter messed up and made the wheel too high because this linkage did not want to go into the slot. Trust me, no mistakes here. It just that it take some elbow grease to get the bottom pin into its slot that’s all.
 Speaking
of landing gears and wheels, like any other Harrier kits, the landing gears have
to be assembled all in place before painting or else good luck trying to get
them into place…You can’t. And because the main wheels have to be in place, so
have to be the wing’s “pogo” wheels. I painted them white per instructions. Just
be sure to measure out the main/rear landing gear so that the wheels touch the
ground. There are some kits that if you are not careful, the rear wheels will be
in the air as a result.
Speaking
of landing gears and wheels, like any other Harrier kits, the landing gears have
to be assembled all in place before painting or else good luck trying to get
them into place…You can’t. And because the main wheels have to be in place, so
have to be the wing’s “pogo” wheels. I painted them white per instructions. Just
be sure to measure out the main/rear landing gear so that the wheels touch the
ground. There are some kits that if you are not careful, the rear wheels will be
in the air as a result.
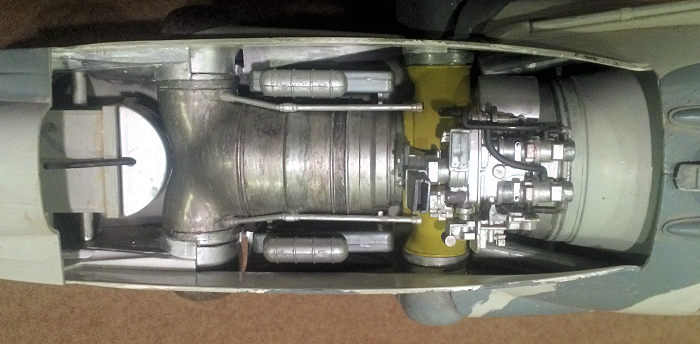
Next up is the wonderful engine.
There are quite a few parts and details are excellent. So it’s a shame to have
to cover it up with the wing mount later. Thinking there must be a way, I
assembled the wing next. The upper half is in one piece so when the two bottom
halves are attached, it covers up the engine bay. I assembled the rear fuselage,
with the rear wheel bay in place, and then put the engine in place and taped up
the fuselage. As it turned out, if you are careful, tolerances are tight here,
the rear wing flange will hold the wing in place while the front end click in
place. And the fit is tight enough that as long as you don’t rough house the
model, the model will stay together in one piece! Because of this reason, I went
to town painting the model with various colors after scouring the internet for
sources.
 The
only thing missing are the wires that usually festoon these things. Also, a hint
of warning, be really careful with the rear end nozzles. Read the instructions
carefully here and test fit three times before committing to glue as if you are
not careful, you can and will cement the rear end nozzles in place like I did so
I ended up with the front nozzles able to swivel but the rear end not be able
to!
The
only thing missing are the wires that usually festoon these things. Also, a hint
of warning, be really careful with the rear end nozzles. Read the instructions
carefully here and test fit three times before committing to glue as if you are
not careful, you can and will cement the rear end nozzles in place like I did so
I ended up with the front nozzles able to swivel but the rear end not be able
to!
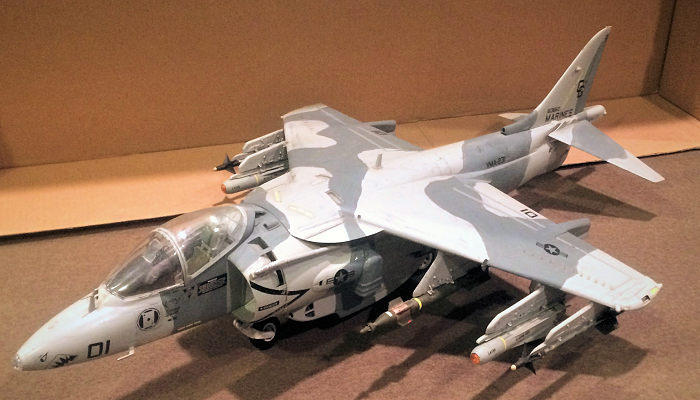
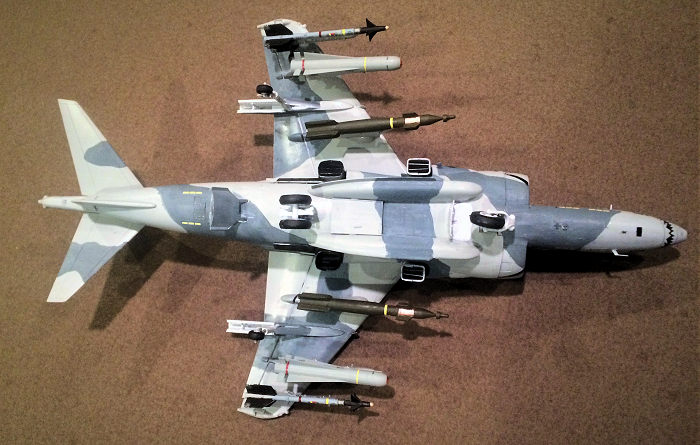
Next are the weapons, there are aplenty! With a bunch of GBU-12, maverick missiles, sidewinders, snake eyes, and two drop tanks. Unfortunately, the tanks are useless as they are misshapen and a bunch of detailed mistakes. Same with the gun pod. Mistakes abound here as there are not one but two cannon holes when there should be one, the left pod is the ammo pod. The central ammo supply connection junction is a small “plank” and the cannon itself is a GBU-12 “Equalizer” gatling gun. The model has a single barrel for the cannon when it should be multiple barrels. In the end, I puttied up the left gun port, jut the rest into place and have to swallow it and just use the kit’s “connection plank”. Two belly streaks are also included if you decide the cannon pod is just too much of a mess to be worthwhile.
 On top of
THAT, this early version, the maverick and sidewinder missile launch rails are
not included! Later versions do have them but not with this version. It took two
more years to gather the correct parts with the Maverick launch rails from my
A-4 Skyhawk kit and the Sidewinder rails from my F-14 kit to able to properly
equip my Harrier, not unless you want an all-out “GBU” loadout. The weapons were
assembled problem free and then put aside.
On top of
THAT, this early version, the maverick and sidewinder missile launch rails are
not included! Later versions do have them but not with this version. It took two
more years to gather the correct parts with the Maverick launch rails from my
A-4 Skyhawk kit and the Sidewinder rails from my F-14 kit to able to properly
equip my Harrier, not unless you want an all-out “GBU” loadout. The weapons were
assembled problem free and then put aside.
The wings assembly is easy afterwards, time to paint…Without an airbrush that is!
| COLORS & MARKINGS |
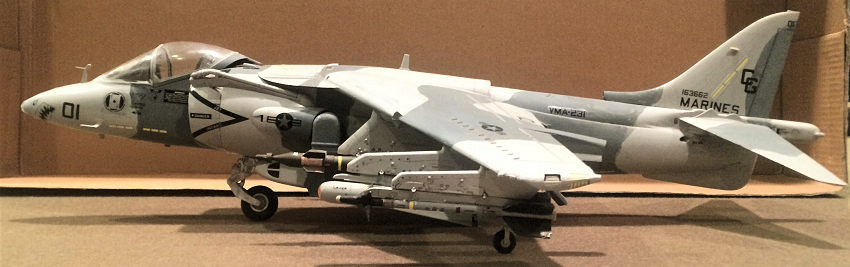
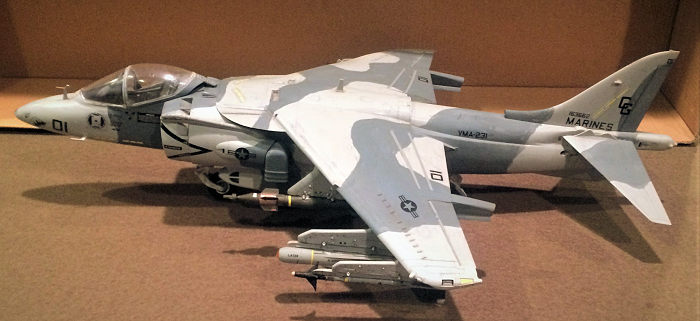
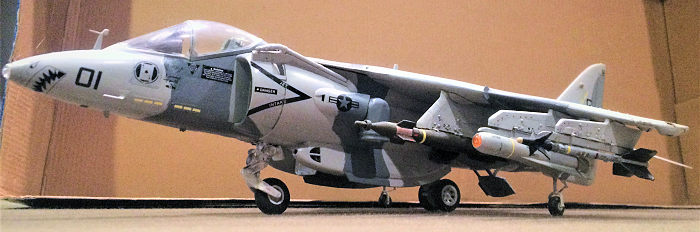
Umm…Yeah, it’s about this time that my airbrush broke…..While waiting on a new one, I just couldn’t wait and decided to hand paint it! I chose marking 1 just because the markings contain a shark face and a spade that look very much like the marking of a Harrier II piloted by some guy named AAARRRRNNOOOLLLDDD in a certain movie that I “quite forgotten”…What is it? About an agent in the “Omega Sector”, who had to pilot a certain V/STOL jet to downtown Miami to stop a bunch of nuclear armed terrorists while saving his daughter……
Anyways, follow the kit
instruction (although, from research, the color can be really disparated with
this one, as there is one version with dark green in place of neutral grey), I
hand painted the light ghost grey and then the neutral grey…Or equivalent colors
in Mr. Hobby colors as I was working in China back then and the only colors on
offer were either Tamiya or Mr. Hobby. They go on pretty nasty as
 Mr. Hobby
was meant for an airbrush (in fact, it is my favorite air brush color….Hand
painting? Not so much!) and took several thin coats to achieve the proper ratio
and coverage. And yes, you can forget about weather with this one as these bird
can get quite dirty! But without an airbrush?!!? Guess this will have to do!
Mr. Hobby
was meant for an airbrush (in fact, it is my favorite air brush color….Hand
painting? Not so much!) and took several thin coats to achieve the proper ratio
and coverage. And yes, you can forget about weather with this one as these bird
can get quite dirty! But without an airbrush?!!? Guess this will have to do!
After using burnt iron for the rear end exhaust and blast deflector, I painted the weapons. Without any rocket pods back then (Well, I got some now from Skyraider kits but just too lazy to put them on), cause the one in True Li……Nope…I don’t remember that movie’s name **Puts tongue in cheek** do have some, I replace them with two GBU’s. I also painted the sidewinders (really! That scene with the lead terrorist on the missile is really reekunkculas!!!) and then the “kick ass” maverick missiles but as stated, they didn’t go on until two years later after I got my A-4 kits.
Most of the paintings are done and now onto the marking. This kit is when Trumpeter’s decals started to get thin. Not as thin as my Tomcat kit but thin enough to lead to some problems such as the left “Danger! Jet Intake” triangle almost rolling completely up on me! Do becareful! Yes, Trumpeter decals reacts very well to Mr. Marks Decal Softer. My go to decal softener agent. A few pat down, some splashes and you are good to go! The only thing I didn’t do is I didn’t put the upper wing’s stars n’ bars in the correct place because, well, the correct place is right over the left wing fence! Yeah, not gonna deal with that headaches!
The kit is mostly done at this point.
Since the kit was basically hand painted, the amount of final constructions was minimum. The only thing left was basically the horizontal stabilizers. Which I attached and then the wheels. The next part are the weapons. Since the sidewinder rails and maverick rails didn’t appear until later, I just add a bit of superglue on the missiles and glued them directly to the pylons that are easily pulled off later. I then carefully mated the wings to the engine bay and snapped it shut. Model done!
| CONCLUSIONS |
And boy did this model went through a lot over the years. Moving to the U.S. being one of them, which snapped off the forward fuselage and caused me to lose a pitot tube! “GRRRR!”. Then came the fact my 3 year old somehow got to it and “KER-SPLATTTTT!!” it right to ground! Broke off the wing and snapped the left nose wheel holder off, hence why the nose wheel is kind of off to the side here and took me a bit to get everything back together again! But still, it still looks good and those few people who saw True Li…No no NO!!! I do not know the name of that movie!!!!!! **Put pinky up to mouth like Dr. Evil!** will instantly go, “is that the jet that ARNNOOOLLLDDD piloted in that movie?” Yep! Of course. Some I have to explain that yes, this jet CAN take off and land vertically and no, that was not some figment of James Cameron’s imagination cause, let me show you! I simply take the model and go, “see those four nozzles there?” and take off the wing to show the engine. Some are actually surprised! “Wait! This jet engine doesn’t have a single pipe to the rear?!?!?” Good stuff! Good stuff!
So in the end, this model is only recommended cause as mentioned, it’s obvious that Trumpeter’s “C” team worked on it and the end result shows as there are too many mistakes and detail discrepancies. However, if you can ignore those, a very good model of a very important aircraft can result!
Donald Zhou
11 April 2017 Copyright ModelingMadness.com If you would like your product reviewed fairly and fairly quickly, please contact the editor or see other details in the
Note to
Contributors. Back to the Main Page
Back to the Review
Index Page
Back to the Previews Index Page