Skunkmodels 1/48 MQ-9 Reaper
| KIT #: | 48013 |
| PRICE: | $55.00 SRP |
| DECALS: | Two options |
| REVIEWER: | Scott Lyle |
| NOTES: |
| HISTORY |
In recent years
armed drones have been receiving a great deal of attention due to some
headline-grabbing kills they have made in the ongoing war against terrorism.
One of the newest drones, or Unmanned Aerial Vehicles (UAV), in the US
military’s arsenal is the General Atomics MQ-9 Reaper.
I must admit I have not stayed up to date with the latest developments
concerning these aircraft (I was aware they don’t have a pilot and can shoot
missiles at stuff…), and so I was quite interested to learn more about where
they came from and what they can actually do (mostly from Wikipedia).
 The MQ-9, fielded in 2007, arose from the MQ-1
Predator drone, the development of which began in the mid 1990’s in response to
a US Air Force demand for an unmanned reconnaissance platform that would be
capable of carrying sensors and cameras as well as staying aloft for extended
periods of time. The resulting RQ-1
reconnaissance drone proved to be very successful, and in 2000 the Air Force
began to develop an armed version that could carry Hellfire missiles.
In tests conducted in February 2001, an MQ-1 UAV successfully fired
Hellfire missiles at stationary targets, and in the following year MQ-1 Predator
drones were used in combat.
Anticipating the demand for a much more capable ordnance carrying drone, General
Atomics began redesigning the Predator, initially without Air Force funding, and
from that effort arose the MQ-9.
The MQ-9, fielded in 2007, arose from the MQ-1
Predator drone, the development of which began in the mid 1990’s in response to
a US Air Force demand for an unmanned reconnaissance platform that would be
capable of carrying sensors and cameras as well as staying aloft for extended
periods of time. The resulting RQ-1
reconnaissance drone proved to be very successful, and in 2000 the Air Force
began to develop an armed version that could carry Hellfire missiles.
In tests conducted in February 2001, an MQ-1 UAV successfully fired
Hellfire missiles at stationary targets, and in the following year MQ-1 Predator
drones were used in combat.
Anticipating the demand for a much more capable ordnance carrying drone, General
Atomics began redesigning the Predator, initially without Air Force funding, and
from that effort arose the MQ-9.
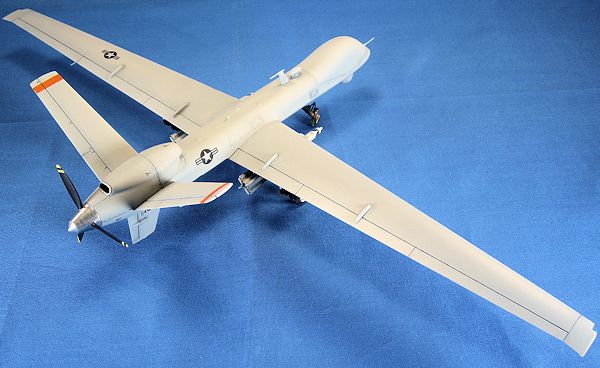
Powered by a 950hp turbofan engine and with a
wingspan of 66 feet, the MQ-9 can stay aloft for 36 hours (36 hours!!!) while
carrying a payload of 3,000 pounds.
Operators stationed in ground command centers halfway around the world can
control the drone, search for targets, and scan the terrain using advanced
sensors and cameras. Night and bad
weather operation is permissible given the UAV’s thermal camera suite, and
reportedly a car’s license plate can be read from two miles away.
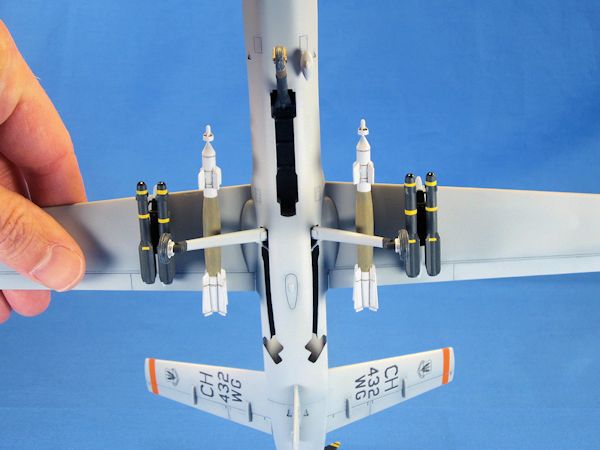
There are six hard-points for ordnance and external fuel tanks.
A large array of ordnance can be carried including the GBU-12
 Paveway II
laser-guided bomb, the AGM-114 Hellfire II missile, the AIM-9 Sidewinder
missile, and even the GBU-38 JDAM.
Paveway II
laser-guided bomb, the AGM-114 Hellfire II missile, the AIM-9 Sidewinder
missile, and even the GBU-38 JDAM.
Operationally the Air Force envisions using the MQ-9
in conjunction with piloted aircraft, with the piloted aircraft dropping large
amounts of ordnance on targets while the drones fly through the combat area day
and night, searching for targets of opportunity.
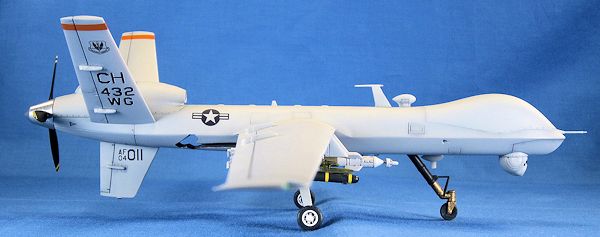
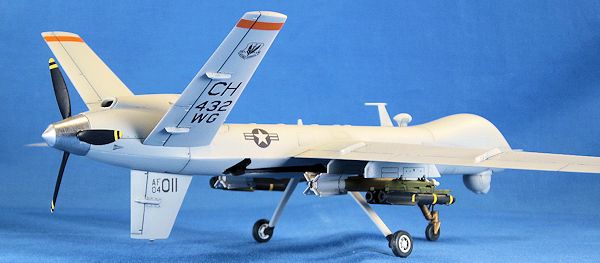
The first Air Force unit to be equipped with the MQ-9 was the 432nd
Wing stationed at Creech Air Force Base in Nevada, which received their new
aircraft in the spring of 2007.
Since then the 174th Fighter Wing has also been similarly equipped.
The MQ-9’s first combat deployment was in October 2007 in Iraq, with
successes against targets using Hellfire missiles being reported soon after.
Along with those aircraft in service with the Air Force, the US Navy,
CIA, NASA, US Customs and Border Patrol, Royal Air Force, and Italian Air Force
have also purchased or plan to purchase MQ-9 Reapers.
| THE KIT |
| CONSTRUCTION |
Construction starts off with the cockpit as usual…wait,
what? Where’s the cockpit?
Oh yeah, there isn’t one. So
in this case, construction starts off by gluing the two main landing gear wells
to the lower fuselage half. These
parts do not create the entire wheel well, just the part that encloses the
landing gear struts. This results
in a gap where you can see directly into the fuselage and out through the other
side. Not having
 any good
reference pictures of a real Reaper’s wheel wells, I don’t know if that is
accurate or not. Ultimately I
decided to leave the situation as is.
any good
reference pictures of a real Reaper’s wheel wells, I don’t know if that is
accurate or not. Ultimately I
decided to leave the situation as is.
The long, thin wing halves were glued together next;
the resulting seams were minimal.
Attaching the wings to the lower fuselage half required a little work.
The wings interlock with each other and pins inside the fuselage.
That results in a strong joint for the wings, but you have to open the
pin holes in the wings a bit so they will butt up tightly with the fuselage.
Once that was done I attached the upper fuselage to the lower, but not
before super-gluing some lead pellets into the nose to ensure that the MQ-9 will
keep its front foot on the ground.
The seam between the two fuselage halves required a little filler and sanding,
and there was also a pair of sink marks on each side to be filled, but none of
this was anything to worry about.
With that done I assembled the engine halves and filled and sanded that seam.
That assembly then mounted to the fuselage nicely.
At this point the instructions would have you add
the landing gear, but I decided to leave them off until the painting process was
over. I also decided to leave the
camera turret on the chin off as well, as I wanted to paint that separately.
I did however add the various antenna, pitot tubes, and ordnance pylons
to the model. Once they were set, I
headed for the paint booth.
| COLORS & MARKINGS |
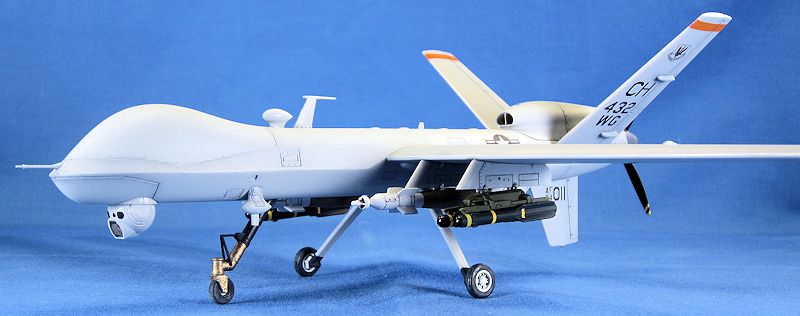
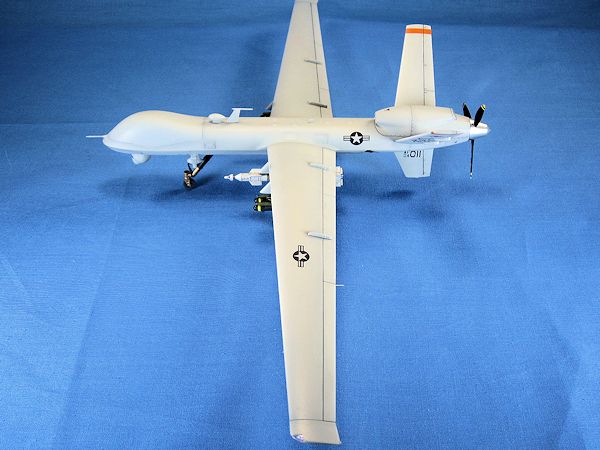
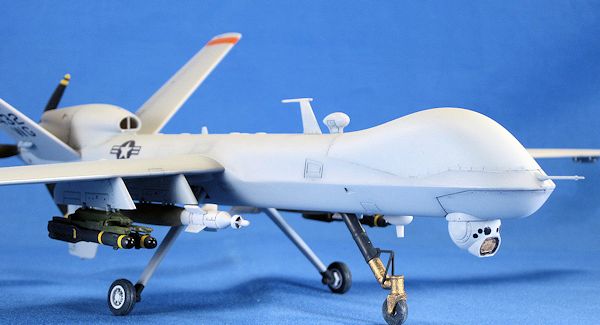
Looking at pictures of a real MQ-9, it seems to be very
cleanly covered in a uniform coat of Light Ghost Grey with very little
weathering. After going over the
model with Polly S Plastic Prep, I sprayed it with Tamiya Surface Primer and
then refilled any of the seam areas that needed a little more attention.
I then sprayed some Tamiya XF-54 Dark Sea Gray on the panel lines and
around the bases of the various antennae and ordnance pylons to act as some
pre-shading. I then airbrushed
Testors Acrylic Light Ghost Gray over the whole model, letting just a hint of
the pre-shading show through. Once
that was set I masked off the large hump on the nose and the control surfaces
and sprayed them a very subtly lightened shade of Light Ghost Gray, just to
provide a little bit of variation.
Up next was a coat of Future over the whole model, to create a glossy surface
for the decals.
 The decals went on easily and behaved well with the
Walthers Solvaset decal solution that I usually use.
Before sealing them I made a wash of Payne’s Gray and ran it into the few
panel lines there are on the model, namely the control surfaces, to create a
little more contrast. I then sealed
the decals and created a matte finish over the whole airframe by airbrushing the
model with Testors’ Lacquer-based Flat Finish.
The decals went on easily and behaved well with the
Walthers Solvaset decal solution that I usually use.
Before sealing them I made a wash of Payne’s Gray and ran it into the few
panel lines there are on the model, namely the control surfaces, to create a
little more contrast. I then sealed
the decals and created a matte finish over the whole airframe by airbrushing the
model with Testors’ Lacquer-based Flat Finish.
With the painting of the airframe finished it was
time to work on the remaining details.
I brush-painted the wheel wells Testors Acrylic Gunship Gray.
The main landing gear struts were painted Light Ghost Gray, and their
“ankles” were painted Vallejo Black Gray.
The nose gear strut was also painted Vallejo Black Gray while it’s
“ankle” was painted Testors Gold.
Before painting the gold however I removed the hunks of plastic on the strut
that represent a linkage and scratch-built a replacement using Evergreen plastic
rod.
The painted landing gear and wheels were glued to
the model, but when I set the model on said landing gear, I realized I had a
problem. It was a tail sitter, even
with the lead pellets I had added to the nose.
With the prop and ordnance still to be added to the model, I decided to
tackle that problem later.
I painted the GBU-12 bombs Testors Acrylic
Camouflage Gray, and then brush painted the bodies of the bombs Testors Acrylic
Olive Drab. They were then
weathered with some MIG Pigments “Europe Dust” to create the worn and dusty look
visible in many pictures of the bombs online.
The Hellfire missiles were painted Vallejo Black Gray, and then also
referencing online photos of the real things, I added yellow stripe decals
sourced from my spares box. I added
the outer wing tip lights next, and that brought me to the two final steps
before completing the model, the prop and the chin “sensor turret”.
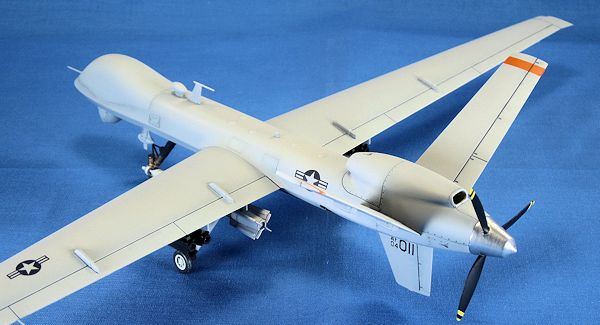 Online pictures of the prop show the hub having sort
of a turned or brushed chrome look.
To replicate that I brush-painted Testors Chrome onto the hub while spinning it
in my hand; the end result looked reasonable to my eye.
The prop blades were painted Testors Black, and then I masked off the
tips with Tamiya tape and sprayed Tamiya XF-2 White and then Testors RLM 04
Yellow to replicate the yellow edges of the blades.
Online pictures of the prop show the hub having sort
of a turned or brushed chrome look.
To replicate that I brush-painted Testors Chrome onto the hub while spinning it
in my hand; the end result looked reasonable to my eye.
The prop blades were painted Testors Black, and then I masked off the
tips with Tamiya tape and sprayed Tamiya XF-2 White and then Testors RLM 04
Yellow to replicate the yellow edges of the blades.
The sensor turret has one large window that receives
a clear piece and also a handful of smaller flats molded on to it to replicate
the many sensor lenses that are on the real thing.
I painted some gold into the large window and then used gloss black to
represent the smaller lenses.
Before I could glue it in place however I had to deal with my tail sitting
problem. Using my Dremel I
carefully opened up the recessed pocket on the fuselage for the chin turret and
added more lead pellets inside, coating each with CA glue to get it to stick.
I could have avoided this if I had just added more weight to the nose
initially, but the end result worked all the same.
With the extra pellets added the model sat properly, so I glued the chin
turret in place. And with that, the
model was finished.
| CONCLUSIONS |
 The
Skunkmodels MQ-9 Reaper is a quick and trouble-free build.
While the modern subject and lack of fancy camouflage schemes may be a
turn-off to some, there’s no doubt that drones are going to assume more of the
“workload” as time and technology march on. If you build it add lots of weight
to the nose and be mindful of what that will do to the main landing gear –
they’re a little on the fragile side and white metal aftermarket legs are
available. But if you’re in the
mood for adding a slice of the present and future to your collection, I can
recommend this kit.
The
Skunkmodels MQ-9 Reaper is a quick and trouble-free build.
While the modern subject and lack of fancy camouflage schemes may be a
turn-off to some, there’s no doubt that drones are going to assume more of the
“workload” as time and technology march on. If you build it add lots of weight
to the nose and be mindful of what that will do to the main landing gear –
they’re a little on the fragile side and white metal aftermarket legs are
available. But if you’re in the
mood for adding a slice of the present and future to your collection, I can
recommend this kit.
| REFERENCES |
April 2013
If you would like your product reviewed fairly and fairly quickly, please contact the editor or see other details in the Note to Contributors.