|
KIT: |
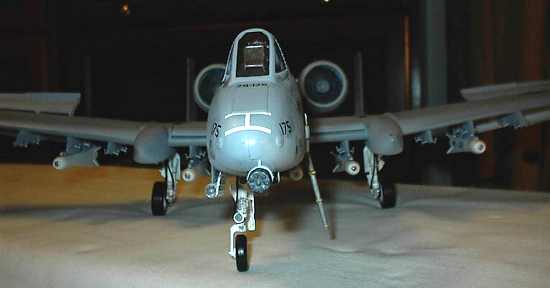
Trumpeter 1/32 A-10 Thunderbolt |
|
KIT # |
` |
|
PRICE: |
$99.95 |
|
DECALS: |
Two aircraft |
|
REVIEW & |
Len Roberto |
|
NOTES: |
|
|
HISTORY |
The first aircraft designed specifically for the CAS (Close Air Support) role, the A-10 was vindicated in the Gulf War. For an excellent overview of the airplane much better than I could write--visit this site:
http://www.fas.org/man/dod-101/sys/ac/a-10.htmAnd, for a fantastic read on the A-10 and the pilots that flew them in the Gulf War, order this book:
Warthog: Flying the A-10 in the Gulf War by William L. Smallwood ISBN: 0028811232 $12.00
You won’t be disappointed by this great account.
|
THE KIT |
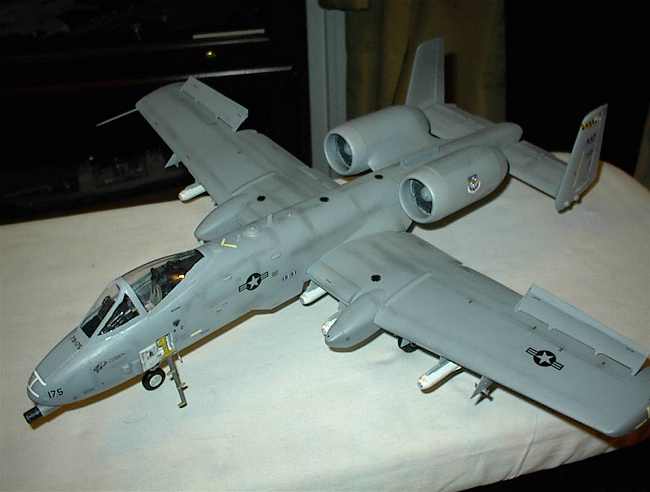
The anticipation and anxiety over the release of this kit was overwhelming. Rumors were flying and spy photos were scrutinized on various websites. At a hefty retail price of around $100.00, expectations were high. Judging by the quality of Trumpeter’s ship kits which are horrid, and their practice of copying other manufacturers’ kits, I was wary of this kit but wanted to check it out anyway. Online retailers were offering the kit for as low as $73.00. After it was released, a flurry of reviews and comments popped up all over the web. Within a few months, modelers were also treated to a host of aftermarket decal schemes as well as two resin upgrade sets.
 Despite the negative comments of some reviewers, the kit is worth the cost.
It comes in a very sturdy and huge box. There are about 12 sprues of light grey
soft plastic bagged thoughtfully. You also get a neat hard plastic box
containing the precisely molded one piece ejection seat, rubber tires, white
metal landing gear, and boarding ladder. Clear sprues are bagged separately with
the canopy, engine see-through covers, and various other bits. Two superb resin
engines are provided in bubble wrap and the metal hardware required to pose the
engine covers open are also included. A 30 or so page construction booklet
guides you with adequate diagrams and color references. Weaponry errors and
cockpit deficiencies aside, (please Lee Kolosna’s cogent comments on this very
subject)—the kit offers a great building experience and an eyeball attracting
model anywhere you bring it!
Despite the negative comments of some reviewers, the kit is worth the cost.
It comes in a very sturdy and huge box. There are about 12 sprues of light grey
soft plastic bagged thoughtfully. You also get a neat hard plastic box
containing the precisely molded one piece ejection seat, rubber tires, white
metal landing gear, and boarding ladder. Clear sprues are bagged separately with
the canopy, engine see-through covers, and various other bits. Two superb resin
engines are provided in bubble wrap and the metal hardware required to pose the
engine covers open are also included. A 30 or so page construction booklet
guides you with adequate diagrams and color references. Weaponry errors and
cockpit deficiencies aside, (please Lee Kolosna’s cogent comments on this very
subject)—the kit offers a great building experience and an eyeball attracting
model anywhere you bring it!
|
CONSTRUCTION |
I will break this monster down in the order I assembled it:
Cockpit:
One of the major bones of contention nay Sayers have with the kit is the poorly detailed cockpit. They are justified because the detail is quite murky. Black Box and Cutting Edge have released excellent resin sets to satisfy the discriminating builder. The ejection seat on the other hand is fantastic. It is a one-piece affair that looks just right. The cockpit is inserted into a tub just like the armored tub on a real ‘Hog. The cost of the kit was high enough for me so used the cockpit as provided and tied to drybrush the instrument panels to provide some texture. A decal is supplied for the main panel.
Gatling Gun:
A wonderful model in itself, the Gatling gun is unseen once installed so I left it out and plan to build it as a separate display. By leaving it out, you also have plenty of room for the weight needed to sit the model on its nose!
Fuselage:
This is split into front and rear sections with left and right halves. After installing the cockpit tub in the right front half (which takes a little patience to fit right) the front halves fit together quite well. Don’t worry about nose weight yet. The large area just behind the seat is not added until later and the opening leaves you plenty of room to drop in fishing weights later on to get the model to sit on its gear.
The rear halves also fit quite well with little fuss. Joining the front and rear fuselage sections was delightful. A tight fit with only the slightest seam requiring a tiny bit of filler. I was pleasantly surprised throughout this part of assembly that the large parts fit so well. I was expecting a bondo job but Trumpeter did a great job here. A few other bits were added to the fuselage and it was filled and sanded in just a few areas and set aside.
 Wings:
The kit offers the modeler the option of movable flaps and speed brakes on each wing. Again the fit here was quite good. Each flap is 2 pieces and is trapped between spars. They move easily and the top and bottom wing halves fit nicely. I used lots of clothespins on the wings while they were drying. The speed brakes can be pushed into their slots with a small screwdriver, which allow them to be posed freely.
Moving to the gear sponsons, fit here was not very good and there are significant gaps to be dealt with. Most of the sandpaper pads I went through were used on this area. Lots of filling and sanding here.
Weapons pylons are split into 2 halves and attachment points are added as well. Instructions were very clear and easy to follow here. It got a bit tedious working on these pylons with a little sanding needed on each one. Care is needed here to ensure that the pylons hang properly from the outer wing sections.
Engines:
The two resin engines are very nicely molded. Upon looking at the instructions and parts involved, I decided it would be a much too fragile setup to pose the engine covers open. I decided to model the ‘Hog with the engines closed up. Fan blades are clear and the assembly takes a lot of dryfitting and patience. Again, fit could have been better. It seems like the kit was engineered to be posed open and there are some serious overlaps when you try to close up the assembly. I used a handful of heavy-duty elastic bands to hold the pod together. Much filling and sanding is needed around the engines.
Attaching the engine pod to the fuselage was another pleasant experience. Fit was very good with just light sanding needed.
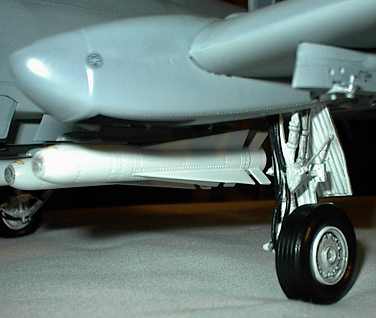 Landing Gear:
The white metal gear needs a light sanding to remove the roughness. Landing lights and braces must be attached with CA glue. The instructions also call for screwing in the wheels into the metal gear. I had read elsewhere that this was damn near impossible—the advice was to CA them as well, which is what I did. Using pictures of the gear as a guide, I used some old Tamiya 1/12 scale motorcycle tubing for brake and hydraulic lines and glued them onto the gear.
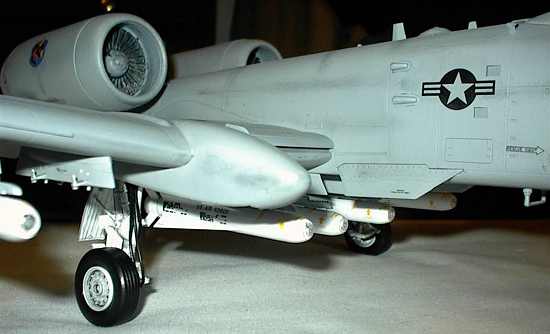
Weapons:
Another area of complaint was the molding of the weapons. You get quite a lot of plastic for the host of different weaponry the ‘Hog carries. The instructions list many variations on the loadouts carried. I decided to go with a full load of AGM-65 Mavericks and two of the big CBU’s. A lot of sanding is needed on the weapons to get their shape smooth and uniform.
|
PAINTING |
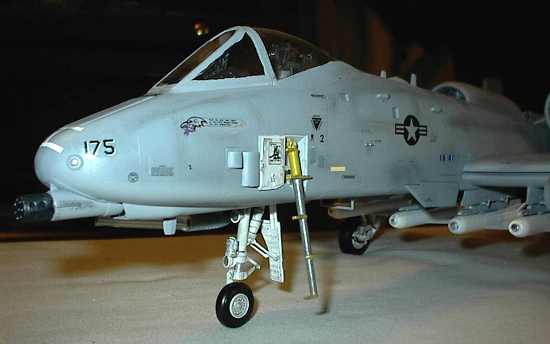
The kit provides markings for a Desert Storm ‘Hog. Living in Connecticut, I get to see our CT Air National Guard birds at airshows so I wanted to do a Grey Ghost scheme. Two Bob’s Aviation Graphics came out with a set with a Maryland ANG A-10, which I jumped on (since then Eagle Strike Decals has released a set with a Connecticut ANG bird…oh well)
The grey scheme calls for three greys: Light Ghost Grey underside as well as a bit on top of the engine pod and fuselage, Dark Ghost Grey upper surfaces, and a small false canopy on the bottom where the nose gear resides using Gunship Grey. This is to confuse ground observers as to the direction of an incoming plane, I believe.
I used Testor’s Model Master enamels airbrushed in a marathon session. The two greys are very similar and the demarcation lines are hard to distinguish on my ‘Hog. I have seen pics of some where the lines are more discernible. I don’t get hung up on these things- I have seen many grey A-10’s at airshows and the fading, repairs, grime, etc. make most of this irrelevant.
When the major paint session was done, I moved on to other detail painting:
-Gunmetal for the rear portions of the engines that stick out the back of the pods. Drybrushed with steel and silver to scuff it up. The same formula was used for the engine fan blades and the gun barrel sleeve at the business end of the ‘Hog.
-Semi-gloss white for landing gear. I used a black wash to muck these up as well as the gear wells.
-Krylon semi-gloss white spray for the Mavericks
-Olive Drab spray for the CBU’s with a steel tip
|
CONSTRUCTION CONTINUES |
When all was dry, I test fitted the landing gear in its slots. Fit was quite snug and I used CA glue to set them in place. Weapons were also attached using CA glue after they were decaled. I had a bit of trouble getting the canopy assembly to work. Instructions call for some finger acrobatics here and I botched it a few times before getting the hinge mechanism to work and the rear deck to stay put. Before this step I dropped in 3 huge fishing weights, which were enough to tilt the monster onto its nose. I used Elmer’s glue poured into the fuselage through the opening to secure them in place. The boarding ladder was painted using Metallic Grey and Zinc Chromate (in place of a too bright flat yellow) and attached with CA.
|
DECALS |
The Two Bob’s decals worked wonderfully. I used my method of sandwiching the decals between Future Floor Polish and it worked fine. Pylon and weapons decals were taken from the kit sheet. I know others have mentioned the fuzziness of these stencils but they worked for me. While putting the various stencils on the weapons, I noticed that Trumpeter has a few comedians on staff because the NO LIFT decals on the Mavericks actually say NO LIFE! The decals settled down with no fussing.
 WEATHERING
I wanted my ‘Hog to look like the workhouse that they are so I did a lot of weathering. First, I drybrushed some steel flecks and went over the rear area rivets to make them pop out. I also did this to the Gatling barrel and the boarding ladder.
A black wash was used on the landing gear and gear wells. To get the worn grimy look around the model, I used my trusty black pastel chalk dust scraped onto a piece of sandpaper. I use an old stiff brush to lightly smudge on the dust along panel lines, engine exhaust areas, high maintenance spots, and chaff/ flare dispensers.
|
CONCLUSIONS |
I know I have a lot to learn about aircraft modeling and I know this kit has its flaws. It was however, a fun project and a surprisingly good building experience. The ‘Hog is a great airplane and if you read about the aircraft’s exploits in the Gulf War, you will appreciate the plane and its pilots even more. If you want a big model of a big plane- this kit is worth the price and will drop jaws wherever you fly it. The biggest problem I had? Deciding where to display it in my limited model room…Have fun with it!
|
REFERENCES |
If you would like your product reviewed fairly and quickly by a site that averages over 2,700 visits a day, please contact me or see other details in the Note to Contributors.