Trumpeter 1/32 A-6E Intruder
| KIT #: | 02250 |
| PRICE: | $150.00 |
| DECALS: | Two options |
| REVIEWER: | Donald Zhou |
| NOTES: | Advantages: Extremely detailed throughout, loads of weapons, BIG. Disadvantages: Radome in two halves, instructions can be vague, and BIIIG! |
| HISTORY |
The Grumman A-6 Intruder was the navy’s first all weather, low flying attack aircraft. It was a mid-winged monoplane with a two man crew, seated sided by side ala the air force’s F-111 capable of carrying a huge load of ordinances and able to fly a 500mile combat radius without aerial refueling.
The aircraft was requested in 1955, with official proposals submitted in 1956 by various manufactures as a jet powered replacement for the venerable A-1 Skyraider. The Grumman proposal was accepted in 1958. At first called the A2F, this designation was later changed to the A-6 after the tri-service nomenclature consolidation. The first proto-type was flown in 1960.
One of the earliest requirement for the new aircraft was that it should have a short-takeoff and landing capability so that it can take off without the use of the catapult and tail hook for landing. To this end, the aircraft was originally designed with exhaust nozzles able to swing some 15 degrees downward. However, after the first proto-type, this was quickly dropped because fly-by-wire systems was at least 20 years away and the aircraft was hard to control otherwise, not to mention the exhaust, when deflected downwards, will probably burn two holes onto the flight deck during take-off and will prove to be maintenance nightmare otherwise. Otherwise, the aircraft was a conventional design with a very unusual dual side-by-side seating with the pilot on the left, seated slightly forward and higher than the bombardier/navigator. The aircraft, at that time, was considered to be state of the art with a highly advanced avionics suit and a terrain following radar, which generated a topographical picture, and display it to the pilot/navigator on a cathode-ray tube screen. The wings was very strong and very efficient at subsonic speeds and was able carry a huge load underneath. In fact, a slightly modified version of these wings was used on Grumman’s next project, the F-14 Tomcat, especially since the lead designers for both aircraft was Lawrence Mead Jr. One of the earliest mission requirement was the aircraft was able to deliver a nuke and the navy practice this as soon as the aircraft entered service.
And as soon as the aircraft entered service, it gained a nickname, “The Iron Tadpole!” (among others including “Double Ugly”, “Big Iron 6”, and “Drumstick”) The aircraft ungainly and unusual appearance with a huge big nose, two framed side-by-side windscreen, giving off the appearance of two huge buggy eyes and a thin tapered tail, made the Intruder look like a young frog indeed, especially from above. The aircraft officially entered service in 1963 with both the Navy and Marines. The “Tadpoles” was eventually upgraded throughout its service life, and was converted to the crucial KA-6D tanker and the even more crucial EA-6B Prowler electronic warfare variant.
As soon as the Intruders entered service, it entered into its first war in the jungles of Southeast Asia. The aircraft’s immense carrying load, up to 18,000lbs of ordinances can be carried and its massive range, a combat radius of 500 miles fully loaded without aerial refueling, meant the aircraft was heavily used from everything to strategic bombing to ground support, especially since it can fly and bomb in any weather. Over 80 Intruders were lost during the war. See the movie Flight of the Intruder on this.
With the Vietnam War winding down and the aircraft entering into the 80’s the A-6 became the Navy’s frontline medium attack aircraft. It eventually was able to drop or fire any and all weapons in the Navy’s service, capable of dropping dumb iron-bomb in a carpet bombing raid, destroy pin-point targets with the new laser guided “Smart Bombs”, or go on an “Iron-Hand” mission with MK. 20 cluster bombs and two of the then new AGM-88 HARM’s. Because of this, the aircraft was constantly upgraded, resulting in the definitive version of the aircraft in 1971 with the A-6E version, the A-6E was also modified into the last official version with the A-6E TRAM, or Terrain Recognition and Attack Multi-sensor, which was a small pod under the nose containing a FLIR and laser designator among other things. Upgrades were still being added to the aircraft even then, resulting in the Intruder being able to use every weapon then in service.
And as the years wore on, the aircraft constantly found itself in action, first over Lebanon, then a series of actions against Libya with operation Prairie Fire, culminating in Operation Eldorado Canyon. Then came the big one, the 1991 Gulf War, in which A-6E from the Navy and Marines flew a combined total of 4,700 combat sorties, doing everything from firing Harpoons against Iraqi naval units, dropping dumb bombs in support of troops, destroying Iraqi air defense with HARM’s and dropping laser guided smart bombs. The Intruder was the Navy’s primary attack aircraft during the period, doing most of the heavy lifting and bombing missions. Three A-6’s were lost during the war. General Chuck Horner felt it was the most useful Navy aircraft in the air war.
The aircraft was retired in 1997, even though several aircraft were newly built and modified with the new composite wings to prolong their life for F-14D “Bombcats”, which was eventually replaced with the F/A-18E/F super bugs that didn’t have anywhere CLOSE to the range and load of the Bombcat, much less than the Tadpole!
| THE KIT |
 Trumpy’s
1/32 A-6 Intruder kits were announced way back when, 2005 I think but it took
them an extra 9 or so years before it was released in late 2014 with the A-6A “Vietwar”
era Intruder. The A-6E/TRAM intruder was released in 2015. During the period,
many wonder if the kits will come out at all, many felt it was canceled, more
rumors were flying there were severe faults with the kits and Trump, or Wasan
Plastic Co. was trying to correct them. Whatever the reasons, with the kit in
your hand, you can tell whatever happened, Trump’s A team was at work and the
end result is a grand of a kit that should keep you busy for months, if not a
year or two! The only tripping point is the asking price. Original asking price
can hit as much as $225, although it has come down from that long since. When
Hobbylinc put up this kit, the A-6E/TRAM one for sale at $123, that’s when I
knew it was time to jump and jump HARD!
Trumpy’s
1/32 A-6 Intruder kits were announced way back when, 2005 I think but it took
them an extra 9 or so years before it was released in late 2014 with the A-6A “Vietwar”
era Intruder. The A-6E/TRAM intruder was released in 2015. During the period,
many wonder if the kits will come out at all, many felt it was canceled, more
rumors were flying there were severe faults with the kits and Trump, or Wasan
Plastic Co. was trying to correct them. Whatever the reasons, with the kit in
your hand, you can tell whatever happened, Trump’s A team was at work and the
end result is a grand of a kit that should keep you busy for months, if not a
year or two! The only tripping point is the asking price. Original asking price
can hit as much as $225, although it has come down from that long since. When
Hobbylinc put up this kit, the A-6E/TRAM one for sale at $123, that’s when I
knew it was time to jump and jump HARD!
My GOOOODDDD that’s another big box for my collection! What’s with me and big kits?!?!?!?!?!?!? I got enough of them now that I’m slowly starting to lose count!
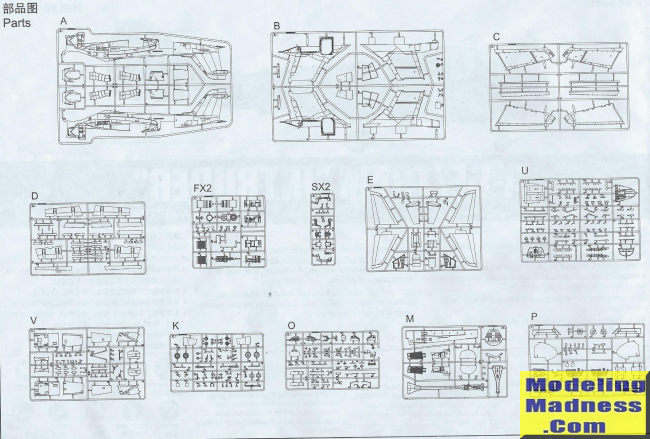
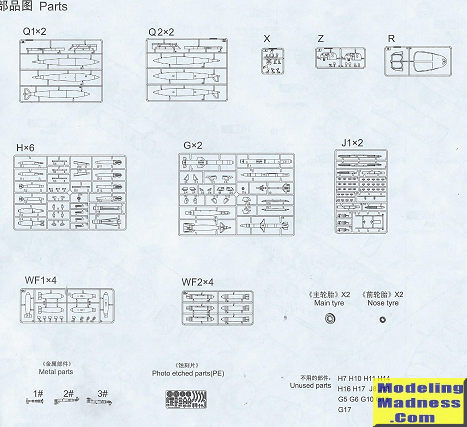 Upon
opening it, nearly 600 pieces greets you, although from checking, I’m wagering
at least 250 pieces are all the weapons that you can hang under the pylons. The
aircraft is detailed throughout. The nose can be hang open to display the
incredible radar piece, the lower back avionics bay has no less than 12 pieces
and can be displayed open. This piece is important since almost all parked
Intruders will have this bay deployed to ease maintenance. A gorgeous cockpit
with a sandwiched instrument panel (the main instrument face is separate. A
clear piece is attached from the back and several decals can be placed to the
back of that to make an awesome panel. It’s also good since the main face is
separate, it helps a great deal with painting) is also included to the point you
don’t really need a resin replacement. Some will get a pair of resin GRU-7 bang
seat but the kit is good enough for you and me. Next are the speed brake bays.
Just a hint of warning though. By the time the A-6E arrived, most of the
Intruders had the fuselage speed brakes bolted shut and only used the two wing
tip brakes. In fact, some of the later built tadpoles may not even have the
fuselage speed brakes since during testing, Grumman found out the fuselage speed
brakes, when deployed interfered with the aircraft handling, hence eventually,
two wing tip brakes were added and later on, the fuselage brakes were eliminated
in favor of the wing tip brakes only.
Upon
opening it, nearly 600 pieces greets you, although from checking, I’m wagering
at least 250 pieces are all the weapons that you can hang under the pylons. The
aircraft is detailed throughout. The nose can be hang open to display the
incredible radar piece, the lower back avionics bay has no less than 12 pieces
and can be displayed open. This piece is important since almost all parked
Intruders will have this bay deployed to ease maintenance. A gorgeous cockpit
with a sandwiched instrument panel (the main instrument face is separate. A
clear piece is attached from the back and several decals can be placed to the
back of that to make an awesome panel. It’s also good since the main face is
separate, it helps a great deal with painting) is also included to the point you
don’t really need a resin replacement. Some will get a pair of resin GRU-7 bang
seat but the kit is good enough for you and me. Next are the speed brake bays.
Just a hint of warning though. By the time the A-6E arrived, most of the
Intruders had the fuselage speed brakes bolted shut and only used the two wing
tip brakes. In fact, some of the later built tadpoles may not even have the
fuselage speed brakes since during testing, Grumman found out the fuselage speed
brakes, when deployed interfered with the aircraft handling, hence eventually,
two wing tip brakes were added and later on, the fuselage brakes were eliminated
in favor of the wing tip brakes only.
That’s the thing, from trolling the net, the Intruder kit may have a few extra panel lines from the A and some other versions and several details may have also crossed version lines…..You know what, I can live with it! As a certain conversation with a certain Mr. Song, the lead designer of the Trumpy’s awesome 1/32 IL-2 went, manufactures will not do separate versions for every single minute details of various versions of the same aircraft! Why? As Song said when people asked him why the early version of the Sturmovik didn’t carried wooden rear fuselage, only metal, he shrugged and said basically, “Not unless you want to pay $30-$40 extra for it!” You see, it takes cash to change the mold, not to mention the redesign etc etc etc! It cost the manufacture, which inevitably, gets dumped on us! So, as Song explained, the manufacture has to make a conscious decision on where to draw the line and make that sacrifice. In the end, they decided it would be easier for the modeler to putty up the steel fuselage and sand it clean, rather than try to make a couple hundred flush rivets! Same thing here. You can certainly track down the details of the versions you are trying to make and putty up the offending lines and sand them clean, or like me, just don’t do anything cause except if say, I encounter an Intruder pilot, I doubt the average layman will notice a thing, well, I may putty up the fuselage speed brakes though!
Ok, time to get off my soap box and continue on! Two detailed engines are offered and the fuselage has two engine bays with panels designed to be posed open or close so you can display them if wished. The wings, all slats, flaps and speed brakes can be posed open or closed, same with the wings, they can be posed deployed or folded. This is important since if parked, some Intruders slats and flaps are in the down position. The RAT air turbine is also there and yes, you can pose it open or closed, same with the crew boarding ladders. If you want to pose them in the deployed positions, the steps and sides are all photo-etch.
Construction strangely, begin with…the two engines and their tubings. These are built and then put aside. Construction then move on to the cockpit and it’s a doozzie! Each of the GRU-7 bang seats has 10 parts, with photo-etched seat belts and as mentioned, the instrument panel should come out beautifully because they are separated. Just becareful which is which though as there is a separate version for either the A-6E or A-6E/TRAM version.
After the cockpit, you get to assemble the lower back end avionics bay. As mentioned, any parked tadpoles will usually have this thing deployed to ease maintenance.
The assembly of the landing gears and the windshield/canopy are next. All landing gears are cast metal…I would wager you need a couple of pounds of lead weight in the nose to sit this thing on its nose gear so the metal gears are absolutely necessary! The speed brake bays are next. Again, toss them with this version as the later versions of the Intruders had these thing removed permanently! The nose gears and the bay are then attached to a long spine. This is necessary to not only provide strength to that bulging fuselage, but also divide it into the two big engine bays.
The intake lips are then assembled. Each are divided into three pieces.
It’s at this point that the fuselage are assembled together with the arrester gear, the spine, and the cockpit trapped in the middle. You then move on to the nice nose radar station with at least 25 parts. The fuselage is now basically done. Time for the wings.
Before construction of wings can begin, you need to think about whether to either fold them or deploy them. I would wager most will fold them cause of this thing is anything but small. Just becareful of the flaps and slats. Which parts are used for deployed, which are for folded are not explained in the instruction. In fact, which parts are for open/deployed, and which are for closed/folded are not mentioned on anything at all. Yes, any modeler worth their salt can easily figure this out but it’s annoying to say the least! Becareful at this section!
The engines are then attached to their bays before assembling the outer wings. Again, make sure you understand the instructions on what parts go into the open joints, and what are for the closed ones!
Time to put the outer wings onto the inner ones. Read carefully what goes where since the assembly of the folded and deployed ones are different, especially since a lot of small details goes into the folded joints.
Afterwards, you get to make another decision, the radome can be displayed opened or closed if you have the radar assembled. Another decision since it is at this point you have to make the decision to build either the A-6E nose or the A-6E/TRAM nose. As can be imagined, the only outside visual difference is the TRAM bird has that little turret under there. Just be noted the radome is divided into two pieces. Well, there is no choice here since that nose is too big and also its shape (and its one of the main reason the A-6 got its nickname in the first place) that a single piece casting is almost impossible, unless you go the resin route. Nothing but some putty will fix although I would wager it will be a huge PITA to try to cure the inside seam if you want to display it in the open position!
Again, decision time, the crew boarding ladders. At least the left side is deployed if the bird is parked for easy maintenance access and as mentioned, the steps are all photo-etch.
Lastly, all the engine bay panels are added. These can be posed opened or closed if you went to town on those engines.
The bird is generally finished at this point, time for the weapons!
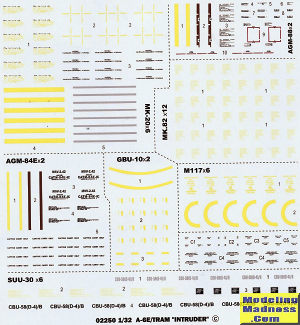
 Unlike the
A kit, Trumpeter moved some of the dumb ordinances out and replaced them with a
few “smarter” ones. Yes, the Mk. 82’s still has shape issues and yes, the MER
and TER’s are still a shade too small, but say what you have to say, at least
Trumpeter give you A LOT of them, here is a major run down:
Unlike the
A kit, Trumpeter moved some of the dumb ordinances out and replaced them with a
few “smarter” ones. Yes, the Mk. 82’s still has shape issues and yes, the MER
and TER’s are still a shade too small, but say what you have to say, at least
Trumpeter give you A LOT of them, here is a major run down:
1x Centerline fuel bag
4x side fuel bags
6x Mk. 20 Rockeye submunition dispenser
SUU-30/CBU-58 submunition dispenser
2x AGM-88 HARM’s
2x GBU-10 GP laser guided bombs
2x AGM-84E SLAM missiles
12x Mk. 82 with either extended “daisy cutter” fuses or regular ones
 12x
Mk. 82 Snake eyes retarder with again, either extended “daisy cutter” or regular
fuses
12x
Mk. 82 Snake eyes retarder with again, either extended “daisy cutter” or regular
fuses
6x MK. 117 750lbs bombs
2x MER and TER
2 markings, 1 for the U.S. Navy VA-196 “Main Battery” 550/NK (BuNo. 159579) and the other one a Marines VMA(AW)-522 “Hawks” 411/ED (BuNo 161111) are included. The VA-196 one is a CAG bird that features a three tone camo of Neutral Grey, Dark Ghost Grey and Light Ghost Grey with a striking black tails with colorful markings. The Marine one is in the standard three tone camo of Neutral Grey, Dark Ghost Grey and Light Ghost Grey. The only fault is that the stencil are anemic but both the stencil and extra markings are now available so you have your third party sources.
| CONCLUSIONS |
WWHHHHHHEEEEEWWWWWWW with a capital W! This is one big kit and there are A LOT of stuff in the box! Is it worth it for $225? Yes it is! But these days, again, this kit has gone down WAY in price! Again, even with shipping and handling, you can get this from hobbylinc for a total of $142 or so! That is a HUGE bang for the bucks as this kit got so much to offer even if you close everything down! The only problem again, is its size. To give you an idea, the fuselage is 1 inch longer than the 1/32 B-25 and the wing span (unfolded) is 1 inch less so you will need some real-estate. Yes, there are some minor problems in the kit but which kit doesn’t? Again, manufactures will not produces 40 different boxes of the same kit with only minute detail differences each! It’s too expensive and too problematic. What’s in the box completely outshine whatever fault the kit problems may have, especially since you can load up your iron tadpole to the hilt here with various weapons. Safe to say, this project has just been put on the front burner….As soon as I can get that pesky 1/16 King Tiger out of the way (after a year of hiatus, I was finally able to get the AFV Club inner ammo rack correction set and that project just jumped back into the “must be completed” list). Stay tune to see how this thing turns out!
August 2017
Copyright ModelingMadness.com
If you would like your product reviewed fairly and fairly quickly, please contact the editor or see other details in the Note to Contributors.
Back to the Main Page Back to the Previews Index Page Back to the Review Index Page