|
KIT: |
Mongram 1/48 F-5E & F-5F |
|
KIT # |
5407 & 5441 |
|
PRICE: |
@$12.00 |
|
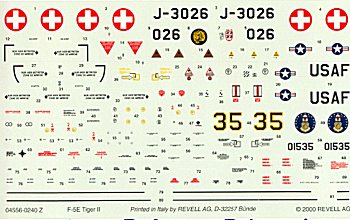
DECALS: |
See Review |
|
REVIEW BY: |
|
|
NOTES: |
Cutting Edge update set used. |
|
HISTORY |
Northrop’s F-5E/F Tiger II were originally developed in the early 1970’s as a follow on to their successful F-5A/B Freedom Fighter. The new fighter featured more powerful engines, and an avionics upgrade, which boosted its capabilities considerably over those of the F-5A/B. Like the F-5A/B, the F-5E/F found considerable success as an export fighter, and to this day, still serves as a front line fighter and trainer with thirty-odd countries. Despite being such a successful export fighter, the F-5E/F has seen relatively little combat, with the Iran/Iraq War being the exception. There are reports of Iranian Tigers downing Iraqi aircraft, but they are sketchy at best. The F-5E/F was also the US Air Force’s and US Navy’s primary aggressor for nearly two decades in the 70’s and 80’s. The USAF aggressor fleet was virtually eliminated in the early 90’s, and the one unit that did remain traded in their F-5’s for F-16s. Both the F-5E/F continue to soldier on in the adversary roll with Navy Reserve unit VFC-13 at NAS Fallon, Nv., and with Marine Reserve unit VMFT-401 at MCAS Yuma, Az. The F-5 is now in the twilight of its career with US forces, but will no doubt continue to serve with smaller air forces around the world for years to come.
|
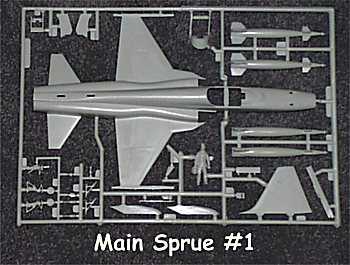
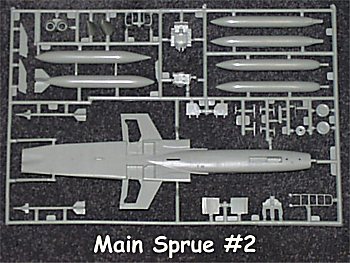
THE KITS |
These kits were release about 10 years apart, but are very similar, right down to their rather unusual weapons load of LGB’s, and gun pods, so I will review them together. I will separate the differences between the versions I did, however. Monogram originally released the F-5E kit in the early 70’s, and while it is a pretty good kit, it does show its age. It was released two more times in the 80’s, with the last version, called "Hi-Tech", including a nice set of photo-etched parts from Model Technologies. The F-5F followed in 1985, and did show some upgrades, but still could use some help, primarily in the cockpit. Both kits are typical Monogram, in that marginal fit and warping plague them. I have one E kit that the wings are so warped on, it looks like its trying to do an F4U Corsair impersonation! Panel lines on both are of the raised type, and are quite accurate. The cockpit tub on both kits is decent, but the seats are molded in as part of it, instead of being separate. On the E kit, however, there are no seat belts, but the release with the PE set does include belt buckles, and a template for belts. The instrument panel is nice, but if you’re doing a USN adversary, remember to shave off the radar scopes, as USN F-5s, until recently, didn’t have radar’s. Some a/c now assigned to VFC-13, and VMFT-401 are ex-USAF machines, and do have radar scopes, so check your references. There are no intake trunks, or exhaust interior on either kit. The E with the PE set does include afterburner rings, but no pipes. The result is daylight right through the kits. The canopy raising mechanism on the F is accurate, if somewhat simplified, while it is totally inaccurate on the E. The weapons load for both kits is two usable AIM-9Ps, and oddly, two early LGB’s, and gun pods, that would more likely be found on an F-4C/D. A centerline fuel tank is also provided. One nice touch on both kits is that Monogram included the numerous antennae’s found on export versions of the E and F. Overall, both are good kits, but a resin cockpit tub, and accurate canopy raising mechanisms would go a long way towards making these kits really nice. The F-5E has just been reissued, so hopefully someone will recognize the need for such an update. Complete Intake trunks and exhaust pipes would be nice too!
|
F-5E CONSTRUCTION |
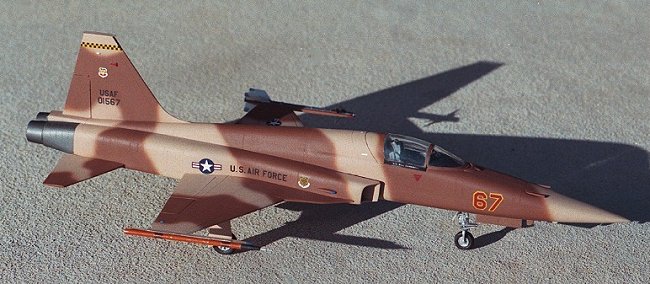
F-5E 64th Aggressor Squadron 1983
Although I am a huge fan of USN adversary F-5s, and tend to model a lot of them, I decided it was time to do their USAF’s counterpart. The first task was deciding which a/c to do. Bert Kinzeys book "Colors & Markings of USAF Aggressor Squadrons (C&M Volume #11)" was a tremendous help in this task. It is a superb reference, and includes official USAF painting diagrams for all schemes carried by the aggressors. However, he does make it clear, and rightfully so, that there was a tremendous amount of variation even between a/c in the same paint schemes. I ended up choosing an F-5E from the 64th Aggressor Squadron based at Nellis AFB approximately 1983. There is a good photo of this a/c in Koku-Fan Illustrated #25 Jet Fighters, page 44, and this was my main photographic reference. Assembly of both kits is extremely straight forward, and you should encounter few major problems. The most time consuming problem with both kits is the fit of the upper fuselage/wing half to the bottom fuselage/wing half. I had to glue the upper fuselage/wing half to the bottom half a little bit at a time, in order to get a decent fit. The result was a still somewhat nasty seam running the length of the model, so a bit of filling, and sanding was still required. I also had to fill seams, and the notches for the pylons on the underside of the wings. I rescribed the leading edge slats after the sanding was finished. I then added the tail, and nose cone, and got ready to paint. Don’t forget to add some weight to the nose.
|
F-5E PAINT & DECALS |
The scheme I chose is called "New Lizard" and is used to simulate aircraft from African nations. I sprayed gray primer, and then touched up whatever seams needed help. Next came the tan. It is a mixture of about 80% FS33613 Radome Tan, and FS30117 Military Brown per the instructions in C&M Vol. #11. After the tan came the brown. It is FS30117 Military Brown. The scheme is very simple to paint, and is a wrap around. I followed the pattern in C&M Vol. #11. The model was then semi-glossed with Testors lacquer. The markings are from Superscale sheet 48-053. This sheet supplies everything, but the national insignia, and crew names, which came for my spares box. The decals on sheet 48-053 are for this same aircraft, but in the original "Old Lizard" scheme. I simply substituted schemes. The decals went down well with a little Solveaset. The landing gear, wheel wells, and the inside of the wheel well doors were all painted Testors Metalizer Aluminum , while the exhaust section was painted Metalizer Stainless Steel. Once everything was dry, a coat of Testors Dullcote was applied.
The landing gear, gear doors, and canopy all went on without any problems. I added some True Details PE mirrors to the canopy before closing it. The kit supplied HUD is a little thick, but acceptable, and was glued on followed by the windscreen. The tail tip antenna came from the PE set in the Hi-Tech release of this kit. The kit guns were left off, and replaced with small stainless steel tubing that was painted Military Brown.. The AIM-9M came from Minicraft’s F-15D kit, while the ACMI pod came from Hasagawa’s F-16N kit.
All in all, I’m pretty happy with the results, and will be doing more USAF aggressors in the future.
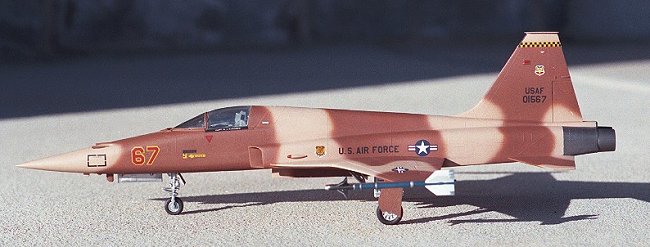
F-5F 401st Air Defense Squadron (EAD) St. Lucia AB Mexico
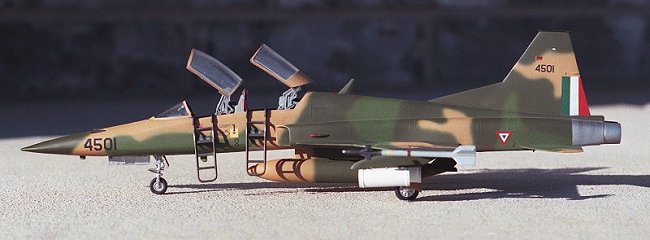
I was inspired to do this aircraft after receiving Carpena Decals sheet #48.36 "International F-5s part 1" in trade from a friend in France. This sheet can be found in the US, and I highly recommend it. It also has markings for Chilean, and Brazilian F-5E’s, and a Sudanese F-5F. Mexico received 10 F-5E’s, and 2 F-5F’s, all newly built, in 1984. They use them primarily in the COIN role.
|
F-5F CONSTRUCTION |
Assembly of this kit is nearly identical to the E kit, so I will only mention the modifications I did to correct it for Mexican AF service. The main modifications need to update this kit were the adding of the ventral antenna strake in front of the tail, and the adding of Cutting Edge’s resin "platypus/duckbill nose, and LEX extensions. The Cutting Edge set is nice, but I found the nose diameter to be just a bit small. I used CA glue to attach it to the front part of the kit, where the kit nose would normally go, but ended up having a large gap between the nose cone, and kit nose section. This was filled with sheet styrene, and gap filling CA. The toughest part of this conversion is getting the nose on straight. The "bill" of the nose is flat, and there are no alignment pins, so if you mess up it will be very noticeable. The LEX’s were added per conversion instructions, and were filled with gap filling CA, and sanded. The ventral antenna strake was cut from sheet styrene, and was added, filled, and sanded, before attachment to the fuselage. The only other modification I did on the kit was to add some exhaust pipes. They came from .357 magnum shell casings that I pick up the last time I was at the rifle range with my father. I cut off the primer ends of the casings, and also cut them about two thirds of the way down, with a razor saw. I then glued the burner rings from the Hi-Tech E kit, on the ends of each of the four pieces. I then glued 1/3rd, and 2/3rd pieces back together. I added a sized circle of sheet styrene to the end of each tube to give it a background. Once dry, the interior was airbrushed Metalizer Exhaust. I had to take my Dremel tool, and shave some plastic out of the inside of the exhaust area of the kit, but with a little patience, I got a good fit. Once the fuselage halves were glued together, the burner cans were installed, followed by the exhaust cone. While not 100% accurate, it does give a nice 3D effect, and keeps daylight from shining from end to end of the kit.
|
F-5F PAINT & DECALS |
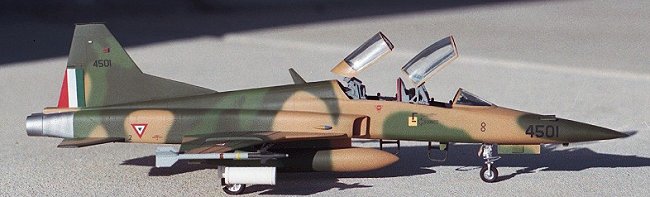
Next came the a coat of gray primer, and some resanding. World Airpower Journal #25 has an excellent feature on the F-5, and all my photo references for this a/c came from that issue. Carpena calls for the tan to be FS30219 Dark Tan. However, I compared this to actual photos, and it didn’t seem to be even close. I chose to use a home brewed mixture based on Testors Wood color. I used Testors FS34097 Field Green, and FS34079 Dark Green for the rest of the scheme, per Carpena’s instructions. There are a few mistakes on the Carpena instruction sheet. One calls for gray on the underside of the aircraft. All photos I’ve seen of Mexican AF F-5s show the scheme to wrap around the underside of the a/c, so I improvised the pattern on this. The pattern for the scheme on the instructions also has an error. It shows the pattern on the plan view correctly, but transposes two colors on one side of the plan. It took me a few minutes to figure out why things weren’t lining up when I was airbrushing! Testors Metalizer followed per the F-5E kit, as did a coat of semi-gloss. The decals went down fine, but the flag colors on the rudder were just a bit big. I had to add the number "4501" to the nose, as the photos I have show it to be there, even though Carpena does not. The numbers came from Repliscale Decals sheet #48-5042 USAF black codes & serial numbers. Wing walks were added from Superscale sheet PS-2 1/16 black stripes. Again, this was not shown on the instruction sheet, but in flight photos reveal their presence. Once they were dry, the national insignia were added to the upper wings., as part of them overlap.
Once dry, flat coat followed, along with the landing gear, and canopies, and again, no problems. Mirrors, canopy framing, tail top antenna, and nose gear door all came from an Eduards PE set. Note that there is a difference between the E’s , and F’s nose gear door., that Monogram failed to correct. Stainless steel tubing was again used in place of the kits guns. On the F, there is only one gun, and its on the right side. What appears to be a gun on the left side is actually a cooling intake for the avionics equipment. It is slightly larger in diameter than the gun, so I used a slightly larger diameter tube for it. Since COIN is the major task of Mexican F-5’s, I decide to go with a weapons load that reflected this assignment. The rocket pods came from Hasagawa’s Weapons Kit B. I had to drill out the alignment holes on the pods, and drill holes in the pylons at the center of the sway braces. I then glued in small sewing pins to the pylons, and once dried, cut them down. I then inserted the pins, with a little CA, into the drilled out holes on the pods, and slide them down into place on the pylons. This cured the alignment problems, and added strength to the attachment point. The AIM-9P’s, and centerline tank came from the kit. The boarding ladders came from both kits, as only one is supplied with the F-5F. They are also only partially complete. I had to add some Plastistruct rod to the backside, and also some sheet styrene behind the upper step. They were painted FS34086 Green Drab, and were "worn" by dry brushing a little silver on them.
|
CONCLUSIONS |
I had a lot of fun with this kit, and have plans to do an Iranian F-5F, complete with an Iraqi kill marking! Hey, creative liberty!
|
REFERENCES |
Detail & Scale Volume #5 F-5E/F
Colors & Markings Volume #11 USAF Aggressor Squadrons
World Airpower Journal Volume #25
Koku-Fan Illustrated #25 Jet Fighters
Verlinden Lock-On #26 F-5E/F