Don't get sticker shock! The price tag includes a great kit of a
Nimrod plus two other smaller kits - a Britten Norman Defender and
the P.1185/AV-16 supersonic Harrier design project. Still, it's not
cheap. You're probably only going to buy it if you really want a
Nimrod (like I did). I think people sometimes sell the Anigrand
bonus kits separately online, though, so if you are keen you could
look around. It would surprise me if an injected version wasn't
available in 1/144 already, or soon. Revell, are you out there?
 Anyway,
for a full preview, have a look
right here on MM:. You can see the
review of the
Islander Defender here on MM, too.
Anyway,
for a full preview, have a look
right here on MM:. You can see the
review of the
Islander Defender here on MM, too.
In brief, this is a lovely little resin
kit, very nicely moulded with nice engraved detail. Unlike an
injection kit (Dragon's great SH-60s, say) of a chopper in this
scale, it's got no main cabin interior. But the external detail is
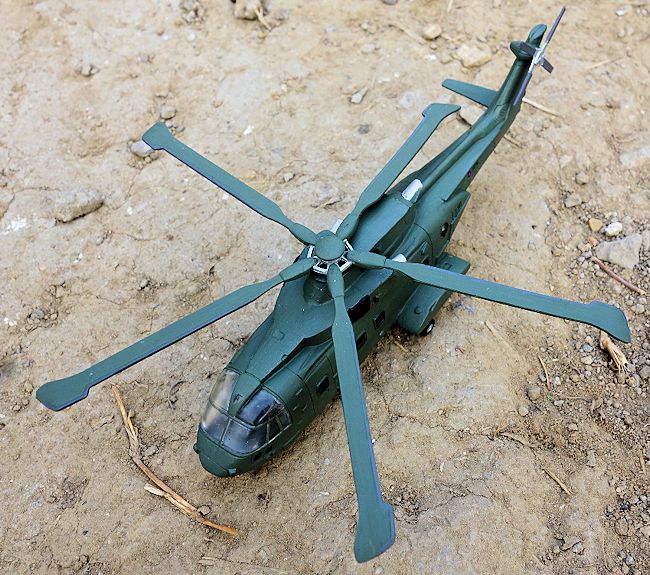
great and the rotor head is finely moulded too. The blades have the
appropriate droop too (though mine were a bit inconsistent). It is
also missing a few bits of detail that a decent injection moulded
kit would include - the interior, obviously, but also the winch and
a few antenna and lumps & bumps here and there. But that said, the
particular aircraft didn't always have a winch installed, as you can
see in the photos linked under references, and as always the
internet offers a wealth of pictures so you can scratch up most of
what's missing anyway. Note too that the window configuration isn't
quite right. At the front end, the smaller, lower cockpit windows
are just engraved detail, rather than actual windows. Towards the
back, the cabin is missing a couple of side windows. Compare with
photos!
With resin kits you need to be a little more careful than
with injection kits. Wear a mask when you are sanding the parts, as
resin dust is bad news. Safety goggles aren't a bad idea either. You
need to trim off the so-called "pour stubs", which are a bit like
the sprue you'd find on a regular kit. You can use a knife or a
little saw to cut off the majority, and then sand off the remaining
bumps. Warning! The very end at the tail boom has a block which
looks like a giant pour stub. I nearly cut it off, but it is
actually part of the airframe. In reality it should be < shaped
rather than [ shaped (in plan, with the < pointing backwards). It's
a sensor of some kind.
 Once you've
done all that, have a good look over all the parts and see if there
are any surface blemishes. Sometimes you'll see bumps which are
basically air bubbles - sand them down - and sometimes you'll see
little pinholes in the surface. You can fill them with superglue and
sand it back just before the glue gets rock hard. You can use
regular filler too if you want. I didn't see anything major on this
kit though. There was a little "flash" but unlike on injected kits
this was very thin and simply rubbed off with my finger.
Once you've
done all that, have a good look over all the parts and see if there
are any surface blemishes. Sometimes you'll see bumps which are
basically air bubbles - sand them down - and sometimes you'll see
little pinholes in the surface. You can fill them with superglue and
sand it back just before the glue gets rock hard. You can use
regular filler too if you want. I didn't see anything major on this
kit though. There was a little "flash" but unlike on injected kits
this was very thin and simply rubbed off with my finger.
And once you've done all that, a resin kit is basically just
like an injection kit except you need superglue because normal glue
won't work. Start at the cockpit with your paint brush and do as
much scratchbuilding as you want (there are seats but nothing else).
I didn't bother because the canopy is pretty thick. Add some nose
weight behind the cockpit bulkhead but ahead of the axis of the main
gear, though my test showed it didn't need any. Put the cabin
windows in. And then glue the fuselage halves together. Be sure you
have carefully test fitted before you do this, because remember,
superglue is not called superglue for nothing, and walking around
town with a 1/144 helicopter attached to your index finger is not
going to help you pick up Danish models...ha ha.
After that, you're on the home stretch. Engine pods, landing
gear, and the rotors and you have a completed Merlin.
 Except,
of course, for all the gaps. I got some pretty decent seams to fill
on the top of the fuselage and also where the main windscreen joins
the rear part of the cockpit area. I've read that some people use
superglue for this type of gap too but I am more comfortable with
filler. I used a lot on the main joins, and sanded for a while
(remember the mask). For the gap where the window attaches I just
used blobs of paint, as the gap was pretty small. This kit didn't
fit together that amazingly well, and certainly not as neatly as the
Islander Defender that came with it.
Except,
of course, for all the gaps. I got some pretty decent seams to fill
on the top of the fuselage and also where the main windscreen joins
the rear part of the cockpit area. I've read that some people use
superglue for this type of gap too but I am more comfortable with
filler. I used a lot on the main joins, and sanded for a while
(remember the mask). For the gap where the window attaches I just
used blobs of paint, as the gap was pretty small. This kit didn't
fit together that amazingly well, and certainly not as neatly as the
Islander Defender that came with it.
Don't worry about the seams underneath though, at least not
the ones on the cargo door and rear boom. As you can see from the
picture linked below ("underside"), there is actually a pretty
prominent line there on the real thing.
I contemplated detailing the cockpit until I saw how opaque
the canopy is. If you know how to mould your own canopies it might
be worth it, but that's beyond my skillset so I just went with the
kit part and painted the cockpit grey, with black seats. Even if you
put your eye right up to the little windows, you wouldn't see
anything in there anyway, at least not with any clarity.
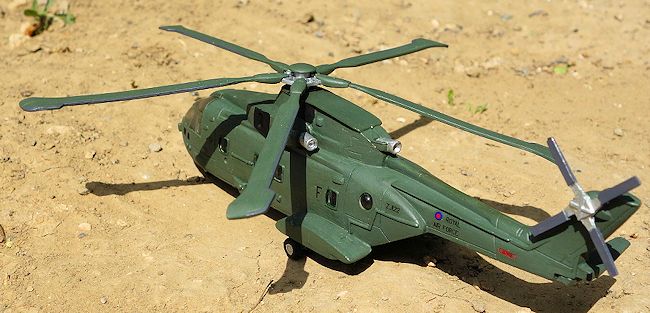
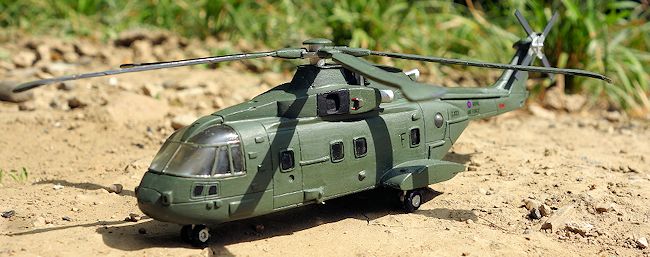
Final details depend on the configuration of your helicopter. The
decals give you the codes and letter F for ZJ122. If you google for
"Merlin HC.3 ZJ122" you'll quickly see that this helicopter must
have had an upgrade at some point. I've depicted it in what I assume
is its earlier configuration, shown in the pictures linked under
references below. If you wanted, you could add the nose bubble
sensor pod and refueling probe and winch which other pictures show.
The markings vary ever so slightly too.
I used black paint
to simulate the undercarriage bays which are completely missing on
the kit. The real thing has retractable gear but no wheel bay doors.
There are a few different Merlins which aren't quite as
boring looking as this one. For example, the Portuguese military
flies Merlins in a nice green and brown camo scheme, while the
Japanese have a grey one with bright orange panels for Antarctic
work. Canada's are bright yellow with awesome red stripes.
The British HC.3 by contrast is a pretty lame olive green.
But unless you are prepared to make more windows, or ignore the fact
that the kit's windows aren't right for those other versions, you're
stuck with the HC.3. Actually even then the windows aren't bang on.
But never mind, they're pretty close.
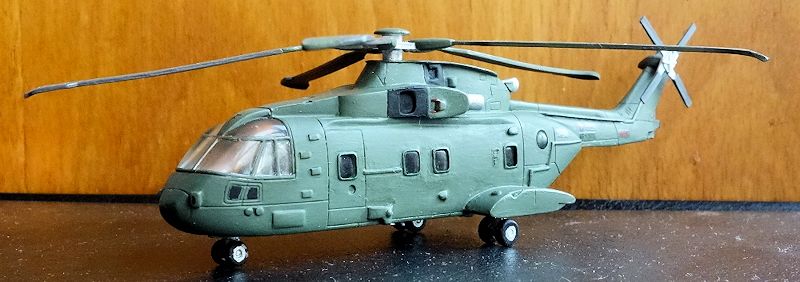
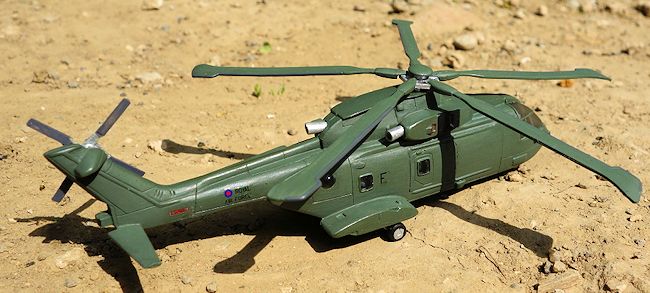 The
official colour of this thing is reported by some online sleuths to
be Olive Drab BS 220 and by others (claiming to have been told by
AgustaWestland) BS381c241. Airfix
has a new 1/48 kit of this helicopter and the instructions recommend
Humbrol 86, which some builders think is too light. Revell 68 is
suggested as an alternative. Tamiya XF-81 is meant to be a pretty
close match. Others say Vallejo 71.011 is right (that's also RLM 83)
but of course I could find neither XF-81 or 71.011 (which is from
Vallejo's airbrush range anyway - and guess what I don't have?). So
in the end I took a gamble and bought Vallejo 70.823 which is RLM 82
- I figured it couldn't be too far from RLM 83. But when painted on
it was much too green. So over the top of that I painted Tamiya
XF-73 which is a JGDSF colour. It is a little too grey. But by then
I'd spend too long on the internet looking at pictures and reading
others' pronouncements about Revell vs Humbrol vs Tamiya vs Vallejo
vs [insert just about any other brand you can think of]. So I
committed to the XF-73 and on balance, given all the usual things we
can say about scale colour, monitor calibration, and rah rah rah, I
think it looks about as close as I am going to get. Held up against
a Google Image search page, it doesn't look too far from the real
thing. As I am neither a Merlin nor an RAF groupie, and really just
built this to get some skill with resin before I tackle the Nimrod,
I think XF-73 was a decent choice. Sometimes you just have to go
with what you've got. Shovel all the coal in, gotta keep her
rolling!
The
official colour of this thing is reported by some online sleuths to
be Olive Drab BS 220 and by others (claiming to have been told by
AgustaWestland) BS381c241. Airfix
has a new 1/48 kit of this helicopter and the instructions recommend
Humbrol 86, which some builders think is too light. Revell 68 is
suggested as an alternative. Tamiya XF-81 is meant to be a pretty
close match. Others say Vallejo 71.011 is right (that's also RLM 83)
but of course I could find neither XF-81 or 71.011 (which is from
Vallejo's airbrush range anyway - and guess what I don't have?). So
in the end I took a gamble and bought Vallejo 70.823 which is RLM 82
- I figured it couldn't be too far from RLM 83. But when painted on
it was much too green. So over the top of that I painted Tamiya
XF-73 which is a JGDSF colour. It is a little too grey. But by then
I'd spend too long on the internet looking at pictures and reading
others' pronouncements about Revell vs Humbrol vs Tamiya vs Vallejo
vs [insert just about any other brand you can think of]. So I
committed to the XF-73 and on balance, given all the usual things we
can say about scale colour, monitor calibration, and rah rah rah, I
think it looks about as close as I am going to get. Held up against
a Google Image search page, it doesn't look too far from the real
thing. As I am neither a Merlin nor an RAF groupie, and really just
built this to get some skill with resin before I tackle the Nimrod,
I think XF-73 was a decent choice. Sometimes you just have to go
with what you've got. Shovel all the coal in, gotta keep her
rolling!
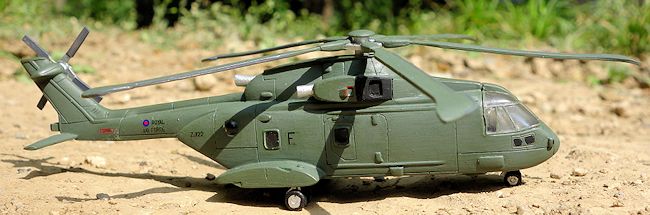
Remember to paint black sections on the engine intakes
(noting that there are three engines, so the left side of the
chopper has two intakes one above the other). According to my photo
checking the top of the landing gear sponsons should be black, too,
but I skipped that (getting bored!). I painted some tiny red lines
around a smaller air inlet near the intakes, copying photos.
 The
decals are, unfortunately, a bit lame. First of all, the
instructions are categorically useless so you have to turn to google.
Second, at least over this Tamiya acrylic, they didn't stick very
well. I used copious amounts of Mr Mark Softer and in the end they
looked, well, "okay", is about as generous as I can be. Perhaps
they'd go down better on some other paint (for example, Anigrand
decals have worked better for me on Tamiya acrylic silver spray
paint and also on Gunze enamels).
The
decals are, unfortunately, a bit lame. First of all, the
instructions are categorically useless so you have to turn to google.
Second, at least over this Tamiya acrylic, they didn't stick very
well. I used copious amounts of Mr Mark Softer and in the end they
looked, well, "okay", is about as generous as I can be. Perhaps
they'd go down better on some other paint (for example, Anigrand
decals have worked better for me on Tamiya acrylic silver spray
paint and also on Gunze enamels).
You get the F letters and the ZJ122 serials - note they come in
different sizes. Because I cleverly paid an extra buck for a spare
decal sheet I had enough to work with - the large F is too big for
the side fuselage location, so I used the smaller one. If I hadn't
had another sheet then I'd have run out of the smaller Fs, meaning I
couldn't have put one on the nose above the canopy (which I'd never
have noticed the need for had I relied on the useless instructions
anyway).
To make the Royal Air Force and roundel
combo on the rear fuselage, I pinched a small roundel from the sheet
and cut the ROYAL AIR FORCE decal so I could break the line. The
decal sheet does not include a prominent red marking on the tail, so
I delivered that from the Ministry of Surplus Decals.
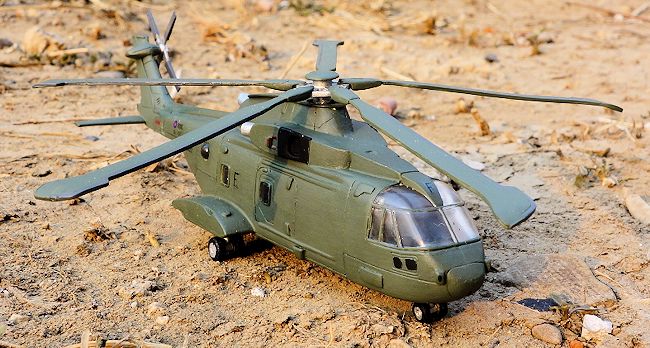
It's a neat kit of the Merlin in a
really manageable scale. Yes, it can only really be had in a quite
expensive kit, though you do get several others for your money (I'm
a bit surprised Revell hasn't done it in 1/144, unless I'm unaware
of it). As a start in resin I think this is a good entry point. I
certainly enjoyed building it and it wasn't really too much harder
than doing it from an injection kit. The biggest downside for me was
the useless instructions and the fussy decals, but again, by the
time you're trying a resin HC.3 in 1/144 you can probably be
flexible. If you come across one, I can recommend it. The only
really tricky bit is finding the right shade of green.
 Land
Rovers or light-strike vehicles and more than five tonnes of freight". A Merlin
can carry 24 troops or 16 stretcher cases and has a side door as well as a rear
ramp. It has all the modern things you can think of - defensive countermeasures,
night goggle compatibility, air to air refueling (though the Brits don't use
that) and the latest navigational systems.
Land
Rovers or light-strike vehicles and more than five tonnes of freight". A Merlin
can carry 24 troops or 16 stretcher cases and has a side door as well as a rear
ramp. It has all the modern things you can think of - defensive countermeasures,
night goggle compatibility, air to air refueling (though the Brits don't use
that) and the latest navigational systems.