|
KIT: |
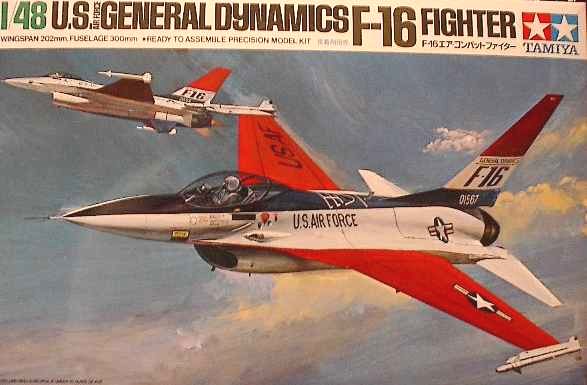
Tamiya 1/48 F-16 Fighting Falcon* |
|
KIT # |
61022 |
|
PRICE: |
$17.00 |
|
DECALS: |
Two aircraft |
|
REVIEW & |
Steve Eggers |
|
NOTES: |
Not a bad kit, no option for an open cockpit and the decals are wrong for the red, white and blue tail number. |
|
HISTORY |
General Dynamics F-16 Fighting Falcon is one of most significant fighters of the latter part of the 20th century. It was originally developed from a concept for an experimental lightweight fighter and has evolved into an all-weather fighter and precision attack aircraft. The F-16 has been manufactured on as many as five separate production lines, making it the largest fighter program in the Western world. Over 4000 F-16s have been built, with production still continuing.
 The
prototype YF-16 (72-1567) was rolled out at Fort Worth on December 13, 1973 and
was air freighted by C-5A to Edwards AFB on January 8, 1974. Its first flight
was an unintended short hop around the pattern on January 21, 1974. YF-16 number
two (72-1568) was flown for the first time on March 9, 1974.
The
prototype YF-16 (72-1567) was rolled out at Fort Worth on December 13, 1973 and
was air freighted by C-5A to Edwards AFB on January 8, 1974. Its first flight
was an unintended short hop around the pattern on January 21, 1974. YF-16 number
two (72-1568) was flown for the first time on March 9, 1974.
The manufacture of the first production F-16 began at General Dynamics Fort Worth plant in August of 1975.
|
THE KIT |
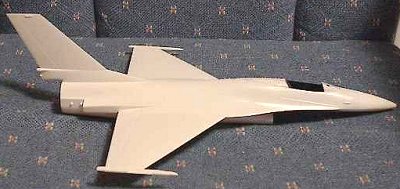
Tamiya’s offering of the F-16 depicts one of the two YF-16 prototypes. The kit is molded in white and has raised panel lines and the distinctive prototype two-piece nose gear and two optional fuel tanks. There was no flash or warpage on any of the parts.
|
CONSTRUCTION |
 The
first step is the construction of the cockpit. The cockpit is very minimal with
just the basics, an ejection seat, cockpit “tub”, forward instrument panel and
control stick. Instrument and side console details are provided by decals. The
ejection seat is pretty basic and represents the early ejection seat and not an
ACES II seat.
The
first step is the construction of the cockpit. The cockpit is very minimal with
just the basics, an ejection seat, cockpit “tub”, forward instrument panel and
control stick. Instrument and side console details are provided by decals. The
ejection seat is pretty basic and represents the early ejection seat and not an
ACES II seat.
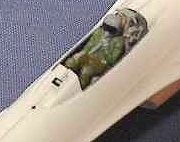
I painted the cockpit “tub” and instrument panel overall light ghost gray and did the cockpit walls on the inside of the fuselage an overall gunship gray. At the risk f being flamed by all the F-16 purists, I decided to pull and ACES II seat out of a 1/48 Italeri F-22 Raptor (since I put a better seat in that kit, I had a spare).
 Prior
to mating the two fuselage halves, the nose landing gear wheel well is
installed, as well as, the intake ramp, the top of the intake and aft portion of
the main landing gear wheel well. Take care to align these properly to ensure a
correct fit when mating the fuselage halves. When these are put into place I
glued the cockpit in and I then mated the two fuselage halves. Unlike other
F-16 kits I have seen, this kit fuselage is a right and left half, instead of
top and bottom. Although the fit is good, I prefer the other method.
Prior
to mating the two fuselage halves, the nose landing gear wheel well is
installed, as well as, the intake ramp, the top of the intake and aft portion of
the main landing gear wheel well. Take care to align these properly to ensure a
correct fit when mating the fuselage halves. When these are put into place I
glued the cockpit in and I then mated the two fuselage halves. Unlike other
F-16 kits I have seen, this kit fuselage is a right and left half, instead of
top and bottom. Although the fit is good, I prefer the other method.
The wings are 2 sections, the bottom is an inset that fits
just aft of the leading edge and the ailerons. The kit includes two external
fuel tanks. I 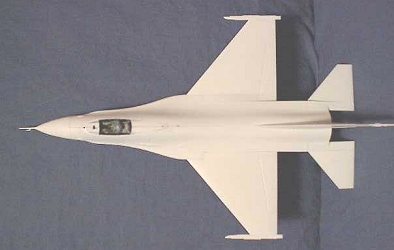 decided not to
put these on, although if one did want this option, two holes on each bottom
wing half needs to be drilled out. The fit is exceptional and little work is
required here. After the fuselage and the wings were dry, I attached the wings
to the fuselage and the fit here is near perfect. There is no drooping of the
wings and little work required. The only work required is at the joint where
the wing is just a tad to high next to the fuselage. Next are the canards and
the speed brakes. The fit here is good with minimal sanding required.
decided not to
put these on, although if one did want this option, two holes on each bottom
wing half needs to be drilled out. The fit is exceptional and little work is
required here. After the fuselage and the wings were dry, I attached the wings
to the fuselage and the fit here is near perfect. There is no drooping of the
wings and little work required. The only work required is at the joint where
the wing is just a tad to high next to the fuselage. Next are the canards and
the speed brakes. The fit here is good with minimal sanding required.
Next is the construction of the landing gear; care needs to be taken here to ensure that the aircraft sits level, mine did not. To remedy this, I removed the left and the right alignment tabs on the main landing gear struts.
The final steps of construction are attaching the gear doors, the intake, horizontal stabs, engine nozzle, nose radome, pitot tube, nose landing gear and vertical stab. There is no fit problem; just light sanding is required.
|
PAINT & DECALS |
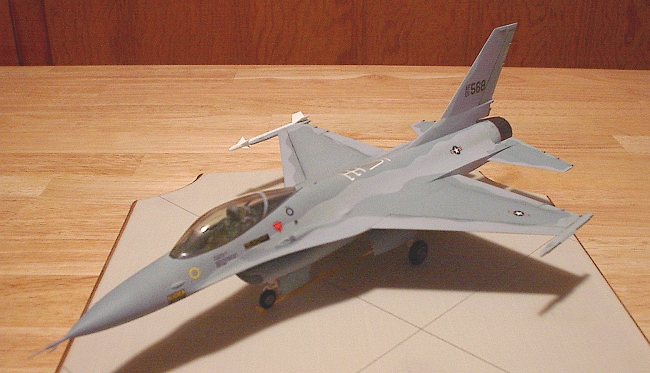
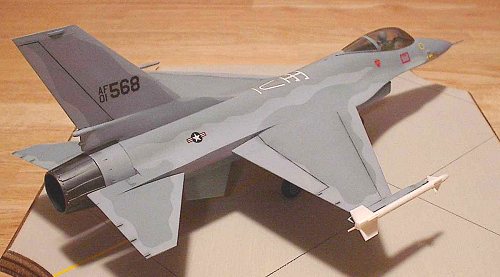
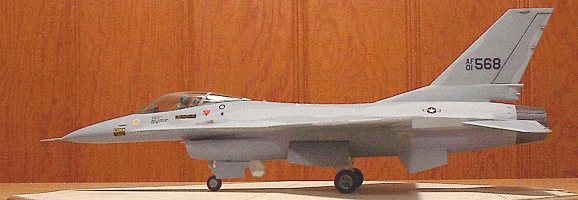
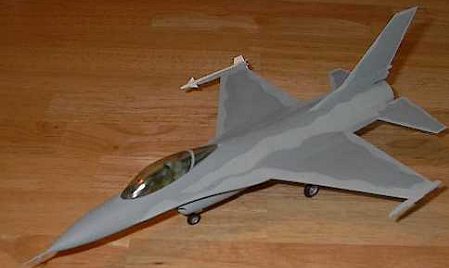 I
decided to paint this aircraft in the short lived two-tone combat gray paint
scheme that was on, YF-16 prototype number two, 01-568, during the weapons
trails in 1976. Tamiya’s instruction sheet gives you mixing instructions for
this particular aircraft. After late nights searching on the internet and
looking through lots of books, I finally found 2 small pictures of the aircraft
in this scheme. The best match I found is Model Master Light and Dark Ghost
Gray.
I
decided to paint this aircraft in the short lived two-tone combat gray paint
scheme that was on, YF-16 prototype number two, 01-568, during the weapons
trails in 1976. Tamiya’s instruction sheet gives you mixing instructions for
this particular aircraft. After late nights searching on the internet and
looking through lots of books, I finally found 2 small pictures of the aircraft
in this scheme. The best match I found is Model Master Light and Dark Ghost
Gray.
I mixed the paint at a 2:1 ratio shot the entire aircraft light ghost gray. For the camouflage pattern, I took an unbuilt F-16 kit and traced the airplane on regular printer paper, I then drew my camouflage pattern on the paper and cut it out, thus making a stencil. I used 3M Blue Paper Masking Tape, since it has low adhesion and won’t take up the light ghost gray paint. I taped from the underside of the fuselage and laid the stencil on top of the aircraft and sprayed the dark ghost gray. I did the same for the bottom of the aircraft.
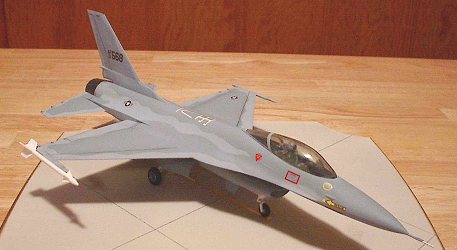 The kit
decal sheet is a fairly nice sheet. It is broken into three sections:
Demonstration paint, Combat gray and common markings to both aircraft. I never
gloss my aircraft prior to decaling. I use a setting solution called CHAMP
Decal-Set. This solution will actually make the decal conform to a flat surface.
Be careful using it though, do not use it at full strength, because it might
take your paint off!! I usually mix it half and half. Using a little bit of
decal set, the decals adhere well to the model.
The kit
decal sheet is a fairly nice sheet. It is broken into three sections:
Demonstration paint, Combat gray and common markings to both aircraft. I never
gloss my aircraft prior to decaling. I use a setting solution called CHAMP
Decal-Set. This solution will actually make the decal conform to a flat surface.
Be careful using it though, do not use it at full strength, because it might
take your paint off!! I usually mix it half and half. Using a little bit of
decal set, the decals adhere well to the model.
After all the decals were applied, I used Willow Charcoal and shaped various areas of the model. I did this around moving surfaces, wheel wells, and the gun area. This was my first attempt at shading, and I think it turned our quite well. The very last step was the exhaust nozzle. I painted it Model Master Gunmetal buffing metalizer. I love this stuff. Spray it, 15 minutes later, buff it!
|
CONCLUSIONS |
This kit, probably one of the oldest F-16 kits, is a good build and would make a nice addition to any model collection. Even though, it is not up to the same level as the Hasagawa F-16s and the Academy F-16 A/C. I recommend this kit to someone wanting an early Falcon.
If you would like your product reviewed fairly and quickly by a site that has over 100,000 visits a month, please contact me or see other details in the Note to Contributors.