Monogram 1/48 F-16A
|
KIT # |
5421 |
|
PRICE: |
$10.99 |
|
DECALS: |
One aircraft; 388 TFW |
|
REVIEW : |
Steve Eggers |
|
NOTES: |
Not too bad of a kit: functioning canopy |
|
HISTORY |
Not to dwell on what has already been written about the F-16, besides it being the most successful fighter program of the 20th century and one of the most exported, the F-16 continues to be an exceptional fighter.
|
THE KIT |
 Monogram’s
offering of the F-16 depicts a YF-16 prototype. The kit is molded in white or
gray, depending on which time period you bought the kit and has raised panel
lines and the distinctive prototype two-piece nose gear and two fuel tanks.
Interesting to note, is that both wings and horizontal stabs are molded into the
top half of the fuselage. Thus not requiring any filling or sanding of those
surfaces.
Monogram’s
offering of the F-16 depicts a YF-16 prototype. The kit is molded in white or
gray, depending on which time period you bought the kit and has raised panel
lines and the distinctive prototype two-piece nose gear and two fuel tanks.
Interesting to note, is that both wings and horizontal stabs are molded into the
top half of the fuselage. Thus not requiring any filling or sanding of those
surfaces.
After studying the kit, I decided to challenge myself. I decided that I wanted to see how correct “looking” I could make this kit, using what was supplied to me in the box. After looking at various pictures of early (pre-block 15) “A” models, I decided I could do it, as you will read here. Although, I did have to go outside the Monogram supplied parts to get what I needed, it was nothing substantial.
|
CONSTRUCTION |
The first step is the construction of the landing gear, which I opted not to do. I feel that landing gear should be one of the last things to be put on a any model if at all possible. That is where the problem come into play with this kit. The intake is designed in such a way that the center section of the main landing gear bay is part of the intake. To remedy this, I cut approximately 1/8 off of the centerline area, so I can put the main gear on later.
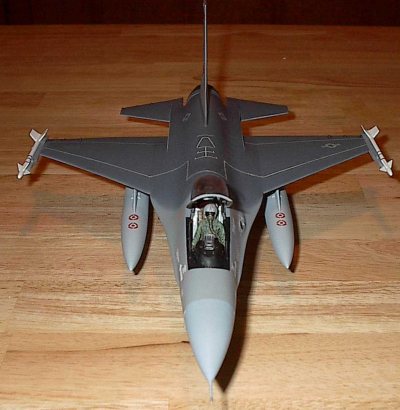
The cockpit is very minimal with just the basics, an ejection seat, cockpit “tub”, forward instrument panel and interestingly enough, no control stick It is molded into the pilots right hand. There is no instrument and side console details. The ejection seat is pretty basic and represents the early ejection seat and not an ACES II seat.
 I
painted the cockpit “tub” and instrument panel overall light ghost gray and did
the cockpit walls on the inside of the fuselage an overall gunship gray.
I
painted the cockpit “tub” and instrument panel overall light ghost gray and did
the cockpit walls on the inside of the fuselage an overall gunship gray.
The fuselage is in 2 sections, a top and a bottom. Like I stated earlier, the wings and the horizontal stabilizers are molded as part of the top fuselage half. This is actually the one endearing quality of this kit. One does not have to worry about sanding off the detail around the wings. I kind of like that!
Next is the building of the intake section. Like I said earlier, Monograms instructions want you to attach the main landing gear first then attach the built up intake section. Well, I have a bad habit of making my aircraft sit uneven, don’t know why, I just do. So, to correct the problem before it happens, I cut approximately 1/8 inch from the aft section of this section, so I can add the landing gear later, then add the piece back in after I am satisfied with the stance of the model.
The intake is comprised of four pieces. Care needs to be taken when inserting the anti-ice vane inside the intake. If it is not put in correctly, it will be crooked and you will hate yourself later. The fit is pretty good and some sanding and filling is required on the part as well as when mated to the fuselage.
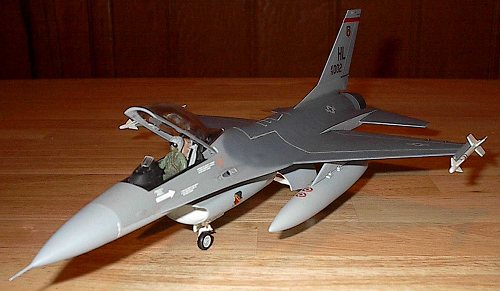
 The
kit includes two external fuel tanks. These tanks represent the early
300-gallon fuel tanks with the three fins on the aft end of the tank. To make
the kit look more correct, I cut at the last raised panel line and “capped” off
the end of the tank with sheet styrene. This gave the tanks a more correct
appearance. The fit is good and little bit of filling and sanding work is
required here.
The
kit includes two external fuel tanks. These tanks represent the early
300-gallon fuel tanks with the three fins on the aft end of the tank. To make
the kit look more correct, I cut at the last raised panel line and “capped” off
the end of the tank with sheet styrene. This gave the tanks a more correct
appearance. The fit is good and little bit of filling and sanding work is
required here.
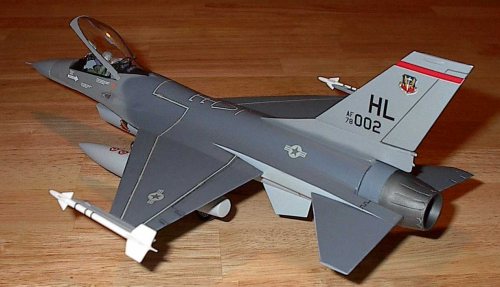
After the fuselage was dry, I attached the vertical stab to the fuselage and the fit here is less than perfect. So, a little more filling and sanding is needed
Next is the construction of the landing gear; care needs to be taken here to ensure that the aircraft sits level. I also decided not to use the kit-supplied wheels. To me, the Revell F-16 ADF wheels looked really good. So I put those on this kit. They turned out really sharp.
The final steps of construction are attaching the landing gear and doors, engine nozzle, the nose pitot tube. I glued the two halves of the nose gear door together to make a solid one-piece door, which is correct for an “A”. I also found a spare pitot tube to place on the right forward side of the fuselage, just aft of the nose radome.
There is a fit problem; with the exhaust nozzle. Lots of sanding is required to make a good fit, get ready, you arm will be tired!!
|
PAINT & DECALS |
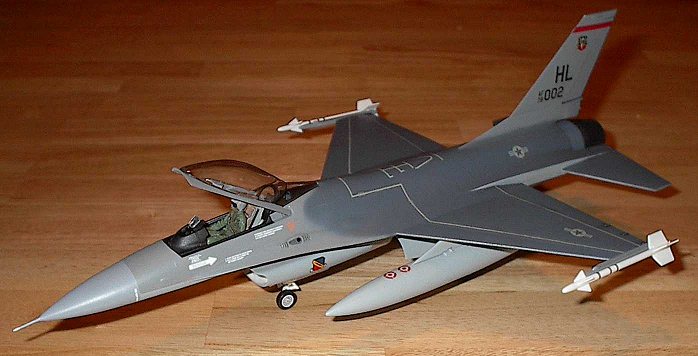
I decided to paint this aircraft in the standard four tone gray paint scheme. I used Model Master paints.
Dark Ghost Gray: Nose Radome
Neutral Gray: Vertical Stab, wingtips, and forward top of fuselage
Gunship Gray: top of fuselage
Light Ghost Gray: bottom of aircraft and fuel tanks
 The kit
decal sheet is a typical Monogram sheet. I found the best way to put these
decals on is to get the absolute hottest water that your fingers can stand and
attach them to a GLOSSY surface. Do not use a setting solution with
these kind of decals, for some reason it just doesn’t work. I mainly used the
tail codes, command badge, Wing badge off of the Monogram sheet. The rest of the
decals, mostly stencils, came from the Revell F-16 ADF sheet. Now that is a good
decal sheet. Nice thin decals. They conformed well to the surface. I also used
some spare Hasagawa decals from their F-16A kit.
The kit
decal sheet is a typical Monogram sheet. I found the best way to put these
decals on is to get the absolute hottest water that your fingers can stand and
attach them to a GLOSSY surface. Do not use a setting solution with
these kind of decals, for some reason it just doesn’t work. I mainly used the
tail codes, command badge, Wing badge off of the Monogram sheet. The rest of the
decals, mostly stencils, came from the Revell F-16 ADF sheet. Now that is a good
decal sheet. Nice thin decals. They conformed well to the surface. I also used
some spare Hasagawa decals from their F-16A kit.
After all the decals were applied, I used Willow Charcoal and shaped various areas of the model. I did this around moving surfaces, wheel wells, and the gun area. The very last step was the exhaust nozzle. I painted it Model Master Gunmetal buffing metalizer and buffed.
|
CONCLUSIONS |
It’s amazing what can happen when you take a basically mediocre kit, spend some quality time with it, and get the result I got out of this Monogram kit. I think this kit looks good sitting next to one for the higher priced kits. This is a fun kit to build and a good “starter” kit
If you would like your product reviewed fairly and fairly quickly , please contact the editor or see other details in the Note to Contributors.