| KIT #: | 6798 |
| PRICE: | $69.99 SRP |
| DECALS: | Two options |
| REVIEWER: | Dale Rannals |
| NOTES: | Short run with photo etch and resin parts |
| HISTORY |
In
1940, the US Army Ordnance Corps started to work on a 50-ton heavy tank design.
Initially a multi-turreted design was proposed, with two main turrets armed with
low-velocity T6 75mm (2.95 inch) guns, one secondary turret with a 37mm gun and
a coaxial .30 caliber (7.62mm) machine gun, and another secondary turret with a
20mm gun and a coaxial .30 caliber machine gun. By October, the US developers
reached the same conclusion as their European counterparts, and the armament was
changed to a single vertically-stabilized 3 inch (76.2mm) gun and a coaxial 37mm
gun in a single three-man turret with both manual and electric traverse.
Additional armament consisted of t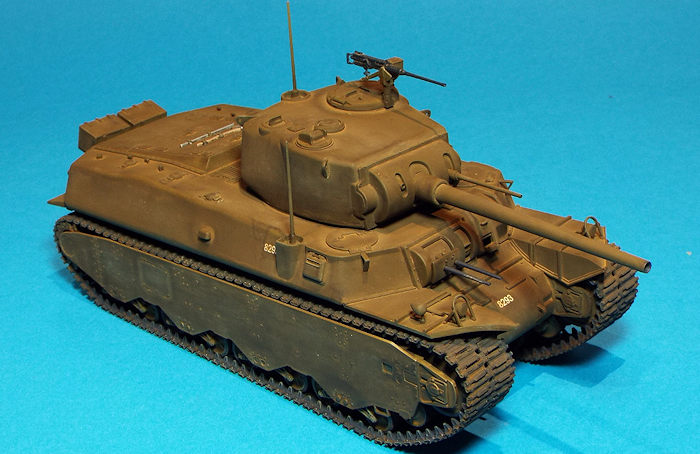 wo .50 caliber machine guns in a bow mount
(operated by the assistant driver), two .30 caliber machine guns in the front
plate (fired electrically by the driver), one .30 caliber in the commander's
cupola and one .50 caliber in a rotor mount for anti-aircraft use in the right
rear of the turret roof (operated by the loader). The crew consisted of
commander (seated in the turret left), gunner to the right of the gun, gun
loader (turret), driver and assistant driver in the front left and right of the
hull respectively, and another crewman in the hull to pass ammunition to the
turret.
wo .50 caliber machine guns in a bow mount
(operated by the assistant driver), two .30 caliber machine guns in the front
plate (fired electrically by the driver), one .30 caliber in the commander's
cupola and one .50 caliber in a rotor mount for anti-aircraft use in the right
rear of the turret roof (operated by the loader). The crew consisted of
commander (seated in the turret left), gunner to the right of the gun, gun
loader (turret), driver and assistant driver in the front left and right of the
hull respectively, and another crewman in the hull to pass ammunition to the
turret.
One of the main challenges was developing a power pack for such a heavy vehicle. The Wright G-200 air-cooled radial gasoline engine was selected by a committee formed by the Society of Automotive Engineers, but no suitable transmission was available.
In 1941 - 1942 three prototypes were built by the Baldwin Locomotive Works, one with electric transmission and two with torque converter transmission. The prototypes also differed in hull assembly method - one had welded hull and two cast hull. On 26 May 1942 two variants with torque converter transmission were standardized as M6 and M6A1. The production started in December 1942.
Some minor changes were introduced in the production vehicles: the cupola was replaced by a double-door hatch with a ring mount, the machine gun in a rotor mount and the left front machine gun were removed.
However by the time the M6 was ready for production, the Armored Corps had lost interest in the project. The advantages the M6 offered over medium tanks - its much thicker armor and slightly more powerful gun - were offset partly by the shortcomings of the design - such as very high silhouette, awkward internal layout and reliability problems - and partly by logistical concerns due to its weight.
In early 1942 the Ordnance Department set
a production target of 250 a month with Fisher as a second contractor to meet a
planned expansion in the size of the army. However by September the focus had
changed with tank production scaled back and more aircraft for the USAAF. At
this time, production was cut from 5,000 to a little over 100.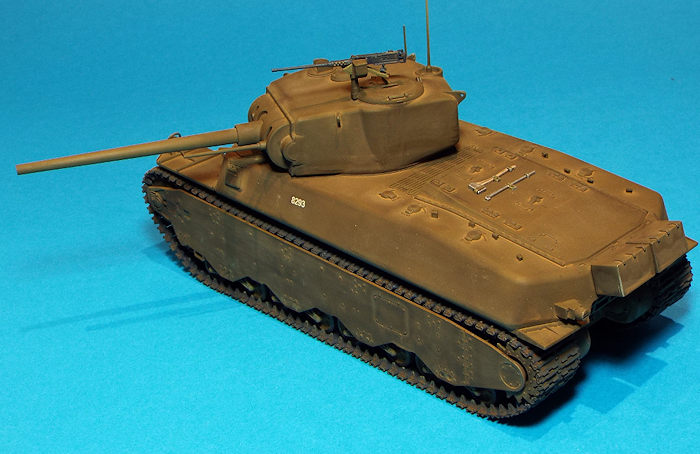
By the end of 1942, the Armored Corps were of the opinion that the new M4 Sherman gave adequate solution for the present and the near future, while being reliable, cheap and much easier to transport and they had no need for a heavy tank. In 1943 the production target was reduced again, down to 40, this being an economic cut-off.
Production M6 and pilot M6A1 examples were evaluated at Fort Knox in the early part of 1943. The reports were critical of the awkward and inefficient crew stations and the superfluous 37mm gun.
On 14 December 1944 the M6 was declared obsolete. Only forty units were produced and they never left US soil. Several toured the United States for propaganda purposes, where they gave performance displays (such as car crushing) at War Bond drives and the like. All were eventually scrapped except for a single T1E1 which was put on display at the United States Army Ordnance Museum, Aberdeen, Maryland.
| THE KIT |
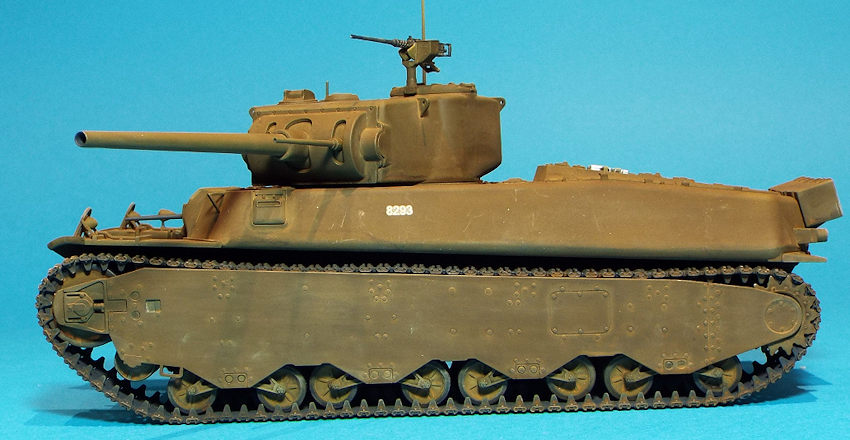
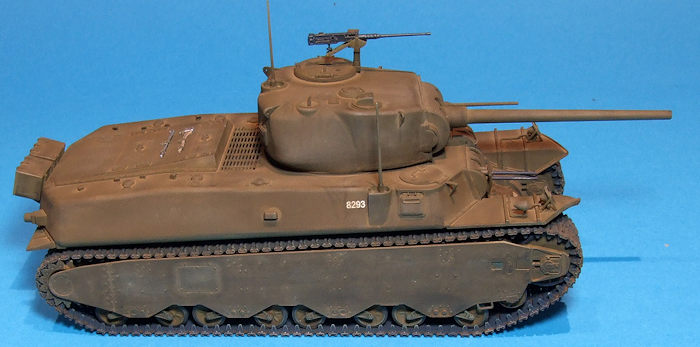
The kit contains almost 300 very crisply molded parts in gray plastic. Dragons usual instructions, in black and blue, are included and, as usual, are adequate but can be confusing at times. Four pieces of Dragon's fantastic DS tracks are in the box.....these are glue-able with normal plastic cement and are detailed well. (No individual links here! Yay!) There are two decal options, but consist mainly of serial number differences on otherwise similar olive drab vehicles.
| CONSTRUCTION |
 Construction begins with
the road wheel/bogie assemblies, which is fairly normal for tank kits. However,
since I did not want to be bogged down by the tedious part of the build right
off the start, I skipped them and moved on.
Construction begins with
the road wheel/bogie assemblies, which is fairly normal for tank kits. However,
since I did not want to be bogged down by the tedious part of the build right
off the start, I skipped them and moved on.
The parts fit nicely (well, most of them … read on) and have decent detail. This boxing is the cast-hull version, so there are parts to remove from the hull (which has score marks on the underside, making it easy.), to which you glue a new bottom piece. I was leery about this at first, since the bottom was very flimsy. But it all lined up well with little more than seam-scraping necessary to hide the joint line. As there is not an abundance of things hanging off of or attached to the hull, it all built up rather quickly. But then there are all those bogies, so a weekend build this is not.
There are two major low points on this kit. At least for me. The first is the turret. The two piece assembly (top and bottom) lined up horribly despite my best efforts. The result couldn't even be passed off as a cast seam. So this required a couple sessions with putty and sandpaper, which seriously is the only time I remember having to put putty on an armour kit. Just sad.
The second are the wheel/bogie
assemblies. But really, not so much the assemblies themselves, but how they
attach to the hull and side skirt. First, there are a bunch of them. Sixteen
dual-wheel bogie assemblies. In itself not too bad, but each one is fiddly with
no real positive locators. Eight assemblies attach to the hull. The other eight
Dragon would have you attach to the side skirts. This would be fine except they
fit in too far, and if you assemble it this way, there will be a gap between
each inner and outer set of bogies and the wheel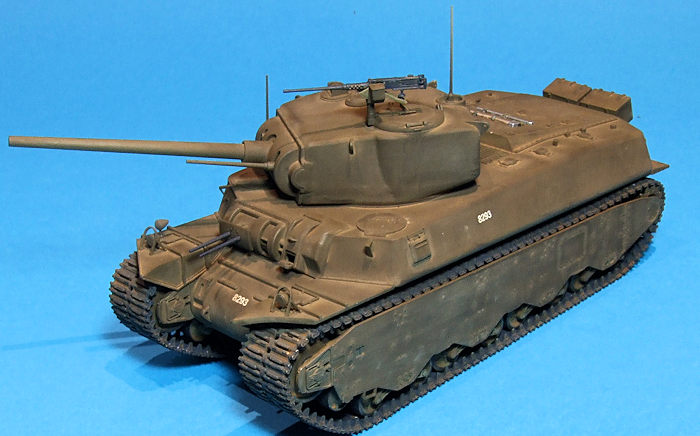 s would be spaced a bit too wide
for the track guides. What I ended up doing was attaching the inner bogies to
the hull, then attaching the outer bogies to them (difficult in that the locator
pins are very small). While the glue was still wet, I placed (not glued) the
side skirts on to keep the bogies aligned correctly. There are more than a few
that are a bit crooked, but with the nice wide tracks it isn't noticeable. This
is just an area that I would have preferred a more solid construct over
accuracy. Nothing is seen behind the side skirts anyway, so it wouldn't have
been an issue. Looking back on things, you may be able to glue the outer bogies
to the side skirts, just ensure the locators lie flush with the outside of the
skirt. I think it should give you the right fit. Might be worth a try.
s would be spaced a bit too wide
for the track guides. What I ended up doing was attaching the inner bogies to
the hull, then attaching the outer bogies to them (difficult in that the locator
pins are very small). While the glue was still wet, I placed (not glued) the
side skirts on to keep the bogies aligned correctly. There are more than a few
that are a bit crooked, but with the nice wide tracks it isn't noticeable. This
is just an area that I would have preferred a more solid construct over
accuracy. Nothing is seen behind the side skirts anyway, so it wouldn't have
been an issue. Looking back on things, you may be able to glue the outer bogies
to the side skirts, just ensure the locators lie flush with the outside of the
skirt. I think it should give you the right fit. Might be worth a try.
Another thing to note: You can't turn the turret very far to the right as the fixed antenna is in the way. And turning the turret to the left will hit the handle on the driver's hatch and cause it to fly away forever. Don't ask how I know....
| COLORS & MARKINGS |
I had some brown-ish Olive Drab mixed up and sprayed the entirety of the kit
with this. I used all this up though
and had to switch to a
more green OD. Though not what I had planned, it ended up okay as i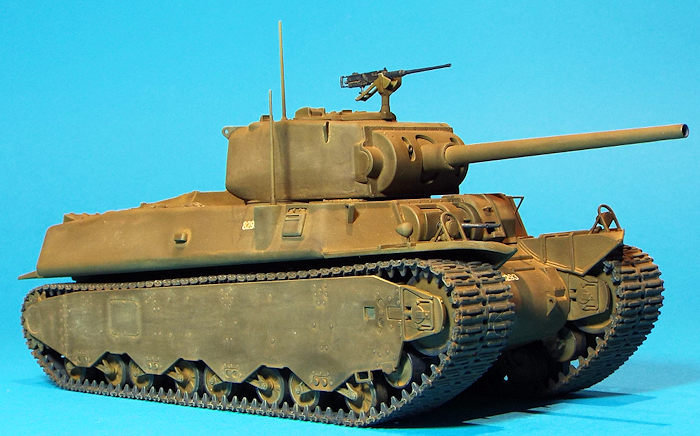 t gave more
tonal variation right from the start. Once dry, I attached the side skirts and
turned my attention to the road wheels. These were very easy to paint attached
to the model as I had not glued the wheels to the bogies. Paint what's visible,
let dry, turn the wheels and repeat.
t gave more
tonal variation right from the start. Once dry, I attached the side skirts and
turned my attention to the road wheels. These were very easy to paint attached
to the model as I had not glued the wheels to the bogies. Paint what's visible,
let dry, turn the wheels and repeat.
The DS tracks were assembled into two sets and painted with a very dark gray, then weathered with a brown oil wash. These fit over the road wheels and sprockets with no problems.
The model was then hit with a black oil wash, then a thinner dark brown wash. Things were highlighted and various areas lightened and darkened with some Tamiya weathering sets, then finally washed again with the thin brown wash.
| CONCLUSIONS |
Though I was disappointed by the turret (which may have been my fault) and the bogie attachment (not my fault, just poor design) I really enjoyed this kit. Though it took me a long time to complete (life got in the way too many times), it really could be assembled pretty quickly, as there is not an overabundance of parts and the DS tracks really simplify things on the lower end. If you are into armour prototypes this one is definitely recommend.
| REFERENCES |
Wikipedia
27 September 2016
Copyright ModelingMadness.com.
If you would like your product reviewed fairly and quickly, please contact the editor or see other details in the Note to Contributors.