Bronco 1/35 M-22 'Locust'
| KIT #: | CB 35162 |
| PRICE: | $53.00 SRP |
| DECALS: | Five options |
| REVIEWER: | Robert Myers |
| NOTES: | New tool kit |
| HISTORY |
The U.S. military became aware of the effectiveness of airborne assault
forces by studying German victories in Euro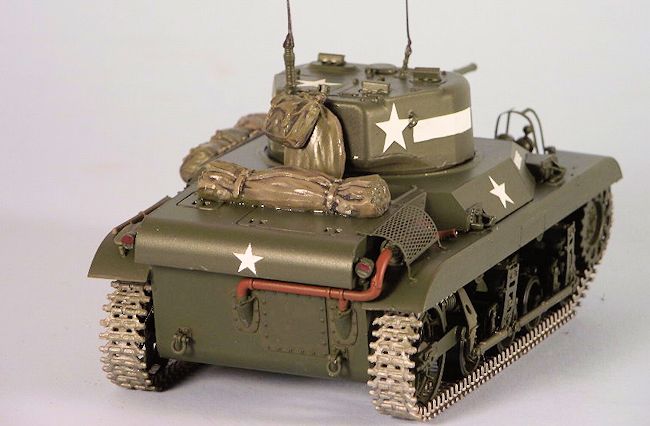 pe, however they were aware of
the vulnerability of lightly armed airborne infantry alone behind enemy
lines without armor support. In May of 1941 the design work began on the air
transportable T9E1 (M22) light tank at the Marmon-Herrington Company.
pe, however they were aware of
the vulnerability of lightly armed airborne infantry alone behind enemy
lines without armor support. In May of 1941 the design work began on the air
transportable T9E1 (M22) light tank at the Marmon-Herrington Company.
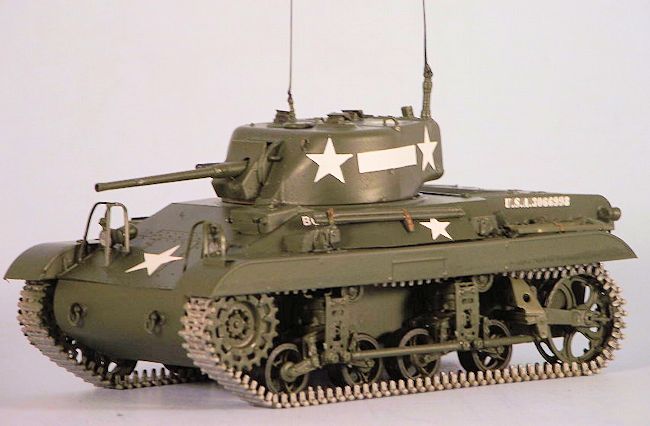
The M22 was constructed of steel plate welded together. The front armor was
1 inch thick with the sides being ½ inch steel plate. The sloped front and
sides added additional protection by helping deflect projectiles. The armor
was minimal because of weight requirements limiting the vehicle to less then
8 short tons (16,000 pounds). The main weapon was a 37mm main with a coaxial
30 caliber machine gun. Production began in April 1943 and ended in February
1944 with a total production of 830 tanks. Under lend-lease, 260 M22s were
given to the British, who gave them the name Locust.
The production version of the M22 weighed in at about 7.5 tons and could be
transported by Hamilcar glider or could be slung under a C54 cargo plane
with the turret removed and stored in the aircraft.
| THE KIT |
This kit is small! When I showed to my friends at a model club meeting they
all thought it was a 1/48 scale kit. The molding is excellent for all of the
parts including the very fragile looking grab handles. I am impressed that
the muzzles of both the 37mm main gun and the 50 cal machine gun have small
opening molded in to make the barrel look hollow.
The parts tress are all bagged as are the decals and photo-etch. The 23 step
instructions, with color illustrations, are the best I have seen (this is my
first Bronco kit). Each step shows the different options you can build. The
building sequence is clear and proceeds in a lo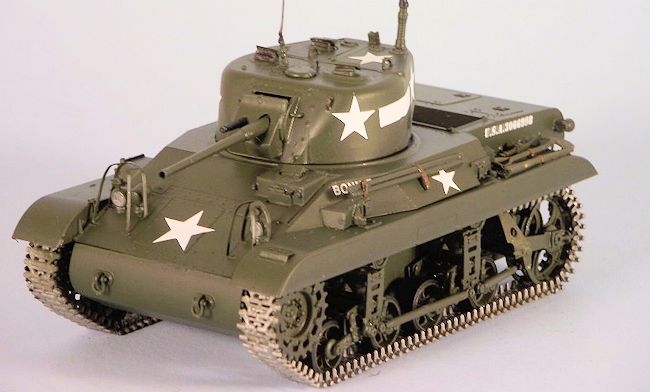 gical manor. You may want to
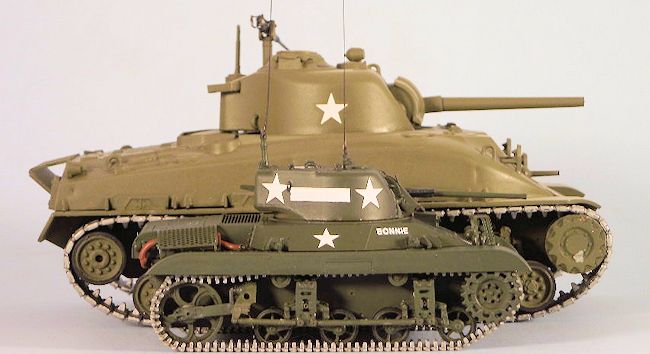
modify the sequence to fit your painting style. There are options for five
U.S. tanks. The only real noticeable differences are the placement of the
stars and other decals. There is a very nice 8x12½ inch color print of the
M-22 included in the box. It is nice enough to frame.
gical manor. You may want to
modify the sequence to fit your painting style. There are options for five
U.S. tanks. The only real noticeable differences are the placement of the
stars and other decals. There is a very nice 8x12½ inch color print of the
M-22 included in the box. It is nice enough to frame.
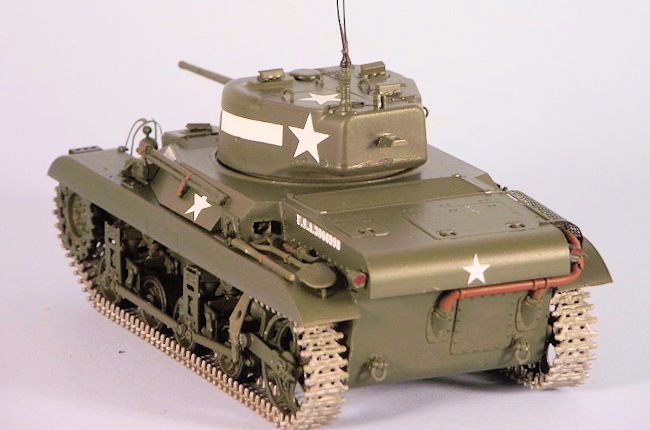
All of the hatches can be posed open or closed. There is minimal detail for
the turret interior and the driver. Bronco included some tarps and packs to
put on the outside of the tank.
I fear plastic track links and photo-etch. This track just has a few
individual pieces to make the curve around the sprocket to connect the upper
and lower one piece runs of track. The upper track even has the sag molded
in! As for the photo-etch. It looks do-able. It is mostly engine screens,
straps muffler guard and light guards. They are pretty good size and look
easy to manage. (Update: during the build, I discovered there are some
photo-etch pieces smaller than a human hair...really! I had to use a pair of
medical grade, very fine tweezers and a strong magnifying glass to form the
parts. They disappeared under the paint.)
| CONSTRUCTON |
Since this was my first Bronco kit, I decided to follow the instructions, so
work started on the inside of the hull (steps 1 and 2). Wouldn’t you know
this is also where I get to deal with the first 5 pieces of photo-etch, none
of which can be seen with the upper hull and turret in place, even with the
hatch open. However, in the interest of a complete build review I installed
all 5 pieces. It was very easy. This is nice photo-etch. It took 45 minutes
to complete the
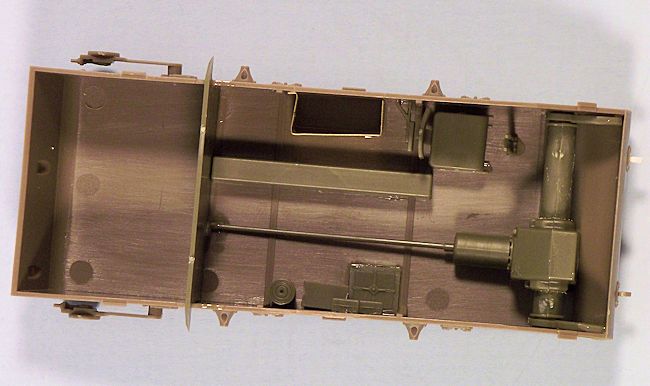 interior. It is minimally detailed, too bad it will all
disappear. On the outside of the hull, I lost one very small piece. It was
the mount for the left front d-ring. I made a new one in about 5 minutes.
The instructions show installing the d-rings on the mounts, but I will wait
until after I paint. I like the rings to move.
interior. It is minimally detailed, too bad it will all
disappear. On the outside of the hull, I lost one very small piece. It was
the mount for the left front d-ring. I made a new one in about 5 minutes.
The instructions show installing the d-rings on the mounts, but I will wait
until after I paint. I like the rings to move.
Next step the running gear. Big parts at last! I pre-sprayed all of the
suspension and the road wheels parts with Tamiya OD before assembly. Each of
the four road wheel assemblies almost fall together. They consist of 12
pieces each. I glued each one on the hull and set it aside to dry. Next, I
assembled the drive sprocket and rear wheel assembly. Pay attention to the
instructions. You can really goof up these pieces. I did. Luckily the glue
wasn’t dry when I discovered my mistake on the rear suspension arms. I got
them apart and re-did them correctly. These were also set aside to dry, but
not glued on the hull. The track links were pre-painted steel. After they
had dried I set the top section on the return rollers and tacked them on
with Elmers glue so I could move them if I had to. The separate links were
formed around the drive sprocket and rear wheel, these were then glued to
the hull. While the glue was wet, I added the bottom section of track and
got everything lined up. It was fiddley and about 40 minutes per track. When
everything looked right, I glued the bars and caps to the outside of the
main suspension. Everything was set aside to dry.
 The upper hull didn’t look too complicated so I attacked it next. I was
dreading the photo etch headlight guards. So I did them first after
installing the head lights. They were easy. I just bent them around a paint
brush handle of the size I wanted dipped each end in a drop of glue and set
them into place. No fuss! The only place I deviated from the instructions
was to glue the large photo etch screen for the rear deck on the inside of
the hull. After looking at a lot of pictures online, I like the look of the
grates no being covered. The screen on the inside helps to hide the fact the
engine compartment is completely empty.
The upper hull didn’t look too complicated so I attacked it next. I was
dreading the photo etch headlight guards. So I did them first after
installing the head lights. They were easy. I just bent them around a paint
brush handle of the size I wanted dipped each end in a drop of glue and set
them into place. No fuss! The only place I deviated from the instructions
was to glue the large photo etch screen for the rear deck on the inside of
the hull. After looking at a lot of pictures online, I like the look of the
grates no being covered. The screen on the inside helps to hide the fact the
engine compartment is completely empty.
The full fenders were glued to the lower hull and set aside to dry while I
finished the photo etch on the upper hull. After drying overnight I was
ready to put the hull together. The first thing I noticed was that the upper
hull had a slight twist to it. I used super glue to glue the front in place.
When it was solid I glued the sides and back down with more super glue. That
took the flex out. If you look at the front of the tank, you can see the
seam. You should be able to see it. It is there on the real ones. Also, on
the turret you can see a seam on the side near the back of the turret. There
is a weld line in the same place on the real tank.
 The turret and the main gun have a lot of small pieces and photo etch. First
decide if you are going to have the hatches open. If they are closed, all
you have to assemble is the basic 37mm gun. I put some tape on the inside of
the hatches so that if a future time I want them open I can, but in the mean
time they won’t fall off and get lost. If you want a fully detailed turret,
take your time and just follow the instructions. I sprayed the interior of
the turret and parts on the sprue with white primer before assembly. After
assembly I detailed it out with a brush. After masking the white assembled
parts, I gave the outside of the turret a spray with Tamiya OD. At this
point I also masked the track and gave the hull a second coat of OD.
The turret and the main gun have a lot of small pieces and photo etch. First
decide if you are going to have the hatches open. If they are closed, all
you have to assemble is the basic 37mm gun. I put some tape on the inside of
the hatches so that if a future time I want them open I can, but in the mean
time they won’t fall off and get lost. If you want a fully detailed turret,
take your time and just follow the instructions. I sprayed the interior of
the turret and parts on the sprue with white primer before assembly. After
assembly I detailed it out with a brush. After masking the white assembled
parts, I gave the outside of the turret a spray with Tamiya OD. At this
point I also masked the track and gave the hull a second coat of OD.
The almost final assembly was a breeze. I added the pre-painted pioneer
tools and brush painted a few details like the hold down straps, lights and
exhaust pipe. Antennas were made from stretched sprue and glued in place
with super glue.
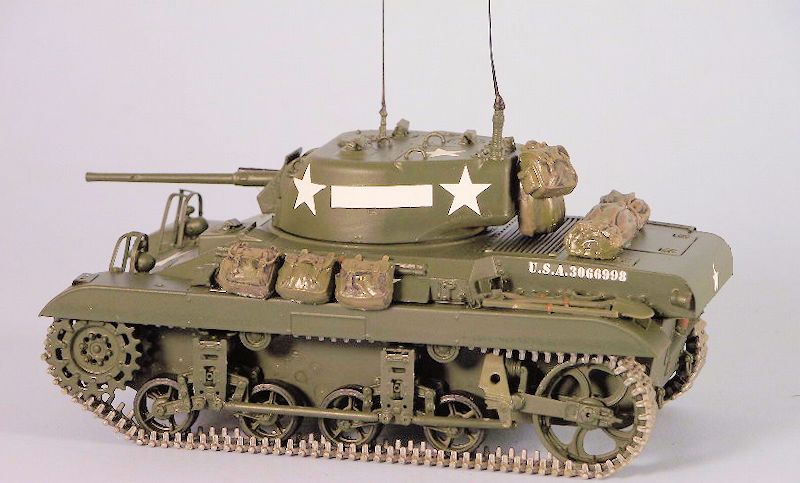
| COLORS & MARKINGS |
 I gave everything a gloss clear coat to get it ready for decals. The decals
differ only in numbers and placement of stars. They are sharp and in
register. Each one was applied over a drop of Micro Sol, washed after drying
and a drop of Micro Set was applied, again the tank was washed after
everything had dried. A final dull coat was sprayed on and the model was set
aside to dry for a week, while I started a new project.
I gave everything a gloss clear coat to get it ready for decals. The decals
differ only in numbers and placement of stars. They are sharp and in
register. Each one was applied over a drop of Micro Sol, washed after drying
and a drop of Micro Set was applied, again the tank was washed after
everything had dried. A final dull coat was sprayed on and the model was set
aside to dry for a week, while I started a new project.
The actual final assembly was adding the d-rings to the front and back
mounts and clear headlight lenses after all of the clear coat had dried.
Since the U.S. M-22s didn’t see battle or prolonged storage, I kept this one
looking fresh with no dirt or rust on the track.
| CONCLUSIONS |
I really like this kit. It builds up with no problems except for some of the
very small parts. I would not recommend it to a new builder or someone
without very good tweezers, again, because of small parts. For the price of
such a small kit, I would have liked to have had a figure of the tank
commander or even a crew member to stand beside it. Next will be a British
version.
| REFERENCES |
July 2014
This kit was courtesy of my wallet.
If you would like your product reviewed fairly and fairly quickly, please contact the editor or see other details in the Note to Contributors.